
Related Manuals for Hyundai L445


Summary of Contents for Hyundai L445
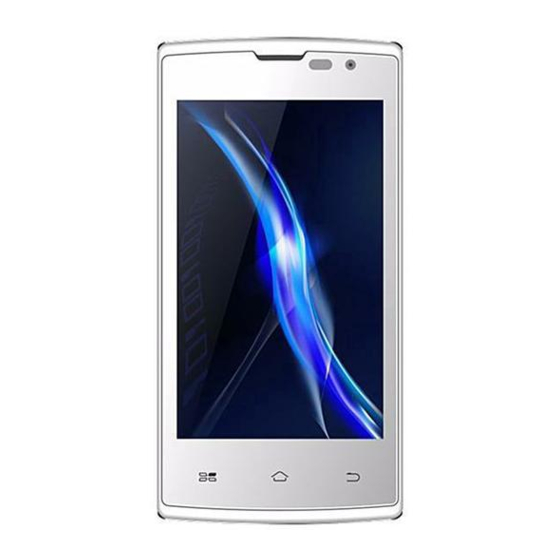
- Page 1 L445 User Manual HYUNDAI CORPORATION (140-2, Kye-dong, Chongro-ku, Seoul, South Korea) Product Name: Mobile Phone Trade: HYUNDAI Mode:L445...
-
Page 2: Table Of Contents
Contents Safety ........................4 Environment ......................5 1 Getting Started ....................6 1.1 Getting to know your touch phone ............ 6 1.2 Installing the SIM card, battery, and storage card ......6 1.3 Charging the Battery ................ 11 1.4 Starting up the device............... 11 1.5 Status Icons .................. - Page 3 9.1Calendar .................... 38 9.2 Alarm Clock ..................38 9.3 Calculator ..................40 10 Play Store* ....................41...
-
Page 4: Safety
Safety Never attempt to disassemble your phone. You alone are responsible for how you use your phone and any consequences of its use. As a general rule, always switch off your phone wherever the use of a phone is prohibited. Use of your phone is subject to safety measures designed to protect users and their environment. -
Page 5: Environment
manufacturers of such equipment will be able to give you any advice you may need in this area. Hospitals: Always make sure that your phone is switched off in hospitals when so instructed by warning signs or by medical staff. Road safety: Do not use your phone when driving. -
Page 6: Getting Started
1 Getting Started Getting to know your touch phone 1.2 Installing the SIM card, battery, and storage card You need to remove the back cover before you can install the SIM card and battery. Also, make sure to always turn off the power before installing or replacing the SIM card and battery. - Page 7 1. Make sure your device is turned off. 2. Firmly hold the device with both hands and the front panel facing down. 3. Push the back cover up with your thumbs until it disengages from the device and then slide it up to remove. To remove the battery...
- Page 8 1. Make sure your device is turned off. 2. Remove the back cover. 3. The bottom of the phone has a notch. Lift the battery by the notch to remove To install the SIM card...
- Page 9 The SIM card contains your phone number, service details, and phonebook/ message memory. Your device is supported2G or 3G(WCDMA) SIM cards. 1. Remove the battery if it is installed. 2. Locate the SIM card slot, and then insert the SIM card with its gold contacts facing down and its cut-off corner facing out the card slot.
- Page 10 To have additional storage for your images, videos, music, and files, you can purchase a memory card and install it into your device. 1. Make sure that your device is turned off, and then remove the back cover. 2. Locate the memory card slot on the upper part of the exposed right panel. 3.
-
Page 11: Charging The Battery
• Do not crush, puncture, short external contacts, or dispose of in fire or water. • Do not expose to temperatures above 60°C (140°F). • Replace only with the battery pack designated for this product. • Recycle or dispose of used battery as stipulated by local regulations. 1. - Page 12 Or on the Home screen, touch and select Settings >Sound & notification >‘Silent’ check box. Screen sleep After a period of inactivity, your screen will go to sleep (display will turn black). In sleep, your phone uses less battery power. You can control this behavior: Set screen timeout period 1.
-
Page 13: Status Icons
1. The Home screen actually extends beyond the screen width. On Home screen, slide your fingertip left and right along the screen to reveal the full width of the Home screen. This additional space gives you more room to customize Home with applications, shortcuts, and widgets. - Page 14 status icons. Network signal Sign-in/sync error WCDMA service EDGE, service connected,data connected flowing Call forward Song is playing WLAN service Missed call connected SMS/MMS Call in progress Wireless services are Alarm is set off (Airplane mode) Ringer is off Phone on mute Bluetooth is on Battery is low Connected the PC...
-
Page 15: Using Phone Features
Notes: On the home screen, touch the bar and slide your finger down the screen to open the list of notifications displayed in the sliding window, you can touch the icon on the top of the screen to enter the shortcuts screen, such as Airplane mode, Wi-Fi, Bluetooth, Data connection, Airplane mode, Brightness, you can open or close the selected function directly. -
Page 16: Making A Call
2.2 Making a call On Home screen, you can touch >Phone to enter the dial screen. 1. Touch the on-screen dial pad to enter a number, touch ‘Delete’ button to delete numbers you’ve entered. Touch & hold to delete all the numbers in the field. -
Page 17: Using Call History
5. Incoming call:During call in progress, if you are on a call (“call in progress”) when another call comes in (“incoming call”), you have a few choices: •Answer the incoming call and place the call in progress on hold. To switch calls at any time, touch ‘Swap calls’. - Page 18 Wi -Fi 1. Select this check box if you prefer to use Wi-Fi for your data connection. 2. Wi-Fi settings: Open the Wi-Fi settings screen; select it from the network list. Provide your username or password if required. Bluetooth 1. Use this check box to turn Bluetooth services on or off. 2.
- Page 19 Phone ringtone: Select to decide on a ringtone to use for incoming calls. Note that you can override this setting for individual contacts in the Edit contact details screens. Default notification sound: Select a ringtone to use for a notification (e.g., new message).
- Page 20 Location Select a source for determining your location. Security Screen unlock pattern: Create a pattern you will be asked to draw before your screen will unlock. You can select to make the pattern visible or invisible as you draw it. SIM card lock settings: Lock your SIM card for extra security.
-
Page 21: Activesync
About phone View your phone Status: This screen lists a variety of information, including your phone number, the network you are currently using, the type of network, signal strength, whether you are roaming or not, any WLAN addresses you’re connected to, and more. View the model number and version information for your phone. - Page 22 Auto-sync: When selected, Auto-sync will sync Contacts automatically, as you make changes or receive new messages. When OFF, information will not be synced automatically, although you can force sync by using the individual application check boxes described below. 4. Sync problems: If you see this icon to the left of the sync check box, then there was a temporary problem with the data synchronization.
-
Page 23: Contacts
3. To pair with a device in the list, select it. 4. Type the device’s PIN and then‘Pair’. 5. Once paired, select the device name to connect. 6. Pairing and connection status appear under the device name. 7. Once the other Bluetooth device shows “connected” status, you can start using it to make and receive phone calls. - Page 24 screen, where all screen the information you’ve saved for this contact is displayed. 2. Take action on a contact: On the Contact details screen, you can view call the contact’s number, send a text message, add or remove a star or edit the contact details.
-
Page 25: Exchanging Messages
1. Call a contact: From the contact list, touch the contact you want to open the Contact details screen.Touch the call number directly to dial that contact’s primary number (first in the list on their details screen). 2. To dial a different number for the contact, select the contact’s name, and then select the number on their details screen and then touch the call number that you want. - Page 26 touch and select Messaging icon. About text and multimedia messages SMS messages are also know as “text” messages and can each be around 160 characters. If you continue to type after the limit is reached, your message will be delivered as one, but count as more than one message. These are called “concatenated”...
- Page 27 3. Links in messages: If a message contains a link to a Web page, it will be selectable. To view the Web page in the Browser, simply select it. 4. Delete messages: Your messages will be saved until you explicitly delete them.
- Page 28 7. As your message sends, progress displays in the title bar. If you see this icon to the right of the message, it means your message is still being delivered. Save message as draft While composing, press BACK,your message automatically saves as a draft. Text and multimedia message settings To set text and multimedia message preferences, from the message list, press MENU and select ‘Settings’.
- Page 29 2. Read email: You can display or collapse the messages in your Inbox by selecting Inbox. Unread messages display with a colored band. (Each account you add will use a different color.) 3. Forward, Reply, Reply all: You can forward, reply, or reply all to an email message from the Inbox.
-
Page 30: Internet
Accounts screen. Your name: Select to change your name as it appears in outgoing email. Email check frequency: Select this pop-up menu to set how frequently your email account is checked for new messages. Note that whenever you open a folder, email is refreshed, regardless of this setting. -
Page 31: Browser
7.2Browser To open the Browser, touch and select Browser icon. The Browser always opens to the last Web page you were viewing. The first time you enter the Browser after powering on, your home page will display. You can change your home page by pressing MENU > Settings >General> Set homepage. - Page 32 select ‘Send’. 3. View bookmarked page: Touch & hold the bookmark you want to open. The context menu opens. Select View page or Open in new window. 4. Edit bookmark: Touch & hold the bookmark you want to e open. The context menu opens.
-
Page 33: Experiencing Multimedia
8 Experiencing Multimedia 8.1 Camera & Picture All the pictures you can capture or view on your phone are stored on memory card, which must be installed in your phone. Before you can use the Camera or view pictures in Pictures, make sure you have a card installed. Load pictures onto your memory card Read the instructions below to add pictures to your Memory card or the phone storage. - Page 34 To view the pictures you’ve captured, as well as any you’ve stored on your memory card or the phone storage, go to Gallery application: 1. To open Pictures, on the Home screen, touch and select Gallery icon. 2. Depending on how many pictures you’ve stored, they may take a few minutes to load.
-
Page 35: Music
appear in the Contact details screen, as well as on any incoming call notifications. 7. Crop picture: In full-screen view, press MENU and select Crop. Touch & hold an edge of the cropper to reveal the sizing arrows, then drag the edge in or out to size. - Page 36 2. On your computer, find the mounted USB drive and open it. 3.Although your phone will find all music files on your memory card, it’s advisable to keep the number of files or folders at the root level to a minimum. So, if you wish, create a folder at the top-level called “music”...
-
Page 37: Fm Radio
automatically in a playlist called “My recordings”. Create a playlist on your phone 1. From the Library, select a category. From the list that appears, navigate to the artist, album, or song that you want on a playlist. 2. Touch & hold the artist, album, or song to open the context menu. 3. -
Page 38: Sound Record
be affected. You can improve the effect in the following ways: Near window, adjust the position of earphone cable or adopt manual adjustment. 8.4 Sound record The phone can be as sound record. 9 Other applications 9.1Calendar Calendar views You can view multiple calendars on your phone, so each calendar event is coded with a color. - Page 39 Three alarms are set up for you, ready to customize. All two alarms are turned off by default. Select the check box to turn on the alarm. If no day shows under the set time, the alarm will go off once when the set time is reached. This alarm will go off at 9:00 am every Tuesday and Friday.
-
Page 40: Calculator
Change date & time display You can change the format of the time displayed in your alarms from the global Settings screen: 1. Go to the main Alarm Clock screen. On the Home screen, then touch then press MENU and select Settings. Scroll down and select ‘Date & time’. The Date &... -
Page 41: Play Store
10 Play Store* This function is to the actualconfiguration of the mobile phone, please take to the actual mobile phone. Android Marketprovides you with direct access to software developers throughout the world. It is the place to go to find fun games and cool applications that have been rated by your fellow Androids. - Page 42 can give your permission. Be sure to read this carefully! Be especially cautious if an application has access to many functions or a significant amount of your data. Once you select ‘OK’ on this screen, you will be responsible for the results of using this item on your phone.
- Page 43 Items you download and install on your phone typically have access to functionality. You can view what an item has access to on your phone: 1. From the Android Market Home screen, press MENU and select ‘Downloads’. 2. Select the item you want to read about. The Item details screen appears. 3.
- Page 44 3. Your rating and comments are removed. FCC Statement This device complies with part 15 of the FCC Rules. Operation is subject to the following two conditions: (1) This device may not cause harmful interference, and (2) this device must accept any interference received, including interference that may cause undesired operation.
- Page 45 10 mm from the body. Non-compliance with the above restrictions may result in violation of RF exposure guidelines. You can gain the Certification Information (FCC ID:RQQHLT-L445) from https://www.fcc.gov/...