
Subscribe to Our Youtube Channel
Related Manuals for Brigade DC-101


Summary of Contents for Brigade DC-101
- Page 1 DC-101 Dash Cam User Guide This product records videos while the vehicle is operating. Read and follow the instructions in this guide to properly use and maintain the product.
- Page 2 Brigade is not responsible for any loss caused by an accident, nor is it responsible for providing any support regarding the outcome of an accident.
- Page 3 FCC Statement This device complies with Part 15 of the FCC Rules. Operation is subject to the following two conditions: (1) this device may not cause harmful interference, and (2) this device must accept any interference received, including interference that may cause undesired operation. FCC CAUTION: Any changes or modifications to the equipment not expressly approved by the party responsible for compliance could void your authority to operate the equipment.
-
Page 4: Table Of Contents
Contents Safety information 5. Settings 5.1 Managing the memory card 1. Product overview 5.1.1 Partitioning the memory card 1.1 Included items 5.1.2 Formatting the memory card 5.1.3 Configuring the video overwriting 1.1.1 Standard items function 1.2 Part names 5.2 Setting the camera 1.2.1 Front camera (main unit) - front view 1.2.2 Front camera (main unit) - rear view 5.2.1 Setting the brightness of the front... - Page 5 Safety information Read the following safety information to properly use the product. Safety symbols in this guide "Warning" - Indicates a potential hazard which, if not avoided, may result in injury or death. "Caution" - Indicates a potential hazard which, if not avoided, may result in minor injury or property damage.
- Page 6 Doing so may result in electrical fire or electrocution. • Use only genuine accessories from Brigade. Brigade does not guarantee compatibility and normal operation of third-party accessories. • When connecting the power cable to the product, ensure that the connection between the cable plug and the power cable connector on the product is secure.
- Page 7 • Brigade is NOT responsible for the loss of any recorded video during operation. • Although the device was designed to withstand high-impact car collisions, Brigade does not guarantee the recording of accidents when the device is damaged as a result of the accident.
-
Page 8: Product Overview
1. Product overview 1.1 Included items Ensure that all the items are included when you open the product box. 1.1.1 Standard items Front camera (main unit) Mount Hardwiring cable Adhesive cable holder External GPS receiver Quick start guide & Warranty MicroSD memory card / CS information / User guide with adapter... -
Page 9: Part Names
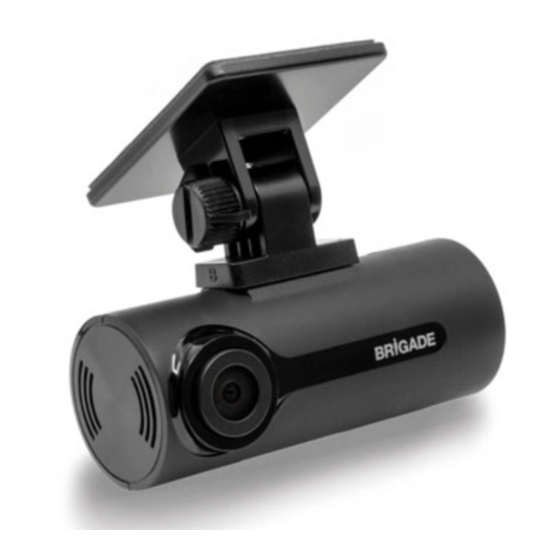
Product overview 1.2 Part names 1.2.1 Front camera (main unit) - front view Mount connector Used to connect the mount. DC-IN power port Used to connect the power cable. Front camera lens Records the front view. GPS port Used to connect the external GPS receiver (optional) for additional features. - Page 10 Product overview 1.2.2 Front camera (main unit) - rear view Speaker Outputs the voice guide and buzzer sounds to indicate the product’s status. Microphone Used for voice recording. Memory card slot Insert a memory card to save recordings. Status LED Indicates the operating status of the product.
-
Page 11: Removing And Inserting The Memory Card
• Ensure that the memory card is in the correct direction before inserting it into the product. The memory card slot or the memory card may be damaged if it is inserted incorrectly. • Use only authentic memory cards from Brigade. Brigade does not guarantee compatibility and normal operation of third-party memory cards. -
Page 12: Hardwiring The Dash Cam
Please visit the Product Support Area of the website. • Brigade Electronics is not responsible for damages to the main unit and /or any attached accessories due to improper user installations. Brigade Electronics strongly recommends professional automotive... -
Page 13: Installing The Product
2. Installing the product 2.1 Installing the front camera (main unit) Follow the instructions to properly install the product . 2.1.1 Selecting an installation location Select an installation location that can record the entire view in front of the vehicle without obstructing the driver’s vision. - Page 14 Installing the product Remove the protective film from the adhesive mount, and then press the mount to the installation location. Remove the product from the mount and push the mount against the windshield to ensure that the mount is firmly fixed. Align the product to the mount, and then slide it into the locking position until you hear a click.
-
Page 15: Connecting The Power Cable
2. Refer to the Installation Guide for Hardwiring the Dash Cam for fitting instructions. • Use the authentic Brigade car charger. Use of third party power cables may damage the product and result in electrical fire or electrocution due to the voltage difference. -
Page 16: Installing The External Gps Receiver
Installing the product 2.2 Installing the external GPS receiver (optional) To activate the safety camera feature or record driving information (the speed and location), follow the instructions and install the external GPS receiver on the upper part of the front windshield. Install the external GPS receiver near the product, taking the receiver's cable length into account. -
Page 17: Using Recording Features
3. Using recording features 3.1 Turning the product on or off The product is turned on automatically and continuous recording starts when you turn on the ACC or start the engine. Wait until the product is completely booted up after turning it on, and then begin operating the vehicle. The video recording does not begin until the product is completely turned on (booted up). -
Page 18: Recording Manually
Using recording features • Wait until the product is completely booted up after turning it on, and then begin operating the vehicle. The video recording does not begin until the product is completely turned on (booted up). • When incident continuous recording starts, the buzzer sounds as a notification. This function saves you time when checking the status LED to know the operating status of the product. -
Page 19: Checking The Video File Storage Location
Using recording features 3.5.1 Checking the video file storage location You can insert the memory card used for recording into a PC to check the video file storage location. Also, you can play the videos on a PC using the PC viewer. For more information about how to play videos via the PC viewer, refer to "4. -
Page 20: Using The Pc Viewer
Insert the memory card into a memory card reader connected to your PC. Run the installation file, and complete the installation according to the instructions given in the installation wizard. After the installation is complete, there will be a shortcut icon to Brigade Dash Cam Viewer. -
Page 21: Pc Viewer Screen Layout
Move the file named "Dashcam Viewer.zip" to the desktop. Right-click the Dashcam Viewer.zip and click Open With Archive Utility. > The Brigade Dashcam Viewer opens. 4.3 PC viewer screen layout The following provides brief information about the PC viewer's screen layout. View or configure the dash cam... -
Page 22: Playing Recorded Videos On The Pc Viewer
Using the PC viewer 4.4 Playing recorded videos on the PC viewer Follow the instructions to play recorded videos. Turn off the product and remove the memory card. Insert the memory card into a memory card reader connected to your PC. Double-click the shortcut to the PC viewer ( ) to open the program. -
Page 23: Video Control Menu Overview
Using the PC viewer 4.5 Video control menu overview The following provides brief information about the PC viewer's video control menu . Number Item Description Play the previous file Play the previous file in the currently selected folder. Rewind by 10 sec. Rewind the video by 10 sec. -
Page 24: Settings
5. Settings You can set the product features according to your needs and preferences using the PC Viewer. 5.1 Managing the memory card 5.1.1 Partitioning the memory card You can partition the memory card to adjust the storage space for different types of video recordings. Refer to the following instructions to partition the memory card . -
Page 25: Setting The Camera
Settings 5.2 Setting the camera You can adjust the brightness of the front view. 5.2.1 Setting the brightness of the front camera You can set the brightness of the front view recording. Refer to the following instructions to set the brightness. From the PC Viewer, click Settings Dash Cam Settings Camera Settings. -
Page 26: Setting Parking Mode
Settings 5.3.2 Setting parking mod You can set the operating mode of the product while the vehicle is parked. Follow the instructions to set parking mode. To use parking mode, install the hardwiring cable (optional). If continuous power is not supplied to the product, the product will stop recording when the vehicle engine is turned off . -
Page 27: Setting The Record Timer Feature
If you have installed the hardwiring cable to record the video for an extended period during parking, connect the authentic Brigade external dash cam battery. 5.3.6 Setting the battery protection feature You can set to use the battery protection feature. Follow the instructions to activate the feature. -
Page 28: Setting The Battery Cutoff Voltage Feature
Settings 5.3.7 Setting the battery cutoff voltage feature You can set the voltage limit to stop recording at when using the Low Voltage Off feature. Refer to the following instructions to set the voltage. From the PC Viewer, click Settings > Dash Cam Settings > Record Settings. From Battery Cutoff Voltage, select the desired voltage. -
Page 29: Setting Road Safety Features
Settings 5.4 Setting road safety features You can activate or deactivate a safety camera alert system and a front vehicle departure warning (FVDW). 5.4.1 Setting the safety cameras When the vehicle approaches or passes the speed limit zone, the safety camera alert system will collect GPS signals and safety camera data. -
Page 30: Configuring The System Settings
Settings 5.5 Configuring the system settings This menu allows you to configure the hardware settings that are globally applied to the system during operation, such as the display language. 5.5.1 Setting the display language Select a language (English, French, or Spanish) to display on the screen. Follow the instructions to select a language . -
Page 31: Setting The Daylight Saving Time
Settings 5.5.4 Setting the daylight saving time Follow the instructions to set the daylight saving time. From the PC Viewer, click Settings > Dash Cam Settings > System Settings. From Daylight Saving, select Enabled or Disabled. Click Save. 5.5.5 Setting the speed unit Follow the instructions to set the speed unit. -
Page 32: Upgrading The Firmware
For optimal operation of the product, ensure that you keep the firmware up to date. Follow the instructions to upgrade the firmware. On your PC, open a web browser and go to https://brigade-electronics.com/product-support-area/. Select the product and download the latest firmware upgrade file. -
Page 33: Troubleshooting
• Turn off the power, remove the memory card, and then check to ensure that recognized. the contacts in the memory card slot are not damaged. • Ensure that the memory card is an authentic product distributed by Brigade. Brigade does not guarantee compatibility and normal operation of third-party memory cards. -
Page 34: Specifications
To see the product specifications, refer to the following table. Item Specification Remarks Model name DC-101 78 x 34.6 x 31.5 mm / 42.4 g Dimensions / Weight 3.1 x 1.4 x 1.2 inch / 0.1 lb - UHS-1: 16 GB, 32 GB, 64 GB... - Page 35 Every product requested for repair is regarded as a device that has had its data backed up. The customer service center does not back up your data. Brigade is not responsible for any loss, such as data loss.
- Page 36 This Class B digital apparatus complies with Canadian ICES-003. Cet appareil numérique de la classe B est conforme à la norme NMB-003 du Canada Brigade Electronics Tested To Comply With FCC Standards For Home or Office Use www.brigade-electronics.com...
Need help?
Do you have a question about the DC-101 and is the answer not in the manual?
Questions and answers