Table of Contents
Advertisement
Quick Links
Advertisement
Table of Contents

Subscribe to Our Youtube Channel
Related Manuals for Gaggenau DF271100


Summary of Contents for Gaggenau DF271100
- Page 1 Gaggenau User manual DF271100 Dishwasher...
-
Page 2: Table Of Contents
Table of contents Safety .......... 4 Features......... 21 General information...... 4 Top basket ........ 22 Intended use........ 4 Bottom basket ........ 23 Restriction on user group.... 4 Cutlery basket ........ 24 Safe installation ........ 4 Etagere ........... 25 Safe use ........... 6 Folding prongs ....... 25 Damaged appliance ...... 8 Baking sheet spray head .... 25 Risk to children ........ 8 Optional extra cleaning area .. 26... - Page 3 Setting a programme ..... 37 Protect appliance from frost... 61 Setting additional functions .... 37 Transporting the appliance .... 61 Setting timer programming .... 37 Disposing of old appliance .... 61 Starting the programme .... 37 Customer Service...... 61 Interrupting programme .... 37 Product number (E-Nr.), produc- Terminate programme.... 38 tion number (FD) and consecut- Display programme information.. 38...
-
Page 4: Safety
en Safety Safety Observe the following safety instructions. General information Read this instruction manual carefully. ¡ Keep the instruction manual and the product information safe ¡ for future reference or for the next owner. Do not connect the appliance if it has been damaged in transit. ¡... - Page 5 Safety en WARNING ‒ Risk of electric shock! Incorrect installation is dangerous. ¡ Connect and operate the appliance only in accordance with ▶ the specifications on the rating plate. Always use the supplied power cable for the new appliance. ▶ Connect the appliance to a power supply with alternating ▶...
-
Page 6: Safe Use
en Safety WARNING ‒ Risk of injury! Hinges move when opening and closing the appliance door and can cause injury. If built-under or integrable appliances are not in a cavity so ▶ that one side is accessible, the hinge area must be covered at the side. - Page 7 Safety en WARNING ‒ Risk of injury! Leaving the appliance door open may result in injury. ¡ Only open the appliance door to load or unload tableware ▶ in order to prevent accidents, e.g. through tripping. Do not sit or stand on the appliance door when open. ▶...
-
Page 8: Damaged Appliance
en Safety Damaged appliance WARNING ‒ Risk of electric shock! If the appliance or the power cord is damaged, this is danger- ¡ ous. Never operate a damaged appliance. ▶ Never operate an appliance with a cracked or fractured sur- ▶ face. Never pull on the power cord to unplug the appliance. Al- ▶... -
Page 9: Safety Systems
Safety en WARNING ‒ Risk of harm to health! Children can lock themselves in the appliance, thereby putting their lives at risk. With redundant appliances, unplug the power cord. Then ▶ cut through the cord and damage the lock on the appliance door beyond repair so that the appliance door will no longer close. -
Page 10: Preventing Material Damage
en Preventing material damage Only use the water hoses sup- ▶ Preventing material damage Preventing material dam- plied with the appliance or genu- ine spare hoses. Never re-use water hoses that ▶ have been used before. Preventing material damage Safe installation If the water pressure is too high or ¡... -
Page 11: Childproof Lock
Childproof lock en To prevent corrosion, do not use ▶ Environmental protection and saving energy Environmental protection sponge cloths on dishwashers with a stainless steel front or and saving energy rinse such cloths thoroughly several times before using them Environmental protection and saving energy for the first time. -
Page 12: Zeolith Drying
en Environmental protection and saving energy Zeolith drying Sensors The appliance features a Zeolith con- The sensors adjust the programme tainer. Zeolith drying lets you save sequence and strength in the auto- energy. matic programmes depending on the Zeolite is a mineral that can store level and type of soiling. -
Page 13: Installation And Connection
Installation and connection en installing it under a continuous work- Installation and connection Installation and connec- top that is securely connected to ad- jacent cabinets. tion "Follow the safety instructions." To ensure proper operation, connect Installation and connection → Page 4 the appliance to the power and water "Follow the instructions for elec- supply correctly. -
Page 14: Drinking Water Connection
en Installation and connection The connection data for the appli- Drinking water connection ance can be found on the rating Connect your appliance to a drinking plate. water connection. Check that the mains plug is inser- ted properly. Installing the drinking water connection Note If you are replacing the appliance,... -
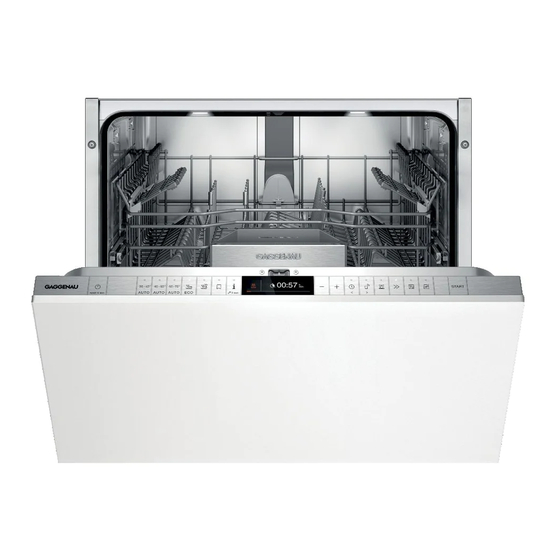
Page 15: Familiarising Yourself With Your Appliance
Familiarising yourself with your appliance en Familiarising yourself with your appliance Familiarising yourself with your appliance Familiarising yourself with your appliance Appliance You can find an overview of the parts of your appliance here. Rating plate Rating plate with "E number and FD number" → Page 62. -
Page 16: Controls
en Familiarising yourself with your appliance "Detergent" → Page 32 is added to the detergent Detergent dispenser dispenser. "Bottom basket" → Page 23 Bottom basket Dispenser for special salt Add special salt to the dispenser for special salt. → "Water softening system", Page 28 Lower spray arm The lower spray arm washes the tableware in the bot- tom basket. - Page 17 Familiarising yourself with your appliance en 4 5 6 7 8 9 "Switching on the appliance" → Page 36 ON/OFF button and reset button "Switching off the appliance" → Page 38 "Terminating the programme" → Page 38 "Programmes" → Page 19 Programme buttons Info button If you press , the display shows information about selected programmes, basic settings and additional functions.
- Page 18 en Familiarising yourself with your appliance buttons You can use these buttons to scroll between the basic settings. → "Changing basic settings", Page 41 "Changing the basic settings" → Page 41 Setting buttons "Open the appliance door." → Page 36 Door handle Display The display shows information about pro- grammes, basic settings or additional functions.
-
Page 19: Programmes
Programmes en Programmes Programmes You can find an overview of the pro- runtime will change if the rinse aid Programmes grammes that can be selected here. system is switched off or rinse aid Different programmes, which can be needs to be added. found on the control panel of your The consumption values can be appliance, are available depending... -
Page 20: Information For Test Institutes
en Programmes Programme: Programme sequence Additional func- tions Tableware: Most economical pro- → "Additional ¡ Cleaning mixed table- gramme: Eco 50° ware and cutlery. Pre-Rinse ¡ functions", Level of soiling: Page 21 Cleaning 50 °C ¡ Removing common ¡ Intermediate rinse ¡ household food remnants ¡... -
Page 21: Additional Functions
Additional functions en Saving Personalisation function Additional func- on the appliance tion Open the appliance door. Switch on with mixed ¡ loads containing table- Press . Intensive ware with different soil- Press the right programme button. ing levels, e.g. place → "Programmes", Page 19 very soiled pots and Press the button for the relevant... -
Page 22: Top Basket
en Features Raise or lower the basket evenly to Top basket the right level. Arrange cups, glasses and small items of tableware in the top basket. Check that the basket is level on both sides. Release the levers. Adjusting top basket with side The basket clicks into position. -
Page 23: Bottom Basket
Features en Lower the basket and pull out. Slide the basket back into the ap- pliance . Slide the guide rails into the appli- ance. Bottom basket Installing the top basket Arrange pans and plates in the bot- Pull the guide rails of the top bas- tom basket. -
Page 24: Cutlery Basket
en Features Lower the basket and insert into the front holders . Removing the bottom basket Pull the bottom basket right out. Slide the basket back into the ap- pliance. Lift the basket out of the front hold- ers and pull forwards slightly. Cutlery basket Arrange cutlery in the cutlery basket, always without sorting it and with the... -
Page 25: Etagere
Features en Push the lever forwards and fold Etagere down the prongs . Use the cutlery shelf and space un- derneath for small cups and glasses or for large items of cutlery, e.g. cooking spoons or serving cutlery. To use the prongs again, fold them back up. -
Page 26: Optional Extra Cleaning Area
en Features Inserting baking sheet spray head Optional extra cleaning area Use the baking sheet spray head in- Use the Optional extra cleaning area stead of the top basket to clean large in the top basket to clean all types of trays, grilles and plates. -
Page 27: Basket Heights
Before using for the first time en Pull out the top basket. Place the Optional extra cleaning area in the top basket and lock in Pull the tab on the Optional extra position . cleaning area up and forwards . Check that the mounts are in the correct position. -
Page 28: Water Softening System
en Water softening system Note: If you select Initial start-up To remove any marks from water Home Connect here, make further or other residues, we recommend settings using the Home Connect you operate the appliance without app on your mobile device. tableware before using it for the You can change the settings for first time. -
Page 29: Setting The Water Softening System
Water softening system en Special salt for dishwashers can ¡ Setting the water softening damage the tub due to corrosion. system To make sure that any special ▶ salt that escapes is washed out Set the water hardness on your appli- of the tub, add the special salt ance. -
Page 30: Switching Off The Water Softening System
en Water softening system Switching off the water Regeneration of the water softening system softening system If you find the special salt refill indic- In order to obtain fault-free function of ator irritating, e.g. when using com- the water softening system, the appli- bined detergents with salt replace- ance performs regeneration of the ment substances, you can switch the... -
Page 31: Rinse Aid System
Rinse aid system en Close the lid of the dispenser for Rinse aid system Rinse aid system rinse aid. The lid clicks into position. Rinse aid system Rinse aid Setting the amount of rinse For optimum drying results, use rinse aid. If there are streaks or water marks on Only use rinse aid for domestic dish- tableware, change the amount of... -
Page 32: Detergent
en Detergent Press repeatedly until the Detergent Description display shows 0. Liquid detergent Liquid detergent works To save the settings, press faster and is recommen- approx. 3 seconds. ded for shorter "Pro- The rinse aid system is switched grammes" → Page 19 off and the rinse aid refill indicator without PreRinse. -
Page 33: Unsuitable Detergents
Detergent en depending on the combination (4in1, According to manufacturers, com- ¡ 5in1, ...), additional components such bined detergents with salt replace- as glass protection or stainless steel ment substances can only be used cleaner. up to a certain water hardness, According to manufacturers, com- usually 26 °E, without adding spe- bined detergents generally only func- cial salt. -
Page 34: Tableware
en Tableware Add the detergent to the dry deter- Close the lid of the detergent dis- gent dispenser. penser. 50 ml 25 ml 15 ml The lid clicks into position. If you are using tablets, one is The detergent dispenser will open enough. -
Page 35: Damage To Glass And Tableware
Tableware en Damage to glass and table- Cause Recommendation ware The water temperat- Select a programme ure of the programme with lower temperat- Only put glasses and china in the is too high. ures. dishwasher if it is marked as dish- After the programme washer-safe by the manufacturer. -
Page 36: Removing Tableware
en Basic operation To save resources, do not pre- Removing tableware rinse tableware under running wa- ter. WARNING Observe the following when arran- Risk of injury! ging tableware: Hot tableware can cause burns to the – Put heavily soiled tableware in skin. -
Page 37: Setting A Programme
Basic operation en for the combination of energy/wa- "Finish at" (e.g. 15:20 hours). You ter consumption for this type of can change this setting in the "Ba- tableware and evidences conform- sic settings" → Page 39. ity with the EU Ecodesign Direct- To activate timer programming, ive. -
Page 38: Terminate Programme
en Basic operation Press to resume the pro- gramme. Terminate programme To end a programme early or to switch from a programme that has already started, you will need to can- cel it first. Open the appliance door. Press for approx. 4 seconds. -
Page 39: Basic Settings
Basic settings en Basic settings Basic settings You can configure the basic settings for your appliance to meet your needs. Basic settings Overview of basic settings The basic settings depend on the features of your appliance. Basic setting Selection Description Time setting 00:00 - 24:00 Set the current time. - Page 40 en Basic settings Basic setting Selection Description Eco forecast Switch EcoCheck on or off. When selecting the programme, the average wa- ter consumption and energy consumption is briefly shown on the display. Emotion Light Switch the interior lighting of the appliance on or On via main switch off.
-
Page 41: Changing Basic Settings
Home Connect en To be able to use Home Connect, Changing basic settings you must first set up the connection Open the appliance door. to the WLAN home network (Wi-Fi Press . and to the Home Connect app. → "Connecting the appliance to ¡... -
Page 42: Home Connect Settings
en Home Connect Connecting the appliance to WLAN Activating Remote Start home network (Wi-Fi) When you have selected "Manual" in the basic settings of this function, ac- Requirements tivate the function on your appliance. Home Connect app is installed on ¡ your mobile device. Requirements Wi-Fi on the router is activated. -
Page 43: Data Protection
Cleaning and servicing en Data protection Cleaning and servicing Cleaning and servicing Please see the information on data To keep your appliance working effi- Cleaning and servicing protection. ciently for a long time, it is important The first time your appliance is to clean and maintain it carefully. -
Page 44: Machine Care
Dishwasher Care and Ma- ance to malfunction. To avoid such chine Cleaner for Dishwashers online faults and reduce odours, we recom- at https://www.gaggenau.com/ mend cleaning your appliance at reg- global/store or from customer ser- ular intervals. vice. -
Page 45: Filter System
Cleaning and servicing en Remove any coarse soiling in the After each wash check the filters interior with a damp cloth. for residue. Clean the filters. Turn the coarse filter anticlockwise and remove the filter system . Place the machine care product in the appliance interior. -
Page 46: Cleaning Spray Arms
en Cleaning and servicing Clean the filter elements under run- Pull up the lower spray arm to re- ning water. move. Carefully clean the rim of dirt between the coarse and the fine fil- ter. Re-assemble the filter system. Make sure that the locking catches on the coarse filter click into posi- tion. -
Page 47: Troubleshooting
Troubleshooting en Troubleshooting Troubleshooting You can rectify minor faults on your appliance yourself. Read the troubleshoot- Troubleshooting ing information before contacting after-sales service. This will avoid unneces- sary costs. WARNING Risk of electric shock! Incorrect repairs are dangerous. Repairs to the appliance should only be carried out by trained specialist ▶... -
Page 48: Error Code / Fault Display / Signal
en Troubleshooting Fault Cause Troubleshooting Appliance door does not Appliance door and door Clean the appliance door and door ▶ open. seal are soiled. seal with a damp cloth and a little washing-up liquid. Automatic door opening is Wait one second after closing the ▶... - Page 49 Troubleshooting en Fault Cause Troubleshooting E:3200 or indicator for wa- Remove the filter from the supply ter supply lights up. hose Clean the filter. Re-insert the filter in the supply hose. Screw the water connection back Check the water connection for leaks.
-
Page 50: Washing Results
en Troubleshooting Fault Cause Troubleshooting A different error code ap- A technical fault is present. Press . pears in the display window. Unplug the appliance or switch off the fuse. E:0100 to E:9010 Wait at least 2 minutes. Insert the mains plug of the appli- ance in a socket or switch on the fuse. - Page 51 Troubleshooting en Fault Cause Troubleshooting Tableware is not dry. Use a different combined detergent with a better drying performance. Activate "Extra Dry" → Page 39. Extra Dry not activated to im- ▶ prove drying performance. Tableware removed too Wait until the programme ends. early or drying process not Only remove tableware 30 minutes yet ended.
- Page 52 en Troubleshooting Fault Cause Troubleshooting Remnants of food on table- Washing programme selec- Select a more intensive washing ▶ ware. ted too weak. programme. → "Programmes", Page 19 Adjust the sensitivity of the sensors. ▶ → "Sensors", Page 12 Tableware has been pre- Only remove large remnants of food ▶...
- Page 53 Troubleshooting en Fault Cause Troubleshooting Water marks on plastic Due to laws of physics Select a more intensive pro- ▶ parts. droplet formation on plastic gramme. → "Programmes", Page 19 surfaces is unavoidable. After drying water marks are Position tableware at an angle. ▶...
- Page 54 en Troubleshooting Fault Cause Troubleshooting Tea residue or lipstick marks Washing temperature is too Select a programme with a higher ▶ on tableware. low. washing temperature. → "Programmes", Page 19 Too little detergent is being Use a suitable "Detergent " ▶ → Page 32 and follow the manufac- used or is unsuitable.
- Page 55 Troubleshooting en Fault Cause Troubleshooting Plastic parts are discol- Washing temperature is too Select a programme with a higher ▶ oured. low. washing temperature. → "Programmes", Page 19 Tableware has been pre- Only remove large remnants of food ▶ cleaned too intensely. The and do not prerinse tableware.
-
Page 56: Home Connect Problem
en Troubleshooting Fault Cause Troubleshooting Rust spots on cutlery. Cutlery is not sufficiently Use rust-resistant tableware. ▶ rust-resistant. Knife blades are often more severely af- fected. Cutlery may also rust if Do not wash rusting items. ▶ washed together with rust- ing items. -
Page 57: Information On Display Panel
Troubleshooting en Information on display panel Fault Cause Troubleshooting Add "Special salt" → Page 29. Special salt refill indicator Insufficient special salt. ▶ lights up. Sensor does not detect spe- Do not use special salt tablets. ▶ cial salt tablets. Refill indicator for special Water softening system is Setting the water softening system ▶... -
Page 58: Mechanical Damage
en Troubleshooting Fault Cause Troubleshooting → "Terminate programme", Programme starts automat- You did not wait until pro- ▶ ically. gramme ended. Page 38 Appliance stops during the Appliance door is not closed Close the appliance door. ▶ programme or cuts out. properly. Power and/or water supply Check the power supply. -
Page 59: Noise
Troubleshooting en Fault Cause Troubleshooting Appliance door cannot be When closed, the appliance door, closed. its decor or attached parts should not knock against adjacent cabin- ets or the worktop. Automatic door opening is Wait for a second after opening the ▶... -
Page 60: Clean Wastewater Pump
en Transportation, storage and disposal Insert the pump cover and press Clean wastewater pump down . Large remnants of food or foreign bodies can block the waste water pump. As soon as the rinsing water no longer drains properly, the waste water pump must be cleaned. -
Page 61: Protect Appliance From Frost
Customer Service en Protect appliance from frost Disposing of old appliance If there is a risk of frost where the ap- Valuable raw materials can be re- pliance will be standing, e.g. in a holi- used by recycling. day home, empty the appliance com- pletely. -
Page 62: Product Number (E-Nr.), Produc- Tion Number (Fd) And Consecut- Ive Numbering (Z-Nr.)
en Technical specifications least 10 years from the date on from water damage, the appliance which your appliance was placed on must be connected to the power the market within the European Eco- supply. nomic Area. The liability guarantee is valid for ¡... -
Page 63: Information Regarding Free And Open Source Software
Declaration of Conformity Declaration of Conformity number (E-Nr.) on the rating plate. Al- ternatively, you can also find the Gaggenau Hausgeräte GmbH hereby Declaration of Conformity model identifier in the first line of the declares that the appliance with EU energy label. - Page 64 en Declaration of Conformity UK (NI) 5 GHz WLAN (Wi-Fi): For indoor use only. 5 GHz WLAN (Wi-Fi): For indoor use only.
- Page 68 Gaggenau Hausgeräte GmbH Valid within Great Britain: Carl-Wery-Straße 34 Imported to Great Britain by 81739 München BSH Home Appliances Ltd. GERMANY Grand Union House www.gaggenau.com Old Wolverton Road Wolverton, Milton Keynes MK12 5PT United Kingdom...
Need help?
Do you have a question about the DF271100 and is the answer not in the manual?
Questions and answers