Table of Contents
Advertisement
Quick Links
Advertisement
Table of Contents

Related Manuals for Telefunken TM350 IZY


Summary of Contents for Telefunken TM350 IZY
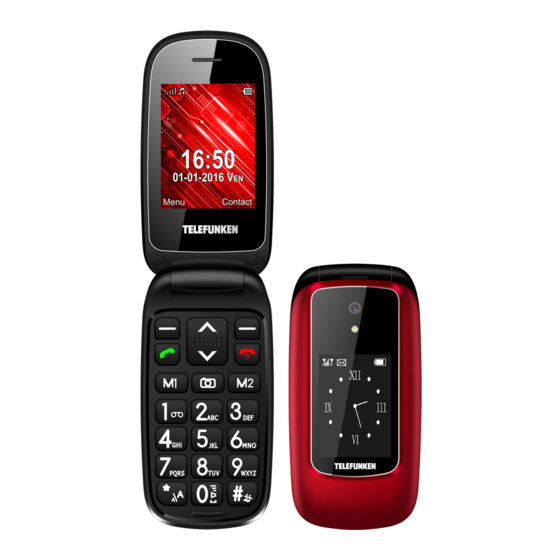
- Page 1 MOBILE PHONE TM350 IZY INSTRUCTION MANUAL...
-
Page 2: Table Of Contents
DEAR CUSTOMER, Thank you for choosing our mobile phone. By reading this instruction manual before using this product you will have an overall knowledge of its simple but outstanding functions. This product is designed for GSM/GPRS networks. On top of basic functions, it enables you to use phone book, ringtones, clock/alarm, calendar, calculator, audio player, camera, sound recorder and other functions. -
Page 3: Safety Instructions
1. SAFETY INSTRUCTIONS Read this instruction manual carefully before use. It contains important information for your safety as well as operating and maintenance advices. Observe all safety instructions to avoid damage through improper use! Keep this instruction manual for future use. If this phone should be passed on to a third party, then this instruction manual must be included. - Page 4 1.4 Precautions for use while driving ƒ Road safety is your priority. Check the laws and regulations concerning the use of mobile phones at the wheel in the areas where you drive. Always obey them. ƒ Use the hands-free function of the phone, if available. Pull off the road and park before making or answering calls if conditions so require.
- Page 5 1.10 Aircraft safety ƒ Please turn off your mobile phone before the airplane takes off. In order to protect the airplane communication system from interference, it is forbidden to use mobile phones during flight. ƒ Safety regulations require permission from a crewmember for the use of phones while the plane is on the ground.
-
Page 6: Scope Of Delivery
2. SCOPE OF DELIVERY Remove all packaging and dispose of accordingly. Carefully check below listed package content. If anything is missing, contact immediately your retailer. 1. TM350 Mobile Phone 2. Hands-free Kit 3. Rechargeable Li-ion Battery 4. Charger 5. USB charging cable 6. -
Page 7: Control Elements
3. CONTROL ELEMENTS Earpiece Display screen Menu/OK Key: fOK key fMain menu key Contacts/Back key: fAnswer a call fBack key fPhonebook access fMute a call Call Key: fDial a number Up and Down Direction fAnswer a call Keys fShow call history f Navigate menu. - Page 8 3. CONTROL ELEMENTS Camera lens Torch Earphone jack Camera flash Volume keys (up/down) Torch switch key Charging indicator Unread message indicator Time display Emergency SOS Speaker button Battery compartment cover Charging cradle Cradle charging connector...
-
Page 9: Getting Started
4. GETTING STARTED Prepare your phone, battery, SIM card, memory card (this is a must for camera and multimedia functions) and the charger. WARNING: ƒ The device and accessories contain small parts. Keep all the equipment out of the reach of children. ƒ... - Page 10 4.2 Installing the memory card (not supplied) WARNING: SIM cards and microSD cards are small objects, so keep them out of the reach of children. 1. Turn off the phone. 2. Open the battery compartment cover and remove the battery. 3.
- Page 11 4.4 Charging the battery WARNING: When a travel charger and its accessories are used to charge the battery, check first whether they have been made or approved by the manufacturer. Using other accessories can damage your mobile phone and present a risk. Note: ƒ...
-
Page 12: Navigating Main Menu
5. NAVIGATING MAIN MENU 5.1 Controls Down Left Right ƒ To access the main menu, press the left key on the left hand side of the keypad. ƒ To navigate up and down, press the key. To navigate left and right, press the key. - Page 13 5.3 Understanding icons Icon Description Icon Description Bluetooth® Enabled Signal Strength for SIM Alarm is set Missed Call Roaming. Different rates Low battery apply, check with your service provider Earphones connected New SMS Message (headset mode) SOS activated New MMS Message Clock Message Inbox is Full No SIM card...
-
Page 14: Sos Mode Function
6. SOS MODE FUNCTION The SOS function is designed to contact your relatives or other persons in case of an emergency. The SOS and SMS functions are deactivated by default. When these functions are activated, you can make an emergency call and send a customized SOS message. 6.1 Activating the SOS function 1. -
Page 15: Basic Functions
7. BASIC FUNCTIONS 7.1 Making a call There are five ways to make a call. Choose one way as shown below, then press the key to launch the call. ƒ From the main screen, enter the number directly using the keypad. ƒ... - Page 16 During a call, press the left key to see available options. Press the key to select an option and press the key to access the selected option: ƒ Connect to BT Connect to a Bluetooth® device. ƒ Adjust volume ...
- Page 17 ƒ Add to blacklist Add the number to the blacklist. When this number calls, it will be rejected automatically. For more information, see "To add a call log to the blacklist" on page 17. To remove the number from the black list, see "10. SETTINGS GUIDE"...
- Page 18 3. Press the key to select a head picture. 4. Select Options > Manually or Choose from Phonebook. ƒ Manually The contact editing interface is displayed. Enter name, phone number and other information, and select Options -> Save to save the contact. ƒ...
- Page 19 To access the phonebook 1. Enter the main menu and select Contacts. 2. Press the left key to see available options: ƒ View contact Display name and number of selected contact. ƒ New Add new number to contact list via saved in the phone or SIM card.
- Page 20 3. Select Options > Write message > SMS or MMS. key to enter the Write message interface. 4. Press the left 5. When you complete the message, select Options > Send and press the left key. For more information about writing SMS and MMS messages, see "To send text messages"...
- Page 21 To import phone contacts 1. Go to Menu > Contacts. 2. Press the key to select a contact. 3. Select Options > Import/Export > Import contact and press the left key. 4. Specify the source where you import phone contacts. Press the key to select the phone directory.
- Page 22 You can send text messages (SMS) and multimedia messages (MMS) to a contact. You can view received, sent, draft messages. The phone provides text templates and you can edit your own text templates. You can insert text template into a message. The phone also provide settings, including message validity period, preferred storage, etc.
- Page 23 ƒ To insert a space press the 0 key. ƒ If you have made a mistake and want to delete letter(s) press the right key. ƒ Press the 1 key repeatedly for common punctuation marks. ƒ Press the * key to access soft keyboard of special characters, press the key to select the desired character and press the left key to confirm.
- Page 24 3. Select Options -> Send, or directly press the key. There are other options. ƒ Preview Preview the multimedia message. ƒ Add new recipient Add one or more recipients. ƒ Add Add more multimedia files. ƒ Delete Delete current message page or audio files.
- Page 25 7.11 Using multimedia Note: A memory card is required to use the multimedia functions. Up to 32 GB micro SD card is supported. h Multimedia section acts as an access hub to below phone tools: ƒ Camera See "To use camera" on page 25. ...
- Page 26 To use DV (video) Go to Menu > Multimedia > DV. While in DV menu, press the key to start recording a video. Press the left key to see available options: ƒ View video directory Access and manage the recorded video list. ...
- Page 27 To use audio player Tips: ƒ Audio player allows you to listen to audio files in various formats: WAV, AMR, MP3, MIDI, AAC. ƒ To increase or decrease the volume, use the "+" or "-" keys on the left side of the phone.
- Page 28 To use video player Tips: ƒ Video player allows you to watch video files in various formats: AVI, FLV, MP4 and 3GP. ƒ To increase or decrease the volume, use the "+" or "-" keys on the left side of the phone. Go to Menu >...
- Page 29 To use sound recorder Tip: Sound recorder allows you to record audio in WAV format. fExit the recorder or the fPress to access Options menu Options menu fPress to pause or fPress to stop recording continue recording fPress to start or pause recording Go to Menu >...
- Page 30 To use image viewer Go to Menu > Multimedia > Image. Image viewer allows you to view photos in JPG format. Photos are displayed in thumbnail. ƒ Press the key to select a photo. ƒ Press the left key to view the photo in full screen. ƒ...
- Page 31 7.12 Using FM radio fSwitch to a lower- fSwitch to a higher- frequency radio frequency radio station station fPress to start or pause the radio playing This phone is equipped with a FM radio, which can be used with or without connected earphones.
-
Page 32: Using Additional Tools
7.13 Connecting to PC/MAC Connect the USB cable to a computer port first, and then connect the micro USB to the phone charging port. Once connected, a pop-up menu prompts for user to select 2 options: ƒ "Charging" - use for charging. Access to media is possible only via phone itself. ƒ... - Page 33 Tool Name Description With this phone you can activate up to 3 different alarms. When phone is off, alarm can still be activated if battery is sufficiently charged. h Select an alarm from Alarm 1, Alarm 2, and Alarm 3. Use the left key to turn on or off the selected alarm.
- Page 34 Tool Name Description ƒ You can establish a Bluetooth® connection with another Bluetooth® ® ® device in order to transfer files or play music via external Bluetooth® ® speaker. ƒ This mobile phone is equipped with Bluetooth® version 2.1 and can ®...
- Page 35 Tool Name Description h The Internet feature enables you to connect to the Internet by typing a URL, bookmark webpages, view browsing history, and save offline webpages. Available options (you can access them by pressing the key): ƒ Input URL Type a URL to open a website.
-
Page 36: Using The Torch
9. USING THE TORCH To activate or deactivate the torch, slide the torch key located on the right side of the telephone upwards or downwards. 10. SETTINGS GUIDE Setting Name Description Set whether the phone answers incoming calls by Flip to answer opening the flip. - Page 37 Setting Name Description ƒ Set time and date. Press the key to move the cursor. Press the key to select the number or press numeric keys to input the Date & time entries. ƒ Set time and date format. ƒ Set whether the phone automatically update time.
- Page 38 Setting Name Description Activate, deactivate and modify PIN code (protects the SIM card only). Modify PIN2 Select to modify PIN2 code. Lock and unlock the phone. To lock or unlock the Phone locked phone, enter the password (Default: 0000). Modify the cellphone Change the phone lock password.
-
Page 39: Cleaning Instructions
This device complies with international safety standards for exposure to radio waves. The value recorded for the TELEFUNKEN TM 350 IZY is 0.767 W/kg for Body and 0.590 W/kg for Head (average measurement for 10g of organic tissue). The maximum limit according to the WHO is 2 W/kg (average measurement for 10g of organic tissue). -
Page 40: Disposal Instructions
13. DISPOSAL INSTRUCTIONS Correct battery recycling (Applicable in the European Union and other European countries with selective waste collection systems) This symbol on the battery and product manual indicates that at the end of life the battery of this product should not be discarded with other household waste.
Need help?
Do you have a question about the TM350 IZY and is the answer not in the manual?
Questions and answers