Table of Contents
Advertisement
Available languages
Available languages
User's Manual
Οδ
ηγίες Χρήσης
Manuale d'installazione ed uso
ΚΛΙΜΑΤΙΣΤΙΚΟ ΤΟΙΧΟΥ ΤΥΠΟΥ INVERTER
W
ALL MOUNTED AIR CONDITIONER INVERTER TYPE
CONDIZIONATORE SPLIT
MODELS/ΜΟΝΤΕΛΑ/MODELLI
KTN/KTG22-09R32
KTN/KTG21-09R32
KTN/KTG22-12R32
KTN/KTG21-12R32
Thank you for purchasing our product.
• Before using this product, be sure to read this Instruction Manual to ensure proper usage. Please
keep this manual for later reference.
• Improper use of this product may result in a malfunction, failure, unexpected accident, or create
a potential hazard.
Ε
υχαριστούμε για την επιλογής σας στο κλιματιστικό TOYOTOMI.
Για τη σωστή του χρήση παρακαλούμε διαβάστε το εγχειρίδιο χρήσης προσεκτικά, πριν θέσετε
τη μονάδα σε λειτουργία και κρατήστε το σε καλή κατάσταση για μελλοντική αναφορά.
Grazie per aver scelto un prodotto TOYOTOMI.
Per un corretto funzionamento, leggere attentamente questo manuale prima di
usare il condizionatore e conservarlo per una futura consultazione.
Advertisement
Table of Contents

Subscribe to Our Youtube Channel
Related Manuals for Toyotomi KTN22-09R32


Summary of Contents for Toyotomi KTN22-09R32
- Page 1 • Improper use of this product may result in a malfunction, failure, unexpected accident, or create a potential hazard. Ε υχαριστούμε για την επιλογής σας στο κλιματιστικό TOYOTOMI. Για τη σωστή του χρήση παρακαλούμε διαβάστε το εγχειρίδιο χρήσης προσεκτικά, πριν θέσετε τη μονάδα σε λειτουργία και κρατήστε το σε καλή κατάσταση για μελλοντική αναφορά.
- Page 2 R32: 675...
- Page 3 Appliance filled with flammable gas R32. Before use the appliance, read the owner’s manual first. Before install the appliance, read the installation manual first. Before repair the appliance, read the service manual first. The Refrigerant To realize the function of the air conditioner unit, a special refrigerant circulates in the system.
-
Page 4: Operation And Maintenance
Precautions WARNING Operation and Maintenance This appliance can be used by children aged from 8 years and above and persons with reduced physical, sensory ormental capabilities or lack of experience and knowledge if they have been given supervision or instruction concerning use of the appliance in a safe way and understand the hazards involved. - Page 5 Precautions WARNING Maintenance must be performed by qualified professionals. Otherwise, it may cause personal injury or damage. Do not repair air conditioner by yourself. It may cause electric shock or damage. Please contact dealer when you need to repair air conditioner. Do not extend fingers or objects into air inlet or air outlet.
- Page 6 Precautions WARNING Attachment Installation must be performed by qualified professionals. Otherwise, it may cause personal injury or damage. Must follow the electric safety regulations when installing the unit. According to the local safety regulations, use qualified power supply circuit and circuit break. Do install the circuit break.
- Page 7 Precautions WARNING Do not put through the power before finishing installation. If the supply cord is damaged, it must be replaced by the manufacturer, its service agent or similarly qualified persons in order to avoid a hazard. The temperature of refrigerant circuit will be high, please keep the interconnection cable away from the copper tube.
- Page 8 Precautions WARNING For the air conditioner with plug ,the plug should be reachable after finishing installation For the air conditioner without plug, an circuit break must be installed in the line. If you need to relocate the air conditioner to another place, only the qualified person can perform the work.
- Page 9 Precautions WARNING The air conditioner is not allowed to use in a room that has running fire (such as fire source, working coal gas ware, operating heater). It is not allowed to drill hole or burn the connection pipe. The air conditioner must be installed in a room that is larger than the minimum room area.
-
Page 11: Introduction For Buttons On Remote Controller
Buttons on remote controller On/O bu on Mode bu on Swing bu on Sleep bu on Temp bu on Turbo bu on Timer bu on WiFi bu on Light bu on Introduction for buttons on remote controller Temp. display type Indoor ambient temp. - Page 12 Introduction for buttons on remote controller Note: , it could be used for the air conditioners with multifunction; For some function, which the model doesn't have, if press the corresponding button on the remote controller that the unit will keep the original running status.
- Page 13 Introduction for buttons on remote controller Swing button Press this button to set up & down swing angle. Sleep button In the Cooling or Heating mode, press this button to start sleep mode. Once you set it up, this symbol " "...
- Page 14 Introduction for buttons on remote controller Temp button Press this button, you can see indoor set temperature, indoor ambient temperature on indoor unit’s display. The setting on remote controller is selected circularly as below: no display Note: Outdoor temperature display is not available. At that time, indoor unit receives "...
-
Page 15: Function Introduction For Combination Buttons
Introduction for buttons on remote controller Light button turn on the display's light and press this button again to turn Press this button to off the display's light. Function introduction for combination buttons Combination of " " and " " buttons: About lock Press "... -
Page 16: Self Clean Function
Self Clean Function Under unit off status, hold “MODE” and “FAN” buttons simultaneously for 5 seconds to turn on or off the SELF CLEAN function. When the SELF CLEAN function is turned on, indoor displays “CL”. During the SELF CLEAN process of evaporator, the unit will perform fast cooling or fast heating. -
Page 17: Emergency Operation
Emergency operation If remote controller is lost or damaged, please use auxiliary button to turn on or turn off the air conditioner. The operation in details are as below: air conditioner. When the air conditioner is turned on, it will operate under auto mode. - Page 18 Clean and Maintenance Open panel Pull out the panel to a certain Use dust catcher or water to angle as shown in the fig. clean the filter. When the filter is very dirty, use the water (below 45 ) to clean it, and then put it in a shady and cool place to dry.
-
Page 19: Notice For Recovery
Clean and Maintenance 1. Check whether air inlets and air outlets are blocked. 2. Check whether air switch, plug and socket are in good condition. 3. Check whether filter is clean. 4. Check whether mounting bracket for outdoor unit is damaged or corroded. If yes, please contact dealer. -
Page 20: Malfunction Analysis
Malfunction analysis General phenomenon analysis Please check below items before asking for maintenance. If the malfunction still can’t be eliminated, please contact local dealer or qualified professionals. Whether it's interfered severely Pull out the plug. Reinsert (such as static electricity,stable the plug after about 3min, and voltage)? then turn on the unit again. - Page 21 Malfunction analysis Power failure? Wait until power recovery. Is plug loose? Reinsert the plug. Air switch trips off or fuse is Ask professional to replace burnt out? air switch or fuse. Air condit- Wiring has malfunction? Ask professional to replace it. ioner can’t Unit has restarted immediately operate...
- Page 22 Malfunction analysis Whether there’s odour source, Eliminate the odour source. Odours are such as furniture and cigarette, emitted Clean the filter. etc. Air conditioner Whether there’s interference, Disconnect power, put back operates nor- such as thunder, wireless power, and then turn on the mally suddenly devices, etc.
- Page 23 Malfunction analysis Error Code When air conditioner status is abnormal, temperature indicator on indoor unit will blink to display corresponding error code. Please refer to below list for identification of error code. Error code Troubleshooting It can be eliminated after restarting the unit. If not , please It can be eliminated after restarting the unit.
-
Page 24: Installation Dimension Diagram
Installation dimension diagram... -
Page 25: Tools For Installation
Tools for installation 1 Level meter 2 Screw driver 3 Impact drill 4 Drill head 5 Pipe expander 6 Torque wrench 7 Open-end wrench 8 Pipe cutter 9 Leakage detector 10 Vacuum pump 11 Pressure meter 12 Universal meter 13 Inner hexagon spanner 14 Measuring tape Note: Please contact the local agent for installation. -
Page 26: Requirements For Electric Connection
Requirements for electric connection Safety precaution 1. Must follow the electric safety regulations when installing the unit. 2. According to the local safety regulations, use qualified power supply circuit and air switch. 3. Make sure the power supply matches with the requirement of air conditioner. Unstable power supply or incorrect wiring or malfunction. - Page 27 9k &12k Wall Wall Wall Space Wall to the Space Space Space wall to the to the to the above wall wall wall 150mm above above above Left 150mm Right Right Left (Rear piping hole) Rear piping hole Rear piping hole (For some models) (Rear piping hole) 55 or...
- Page 28 Pay attention to dust prevention and take relevant safety measures when not provided and should be bought...
-
Page 29: Installation Of Indoor Unit
Installation of indoor unit Hex nut diameter Tightening torque (N . m) open-end wrench 15~20 9.52 30~40 union nut 45~55 pipe torque wrench 60~65 70~75 indoor pipe 4. Wrap the indoor pipe and joint of con- nection pipe with insulating pipe, and then wrap it with tape. - Page 30 of indoor unit and then pull it out from 3. Remove the wire clip; connect the power connection wire to the wiring terminal according to the color; tighten the screw 9K, 12K, 17K, 21K Heat pump type: N(1) blue black brown yellow- green...
- Page 31 Installation of indoor unit Step eight: bind up pipe 1. Bind up the connection pipe, power drain hose connection pipe band cord and drain hose with the band. indoor and outdoor power cord indoor unit pipe indoor power cord liquid pipe 3.
- Page 32 5m, 7.5m, 8m. 2.Min. length of connection pipe is 3m. 3.Max. length of connection pipe capacity capacity 5000Btu/h 24000Btu/h (1465W) (7032W) 7000Btu/h 28000Btu/h (2051W) (8204W) 9000Btu/h 36000Btu/h (2637W) (10548W) 12000Btu/h 42000Btu/h (3516W) (12306W) 18000Btu/h 48000Btu/h (5274W) (14064W) After the length of connection pipe is prolonged for 10m at the basis of standard length, you should add 5ml of refrigerant oil for each additional 5m Additional refrigerant charging amount additional refrigerant charging amount per meter...
-
Page 33: Configuration Of Connection Pipe
Configuration of connection pipe Sheet 2. Additional refrigerant charging amount for R32 Diameter of connection pipe mm Indoor unit throttle Outdoor unit throttle Cooling only, cooling and Cooling only Liquid pipe Gas pipe cooling and heating heating (g / m) Note: The additional refrigerant charging amount in Sheet 2 is recommended value, not compulsory. -
Page 34: Safety Operation Of Flammable Refrigerant
Safety operation of flammable refrigerant Qualification requirement for installation and maintenance man All the work men who are engaging in the refrigeration system should bear the valid certification awarded by the authoritative organization and the qualification for dealing with the refrigeration system recognized by this industry. If it needs other technician to maintain and repair the appliance, they should be supervised by the person who bears the qualification for using the flammable refrigerant. - Page 35 Safety operation of flammable refrigerant a. Shut down the unit and cut power supply b. Eliminate the refrigerant c. Vacuuming d. Clean it with N e. Cutting or welding f. Carry back to the service spot for welding The refrigerant should be recycled into the specialized storage tank. Make sure that there isn’t any naked flame near the outlet of the vacuum pump and it’s well-ventilated.
-
Page 36: Installation Of Outdoor Unit
Installation of outdoor unit (select it according to the actual installation situation) 1. Select installation location according to the house structure. 2. Fix the support of outdoor unit on the selected location with expansion screws. installing the outdoor unit. Make sure the support can withstand at least four times of the unit weight. - Page 37 Installation of outdoor unit Step four: connect indoor and outdoor pipes 1. Remove the screw on the right han- 3. Pretightening the union nut with dle of outdoor unit and then remove hand. the handle. pipe joint screw union nut handle 2.
- Page 38 Installation of outdoor unit 2. Fix the power connection wire and signal control wire with wire clip (only for cooling and heating unit). Note: Step six: neaten the pipes 1. The pipes should be placed along the wall, bent reasonably and hidden possibly. Min. semidiameter of bending the pipe is 10cm.
-
Page 39: Vacuum Pumping
Vacuum pumping Use vacuum pump 1. Remove the valve caps on the liquid valve and gas liquid valve piezometer valve and the nut of refri- gas valve gerant charging vent. 2. Connect the charging hose refrigerant charging valve cap vent of piezometer to the refri- gerant charging vent of gas nut of refrigerant... -
Page 40: Check After Installation
Check after installation Check according to the following requirement after finishing installation. Items to be checked Possible malfunction Has the unit been installed rmly? The unit may drop, shake or emit noise. Have you done the refrigerant leakage It may cause insuf cient cooling test? (heating) capacity. -
Page 41: Pipe Expanding Method
Pipe expanding method Note: Improper pipe expanding is the main cause of refrigerant leakage. Please expand the pipe according to the following steps: A: Cut the pipe E: Expand the port the distance of indoor unit and hard outdoor unit. mold expander pipe... - Page 42 42 42...
- Page 46 •...
- Page 52 On/O Mode Swing Sleep Temp Turbo I Feel Timer WiFi Light Turbo 8°C ( WiFi I-Feel ( LIGHT ON/OFF...
- Page 53 “...
- Page 54 “ “ ” & “8 C 16-23 24-27 C 28-29 30 C 17-20 21-27 28-30...
- Page 57 Λειτουργία Self Clean Όταν το κλιματιστικό βρίσκεται εκτός λειτουργίας, πατήστε ταυτόχρονα τα πλήκτρα “MODE” και “FAN” για 5 δευτερόλεπτα για να ενεργοποιήσετε ή να απενεργοποιήσετε τη λειτουργία SELF CLEAN. Μόλις ενεργοποιηθεί η λειτουργία SELF CLEAN, θα φανεί η έν- δειξη “CL” στην εσωτερική μονάδα. Κατά τη διάρκεια της διαδικασίας αυτοκαθαρισμού του...
- Page 58 • • • • • • AUTO.
- Page 59 ΠΡΟΣΟΧΗ!
- Page 60 ΠΡΟΕΙΔΟΠΟΙΗΣΗ • • • •...
- Page 61 ( . .
- Page 63 AUTO AUTO.
- Page 71 9k &12k º...
- Page 72 εσωτερική εξωτερική...
- Page 73 . m) 30~40...
- Page 76 • ON/OFF • MODE HEAT • 16° 5000Btu/h 24000Btu/h (1465W) (7032W) 7000Btu/h 28000Btu/h (2051W) (8204W) 9000Btu/h 36000Btu/h (2637W) (10548W) 12000Btu/h 42000Btu/h (3516W) (12306W) 18000Btu/h 48000Btu/h (5274W) (14064W)
- Page 81 2300W 6000W ~8000W,...
- Page 82 (N . m) 30~40 N(1) 2 N(1) N(1) N(1)
- Page 86 GR IT...
- Page 87 Questo apparecchio non è destinato a persone (bambini inclusi) con ridotte capacità fisiche, sensoriali o mentali, oppure senza la necessaria esperienza e conoscenza, a meno che non abbiano ricevuto la necessaria supervisione o formazione per l'uso dell'apparecchio da una persona responsabile per la loro sicurezza. I bambini devono essere sorvegliati affinché...
- Page 88 Prima di installare l'apparecchio, leggere attentamente il manuale di installazione Prima di riparare l'apparecchio, leggere attentamente il manuale di servizio. Per realizzare il funzionamento del condizionatore, un refrigerante speciale circola nel sistema. Il refrigerante utilizzato è l’R32, che è un refrigerante ecologico.Il refrigerante è in ammabile e inodore.
-
Page 89: Uso E Manutenzione
Uso e Manutenzione... - Page 91 Allegati...
- Page 94 AVVISO:...
-
Page 95: Descrizione Dei Componenti
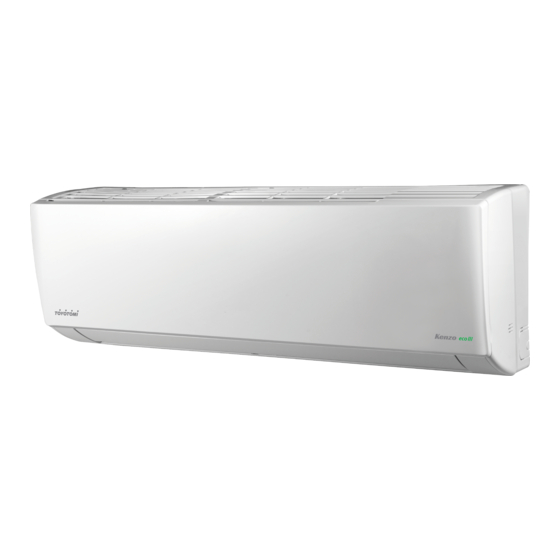
Descrizione dei componenti Unità interna lato ingresso aria pannello frontale filtro tasto ausiliario deflettore orizzontale lato uscita dell’aria indicazione temperatura indicazione riscaldamento display indicazione raffreddamento posizione indicazione ricevitore alimentazione comando infrarosso indicazione deumidificazione (Il contenuto o le posizioni nel display potrebbero esserediversi dalla grafica riportata qui sopra: fare riferimentoal prodotto reale) NOTA: Il prodotto effettivamente acquistato può... -
Page 96: Tasti Del Telecomando
Tasti del telecomando Tasto On/Off (Accensione/Spegnimento) Tasto Mode (Modalità di funzionamento) Tasto Fan (Ventilazione) Tasto regolazione della temperatura Tasto Swing Tasto Sleep per spegnimento temporizzato Tasto Temp Tasto Turbo Tasto Pulsante Timer Pulsante WiFi Pulsante Light (Illuminazione display) Introduzione ai pulsanti del telecomando Tipo visualizzazione temperatura Temperatura impostata :Temperatura ambiente interna... - Page 98 Introduzione ai pulsanti del telecomando Pulsante Swing Premere questo pulsante per regolare l'angolo di oscillazione verticale. Pulsante Sleep Nella modalità di raffreddamento o riscaldamento, premere questo tasto per avviare la modalità di sospensione. Una volta impostato, questo simbolo " " appare sul teleco- mando dello schermo.
- Page 99 Introduzione ai pulsanti del telecomando Pulsante Temp Premendo questo pulsante, è possibile visualizzare la temperatura impostata e la temperatura ambiente sul display dell'unità interna. L'impostazione sul telecomando è visualizzata circolarmente come di seguito: no display Nota: La visualizzazione della temperatura esterna non è disponibile. Se l'unità interna riceve il segnale "...
- Page 100 Introduzione ai pulsanti del telecomando Pulsante WiFi Premere il pulsante "WiFi" per attivare o disattivare la funzione WiFi. Quando la funzione WiFi è attiva, l'icona "WiFi" verrà visualizzata sul telecomando; A unità spenta, premere simultaneamente i pulsanti "MODE" e "WiFi" per 1s, il modulo WiFi ripristinerà l'impostazione predefinita di fabbrica.
- Page 101 Funzione auto pulizia (Self Clean) Con l’unità spenta, tenere premuti contemporaneamente i pulsanti «MODE» e «FAN» per 5 secondi per attivare o disattivare la funzione SELF CLEAN. Quando la funzione SELF CLEAN è attivata, l’interno visualizza «CL». Durante il processo di pulizia automatica dell’evaporatore, l’unità...
- Page 102 NOTA:...
- Page 111 tabella a - Superficie minima (m Disposizioni di sicurezza per refrigeranti infiammabili...
- Page 112 Parete Distanza Parete dalla Distanza parete dalla superiore parete a150 mm superiore Sinistra a150 mm Destra (Foro tubazioni posteriore) Per un po' di modelli (Foro tubazioni posteriore)
- Page 118 quantità di carica refrigerante supplementare = lunghezza aggiuntiva di tubo liquido x quantità aggiuntiva di carica refrigerante per metro.
-
Page 122: Installazione Dell'unità Esterna
Installazione dell’unità esterna Fase uno: Fissare il supporto dell’unità esterna (da selezionare in funzione del tipo di installazione) 1. Selezionare il luogo di installazione in base alla struttura della casa. 2. Fissare il supporto dell'unità esterna nella posizione selezionata con tasselli ad espansione. - Page 123 Installazione dell’unità esterna Fase 4: collegamento delle tubazioni 1. Rimuovere la vite sulla maniglia destra 3. Chiudere il dado con la mano. dell'unità esterna e quindi rimuovere la maniglia. giunto vite dado maniglia 2. Togliere il tappo a vite dalla valvola 4.
- Page 125 Essiccazione delle linee tramite il vuoto Uso della pompa del vuoto 1. Rimuovere i tappi delle valvole del valvola liquido liquido, del gas e dalla valvola di manometro (vacuometro) carica del refrigerante. valvola gas 2. Collegare il tubo di carica del valvola carica tappi valvole manometro sulla valvola di...
-
Page 126: Funzionamento Di Prova
Controllo post installazione Al termine dell’installazione eseguire il controllo finale secondo la seguente tabella. Elementi da controllare Possibile anomalia L’unità è stata fissata correttamente? L’unità potrebbe cadere, vibrare o essere rumorosa. È stata eseguita la prova di perdita del In caso contrario si può constatare una capacità refrigerante? di raffreddamento (riscaldamento) insufficiente. - Page 127 Svasatura delle tubazioni Nota: A: Taglio della tubazione E: Svasatura (cartellatura) della tubazione to on la Note: B: Rimozione della bavatura F: Ispezione Isolare adeguatamente la tubazione D: Inserimento del dado ’ nterna e t e terna e nella ato n...
- Page 128 Δήλωση Συμμόρφωσης έχει χορηγηθεί στον κατασκευαστή και εί- ναι στη διάθεση των αρμοδίων αρχών εποπτείας της αγοράς. Certifi cate of compliance CE TOYOTOMI CO., LTD declares that this product complies with the general requirements pursuant to the following European Directives: LVD: 2014/35/EU...
- Page 129 ΣΗΜΕΙΩΣΕΙΣ...
- Page 130 NOTES...
- Page 131 NOTES...
- Page 132 È vietato ristampare o riprodurre tutto o parte di questo manuale in qualsiasi modo senza il permesso scritto di TOYOTOMI ITALIA S.R.L. Quedan prohibidas la reimpresión y reproducción de este manual o partes del mismo sin permiso previo por escrito de TOYOTOMI EUROPE SALES SPAIN S.A. ΕΠΙΣΗΜΗ ΑΝΤΙΠΡΟΣΩΠΕΙΑ ΕΛΛΑΔΑΣ Γ.Ε.ΔΗΜΗΤΡΙΟΥ Α.Ε.Ε.
Need help?
Do you have a question about the KTN22-09R32 and is the answer not in the manual?
Questions and answers