Table of Contents
Advertisement
Quick Links
Advertisement
Table of Contents

Subscribe to Our Youtube Channel
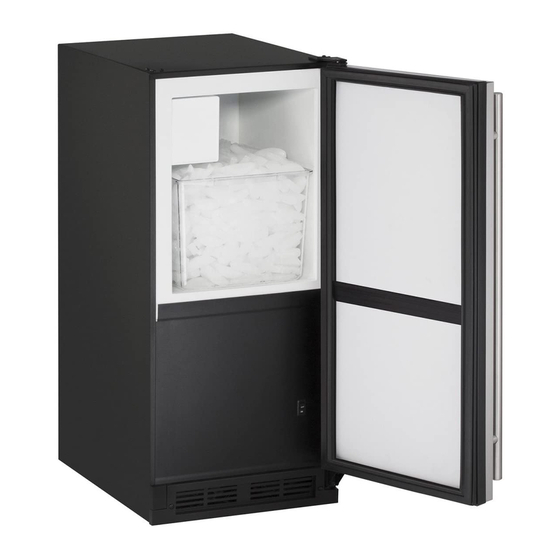
Summary of Contents for U-Line U-BI1215B-00A
- Page 1 QUICK START GUIDE Ice Makers 115 V / 60 Hz & 220-240 V / 50 Hz •...
- Page 2 1. U-Line Customer Care must be contacted immediately at +1.800.779.2547. 2. Service or repairs performed on the unit without prior written approval from U-Line is not permitted. If the unit has been altered or repaired in the field without prior written approval from U-Line, claims will not be eligible.
-
Page 3: Table Of Contents
QUICK START GUIDE u-line.com Contents Model List Safety and Warning Environmental Requirements Electrical Water Hookup Door Swing General Installation Integrated Panel Installation First Use Warranty... -
Page 4: Model List
QUICK START GUIDE u-line.com Model List This guide provides the basics to get you started. Looking for more information? Visit u-line.com to view detailed User Guides for all U-Line products. Crescent Ice Makers U-BI1215S-00A U-BI1215INT-00A U-BI1215B-00A U-BI1215W-00A ADA Series U-BI95B-00A... - Page 5 QUICK START GUIDE u-line.com Marine Series ULN-BI95FCB-03A ULN-WH95FC-03A ULN-SS1095FC-03A ULN-BI95FCB-20A ULN-WH95FC-20A ULN-SS1095FC-20A ULN-SS1095FD-03A ULN-SS1095FD-20A ULN-SS1095NF-03A ULN-SS1095NF-20A ULN-SP18FCS-03A ULN-SP18FCS-20A ULN-SP18FCB-03A ULN-SP18FCB-20A ULN-SP18FCW-03A ULN-SP18FCW-20A ULN-SS98NF-03A ULN-SS98NF-20A Visit http://www.u-line.com/product-literature/userguides or scan this QR code to view all user guides online.
-
Page 6: Safety And Warning
QUICK START GUIDE u-line.com Safety and Warning DANGER NOTICE Do not use electrical appliances inside the food PLEASE READ all instructions before installing, storage compartment of this appliance. operating, or servicing the appliance. SAFETY ALERT DEFINITIONS WARNING Throughout this guide are safety items labeled with a... -
Page 7: Environmental Requirements
This is considered normal. The condensation will Do not block any internal fans. evaporate when the humidity drops. Use only genuine U-Line replacement parts. CAUTION Imitation parts can damage the unit, affect its operation or performance and may void the warranty. -
Page 8: Electrical
QUICK START GUIDE u-line.com 220-240 V UNITS CAUTION This model is intended for indoor/interior applications only and is not to be used in installations that are open/ Damages caused by ambient temperatures of exposed to natural elements. 40°F (4°C) or below are not covered by the warranty. -
Page 9: Water Hookup
Required. Never attempt to repair or perform The water valve in this unit uses a standard 1/4" maintenance on the unit until the electricity has (6.35 mm) compression fitting. U-Line recommends a been disconnected. braided stainless steel water supply line. - Page 10 QUICK START GUIDE u-line.com • The water line should be looped into 2 coils. This will 2. Remove the grille/access panel in the front and the allow the unit to be removed for cleaning and servicing. back panel. Make certain that the tubing is not pinched or damaged during installation.
- Page 11 The water valve in this unit uses a standard 1/4" Do not use Teflon tape or joint compound on the (6.35 mm) compression fitting. U-Line recommends a water fitting. The rubber washer provides an braided stainless steel water supply line.
-
Page 12: Door Swing
QUICK START GUIDE u-line.com 1. Turn off water supply and disconnect electrical supply 9. Install retaining clip. to product prior to attempting installation. 2. Remove the back panel. 3. Locate water valve inlet. Door Swing 4. Break away filler feature... -
Page 13: General Installation
Door Swing All units have a zero clearance for the door to open 90°. U-Line recommends a minimum door clearance of 1/4" (6 mm) to accommodate the handle if the unit is installed next to a wall. INSTALLATION MARINE SERIES 1. -
Page 14: Integrated Panel Installation
QUICK START GUIDE u-line.com 1200 SERIES INSTALLATION LEVELING INFORMATION 1. Plug in the power/electrical cord. 1. Use a level to confirm the unit is 2. Gently push the unit into position. Be careful not to level. Level should kink the water supply line or entangle the cord. - Page 15 QUICK START GUIDE u-line.com 1. Remove top hinge screw pin 8. Starting at the corners and working inward, push door with Phillips head screwdriver. gasket into place on door. Remove door by tilting forward and lifting off bottom hinge pin.
-
Page 16: First Use
Clamp First Use drill bit, drill 6 pilot holes into the wood All U-Line controls are preset at the factory. Initial startup panel 1/2" (12 mm) requires no adjustments. deep using the holes in the door/drawer frame as a guide. -
Page 17: Ice
It is also important to U-Line product to be free from defects in materials and raise the bin arm of the ice maker (see above). workmanship for a period of five years from the date of Failure to raise the bin arm may result in damage purchase. - Page 18 (2) for all Marine, RV and Domestic U-Line exposure. U-Line product may not be subjected to products sold and serviced in the United States temperatures below 40°F without following the...
- Page 19 2. During the two year warranty period for all U-Line ice production or spoiled contents that are not covered products, U-Line shall be responsible for the labor...
- Page 20 ARE DISCLAIMED. U-Line’s sole liability and your exclusive remedy under this warranty are set forth in the paragraphs above. U-Line shall have no liability whatsoever for any incidental, consequential or special damages arising from the sale, use or installation of...


Need help?
Do you have a question about the U-BI1215B-00A and is the answer not in the manual?
Questions and answers