Table of Contents
Advertisement
Quick Links
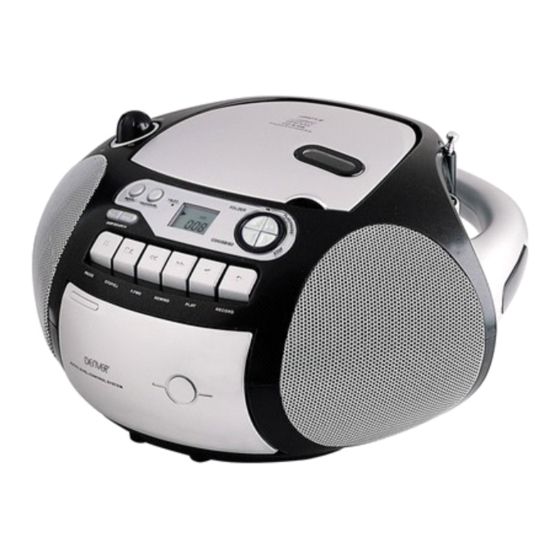
1. FUNCTION SWITCH
CD/TAPE (OFF)/RADIO
2. BAND SWITCH
3. FM ANTENNA
4. CD DOOR
5. TUNING KNOB
6. BASS BOOST BUTTON
7. CD SKIP/SEARCH FORWARD
BUTTON
8. CD SKIP/SEARCH BACKWARD
BUTTON
9. CD PROGR BUTTON
10. CD MODE BUTTON
11. CD STOP BUTTON
12. CD PLAY/PAUSE BUTTON
13. CD LCD DISPLAY
14. STEREO HEADPHONE JACK
15. VOLUME CONTROL KNOB
All manuals and user guides at all-guides.com
English - 1
16. AC SOCKET
17. BATTERY DOOR
18. FM STEREO LED INDICATOR
19. CASSETTE COMPARTMENT
20. CASSETTE RECORD BUTTON
21. CASSETTE PLAY BUTTON
22. CASSETTE REWIND BUTTON
23. CASSETTE FAST FORWARD
BUTTON
24. CASSETTE STOP/EJECT BUTTON
25. CASSETTE PAUSE BUTTON
26. SPEAKER LEFT
27. SPEAKER RIGHT
28. FOLDER BUTTON
29. CD /SD/USB BUTTON
30. -
31. USB PORT
32. SD/MMC CARD SLOT
Advertisement
Table of Contents

Subscribe to Our Youtube Channel
Summary of Contents for Denver TCU-209
- Page 1 All manuals and user guides at all-guides.com 1. FUNCTION SWITCH 16. AC SOCKET CD/TAPE (OFF)/RADIO 17. BATTERY DOOR 2. BAND SWITCH 18. FM STEREO LED INDICATOR 3. FM ANTENNA 19. CASSETTE COMPARTMENT 4. CD DOOR 20. CASSETTE RECORD BUTTON 5. TUNING KNOB 21.
-
Page 2: Battery Operation
All manuals and user guides at all-guides.com AC OPERATION Before operation please be sure that the voltage on the set corresponds to the voltage of your local area. Unravel the AC Line Cord, insert one end into the AC jack on the set, and the other end into a standard AC outlet. Remarks 1) In case of malfunction due to electrostatic discharge (ESD), reset the unit by reconnecting the AC cord again to resume to normal operation. -
Page 3: Stereo Headphone Jack
All manuals and user guides at all-guides.com STEREO HEADPHONE JACK For private listening, insert the plug of a Stereo Headphone into the STEREO HEADPHONE JACK and adjust the VOLUME CONTROL KNOB accordingly. During the use of a headphone, the Speakers are automatically disconnected. CASSETTE OPERATION Tape Playback Depress the STOP/EJECT BUTTON to open the cassette door. - Page 4 All manuals and user guides at all-guides.com To stop recording temporarily, press the PAUSE BUTTON. To continue the recording, press the PAUSE BUTTON once again. Press the STOP/EJECT BUTTON to stop recording. When the tape runs to its end, the cassette operation will be stopped automatically.
- Page 5 All manuals and user guides at all-guides.com BUTTON once again. The music will start from the exact position where it was interrupted. 4. To stop the CD, press the CD STOP BUTTON once whether the CD is in Play or Pause mode. The LCD DISPLAY will show the total number of tracks of the disc again.
-
Page 6: Playing Mp3 Disc
All manuals and user guides at all-guides.com the first program “ ” will light up and blink continuously. Press the CD SKIP/SEARCH or SKIP/SEARCH BUTTON to your desired musical track, the CD LCD DISPLAY will show the appropriate track number. Press the PROGRAM BUTTON to store this track in memory. 2. - Page 7 All manuals and user guides at all-guides.com mode. The “DISC” indicator will always be shown on the LCD DISPLAY. 3. If there is no disc inside, the DISPLAY will show “ ” and go to stop mode. 4. If the CD DOOR is not closed, the DISPLAY will show “ ”.
- Page 8 All manuals and user guides at all-guides.com 4. Though the sound stops, the disc will continue to spin. To re-start playing, press the CD PLAY/PAUSE BUTTON once again. The music will start from the exact position where it was interrupted. 5.
- Page 9 All manuals and user guides at all-guides.com 2. During play mode, when CD SKIP/SEARCH or CD SKIP/SEARCH BUTTON is pressed once and held, it will search the track with audible high speed forward or backward playback. Program Mode 1. During the CD stop mode, press the PROGRAM BUTTON once.
-
Page 10: Lcd Display
All manuals and user guides at all-guides.com programs being stored. 5. To cancel the programmed memory: During the CD stop mode, press the CD STOP BUTTON once. Open the CD Door during the CD stop mode. The “PROGRAM” Indicator will disappear from the LCD DISPLAY. Recording from CD Player 1. -
Page 11: Maintenance
All manuals and user guides at all-guides.com 6. To exit from the SD/MMC CARD playback mode, press the CD/SD/USB BUTTON twice. It will go back to CD Disc mode again. USB OPERATION IMPORTANT NOTE: This unit supports most of the common MP3 interface but not 100% because there are too many different formats keep on changing in the market. - Page 12 All manuals and user guides at all-guides.com Instructions on environment protection Do not dispose of this product in the usual household garbage at the end of its lifecycle; hand it over at a collection point for the recycling of electrical and electronic appliances.


Need help?
Do you have a question about the TCU-209 and is the answer not in the manual?
Questions and answers