
Subscribe to Our Youtube Channel
Related Manuals for Skywalker SWTC1511


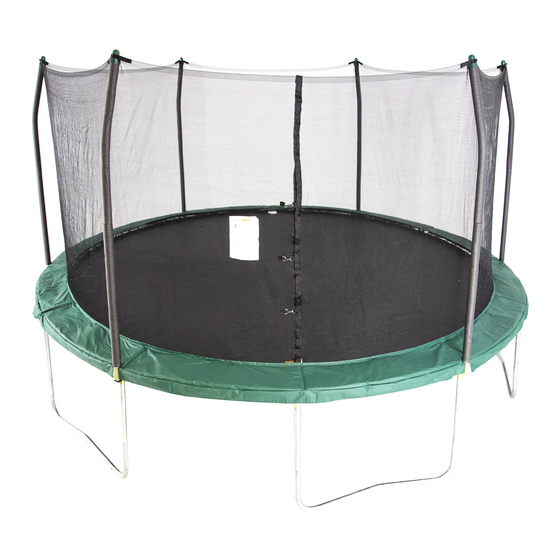
Summary of Contents for Skywalker SWTC1511
- Page 1 User’s Manual Model - SWTC1500 /SWTC1511 /SWTC1515 /SWTC1514 /OWTC15 CAUTION: Adult Assembly Required...
- Page 2 Model - SWTC1500 /SWTC1511 /SWTC1515 /SWTC1514 /OWTC15 ...........3 ........4 ..........4 ......5 .......6 ......7 ..........8 ......9 ..10-11 Part Identification Chart ........Exploded Drawing and Parts List......13-14 Ordering Replacement Parts.........14 Assembly..............15-23 Care and Maintenance.......... Limited Warranty..........25...
- Page 4 round...
-
Page 7: Methods Of Accident Prevention
METHODS OF ACCIDENT PREVENTION... - Page 8 • • • • •...
- Page 12 Use below drawings to identify all the parts. Top Tube with Socket (6 pcs) Top Tube with T-joint (6 pcs) Leg extension (12 pcs) Leg brace (6 pcs) Jumping mat (1 pc) Frame (1 pc) Enclosure net (1 pc) Straight Tube(6 pcs) Spring (96 pcs) Curved Tube (6 pcs) Foam (12 pcs)
- Page 14 Key No. Qty. Description Top Tube with T-joint Top Tube with Socket Leg extension Leg brace Jumping mat Frame Enclosure net Spring Straight Tube Curved Tube Foam Pole Cap End Cap M5x50mm Bolt M4.8x16mm Self-tapping Screw(3 spare parts) Spring Tool Screw Driver User’s Manual and Safety Placard Set of ASTM Frame Labels...
- Page 15 • • Trampoline and Enclosure Assembly Locate the Top tube with T-joint(1) and the Top tube with Socket(2) as shown. Socket NOTE: Make sure all the spring holes are facing ground. T-joint spring holes face the ground NOTE: If you don’t assemble in the right order, you will have to disassemble the entire trampoline in order to attach correctly.
- Page 16 Insert the Leg Brace(4) into two Leg Extensions(3) as shown, then tighten with two M4.8x16mm Self- tapping screws(15). Press down on both Leg Extensions(3) at the same time and fully insert them into the T-joint and Socket , then tighten by two M4.8x16mm Self-tapping screws(15).
- Page 17 If the Enclosure net(7) and Jumping mat(5) are not pre-installed, follow below steps to install. Place the Jumping mat(5) on clear ground. Identify the warning label on mat top and the ID label on mat back as shown. the first hole the first V-ring ID label (on mat back) Place the Enclosure net(7) on the Jumping mat(5),...
- Page 18 If the Enclosure net and Jumping mat are pre-installed, follow below steps to assemble the Jumping mat to frame. T-joint Warning 5.1 Inspect the connection of Jumping mat and Enclosure Decal net, make sure all the V-rings are passed through the corresponding net holes.
- Page 19 Attach the Spring as follows: V-ring Hook one end of Spring into the V-ring sewn on Jumping mat. Hook a Spring Tool as shown to the free end of the Spring. Pull the Spring until it reaches the frame. Push the end of the Spring into a hole in the frame, then unlook the Spring Tool Frame CAUTION:...
- Page 20 Attach all the remaining V-rings with spring to Top tube holes correspondlingly. Enclosure door T-joint Lay the Frame Pad(6) on the frame. Adjust it’s position so that the slits are just above the Sockets as shown. CAUTION: Do not use the trampoline without the Frame Pad(6).The Frame Pad is designed to reduce the possibility of injuries due to jumpers coming in contact with the trampoline frame.
- Page 21 Inner Straps 7. Look underneath the trampoline. Locate the straps Strap sewn in the outside of attached to the underside of the Frame Pad. Position the Joint for the pad bottom each outer strap so that one strap is on each side of Inner Straps the frame as shown.
- Page 22 Follow below steps to attach Curved tube to cap Hexagon hole Holes Identify the hexagon hole on the Pole Cap(12) with a nut buried inside. Insert the Pole Cap(12) into one strap ring on the top Strap ring edge of net. Make sure the Hexagon hole side of the cap is against the net, and the holes on both the strap ring and the caps are aligned.
- Page 23 Insert the end cap(13) into the bottom hole of the Socket as shown. Socket Using a ladder, reach to the top of the enclosure poles and tie the straps around the pole caps as shown. Make sure to secure the knot tightly. (Do not stand on the edge of the trampoline to do Strap Strap...
Need help?
Do you have a question about the SWTC1511 and is the answer not in the manual?
Questions and answers