Advertisement
Quick Links
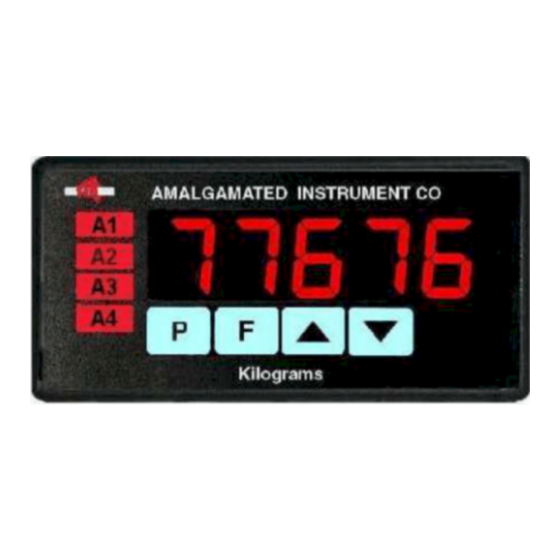
Panel Mount Display/Controller
Operation and Instruction Manual
AMALGAMATED INSTRUMENT CO
Unit 5, 28 Leighton Place Hornsby
NSW 2077 Australia
Model PM4-IVT
Process Rate/Total Monitor
Telephone: +61 2 9476 2244
Facsimile: +61 2 9476 2902
ABN: 80 619 963 692
e-mail: sales@aicpl.com.au
Internet: www.aicpl.com.au
Advertisement

Related Manuals for AMALGAMATED INSTRUMENT PM4-IVT


Summary of Contents for AMALGAMATED INSTRUMENT PM4-IVT
- Page 1 Model PM4-IVT Process Rate/Total Monitor Panel Mount Display/Controller Operation and Instruction Manual AMALGAMATED INSTRUMENT CO ABN: 80 619 963 692 Unit 5, 28 Leighton Place Hornsby Telephone: +61 2 9476 2244 e-mail: sales@aicpl.com.au NSW 2077 Australia Facsimile: +61 2 9476 2902...
-
Page 2: Table Of Contents
Table of Contents 1 Introduction 2 Mechanical Installation 3 Electrical installation 4 Function tables - summary of setup functions 5 Explanation of functions 6 Calibration 7 Specifications 8 Guarantee and service 2 of PM4IVTMAN-2.3-0... -
Page 3: Introduction
Introduction General description This manual contains information for the installation and operation of the PM4-IVT rate/total monitor. The PM4-IVT is a general purpose instrument which may be configured to accept an input signal of 2mA, 20mA, 4 to 20mA, 100mV,... -
Page 4: Mechanical Installation
Mechanical Installation Choose a mounting position as far away as possible from sources of electrical noise such as motors, generators, fluorescent lights, high voltage cables/bus bars etc. An IP65 or IP67 access cover which may be installed on the panel and surrounds is available as an option to be used when mounting the instrument in damp/dusty positions. -
Page 5: Electrical Installation
Electrical installation Electrical installation The PM4 Panel Meter is designed for continuous operation and no power switch is fitted to the unit. It is recommended that an external switch and fuse be provided to allow the unit to be removed for servicing. The plug in, screw type, terminal blocks allow for wires of up to 2.5mm to be fitted. - Page 6 Electrical connection examples If output options are fitted refer to the ”PM4 Panel Meter Optional Output Addendum” booklet for connection details. AC power connections - supply type is factory configured, check before connecting 1 2 3 4 5 6 7 8 9 10 11 Active Neutral Case earth...
- Page 7 3 wire 4-20mA externally powered sensor External Power Supply 1 2 3 4 5 6 7 8 9 10 11 3 WIRE 4-20mA 4-20mA SENSOR 4 wire 4-20mA externally powered sensor External Power 1 2 3 4 5 6 7 8 9 10 11 Supply 4 WIRE 4-20mA...
- Page 8 Slidewire input Note: Links LK7 & 1 2 3 4 5 6 7 8 9 10 11 LK8 Must be set to SLIDE WIRE for Slide Wire input all other links should be out. Remote input 1 2 3 4 5 6 7 8 9 10 11 Momentary or latching action switch...
- Page 9 Input Output Configuration If you need to alter the input or output configuration link settings proceed as follows: 1. Remove the plug in terminals from the rear of the instrument 2. Remove the 4 x self tapping screws from the back cover then remove the back cover by pulling it away from the instrument 3.
- Page 10 Input range link selection Dismantle the instrument as described in section 3.3. Insert the links into the appropriate location on the pin header to suit the range required. Note: all other links should be out when slidewire is selected. Transmitter Slidewire Supply Output Excitation...
-
Page 11: Function Tables - Summary Of Setup Functions
Function tables - summary of setup functions Note: the order in which the functions appear on the display may not be exactly as shown below. The availability and order of functions is determined by choice of function settings and options fitted. - Page 12 Functions in this second table are available only in CAL mode or if ACCS is set to ALL Display Function Range Default Your Ref/Page record bAr_ Bargraph low value (seen only Any display 5.12 on bargraph display value instruments) bAr~ 1000 Bargraph high value (seen only Any display...
- Page 13 Zero reference point for ZERO 5.32 ZERO RNGE operation USER 4mA input scale Any display 5.33 value USER 20mA input scale Any display 5.34 En20 value UCAL Uncalibrate 5.35 Pbut NONE, Hi, NONE P button function (for 5.36 Lo, HiLo, instruments with front P ZERO, dISP, button)
- Page 14 Ax.rt, Ax.rt, Ax.tL Ax.rt Alarm relay 1 operation mode 5.49 Ax.tL or Ax.PS Ax.PS rAtE or rAtE Bargraph display operation 5.50 totL mode LiuE, totL, LiuE Analog operation mode 5.51 P.HLd, ( Optional) d.HLd, Hi, Lo or dISP dG.OP rAtE or rAtE Digital output operation mode 5.52...
- Page 15 Relay table Record your relay settings in the table below Display Relay 1 Relay 2 Relay 3 Relay 4 Relay 5 Relay 6 Relay 7 AxPS AxPt AxLo AxHi AxHY Axtt Axrt Axn.o or Axn.c AxSP or Axt1 etc. Ax.rt, Ax.tL or Ax.PS PM4IVTMAN-2.3-0 15 of...
-
Page 16: Explanation Of Functions
Explanation of functions The PM4 setup and calibration functions are configured through a push button sequence. The three push buttons located at the rear of the instrument (also at the front on some display options) are used to alter settings. Two basic access modes are available: FUNC mode (simple push button sequence) allows access to commonly set up functions such as alarm setpoints. - Page 17 Example: Entering FUNC mode to change alarm 1 high function A1Hi from OFF to 100 Press & release Press & release Press & release F U N C A 1 H i O F F F until then press until Press &...
- Page 18 Explanation of Functions Relay pass value AxPS Display: Range: Any display value Default Value: OFF Alarm relay pass value - only seen when AxPS is selected at the Axrt/AxtL/AxPS function. Displays and sets the chosen alarm relay (A1Pt, A2Pt etc.) pass time in seconds. The alarm relay will activate at multiples of the pass value e.g.
- Page 19 If A1Lo is set to 10 then relay 1 will activate when the display value is 10 or less. Display Value Relay resets above this Relay value activates A Lo at this value plus or below A HY A HY value A Lo Alarm low operation with hysteresis...
- Page 20 Alarm relay hysteresis (deadband) AxHY Display: 0 to 9999 Range: Default Value: 10 Displays and sets the alarm relay hysteresis limit for the designated relay x. Note x will be replaced by the relay number when displayed e.g. A1HY for relay 1. To set a relay hysteresis value go to the AxHY function and use the ^ or v push buttons to set the value required then press F to accept this value.
- Page 21 Alarm relay reset time Axrt Display: 0 to 9999 Range: Default Value: 0 Displays and sets the alarm reset delay time in seconds. The reset time is common for both alarm high and low setpoint values. With the alarm condition is removed the alarm relay will stay in its alarm condition for the time selected as the reset time.
- Page 22 Example: With Alarm 2 set to trail alarm 1, if A1Hi is set to 1000 and A2Hi is set to 50 then Alarm 1 will activate at 1000 and alarm 2 will activate at 1050 (i.e. 1000 + 50). If Alarm 2 had been set at -50 then alarm 2 would activate at 950 (i.e.
- Page 23 5.13 Bargraph high value bAr~ Display: Range: Any display value Default Value: 1000 Seen only in bargraph display instruments. Displays and sets the bar graph high value i.e. the value on the 7 segment display at which the bargraph will reach its maximum indication (e.g. all LEDs illuminated).
- Page 24 10 then in other bargaph modes when the 7 segment display reads a value such as 25 the bargraph would be stuck at the high limit of its travel since it cannot go beyond 10. In r.dot mode the display will wrap around at 10 then continue up the bar again and will be at the midpoint of the bargraph when the 7 segment display shows 25 (as it would for a 7 segment display of 15, 35, etc.).
- Page 25 5.18 Digital output option low value diG_ Display: Range: Any display value Default Value: 0 Seen only with the 16 bit digital output option. Refer to the separate “PM4 Panel Meter Optional Output Addendum” booklet supplied when this option is fitted. Accepts any valid display value. Determines the low scaling point for the b.SCL mode and has no effect on other modes.
- Page 26 Optional Output Addendum” booklet supplied when this option is fitted for wiring details and link settings. Displays and sets the analog retransmission (4–20mA, 0–1V or 0–10V, link selectable) output high display value (20mA, 1V or 10V) in displayed engineering units. To set the analog output high value go to the REC~ function and use the ^ or v push buttons to set the required value then press F to accept this selection.
- Page 27 the decimal point position may be set. The display will indicate as follows: 0 (no decimal point), 0.1 (1 decimal place), 0.02 (2 decimal places), 0.003 (3 decimal places) and 0.0004 for display with more than 4 digits. Note if the decimal point is altered the display will need to be recalibrated and alarm etc.
- Page 28 5.29 Second calibration scaling point CAL2 Display: Range: Any display value Default Value: n/a Second scaling point for 2 point calibration scaling - See “Calibration” chapter, section 6.1. 5.30 Calibration offset CAL OFSt Display: Range: Any display value Default Value: n/a Calibration offset - See section 6.2.
- Page 29 5.34 20mA input scale USER En20 Display: Range: Any display value Default Value: n/a 20mA input scale value, use only as an alternative to CAL1 and CAL2 calibration - See “Cali- bration” chapter, section 6.5. 5.35 Uncalibrate UCAL Display: Range: Default Value: n/a Uncalibrate, resets calibration - required only when a calibration problem occurs and it is necessary to clear the calibration memory.
- Page 30 P.HLd - rate peak hold. The display will show the peak rate value (highest positive value) only whilst the remote input terminals are short circuited i.e. the display value can rise but not fall whilst the input terminals are short circuited. The message P.HLd will appear briefly every 8 seconds whilst the input terminals are short circuited to indicate that the peak hold function is active.
- Page 31 then the totI or rAtE message will appear briefly approximately once every 8 second to reinforce that the display has been switched away from its default display setting. CLR.t - clear total. This function allows the total to be cleared (reset to zero). The message CLrd will appear when this function is operated.
- Page 32 For a 4–20mA input if you wish to display 0 at 4mA and 1000 at 20mA the square root function will calculate as follows: At 20mA (100%) the display will be 1000 i.e. 1000. At 16mA (75%) the display will be 866 i.e. 0.75 1000.
- Page 33 5.44 Total exponent scaling factor E.SCL Display: 0 to 9 Range: Default Value: 0 Displays and sets the exponent factor for the display. The scaling factor can be set anywhere in the range from 0 to 9. This factor allows a larger accumulated total by dividing the rate display value down to a smaller number.
- Page 34 or would incorrectly be displayed as 28640 if the totaliser had no decimal points. This could be adjusted by changing the ESCL value to 2 i.e. 3580 T otal = P revious total + 7200 3600 T otal = P revious total + 286(m If the total has more decimal point places than the rate then the adjustment would have to be the other way i.e.
- Page 35 5.48 Default display dFIt dISP Display: RAtE or tOtI Range: Default Value: RAtE The default display may be set to total (tOtI) or rate (RAtE). The instrument will automatically revert to its default display. The ^ or v button can be used to change from the default to the alternate display and the instrument will then return to the default display after a period of around 20 seconds.
- Page 36 d.HLd - display hold mode. The 7 segment display and retransmission value will be held whilst the remote input display hold switch is closed. Hi - peak (max.) memory mode. With the peak remote input switch open the retransmission will indicate the peak value in memory i.e. the retransmission output can rise but not fall. The retransmission output can be reset by clearing the memory.
- Page 37 the display reading rises above 1000 the message -or- will flash on and off or the display value will flash on and off instead of the normal display units (see dISP function 5.55). This message can be used to alert operators to the presence of an input which is above the high limit. If this function is not required it should be set to OFF by pressing the ^ and v buttons simultaneously at this function.
- Page 38 5.58 Output mode for optional serial communications O.Put Display: dISP, Cont, POLL, A.buS or M.buS Range: Default Value: Cont Set serial interface mode - seen only with serial output option. Refer to the separate “PM4 Panel Meter Optional Output Addendum” booklet supplied when optional outputs are fitted. Allows user to select the serial interface operation as follows: disP - sends image data from the display without conversion to ASCII.
- Page 39 The peak value will be transmitted followed by a space then the valley value. Select both for both rate and total retransmission. The rate value will be transmitted followed by a space then the total value. PM4IVTMAN-2.3-0 39 of...
-
Page 40: Calibration
Calibration The instrument can be calibrated via a two point live input calibration method using functions CAL1 and CAL2. For 4-20mA inputs only an alternative method allows display scaling without live inputs using the USER En4 and USER En20 functions. An offset calibration scaling adjustment using the CAL OFSt function is available which allows the scaling to be adjusted by a fixed amount over the entire scale. - Page 41 The procedure for entering the second scaling point CAL2 is as follows: a. Ensure that an input signal is present at the input terminals, this will usually be at the high end of the signal range e.g. 20mA for a 4-20mA input. The change in input signal from the CAL1 input must be at least 10% of the input range full scale.
- Page 42 Offset calibration CAL OFSt - Calibration offset - the calibration offset is a single point adjustment which can be used to alter the calibration scaling values across the entire measuring range without affecting the calibration slope. This method can be used instead of performing a two point calibration when a constant measurement error is found to exist across the entire range.
- Page 43 Alternative 4-20mA scaling USER En4 - 4mA input scaling without a live input - this calibration method can be used with 4-20mA inputs only. The instrument can be scaled for a 4-20mA input without a live input i.e. this is an alternative method to the CAL1 and CAL2 method of scaling. To perform the first point (En 4) scaling simply press the ^ and v buttons simultaneously when the USER En4 function is displayed.
-
Page 44: Specifications
Specifications Technical specifications Input type: Link selectable 2mA, 20mA, 4 to 20mA or DC Volts 100mV, 10V, 100V or Slidewire, 3 wire 0-1kΩ to 0-1MΩ value slidewires Impedance: Typically 150Ω for mA input (82Ω plus polyfuse resistance) 1MΩ on DC voltage input ADC Resolution: 1 in 20,000 Accuracy:... -
Page 45: Guarantee And Service
Physical Characteristics Bezel Size: DIN 48mm x 96mm x 10mm Case Size: 44mm x 91mm x 120mm behind face of panel Panel Cut Out: 45mm x 92mm +1mm/-0mm Connections: Plug in screw terminals (max. 2.5mm wire) Weight: 400 gms basic model, 450 gms with option card Guarantee and service The product supplied with this manual is guaranteed against faulty workmanship for a period of two years from the date of dispatch.
Need help?
Do you have a question about the PM4-IVT and is the answer not in the manual?
Questions and answers