Table of Contents
Advertisement
Quick Links
Advertisement
Table of Contents

Related Manuals for Nano Vision mimo UM-710

Summary of Contents for Nano Vision mimo UM-710
- Page 1 These safety instructions must be followed to ensure your safety and prevent property damage. UM - 430 UM - 710 UM - 730 UM - 740 UM - 750 Warning/Cautions Otherwise, it may result in personal injury or property damage. User’s Manual http://www.nanovision.co.kr...
- Page 2 Product Input/Output Connectors - Do not insert any metal, such as chopsticks, coins, pins and steel, - If foreign material enters the product, disconnect the USB cable and contact a Service Center. T a b l e C o n t e n t s User’s Manual Using DMB (UM-750 Only) - Do not use the product near a microwave oven or a...
-
Page 3: Safety Instructions
Safety Instructions These safety instructions must be followed to ensure your safety and prevent property damage. Warning/Cautions Otherwise, it may result in personal injury or property damage. Make sure to read the instructions carefully and use the product in the correct manner. Power Source: - Make sure to use USB Cable (DC 5V, 500mA) only. - Page 4 Product Input/Output Connectors - Do not insert any metal, such as chopsticks, coins, pins and steel, - If foreign material enters the product, disconnect the USB cable and contact a Service Center. Do not install mimo in an unstable location. - Otherwise, it may fall and cause personal injury and/or damage the product.
-
Page 5: Product Features
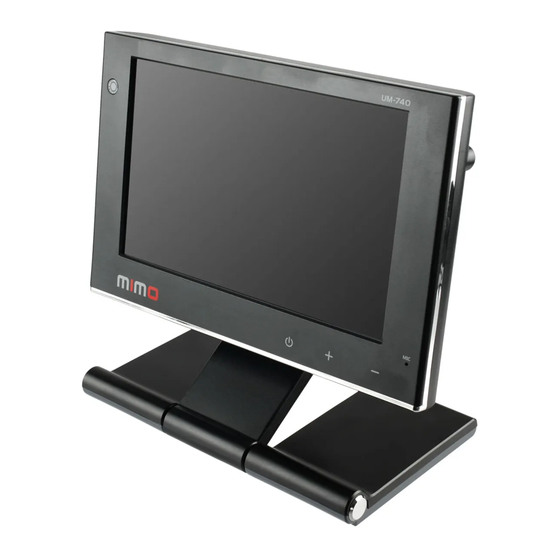
Product Features mimo is a USB powered monitor with Webcam, Mic, DMB TV, Touch Screen Display. With only USB cable connection, a user may utilize mimo as Multiple Input/Output device for Video Conference, Instant Messaging, News and Stock casting. Each model has different functions and features as listed Product Matrix below Product Matrix Model Name UM-430... -
Page 6: Package Contents
Package Contents Please make sure the following items are included with your monitor. Contact a local dealer to buy optional items. UM-430 UM-710 UM-730, UM-740, UM750 UM-430 USB CABLE UM-710/730/740/750 USB CABLE User’ s Manual Install Disc Audio Cable(UM-730, UM-750) Rod Antenna (UM-750) Extension Antenna (UM-750) ※... -
Page 7: Connections And Installation
Connections and Installation mimo requires USB connection only. ⑥ ① ② ③ ④ ⑤ ①②③④ ① Emergency Power input : mimo doesn’ t require any additional power source except USB. Emergency Power input is for Factory or Technical Service purpose only. ②... - Page 8 Installing Monitor Driver (AutoRun) Insert the CD into the CD-ROM drive Please make sure that your mimo is connected to the PC (If the CD is not running automatically please double- click the “Mimo Drive” among the CD clontents) Installation takes about 1 minute. Do not power off or disconnect the USB cable until installation is completely finished.
- Page 9 5. If you see following message window, select “I agree” to accept the terms of use 6. When the installation is complete, the mimo setting icon appears on your system tray and the connected USB monitor information will pop-up. 7. After finish installation of the mimo driver, please follow below steps for multi-monitor setting.
- Page 10 mimo display setting 1. When the mimo driver installation is complete, the mimo setting icon appears on your system tray. 2. Click-on mimo icon then you may see the mimo setup menu for Screen Resolution, Colors, Rotation, Extention and etc.
-
Page 11: Installing Touch Screen Controller
Installing Touch Screen Controller (UM-740/UM-750 only) 1. Selecting Controller If you see following message window, select “E2i Technologies, NTR, USB” and click “Install” . 2. Installing the Controller Click “Next” and follow on screen direction. Program will display the progress. 3. - Page 12 4. Settings and Calibrations Check the monitor number of the installed mimo at “Display Properties” Right-click and Run the UPDD Consol (Pointer Device Setting) icon on system tray. Chose Hardware and Click “Handling Whole desktop” menu...
- Page 13 Select the monitor number of the installed mimo. Calibration The product is with factory default calibration value. If required user may execute Touch Screen Controller Calibration as follow. Calibration is very important procedure to align coordinates of the exact touch point on screen with mouse pointer.
- Page 14 Touch + mark position in order then 「 Confirm」 If calibration point inputs are correct click 「Confirm」 In case any mistake in calibration points inputs click 「Cancel」 or leave the screen untouched for about 10 seconds then the Calibration Data will be scrapped. ※...
- Page 15 System Requirements & Restrictions 1. Operating Systems Windows XP - Service Pack 1 prior : Not supported - Service Pack 2 or after : Supported Windows 2000 - Service Pack 3 prior : Not supported - Service Pack 4 or after : Supported Windows Server 2003: Not supported Windows Vista: Supported except 64bit systems User may check the Operating System version by Right-click ‘My Computer’...
-
Page 16: Troubleshooting
Troubleshooting Before calling for assistance, please read carefully below. If you do need assistance, please call local service center or contact your dealer. No image on screen, I cannot turn on the mimo. Is USB cable connected and did you install mimo driver yet? Please run ‘mimo Installation Software’... - Page 17 I cannot boot my system after connecting mimo. in case i815 chipset One-Board Type PC system, please disable ‘Legacy USB support’ option in system BIOS menu and reboot the system. - BIOS setup method may differ from PC to PC, please refer to the User manual of the PC.
- Page 18 mimo information remains in my ‘Display Properties’ even after disconnect or power off the mimo. The deactivated USB information implies power off or disconnected USB monitor status. To delete the deactivated monitor information, please uninstall ‘nanovision Mini Monitor’ driver. Once the driver is uninstalled, you may not use MIMO. To use mimo again please re-install the driver.
-
Page 19: Specifications
Specifications Model Name: MIMO UM-430 (4.3 〃 WQVGA), UM-710(7 〃 VGA) UM-730(7 〃 WVGA/Webcam /MIC), UM-740(7 〃 WVGA/Webcam/MIC/TSP) UM-750(7 〃 WVGA/Webcam/MIC/TSP/DMB) LCD Panel Size: 10.92 cm(UM-430), 17.78 cm(UM-710/730/740/750) Display Size: 97mm(H) x 57 mm(V), 152.4 mm(H) x 91.4 mm(V), Pixel Pitch: 0.198mm(H)x0.198mm(V), 0.1905mm(H)x0.1905mm(V) Number of Color: 16.7M Contrast: 400:1 Input Power: USB (DC 5V)
Need help?
Do you have a question about the mimo UM-710 and is the answer not in the manual?
Questions and answers