
Related Manuals for oneConcept 10006664


Summary of Contents for oneConcept 10006664
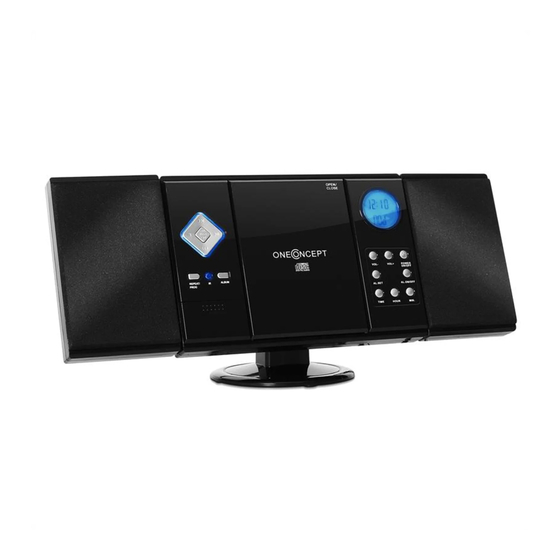
- Page 1 V-12 Stereoanlage Stereo System Equipo estéreo Chaîne stéréo Impianto stereo Stereo-installatie 10006663 10006664 10009511 10009512 10009513 10009514 10027657 10027658...
-
Page 3: Table Of Contents
Sehr geehrter Kunde, wir gratulieren Ihnen zum Erwerb Ihres Gerätes. Lesen Sie die folgenden Hinweise sorgfältig durch und befolgen Sie diese, um möglichen Schäden vorzubeugen. Für Schäden, die durch Missachtung der Hinweise und unsachgemäßen Gebrauch entstehen, übernehmen wir keine Haftung. Scannen Sie den QR-Code, um Zugriff auf die aktuellste Bedienungsanleitung und weitere Informationen rund um das Produkt zu erhalten. -
Page 4: Technische Daten
TECHNISCHE DATEN 10006663, 10006664, 10009511, 10009512, Artikelnummer 10009513, 10009514, 10027657, 10027658 100-240 V ~ 50/60 Hz Stromversorgung (AC/DC-Netzteil mitgeliefert) Batterie (Fernbedienung) CR2025 3 V Knopfzellenbatterie Ausgangsleistung DC 5V 1,2A Radio (FM) 87,5–108 MHz BT (nur 10009513, 10009514) BT Frequenzband 2402–2480 MHz BT Sendeleistung (max.) -
Page 5: Sicherheitshinweise
SICHERHEITSHINWEISE Allgemeine Sicherheitshinweise VORSICHT Verletzungsgefahr! Hören Sie nicht mit übermäßig hoher Lautstärke Musik, da dies zu Hörschäden führen kann. • Kinder ab 8 Jahren, psychisch, sensorisch und körperlich eingeschränkte Menschen dürfen das Gerät nur benutzen, wenn sie vorher von einer für sie verantwortlichen Aufsichtsperson ausführlich mit den Funktionen und den Sicherheitsvorkehrungen vertraut gemacht wurden und die damit verbundenen Risiken verstehen. - Page 6 Belüftung • Blockieren oder bedecken Sie keinesfalls die Belüftungsöffnungen, Löcher oder Öffnungen des Geräts, mit Gegenständen wie Teppichen, Tüchern und ähnlichem, da andernfalls die Funktionalität und/oder die Belüftung für eine sicherer Verwendung nicht gewährleistet werden können. • Die Unterseite des Geräts kann warm werden, wenn das Gerät über einen längeren Zeitraum verwendet wird.
-
Page 7: Geräteübersicht
GERÄTEÜBERSICHT USB-Eingang Standby SD-Slot VOL- / Stunde Funktionswahlschalter Alarm CD-Tür VOL+ / Minute Display Alarm an / aus Sendersuche (abwärts) Zeit Sendersuche (aufwärts) Kopfhörer-Anschluss... -
Page 8: Fernbedienung
AUX-Eingang Album / Preset+ Abdeckung Lautsprecher Abspielen / Pause / Scan Wandmontagelöcher Titelsuche vorwärts Lautsprecherständer Stop / Speichern Batteriefach Titelsuche rückwärts UKW-Antenne Wiederholen / Prog / Preset- Standfuß Fernbedienungssensor Lautsprecheraufhängungen FERNBEDIENUNG Standby Abspielen / Pause / Scan Stop / MEM. Lautstärke - Wiederholen / Zufallswiedergabe / Preset-... -
Page 9: Montage
MONTAGE Standfuß Verbindung zwischen Lautsprechern und Haupteinheit... - Page 10 Wandmontage...
-
Page 11: Inbetriebnahme Und Bedienung
INBETRIEBNAHME UND BEDIENUNG Anschluss des Netzteils Dieses Ende des Netzteils in den Netzeingang (DC 5V MAX 2A) hinten am Gerät Steckdose stecken und Netzteil Stellen Sie sicher, dass der Stecker aus der Steckdose gezogen wurde, bevor Sie irgendwelche Verbindungen herstellen. Vergewissern Sie sich, dass die Steckdose, an die Sie das Netzteil anschließen, funktioniert und eine konstante Stromversorgung liefert. -
Page 12: Radio
Einlegen der Batterien in die Fernbedienung • Drücken Sie den Batteriefachdeckel nach unten und schieben Sie den Deckel ab, um das Fach zu öffnen. • Legen Sie die eine CR2025-Batterie entsprechend den Polaritätsmarkierungen (+ und -) im Fachs und auf der Batterie ein. •... -
Page 13: Cd-Player
Gespeicherte Sender aufrufen Wenn Sie sich im Radiomodus befinden, können Sie die gespeicherten Radiosender durch wiederholtes Drücken der Taste PRESET auf der Fernbedienung aufrufen. Wenn Sie die gespeicherten Sender zum ersten Mal aufrufen, blinkt [P01] im Display. Hinweis: Die Uhr und die Radiosender müssen bei einer Stromunterbrechung oder einem Stromausfall neu eingestellt werden. -
Page 14: Wiedergabe Einer Mp3-Cd
WIEDERGABE EINER MP3-CD 1. Schalten Sie das Gerät ein, indem Sie die Taste STANDBY drücken. Das Display geht an. 2. Drücken Sie die MODE-Taste, um den CD-Modus zu wählen. 3. Öffnen Sie die CD-Tür, indem Sie auf Markierung OPEN/CLOSE an der CD- Tür drücken. - Page 15 Titel in einer bestimmten Reihenfolge programmieren Mit dieser Funktion können Musiktitel in einer programmierten Reihenfolge abgespielt werden. Hinweis: Das Programm kann nur im STOP-Modus eingestellt werden. 1. Drücken Sie die Taste PROG einmal. Sowohl die Programmnummer [01] als auch die Anzeige [PROG] blinken auf dem Display. 2.
-
Page 16: Usb/Sd-Betrieb
USB/SD-BETRIEB 1. Wählen Sie den USB/SD-Modus mit dem FUNKTIONSWAHLSCHALTER und legen Sie ein USB- bzw. SD- Speichermedium ein. 2. Mit dem Knopf CD/USB/SD-Umschaltung können Sie durch die Abspielmodi CD, USB und SD rotieren. Das Display wird „USB“ oder „SD“ anzeigen, wenn der entsprechende Modus aktiv ist. 3. -
Page 17: Wecker Einstellen
WECKER EINSTELLEN Weckzeit einstellen 1. Halten Sie den ALARM-Knopf gedrückt und drücken Sie wiederholt den STUNDEN- KNOPF. 2. Halten Sie den ALARM-Knopf gedrückt und drücken Sie wiederholt den MINUTEN-KNOPF. Hinweis: Wenn die “PM”-Anzeige auf dem Display leuchtet, zeigt das Gerät eine Uhrzeit in der zweiten Tages- hälfte an. -
Page 18: Fehlerbehebung
FEHLERBEHEBUNG Problem Mögliche Ursache Lösungsansatz Radiosignal Radiostation nicht Radiostation nachstellen. rauscht. richtig eingestellt. Radioantenne nicht Radioantenne entwickeln entwickelt. Kein Gerät nicht im RADIO- Wählen Sie den RADIO- Radioempfang. Modus. Modus. Lautstärke zu niedrig Lautstärke erhöhen. CD-Laufwerk läuft CD-Modus nicht aktiv Wählen Sie den CD-Modus. -
Page 19: Hinweise Zur Entsorgung
HINWEISE ZUR ENTSORGUNG Wenn es in Ihrem Land eine gesetzliche Regelung zur Entsorgung von elektrischen und elektronischen Geräten gibt, weist dieses Symbol auf dem Produkt oder auf der Verpackung darauf hin, dass dieses Produkt nicht im Hausmüll entsorgt werden darf. Stattdessen muss es zu einer Sammelstelle für das Recycling von elektrischen und elektronischen Geräten gebracht werden. - Page 21 Dear Customer, Congratulations on purchasing this device. Please read the following instructions carefully and follow them to prevent possible damages. We assume no liability for damage caused by disregard of the instructions and improper use. Scan the QR code to get access to the latest user manual and more product information.
-
Page 22: Technical Data
TECHNICAL DATA 10006663, 10006664, 10009511, 10009512, Product code 10009513, 10009514, 10027657, 10027658 100-240 V ~ 50/60 Hz Power supply (AC / DC power supply included) Battery (remote control) CR2025 3 V button cell battery Output power DC 5V 1.2A Radio (FM) 87.5–108 MHz... -
Page 23: Safety Instructions
SAFETY INSTRUCTIONS General safety instructions CAUTION Risk of injury. Do not listen to music at excessive volume as this may result in a loss of hearing. • This device may be only used by children 8 years old or older and persons with limited physical, sensory and mental capabilities and / or lack of experience and knowledge, provided that they have been instructed in use of the device by a responsible person who understands the associated... - Page 24 Ventilation • Do not block or cover the ventilation holes, vents, or openings of the unit with anything, such as carpet, cloth, or similar, as otherwise the openings may not be able to ensure functionality and / or ventilation for safe use. •...
-
Page 25: Product Overview
PRODUCT OVERVIEW USB input Standby SD slot VOL- / hour Function selector switch Alarm CD door VOL+ / minute Display Alarm on / off Channel search (downwards) Time Channel search (upwards) Headphone connection... -
Page 26: Remote Control
AUX input Album / Preset+ Cover Loudspeaker Play / Pause / Scan Wall mounting holes Title search forward Speaker stand Stop / Save Battery compartment Title search backwards FM antenna Repeat / Prog / Preset- Stand foot Remote control sensor Speaker suspensions REMOTE CONTROL Standby... -
Page 27: Mounting
MOUNTING Pedestal Connection between speakers and main unit... - Page 28 Wall mounting...
-
Page 29: Commissioning And Operation
COMMISSIONING AND OPERATION Connecting the power supply unit Plug this end of the mains adapter into the mains input (DC 5V MAX 2A) Socket and at the back of the unit power supply unit Make sure that the plug has been removed from the socket before making any connections. -
Page 30: Radio
Inserting the batteries in the remote control • Push down the battery compartment cover and slide the cover off to open the compartment. • Insert one CR2025 battery according to the polarity markings (+ and -) in the compartment and on the battery. •... -
Page 31: Cd Player
Calling up saved stations When you are in radio mode, you can access the stored radio stations by pressing the PRESET key on the remote control repeatedly. When you access the preset stations for the first time, [P01] blinks on the display. Note: The clock and the radio stations must be reset if there is a power interruption or power failure. -
Page 32: Playing An Mp3 Cd
PLAYING AN MP3 CD 1. Switch on the machine by pressing the STANDBY key. The display goes on. 2. Press the MODE button to select the CD mode. 3. Open the CD door by pressing the OPEN/CLOSE mark on the CD door. Insert an MP3 CD. - Page 33 Programming titles in a specific order This function allows you to play music tracks in a programmed order. Note: The programme can only be set in STOP mode. 1. Press the PROG key once. Both the program number [01] and [PROG] blink on the display.
-
Page 34: Usb/Sd Operation
USB/SD OPERATION 1. Select the USB/SD mode with the FUNCTION SELECTOR and insert a USB or SD memory device. 2. Use the CD/USB/SD switch button to rotate through CD, USB and SD play modes. The display will show „USB“ or „SD“ if the corresponding mode is active. -
Page 35: Setting The Alarm Clock
SETTING THE ALARM CLOCK Setting the alarm time 1. Press and hold the ALARM button and press the HOUR BUTTON repeatedly. 2. Press and hold the ALARM button and press the MINUTE button repeatedly. Note: When the „PM“ indicator lights up on the display, the unit shows a time in the second half of the day. -
Page 36: Troubleshooting
TROUBLESHOOTING Problem Possible cause Approach The radio signal Radio station not Readjust the radio station. roars. correctly set. Radio antenna not Develop radio antenna developed. No radio reception. Device not in RADIO Select the RADIO mode. mode. Volume too low Increase the volume. -
Page 37: Disposal Considerations
DISPOSAL CONSIDERATIONS If there is a legal regulation for the disposal of electrical and electronic devices in your country, this symbol on the product or on the packaging indicates that this product must not be disposed of with household waste. Instead, it must be taken to a collection point for the recycling of electrical and electronic equipment. - Page 39 Estimado cliente: Le felicitamos por la adquisición de este producto. Lea atentamente el siguiente manual y siga cuidadosamente las instrucciones de uso con el fin de evitar posibles daños. La empresa no se responsabiliza de los daños ocasionados por un uso indebido del producto o por haber desatendido las indicaciones de seguridad.
-
Page 40: Datos Técnicos
DATOS TÉCNICOS 10006663, 10006664, 10009511, 10009512, Número de artículo 10009513, 10009514, 10027657, 10027658 100-240 V ~ 50/60 Hz Suministro eléctrico (fuente de alimentación AC/DC incluida) Batería (mando a Pila de botón CR2025 de 3 V distancia) Potencia de salida DC 5V 1,2A Radio FM 87,5 –... -
Page 41: Indicaciones De Seguridad
INDICACIONES DE SEGURIDAD Advertencias generales de seguridad ATENCIÓN Riesgo de lesiones. No escuche la música a un volumen demasiado alto, pues podría provocar daños auditivos. • Este aparato puede ser utilizado por niños mayores de 8 años y personas con discapacidades físicas, sensoriales y mentales y/o con falta de experiencia y conocimientos, siempre y cuando hayan sido instruidos sobre el uso del aparato y comprendan los peligros y riesgos asociados. - Page 42 Ventilación • Nunca bloquee ni tape los orifi cios de ventilación, agujeros o aperturas del aparato con objetos como alfombras, paños o similares, pues podrían poner en riesgo su funcionalidad y/o ventilación en cuanto a un uso seguro. • La parte inferior del aparato puede calentarse si se utiliza durante un periodo de tiempo prolongado.
-
Page 43: Descripción Del Aparato
DESCRIPCIÓN DEL APARATO Entrada USB Standby Entrada SD Volumen - / hora Selector de funciones Alarma Tapa del CD Volumen + /minuto Pantalla Encender/apagar alarma Sintonizador (hacia abajo) Tiempo Sintonizador (hacia arriba) Entrada auriculares... -
Page 44: Mando A Distancia
Entrada AUX Album/preset+ Tapa Altavoz Agujeros para el montaje en Play/pausa/escan pared Búsqueda de pista hacia Apoyo del altavoz adelante Stop/guardar Pilas Búsqueda de pista hacia atrás Antena UKW Repetir/programar/configurar Sensor del mando a distancia Colgadores del altavoz MANDO A DISTANCIA Standby Play/pausa/scan Stop/memoria... -
Page 45: Montaje
MONTAJE Conexión entre los altavoces y la unidad principal... - Page 46 Montaje en la pared...
-
Page 47: Puesta En Marcha Y Funcionamiento
PUESTA EN MARCHA Y FUNCIONAMIENTO Conectando la fuente de alimentación Enchufe este extremo de la fuente de alimentación en la entrada de la red Enchufe y (DC 5V MAX 2A) en la fuente de parte posterior de la alimentación unidad Asegúrese de que el enchufe se ha retirado de la toma antes de hacer cualquier conexión. -
Page 48: Radio
Insertar las pilas en el mando a distancia • Empuje la tapa del compartimento de las pilas y deslícela para abrir el compartimento. • Inserte una pila CR2025 de acuerdo con las marcas de polaridad (+ y -) en el compartimento y en la pila. •... -
Page 49: Reproductor De Cd
Recuperar las emisoras almacenadas En el modo de radio, puede acceder a las emisoras de radio preseleccionadas pulsando repetidamente el botón PRESET del mando a distancia. Cuando se accede a las emisoras preseleccionadas por primera vez, [P01] parpadea en la pantalla. -
Page 50: Reproducción De Un Cd Mp3
REPRODUCCIÓN DE UN CD MP3 1. Encienda la unidad pulsando el botón STANDBY. La pantalla se enciende. 2. Presione el botón MODE para seleccionar el modo CD. 3. Abra la puerta del CD pulsando la marca de ABRIR/CERRAR de la puerta del CD. - Page 51 Programar pistas en un orden específico Esta función permite que las pistas de música se reproduzcan en un orden programado. Nota: El programa sólo se puede ajustar en el modo STOP. 1. Presione el botón PROG una vez. Tanto el número de programa [01] como el [PROG] parpadearán en la pantalla.
-
Page 52: Funcionamiento Del Usb/Sd
FUNCIONAMIENTO DEL USB/SD 1. Seleccione el modo USB/SD con el INTERRUPTOR DE SELECCIÓN DE FUNCIONES e inserte un dispositivo de memoria USB o SD. 2. Utilice el botón de conmutación CD/USB/SD para girar a través de los modos de reproducción de CD, USB y SD. La pantalla mostrará „USB“ o „SD“... -
Page 53: Ajuste De La Alarma
AJUSTE DE LA ALARMA Ajustar la hora de la alarma 1. Mantenga presionado el botón de ALARMA y pulse el BOTÓN DE HORA repetidamente 2. Mantenga pulsado el botón de ALARMA y pulse el botón de MINUTO repetidamente. Nota: Cuando el indicador „PM“ se enciende en la pantalla, la unidad muestra una hora en la segunda mitad del día. -
Page 54: Solución De Errores
SOLUCIÓN DE ERRORES Problema Posible causa Solución La señal de radio La emisora de radio no Reajuste la estación de está retumbando. está correctamente radio. ajustada. Antena de radio no Extienda la antena de radio extendida. No hay señal El aparato no está en el Seleccione el modo radio modo radio El volumen está... -
Page 55: Retirada Del Aparato
RETIRADA DEL APARATO Si en su país existe una disposición legal relativa a la eliminación de aparatos eléctricos y electrónicos, este símbolo estampado en el producto o en el embalaje advierte que no debe eliminarse como residuo doméstico. En lugar de ello, debe depositarse en un punto de recogida de reciclaje de aparatos eléctricos y electrónicos. - Page 57 Chère cliente, cher client, Toutes nos félicitations pour l’acquisition de ce nouvel appareil. Veuillez lire attentivement et respecter les instructions de ce mode d’emploi afin d’éviter d’éventuels dommages. Nous ne saurions être tenus pour responsables des dommages dus au non-respect des consignes et à la mauvaise utilisation de l’appareil.
-
Page 58: Fiche Technique
FICHE TECHNIQUE 10006663, 10006664, 10009511, 10009512, Numéro d'article 10009513, 10009514, 10027657, 10027658 100-240 V ~ 50/60 Hz Alimentation (Adaptateur secteur AC/DC fourni) Pile (télécommande) Pile bouton CR2025 3 V Puissance de sortie CC 5V 1,2A Radio (FM) 87,5 – 108 MHz BT (seulement 10009513, 10009514) Bande de fréquence BT... -
Page 59: Consignes De Sécurité
CONSIGNES DE SÉCURITÉ Consignes générales de sécurité ATTENTION Risque de blessures ! n‘écoutez pas de musique à trop fort volume, car cela peut endommager votre audition. • Cet appareil peut être utilisé par des enfants de 8 ans ou plus et des personnes ayant des capacités physiques, sensorielles et mentales limitées et / ou dénuées d‘expérience et de connaissances, à... - Page 60 Ventilation • Ne pas obstruer ni couvrir les ouvertures de ventilation, les trous ou les ouvertures de l‘appareil avec des objets tels que des tapis, tissus et similaires, car la fonctionnalité et/ou la ventilation en toute sécurité ne pourraient pas être garanties. •...
-
Page 61: Aperçu De L'appareil
APERÇU DE L‘APPAREIL Entrée USB Veille Lecteur SD VOL- / heure Sélecteur de fonction Alarme Tiroir CD VOL+ / Minute Écran Alarme marche/ arrêt Recherche de stations (vers Heure le bas) Recherche de stations (vers Prise casque le haut) -
Page 62: Télécommande
Entrée AUX Album / Preset+ Cache Enceinte Lecture / Pause / Scan Trou de montage mural Recherche de titre vers l'avant Support d'enceinte Stop / mémoire Compartiment à piles Recherche de titre vers Antenne FM l'arrière Répétition / Prog / Preset- Pied Capteur de télécommande Suspensions de haut-parleurs... -
Page 63: Montage
MONTAGE Pied Connexion entre les enceintes et l‘unité principale... - Page 64 Montage mural...
-
Page 65: Mise En Marche Et Utilisation
MISE EN MARCHE ET UTILISATION Branchement de l‘adaptateur secteur Branchez cette extrémité du bloc d‘alimentation dans l‘entrée d‘alimentation Prise et (DC 5V MAX 2A) à adaptateur l‘arrière de l‘appareil secteur Vérifiez que la fiche est débranchée de la prise avant d‘effectuer toute connexion. -
Page 66: Radio
Insertion des piles dans la télécommande • Appuyez sur le couvercle du compartiment des piles et faites glisser le couvercle pour ouvrir le compartiment. • Insérez la pile CR2025 en respectant le Marquage de polarité (+ et -) dans le compartiment et sur la pile. •... -
Page 67: Lecteur Cd
Rappel d‘une station mémorisée En mode radio, rappelez les stations mémorisées en appuyant plusieurs fois sur la touche PRESET de la télécommande. Lorsque vous appelez les stations mémorisées pour la première fois, [P01] clignote sur l‘affichage. Remarque : L‘horloge et les stations de radio doivent être réinitialisées en cas de panne de courant. -
Page 68: Lecture D'un Cd Mp3
LECTURE D‘UN CD MP3 1. Allumez l‘appareil en appuyant sur la touche STANDBY. L‘écran s‘allume. 2. Appuyez sur MODE pour sélectionner le mode CD. 3. Ouvrez le tiroir à CD en appuyant sur la marque OPEN / CLOSE sur le tiroir à... - Page 69 Programmation d‘une liste de lecture Cette fonction vous permet de lire des titres dans un ordre choisi. Remarque : Le programme ne peut être réglé qu‘en mode STOP. 1. Appuyez une fois sur PROG. Le numéro de programme [01] et l‘indication [PROG] clignotent sur l‘affichage.
-
Page 70: Utilisation Avec Usb/Sd
UTILISATION AVEC USB/SD 1. Sélectionnez le mode USB / SD avec le sélecteur de fonction et insérez un support de stockage USB ou SD. 2. Avec le bouton CD / USB / SD, vous pouvez faire alterner entre les modes de lecture CD, USB et SD. -
Page 71: Réglage De L'alarme
RÉGLAGE DE L‘ALARME Réglage de l‘heure de l‘alarme 1. Maintenez le bouton ALARME et appuyez sur le bouton HEURE à plusieurs reprises. 2. Maintenez le bouton ALARME et appuyez sur le bouton MINUTE à plusieurs reprises. Remarque : Lorsque l‘indicateur „PM“ s‘allume, l‘appareil affiche une heure dans la seconde moitié... -
Page 72: Résolution Des Problèmes
RÉSOLUTION DES PROBLÈMES Problème Cause possible Solution Parasites sur le La station de radio est Ajuster la station de radio. signal radio. mal réglée. L'antenne radio n'est Déployez l'antenne radio pas déployée. Pas de réception L'appareil n'est pas en Choisissez e mode radio. radio. -
Page 73: Conseils Pour Le Recyclage
CONSEILS POUR LE RECYCLAGE S‘il existe une réglementation pour l‘élimination ou le recyclage des appareils électriques et électroniques dans votre pays, ce symbole sur le produit ou sur l‘emballage indique que cet appareil ne doit pas être jeté avec les ordures ménagères. Vous devez le déposer dans un point de collecte pour le recyclage des équipements électriques et électroniques. - Page 75 Gentile cliente, La ringraziamo per aver acquistato il dispositivo. La preghiamo di leggere attentamente le seguenti istruzioni per l’uso e di seguirle per evitare possibili danni. Non ci assumiamo alcuna responsabilità per danni scaturiti da una mancata osservazione delle avvertenze di sicurezza e da un uso improprio del dispositivo.
-
Page 76: Dati Tecnici
DATI TECNICI 10006663, 10006664, 10009511, 10009512, Numero articolo 10009513, 10009514, 10027657, 10027658 100-240 V ~ 50/60 Hz Alimentazione (alimentatore AC/DC incluso) Batteria (telecomando) Batteria a bottone CR2025 da 3 V Potenza di uscita DC 5V 1,2A Radio (FM) FM 87.5 - 108 MHz... -
Page 77: Avvertenze Di Sicurezza
AVVERTENZE DI SICUREZZA Avvertenze di sicurezza generiche ATTENZIONE Pericolo di lesione! Non ascoltare la musica a volume eccessivamente altro, in quanto può provocare danni all’udito. • Questo dispositivo può essere utilizzato da bambini a partire da 8 anni e da persone con limitate capacità fi siche e psichiche o con conoscenza ed esperienza limitate, solo se sono stati istruiti sulle modalità... - Page 78 Ventilazione • Non bloccare in nessun caso le fessure di ventilazione, i fori o le aperture del dispositivo con oggetti, come tappeti, teli e similari, altrimenti non possono essere garantite funzionalità e/o ventilazione per un utilizzo sicuro. • Il lato inferiore del dispositivo può diventare caldo dopo utilizzi prolungati. Questo è...
-
Page 79: Descrizione Del Prodotto
DESCRIZIONE DEL PRODOTTO Ingresso USB Standby Slot SD VOL- / Ora Selettore di funzione Allarme Sportello CD VOL+ / Minuti Display Allarme on / off Ricerca emittenti (verso il Orario basso) Ricerca emittenti (verso l’alto) Collegamento cuffie... -
Page 80: Telecomando
Ingresso AUX Album / Preset+ Copertura Altoparlante Play / Pause / Scan Fori per montaggio a parete Ricerca brani avanti Sostegno per altoparlanti Stop / Memorizza Vano pile Ricerca brani indietro Antenna FM Ripeti / Prog / Preset- Piedistallo Sensore telecomando Sospensioni per altoparlanti TELECOMANDO Standby... -
Page 81: Montaggio
MONTAGGIO Piedistallo Collegamento tra gli altoparlanti e l’unità principale... - Page 82 Montaggio a parete...
-
Page 83: Messa In Funzione E Utilizzo
MESSA IN FUNZIONE E UTILIZZO Collegamento del cavo d’alimentazione Inserire questa estremità del cavo nell’ingresso di rete (DC 5V MAX 2A) sul retro del Presa e dispositivo alimentatore Prima di instaurare un collegamento assicurarsi che la spina sia stata tolta dalla presa di corrente, che quest’ultima funzioni e che fornisca costantemente energia elettrica. -
Page 84: Radio
Inserire le pile nel telecomando • Spingere il coperchio del vano pile verso il basso e rimuoverlo per aprire il vano. • Inserire la pila CR2025 seguendo la polarità corretta (+ e -) nel vano e sulla batteria. • Richiudere il vano con il coperchio premendolo leggermente verso il basso e farlo scivolare verso l’interno finché... -
Page 85: Lettore Cd
Come accedere alle emittenti salvate Quando si è in modalità radio si può accedere alle emittenti radio salvate premendo più volte il tasto PRESET sull’impianto stereo o sul telecomando. Quando si accede per la prima volta alle emittenti salvate sul display lampeggia [P01]. -
Page 86: Riproduzione Di Un Cd Mp3
RIPRODUZIONE DI UN CD MP3 1. Accendere il dispositivo premendo il tasto STANDBY. Il display si accende. 2. Premere il tasto MODE per selezionare la modalità CD. 3. Aprire il vano CD premendo OPEN/CLOSE sullo sportello e inserire un CD MP3. - Page 87 Come programmare il brano in una determinata sequenza Con questa funzione è possibile riprodurre i brani musicali seguendo una sequenza programmata. Nota: il programma può essere impostato solo in modalità STOP. 1. Premere una volta il tasto PROG. Sul display lampeggiano il numero del programma [01] e la spia [PROG].
-
Page 88: Funzionamento Usb/Sd
FUNZIONAMENTO USB/SD 1. Selezionare la modalità USB/SD con il SELETTORE DI FUNZIONE e inserire un supporto di memoria USB o SD. 2. Con l’interruttore CD/USB/SD ruotare all’interno delle modalità di riproduzione CD, USB e SD. Sul display appare “USB” o “SD” quando la modalità... -
Page 89: Come Impostare La Sveglia
COME IMPOSTARE LA SVEGLIA Come impostare l’ora Tenere premuto il tasto ALARM e premere ripetutamente il tasto ORA. Tenere premuto il tasto ALARM e premere ripetutamente il tasto MINUTI. Nota: se sul display lampeggia il simbolo “PM”, significa che il dispositivo indica l’orario riguardante la seconda metà... -
Page 90: Correzione Degli Errori
CORREZIONE DEGLI ERRORI Problema Possibile causa Soluzione Il segnale radio fa La stazione radio non è Reimpostare la stazione dei fruscii. ben impostata. radio. L’antenna radio non è Dispiegare l’antenna. dispiegata. La radio non riceve. Il dispositivo non si Selezionare la modalità trova in modalità... -
Page 91: Avviso Di Smaltimento
AVVISO DI SMALTIMENTO Se nel proprio paese si applicano le regolamentazioni inerenti lo smaltimento di dispositivi elettrici ed elettronici, questo simbolo sul prodotto o sulla confezione segnala che questi prodotti non possono essere smaltiti con i rifi uti normali e devono essere portati a un punto di raccolta di dispositivi elettrici ed elettronici. - Page 93 Geachte klant, hartelijk gefeliciteerd met de aanschaf van dit apparaat. Lees de hierna volgende handleiding aandachtig door en volg de instructies op om schade te voorkomen. Voor schade veroorzaakt door het niet in acht nemen van de instructies of door onjuist gebruik nemen wij geen verantwoordelijkheid.
-
Page 94: Technische Gegevens
TECHNISCHE GEGEVENS 10006663, 10006664, 10009511, 10009512, Artikelnummer 10009513, 10009514, 10027657, 10027658 100-240 V ~ 50/60 Hz Stroomvoorziening (AC/DC stroomkabel inclusief) Batterij CR2025 3V knoopcel (afstandsbediening) Uitgangsvermogen DC 5V 1,2A Radio (FM) 87,5–108 MHz BT gebruik (alleen 10009513 & 10009514) BT frequentie 2402–2480 MHz... -
Page 95: Veiligheidsinstructies
VEILIGHEIDSINSTRUCTIES Algemene veiligheidsinstructies WAARSCHUWING Letselgevaar! Luister niet naar muziek met een te hoog volume daar dit tot gehoorschade kan leiden. • Kinderen vanaf 8 jaar en personen met een beperkte lichamelijke, sensorische en/of geestelijke gezondheid mogen het apparaat alleen gebruiken wanneer ze van tevoren door een voor hen verantwoordelijke persoon uitvoerig met de functies en veiligheidsinstructies van het apparaat vertrouwd zijn gemaakt en de hieraan verbonden risico's begrijpen. - Page 96 Ventilatie • Blokkeer of bedek de ventilatieopeningen, gaten of andere openingen van het apparaat niet met objecten, zoals tapijt, kleedjes en dergelijke, omdat anders de functionaliteit en/of de ventilatie voor een veilig gebruik niet kunnen worden gegarandeerd. • De onderkant van het apparaat kan warm worden wanneer het apparaat gedurende langere tijd gebruikt wordt.
-
Page 97: Overzicht Apparaat
OVERZICHT APPARAAT USB ingang Stand-by SD sleuf VOL - / uur Functieschakelaar Alarm CD klep VOL + / minuut Display Alarm aan / uit Zenders zoeken (omlaag) Tijd Zenders zoeken (omhoog) Koptelefoonaansluiting... -
Page 98: Afstandsbediening
AUX ingang Album / Preset + Afdekking Luidspreker Play / Pauze / Scan Wandmontagegaten Titel zoeken vooruit Luidsprekerstandaard Stop / Opslaan Batterijcompartiment Titel zoeken terug FM antenne Repeat / Prog / Preset - Standvoet Sensor afstandsbediening Luidsprekerbeugels AFSTANDSBEDIENING Stand-by Play / Pauze / Scan Stop / MEM. -
Page 99: Montage
MONTAGE Standvoet Verbinding tussen luidsprekers en basiseenheid... - Page 100 Wandmontage...
-
Page 101: Ingebruikname En Bediening
INGEBRUIKNAME EN BEDIENING Aansluiting stroomkabel Plaats het uiteinde van de stroomkabel in de hiervoor bestemde ingang (DC 5V MAX 2A) Stopcontact en achterin het apparaat. stroomkabel Zorg ervoor dat de stekker uit het stopcontact is gehaald voordat u een verbinding maakt. Zorg ervoor dat het stopcontact, waarop u de stroomkabel aansluit, functioneert en een constante stroomvoorziening levert. -
Page 102: Radio
Plaatsen van batterijen in de afstandsbediening • Druk het deksel van het compartiment naar beneden en schuif de deksel weg om het vak te openen. • Plaats een CR2025 batterij overeenkomstig de polariteitsmarkeringen (+ en -) in het vak en op de batterij. •... -
Page 103: Cd Speler
Opgeslagen zenders oproepen Wanneer u zich in radiomodus bevindt kunt u de opgeslagen radiozenders oproepen door herhaaldelijk op de toets PRESET op de afstandsbediening te drukken. Wanneer u de opgeslagen zender voor het eerst oproept knippert [P01] in het display. Info: de klok en de radiozenders moeten bij een stroomonderbreking of -uitval opnieuw worden geprogrammeerd. -
Page 104: Afspelen Van Een Mp3-Cd
AFSPELEN VAN EEN MP3-CD 1. Schakel het apparaat in door op STANDBY te drukken. Het display gaat aan. 2. Druk op MODE om de CD modus te kiezen. 3. Open de CD lader door op OPEN/CLOSE te drukken. Plaats een mp3-CD. 4. - Page 105 Titels in een specifieke volgorde programmeren Met deze functie kunnen muziektitels in een geprogrammeerde volgorde worden afgespeeld. Info: dit programma is alleen beschikbaar in STOP modus. 1. Druk eenmaal op PROG. Zowel het programmanummer [01] als ook de indicator (PROG) knipperen op het display. 2.
-
Page 106: Usb/Sd Gebruik
USB/SD GEBRUIK 1. Kies met functieschakelaar de functie USB/SD en plaats een USB stick of SD kaart. 2. Met de toets CD/USB/SD kunt u wisselen tussen de afspeelmodi SD, USB en SD. Het display geeft met 'USB' of 'SD' aan welke modus actief is. 3. -
Page 107: Wekker Programmeren
WEKKER PROGRAMMEREN Wektijd programmeren 1. Houdt de ALARM toets ingedrukt en druk herhaaldelijk op UUR. 2. Houdt de ALARM toets ingedrukt en druk herhaaldelijk op MINUUT. Info: wanneer de 'PM' indicator oplicht in het display laat het apparaat de tijd in de tweede helft van de dag zien. Wanneer geen PM zichtbaar is, laat het apparaat de tijd in de eerste helft van de dag zien. -
Page 108: Problemen Oplossen
PROBLEMEN OPLOSSEN Probleem Mogelijke oorzaak Mogelijke oplossing Radiosignaal Radiostation niet goed Radiostation opnieuw stoort. afgesteld. afstellen. Radio-antenne niet Radio-antenne afrollen/ afgerold/ uitgetrokken. uittrekken. Geen radio- Apparaat niet in RADIO Selecteer RADIO modus. ontvangst. modus. Volume te laag. Verhoog volume. CD speler loopt CD modus niet actief. -
Page 109: Instructies Voor Afvoer
INSTRUCTIES VOOR AFVOER Wanneer in uw land een wettelijke regeling geldt voor het afvoeren van elektrische en elektronische apparaten, wijst dit symbool, op het product zelf of op de verpakking, erop dat het betreffende product niet met het huisvuil afgevoerd mag worden. In plaats daarvan dient het naar een centraal depot voor het recyclen van elektrische en elektronische apparaten te worden gebracht Door het afval volgens de...
Need help?
Do you have a question about the 10006664 and is the answer not in the manual?
Questions and answers