
Related Manuals for Sencor SLE 3261TCS


Summary of Contents for Sencor SLE 3261TCS
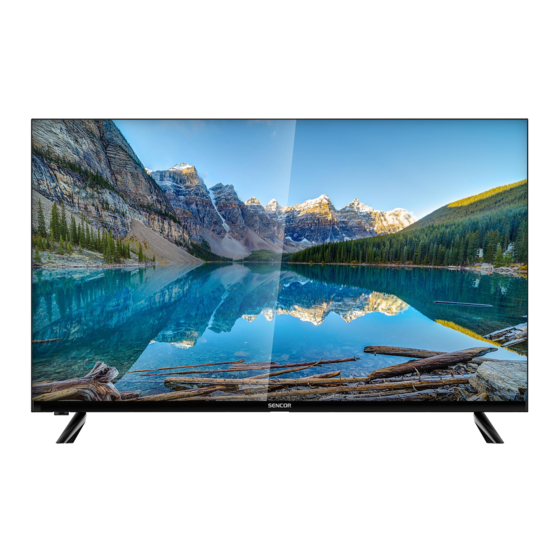
- Page 1 SLE 3261TCS User Manual LED TV Uživatelská příručka LED televizor Používateľská príručka LED televízor Felhasználói kézikönyv LED tévékészülék Podręcznik użytkownika Telewizor LED...
-
Page 3: Table Of Contents
Contents PLEASE, READ THESE INSTRUCTIONS BEFORE STARTING TO OPERATE THE TELEVISION. STORE IT FOR LATER REFERENCE. NOTE DOWN THE MODEL NUMBER AND THE SERIAL NUMBER OF THE TV SET. LOOK AT THE LABEL ON THE BACK COVER AND PASS THE INFORMATION PROVIDED THERE TO YOUR DEALER IN CASE THAT YOU WOULD NEED SERVICING. -
Page 4: Important Safety Instructions
Important safety instructions 1. Important safety instructions To be able to use this product properly, read this user's manual carefully and keep it for future reference. If you plan to give (sell) this device to a third person, include all documentation, including this manual, with the transaction. TO REDUCE THE RISK OF ELECTRIC SHOCK, DO NOT REMOVE THE COVER (OR BACK SIDE). - Page 5 Important safety instructions • This device shall not be kept in a closed area, such as a library or shelf, provided sufficient ventilation cannot be provided or the manufacturer's instructions cannot be followed. • Do not place any objects into the air vents or any other holes. Risk of touching components with dangerous voltage or shorting parts that could cause fire or electric shock.
- Page 6 Important safety instructions • Disconnect the power cord from the power outlet during thunderstorms, or when not in use for a longer period of time. Avoid carrying the device from a cool environment into a warm environment or vice versa, or operating the device in a moist environment.
- Page 7 Important safety instructions Repairs and maintenance • To avoid risks of electric shock or fire, do not remove the device from the case – the case does not contain components that the user could repair or adjust without the necessary equipment and qualification. Refer to a professional service centre if your device requires service.
- Page 8 Important safety instructions – Do not throw batteries into a fire. – Do not leave dead batteries in the remote controller. – Do not combine various types of batteries or old and new batteries. – If you do not use the remote controller for a longer period of time, remove the batteries to prevent damaging the remote controller by the batteries leaking out.
- Page 9 Important safety instructions Notes on the USB connector: • USB memory devices require being connected directly into the device. To prevent a failing or interrupting data transfer, do not use USB extension cable. Electrostatic discharge can cause the device to not function. In this case, the user must restart the device.
-
Page 10: Assembling The Stand
Assembling the stand 2. Assembling the stand Before attaching /removing the stand, make sure the TV is turned off and plug is disconnected from the wall o Before performing the work, put underneath the LED TV set some soft material so that t Instruction for assembling the stand 8 EN... -
Page 11: Device
Device 3. Device 3.1. Button functions of the control panel The buttons on the bottom right control basic TV functions, including on-screen me you want to use advanced functions, you have to use the remote controller Note: res are only for orientation Remote Control Sensor •... -
Page 12: Connecting The Tv Connectors
Device 3.2. Connecting the TV connectors COAXIAL/DIGITAL AUDIO OUT: coaxial audio output 2-3. AV IN: The AV output connector of DVD can be connected to AV input via the AV RF IN (S2)/ANTENNA IN (S2): connection to the antenna or to the cable television system, LNB for satellite RF IN/ANTENNA IN: connection to the antenna or to the cable television system... -
Page 13: Remote Control
Remote control 4. Remote control POWER 1 button Turns the television on/from the stand-by mode. INPUT button Press to select the desired input. NICAM button NICAM/A2 input or output. ASPECT button Page aspect ratio selection, e.g. 16:9, Zoom, Auto, 4:3. PMODE button Press repeatedly to select a picture mode. - Page 14 Remote control 15. v/V/b/B/ENTER buttons Used to navigate in a menu on the screen and to set up the TV according to your preferences. ENTER button Used to enter/exit the channel list menu (DTV/ATV only). 16. MENU button It displays TV main menu in TV mode. 17.
- Page 15 Remote control 30. AUDIO button DTV/MEDIO mode: select a background sound if available. ATV mode: select a sound mode: Stereo / Dual I/II / Mono. Other sources: select left/right channel 31. SUBTITLE button Press to show/hide subtitles in the bottom part of the screen, if they are available. 32.
-
Page 16: Turn On First Time
Turn on rst time 5. Turn on rst time Press SOURCE to display the list of input sour Press or SOURCE to select the required input sour Press OK to switch to the appropriate input sour Press EXIT to exit me To watch television connect the antenna cable with functional reception (antenna, common anten mark... -
Page 17: Automatic Tuning
Turn on first time 5.3. Automatic tuning Select between the Analogue (ATV) or digital (DTV) reception or keep both receptions ATV+DTV. First will be processed the tuning of the analogue television channels (ATV). If you want to skip the ATV tuning, press the Menu button and the button with left arrow. Afterwards, the tuning of the digital television channels will be done (DTV). - Page 18 Turn on first time Note: When the automatic tuning does not find any receivable channel (e.g. due to poor antenna) or you interrupted the tuning manually, you can still tune channels manually, one by one, in the device menu described below. For this you will need some technical information about the broadcast that you want to receive, e.g.
-
Page 19: Menu
Menu 6. Menu 6.1. Channel Menu - satellite WARNING: We strongly recommend that the antenna system is installed by an expert. A good quality installation will reward you with a stable and trouble-free reception. Press MENU to display the main menu. Use the buttons b/B to select the item CHANNEL in the main menu. Using the buttons V/v select the item, which you want to modify in the menu CHANNEL. - Page 20 Menu transponder is mainly characterized by a frequency (and also by H/V polarization and symbol rate, e.g. 27500 kSym/s) and carries several TV programs and if you want to receive them, when selected, the indicator Quality must again show non-zero value, e.g. the middle of the range.
- Page 21 Menu Note about updating the FastScan and consumption list: The device will check the channel list of the operator FastScan for up to date channel list availability when switched into Standby mode. To do this, simply switch off the TV at the selected Satellite input.
-
Page 22: Channel Menu - Atv/Dtv
Menu 6.2. Channel menu – ATV/DTV Press MENU to display the main menu. Use the buttons b/B to select the item CHANNEL in the main menu. Using the buttons V/v select the item, which you want to modify in the menu CHANNEL. - Page 23 Menu Color System Select the color system. Sound System Select the sound system. Fine-Tune Fine tuning of channel frequency. Search Start channel search. 6.2.3. Manual DTV tuning Using the buttons V/v select the item DTV Manual Tuning and press OK to enter the submenu.
- Page 24 Menu Use the blue button to skip the channel (the television will automatically skip the channel when you will use the buttons PR+/- for switching channels). Press FAV to add or remove the channel from the list of the Favourite channels. The position and numbers of each channel captured by FastScan are determined by the broadcast operator and the user can not change them.
-
Page 25: Picture Menu
Menu Note: If your Conditional Access System (CAM) supports URI protection, you need to enter the PIN (CI CAM PIN) of your CA system for the first time. This is different from the TV lock password, it is assigned by the CAM operator. 6.2.6. - Page 26 Menu After you finish the setting, save it by pressing the button MENU and return to the previous menu. 6.3.1. Picture mode Using the buttons V/v select the item Picture Mode and press OK to enter the submenu. If the picture is in the Personal mode, you can change the values of contrast, brightness, colors, sharpness and tint.
- Page 27 Menu 6.3.2. Color temperature Change of the overall color presentation. Using the buttons V/v select the item Color Temperature and then press OK to enter the submenu. Using the buttons b/B select the mode (available picture modes: Cold, Normal, Warm). Emphasizes blue tint of the white color.
-
Page 28: Sound Menu
Menu 6.3.4. HDMI mode Select for the currently connected source in the HDMI input either Video (e.g. satellite receiver) or PC (computer) or AUTO. This way you will adjust the picture processing and its size to the current source. When a source is not connected the HDMI is not active. 6.4. - Page 29 Menu Tip: To change the sound mode directly, use the button S.M. on the remote controller. Standard: Provides balanced sound in all environments. Music: Maintains the original sound. Suitable for music programs. Movie: Emphasizes the treble and bass for an enhanced audio experience. Sports: Emphasizes voice in sports programs.
-
Page 30: Time Menu
Menu 6.5. Time menu Press MENU to display the main menu. Use the buttons b/B to select the item TIME in the main menu. Using the buttons V/v select the item, which you want to set in the menu TIME. Press OK and set. - Page 31 Menu 6.5.2. Sleep Timer Use the buttons V/v to select the item Sleep Timer and press OK to enter the submenu. Use the buttons V/v to select (available options: Off, 15 min, 30 min, 45 min, 60 min, 90 min, 120 min, 240 min). 6.5.3.
-
Page 32: Lock Menu
Menu 6.5.4. Menu display timer Use the buttons V/v to select the item OSD Timer and press OK to enter the submenu. Use the buttons V/v to select how long should be displayed the setting options on the screen before they disappear. 6.6. - Page 33 Menu 6.6.1. Lock system Use the buttons V/v to select the item Lock System, press OK and select one of the following three options. 6.6.2. Setting the password Use the buttons V/v to select the item Set Password and then press OK to enter the submenu and enter the new password.
- Page 34 Menu 6.6.3. Channel Lock Use the buttons V/v to select the item Channel Lock and then press OK to enter the submenu and select. Use the green button to lock or unlock the channel. You have to enter the a password to watch it.
-
Page 35: Hotel Mode
Menu 6.6.6. Hotel mode Hotel Mode is used to restrict certain TV functions, to make it easy to operate in places where should be e.g. limited maximum volume or to prevent tuning TV. Use the buttons V/v on the remote control to select the hotel mode in the menu Lock. -
Page 36: Setup Menu
Menu 6.7.5. Clear Lock Use the buttons V/v to select the item Clear Lock and then press OK to delete the previous settings. 6.8. Setup menu Press MENU to display the main menu. Use the buttons b/B to select the item SETUP in the main menu. Using the buttons V/v select the item, which you want to set in the menu SETUP. - Page 37 Menu 6.8.2. TT Language Use the buttons V/v to select the item TT Language and then press OK to enter the submenu. Use the buttons V/v/b/B to select the teletext language if the national alphabet is not correctly displayed. 6.8.3. Audio Language Press V/v to select the item Audio Languages and then press OK to enter the submenu.
- Page 38 Menu Use the buttons b/B to select the primary/secondary language of the subtitles. Use the buttons V/v/b/B to select the subtitle language. 6.8.5. Hearing Impaired, Impaired listening Use the buttons V/v to select the item Hearing Impaired and then press OK to select the option On or Off.
- Page 39 Menu Note: First try each USB device for speed and the reliability of recording. When the result is unsatisfactory, replace it with another one, mainly faster. The speed of the USB memory is the basic parameter of the reliability of the recording and also of the time shift.
- Page 40 Menu 6.8.10. Reset, Reset the default factory setting. Use the buttons V/v to select the item Reset and then press OK to enter the submenu. The function performs return of TV settings to factory defaults, except for deletion of the list of tuned programs.
-
Page 41: Atv Channel Menu
Menu 6.9. ATV Channel menu Press the button MENU to display the main menu (in the ATV mode). Use the buttons b/B to select the item CHANNEL in the main menu. Using the buttons V/v select the item, which you want to set in the menu CHANNEL. -
Page 42: Component Input / Hdmi / Av Menu
Menu 6.10. Component Input / HDMI / AV menu Notes: The menu Picture and its description are the same like in the DTV mode. The menu Sound and its description are the same like in the DTV mode (however the item AD switch is not available). The menu Lock and its description are the same like in the DTV mode. -
Page 43: Usb
7. USB Note: Before you use the Media menu, connect the USB device and then press SOURCE and set the input source to Media. The TV set detects the majority of the USB devices and shortly offers you to switch to playback. When you will not respond, the offer disappears and the TV remains in the original mode. -
Page 44: Photo Menu
7.1. Photo Menu Use the buttons b/B to select in the main menu the item PHOTO and then enter the interface by pressing OK. Press Exit to return to the previous menu and to exit menu. Press b/B to select in the file menu the file, which you want to view and press the OK button to display the picture. -
Page 45: Music Menu
7.2. Music menu Use the buttons b/B to select in the main menu the item MUSIC and then enter the interface by pressing OK. Press Exit to return to the previous menu and to exit menu. Use the buttons b/B to select the disk unit, which you want to play and press OK to enter the interface. -
Page 46: Movie Menu
7.3. Movie menu Use the buttons b/B to select in the main menu the item MOVIE and then enter the interface by pressing OK. Press Exit to return to the previous menu and to exit menu. Use the buttons b/B to select the disk unit, which you want to play and press OK to enter the interface. -
Page 47: Text Menu
7.4. Text Menu Use the buttons b/B to select in the main menu the item TEXT and then enter the interface by pressing OK. Press Exit to return to the previous menu and to exit menu. Use the buttons b/B to select the drive unit which you want to browse and press OK to enter the interface. -
Page 48: Troubleshooting
Troubleshooting 8. Troubleshooting WARNING: Under no circumstances should you try to repair the appliance yourself, the device does not contain parts that could be repaired by the user. Always take the device to an authorized service center if a repair or adjustment are necessary other than regular maintenance. - Page 49 Troubleshooting Problems Possible solutions The TV set does not respond to The batteries in the remote controller might be the remote controller. empty. If it is necessary, replace them with new ones. Clean the lens of the remote controller. The distance between the LED TV set and the remote controller should be no more than 8 m, in the recommended operating angle and with no obstacles in the path...
- Page 50 Troubleshooting Problems Possible solutions The picture is distorted, Video compression can cause disruption, especially contains macroblocks, during rapid movement, e.g. In sports programs and microblocks, points, large pixels, action movies. etc. Speaker noise Check the cable connections, make sure that the video cable is not connected to video input.
-
Page 51: Technical Specifications
Technical speci cations M d el SLE 3261TCS Panel size 32" Power consumption 65 W Standby consumption Rated voltage 110–240 V AC, 50/60 Hz Remote controller VESA wall mount 200 × 100 Dimensions with stand (w × h × d) 721 x 191 x 471 Dimensions without stand (w ×... - Page 52 Technical spe ations Teletext Teletext pages 1000 OSD menu Zoom Noise reduction Timer OFF / ON / SLEEP Subtitles Audio language Channel list Favourites list Image freeze Radio Lock Parent lock Hotel mode Note: Technical spe ations may change without prior not The original version is in Cze Manufacturer address: F any, Czech Republic...
-
Page 53: Information Sheet
1. Supplier's name or trademark. SENCOR Supplier's address. 2. Model identifier SLE 3261TCS 3. Energy Efficiency Class for Standard Dynamic Range (SDR) 4. On mode power demand in SDR 32,0 5. Energy Efficiency Class for High Dynamic Range n.a. - Page 54 INSTRUCTIONS AND INFORMATION REGARDING THE DISPOSAL OF USED PACKAGING MATERIALS Dispose of packaging material at a public w DISPOSAL OF USED ELECTRICAL AND ELECTRONIC APPLIANCES The meaning of the symbol on the product, its accessory or packaging indicates that this product shall not be treated as household w Please, dispose of this product at your applicable collection point for the recycling of electrical &...
- Page 55 Data on presented documents differs from data on products. Cases when the claiming product cannot be indentified according to the presented documents (e.g. the serial number or the warranty seal has been damaged). Authorized service centers Visit www.sencor. for detailed information about authorized service centers.
Need help?
Do you have a question about the SLE 3261TCS and is the answer not in the manual?
Questions and answers