
Subscribe to Our Youtube Channel
Related Manuals for LG WT-13SNSV


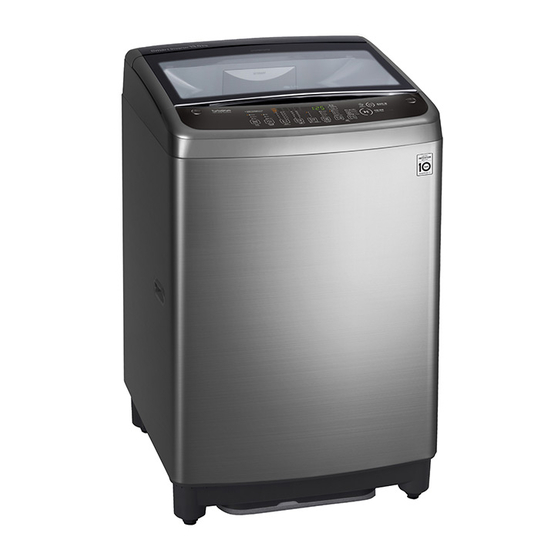
Summary of Contents for LG WT-13SNSV
- Page 1 使用者手冊 洗衣機 開始安裝前 , 請仔細閱讀這些操作指引 。 這將簡化安裝過程 , 保證產品正 確並且安全安裝 。 將這些操作指引放置在產品旁 , 以便以後參考 。 HK 粵語 ENGLISH WT-13SNSV www.lg.com MFL70761345 Copyright © 2020 LG Electronics Inc. All Rights Reserved Rev.02_031820...
-
Page 3: Table Of Contents
操作 .............. 14 操作概述 ................14 準備衣物 ................14 添加清潔劑 、 柔順劑與漂白劑 ..........16 控制面板 ................18 洗滌程序 ................20 額外選項和功能 ..............21 智能系統 ............25 LG ThinQ 應用程式 ............25 Smart Diagnosis ...............25 維護 .............. 26 每次洗滌後的清潔 ..............26 定期清潔電器 ..............26 疑難排解 ............29 在致電尋求服務之前 ............29 無限保固 ................36... -
Page 4: 安全說明
安全說明 下列安全指引是為防止無法預見的危險或由於不安全或不正確的電器操 作方式造成的損失 。 如下所述 , 指引分為 「警告」 和 「注意」 兩部份 。 此標誌標示可能造成危險的事物和操作 。 仔細閱讀帶有此標誌的 部份 , 遵循操作指引以避免危險 。 警告 這表示不遵循操作指引會造成重傷或死亡 。 注意 這表示不遵循操作指引會造成輕傷或產品損壞 。 重要安全說明 警告 在使用產品時 , 為減少給人體帶來爆炸 、 火災 、 死亡 、 觸電 、 傷害或燙傷 的風險 , 應遵循基本的安全預防措施 , 包括以下內容 : 技術安全... - Page 5 • 本電器僅限家居使用 , 且不得用於以下場合 : − 商店 、 寫字樓及其他工作場所員工廚房區域 ; − 農舍 ; − 酒店 、 汽車旅館及其他臨時住宿環境供住客使用 ; − 就寢及用早餐環境 ; − 住宿樓層或自助洗衣店共用區域 • 進水壓須介乎 30 與 800 kPa 之間 。 • 部分洗滌程序可清洗衣物最大容量為 13 kg 。 安裝 • 若電器損壞 、 故障 、 部份拆開 , 或有遺失或破損部份 , 包括損壞的電源線 或插頭...
- Page 6 劑 、 松節油 、 植物油 、 食用油 、 丙酮 、 酒精等) 的衣物 。 不當使用可引起火警 或爆炸 。 • 電器運轉時 , 請勿伸手入電器中 。 請等候至滾筒完全停止 。 • 如設備漏水 , 請斷開電源插座並聯絡 LG Electronics 客戶資訊中心 。 • 關閉水龍頭可減輕軟管和閥門壓力 , 並且如果發生斷裂或破裂 , 能使外 漏降至最低 。 檢查填充軟管的狀況;5 年後可能需要更換 。...
- Page 7 • 去除所有濕氣和灰塵後 , 將電力插頭安全插入電力插座中 。 • 請勿在電器內部或外部噴水來進行清潔 。 • 若要中斷電源連接 , 切勿拉扯電源線 , 應緊握插頭將其從插座拔出 。 • 僅限LG電子客戶服務中心的合資格維修人員進行拆卸 、 維修或修改設 備 。 如移動設備並將其安裝在不同位置 , 請聯絡LG電子客戶服務中心 。 處理 • 丟棄舊電器前 , 請拔掉插頭 。 直接拔除電器後面的電線 , 防止使用不當 。 • 所有包裝材料 (如膠袋和發泡膠) 的處理應遠離兒童 。 包裝材料會導致窒...
-
Page 8: 配件與規格
安裝 配件與規格 附註 • 外部特徵與技術參數可能變更,以改善電器品質 ,恕不另行通知。 前視圖 * 部分型號提供此功能 。 a 機門 b 強化玻璃 c 清潔劑分配器抽屜盒 d 衣物柔順劑分配盒 e 漂白劑 f 滾筒 g 調平腳 h 排水軟管* i 控制面板 j 絨毛過濾器 k 電源線 l 冷水進水口... - Page 9 附件(視乎型號而定) * 部分型號提供此功能 。 冷水進水口軟管排 水軟管 索帶 * 規格 型號 WT-13SNSV 電源 220 V~, 50 Hz 尺寸 (寬 x 深 x 高) 590 mm x 606 mm x 960 mm 產品重量 39 kg...
-
Page 10: 安裝地點要求
• 按照電流接線規定,將電器連接至接 地插座。 • 電器必須安置在易於接近插座的位 置。 • 電源插座必須位於電器兩側 1.5 公尺 內。 警告 10 cm 2 cm 2 cm • 只有符合資格人員才能維修電器。無 經驗的人員維修電器可能導致受傷或 警告 嚴重故障。請與 LG Electronics 客戶 • 本電器只適用於家居正常使用,不適 服務中心聯絡。 用於行動平台或載具 (如車輪或船隻 • 插頭必須插入按照當地所有法規和條 等) 上。 例正確安裝和接地的適當插座中。 附註 • 請勿將本電器安裝在隆起的表面或平 台、底座或支架上。否則可能會導致 受傷或嚴重故障。... -
Page 11: 連接供水管
連接供水管 將水管接上水龍頭 將入水軟管連接水龍頭時 , 請檢查軟管 連接螺紋式水管至帶螺紋的水龍頭 接頭類型並選擇正確指引 。 將水管連接器擰到供水水龍頭上 。 連接注意事項 • 水壓必須在 30 kPa 與 800 kPa (0.3 - 8.0 kgf/cm²) 之間。如果供水壓力超 過 800 kPa,則應安裝減壓裝置。 • 切勿將入水管軟管擰的過緊。 • 定期檢查水管的狀況,視需要更換水 管。 檢查橡膠封圈 附註 進水軟管附有兩個墊圈 a 。 用於避免漏 • 將進水軟管連接上水龍頭後,打開水 水 。 確保水龍頭的接頭已充分固定 。 龍頭沖洗水管內的異物... -
Page 12: 安裝排水管
安裝排水管 將軟管連接設備 將入水軟管擰上設備後方入水閥 。 檢查排水軟管型號並選擇正確指引 , 方 可連接排水軟管 。 • 請勿將連結熱水供應的軟管帶有一個 入水口的型號。僅連接冷水供應。 用彎頭支架安裝排水軟管 排水軟管高度不得超過地面 120 公分 。 設備中的水不可排出或滴出 。 • 正確固定排水管可防止地板因漏水而 受損。 附註 • 如在水管完成連接後,有水從軟管中 滲出,請重複相同步驟。使用最傳統 的水龍頭供水。如水龍頭為正方形或 過大,請取下導板後將水龍頭插入適 配器。 • 如排水管過長,請勿強行將將排水軟 管壓入排水出口。這會引致不正常噪 音。 • 將排水軟管安裝入水槽時,請用繩、 紮帶或鐵鍊將其固定。 附註 • 排水高度應高於地面 90 至 120 公 分。... -
Page 13: 校平電器
校平電器 檢查水平 調平電器以避免不必要的噪音與振動 。 安裝後檢查電器是否處於水平狀態 。 • 如果在斜推電器的上部頂盤時電器晃 動,請再次調節機腳。 調整和校平機腳 當電器不完全處於水平狀態時 , 旋轉可 調節機腳直到電器不再擺動 。 • 順時針旋轉可調腳以從前到後、 左到 右和角到角降低或逆時針旋轉可調節 機腳。 附註 • 請勿在腳下插入木塊等。 • 木地板或懸浮地板可能會導致過度 振動與不平衡。可能需要加固或支撐 木地板,以停止或減少過多的噪音與 振動。 • 請勿在任何隆起的表面、架子或底座 上安裝電器,因為可能會不穩定而掉 落,造成嚴重的人身傷害與財產損 失。 • 如果電器安裝在不平坦、不牢固或傾 斜的地板上,導致過度振動,則會發 生脫水故障或 UE 錯誤。它必須放在 一個牢固的水平地板上,以避免脫水 故障。... -
Page 14: 操作概述
操作 操作概述 程序結束 。 • 程序完成後 , 將響起一段旋律 。 立 即從電器中取出您的衣物以減少 使用電器 起皺 。 第一次洗滌前 , 請選擇 標準 程序並加入 一半的清潔劑 。 不放入衣物啟動電器 。 附註 • 這將去除製造期間可能殘留在滾筒中 • 自動重新啟動 功能允許程序在斷電 的殘留物與水。 的情況下自行重新啟動。從停止的階 段重啟。 分類並放入衣物 。 • 根據衣物類型 、 髒污程度 、 顏色與 準備衣物... - Page 15 檢查衣物保養標籤 • 在洗衣網袋中洗滌纖幼衣物 (長襪、 帶鋼圈的胸罩) 。 上面可能標有衣物的織物成份以及洗滌 • 拉上拉練、合上鉤子並繫好帶子以確 方法 。 保這些衣物不會勾到其他衣物。 • 預處理污垢與污漬,先溶解清潔劑然 保養標籤上的符號 後浸泡並刷洗污垢與污漬。 符號 洗滌/面料類型 注意 • 正常洗滌 • 請勿清洗或脫水任何標識或已知防水 • 棉、混紡面料 或防潑水的物品,即使該物品上的產 • 簡易 品保養標籤允許機器清洗。不遵守這 • 合成混合面料 些說明可能會引致衣物、電器嚴重損 壞及/或因電器的異常衣物摩擦或震 • 特殊精緻洗滌 動造成財產損失。 • 纖幼衣物 − 防水或防水物品包括床墊 , 床罩 , 雨 •...
-
Page 16: 添加清潔劑 、 柔順劑與漂白劑
添加清潔劑 、 柔順劑與漂白劑 注意 • 使用未稀釋的液體清潔劑,或將稀釋 清潔劑用量 的液體清潔劑倒入滾筒後,長時間未 清洗,可能導致布料損壞、漂白或變 • 應根據材質類型、顏色、髒污程度和 色。 洗滌溫度選擇清潔劑,並應根據清潔 劑製造商的指示使用。 附註 • 洗滌劑過多會引致泡沫過多,因而引 • 不要使清潔劑硬化。 這樣做可能會引 致洗滌不良。 起阻塞、清洗效能變差或產生異味。 • 當使用液體清潔劑時,請遵循清潔劑 • 滿載:按照製造商的建議 製造商的指示。 • 部分負荷:3/4 標準量 • 如果要立即開始洗滌行程,可以直接 將液體清潔劑倒入主清潔劑盒中。也 • 最小負荷:滿載的一半 建議在裝入衣服時加入滾筒中。 • 如果您正在使用 預約 功能或已經選 添加清潔劑... - Page 17 添加衣物柔順劑 附註 • 請勿與洗滌劑或漂白劑混合。 • 用水稀釋衣物柔順劑。未稀釋的衣物 • 切勿將衣物柔順劑直接倒在衣服上。 柔順劑可能會導致斑點看起來像油 漬。 以免造成污漬。 • 在第一次脫水期間,請勿停止洗衣機 • 測量並添加建議量的衣物柔順劑到標 有此符號 ( ) 的隔間中。 以便柔 順 劑 在 適 當 時 候 注 入。 • 選用洗滌功能不適用於衣物柔順劑分 − 遵循製造商的指示 。 配器。 衣物柔順劑會在最終洗清過程中自 − 動注入,並發出提示音。 加入液體漂白劑 如果要進行額外的洗清,則在最後 −...
-
Page 18: 控制面板
控制面板 控制面板功能 a 電源開/關按鈕 • 按此 電源開/關 按鈕可開啟或關閉電器。 • 電器將在洗滌完成後一段時間自動關閉。 b 啟動/暫停按鈕 • 按下 啟動/暫停 按鈕開始或暫停洗衣程序。 • 按下 啟動/暫停 按鈕暫時停止洗衣程序。 附註 • 如果未在一定時間內按下 啟動/暫停 按鈕,電器將會關閉,所有設定將會遺失。 c 程序按鈕 • 根據洗衣類型,可選擇不同程序。 • 燈將亮起指示所選程序。 d 額外選項和功能 • 您可以使用額外選項和功能來自訂程序。 e 行程狀態指示燈 • 行程開始之前,狀態指示燈亮起。 • 在行程中,狀態指示燈閃爍,然後在行程結束時熄滅。... - Page 19 f 顯示屏 • 顯示器會顯示設定、預計剩餘時間、選項以及狀態訊息。啟動電器後,顯示器中的 預設設定將會亮起。 • 18:88 :選擇程式後,將顯示該程式的預設時間。時間可能隨所選選項而改變。 − 如果顯示器出現 -:-- , 在衣物感應偵測出衣物量後將會顯示時間 。 此為正常現 象 。 − 顯示屏的時間僅為估計值 。 幾個外部因素 (衣物量 、 室溫 、 進水溫度等) 會影響實際 時間 。 • i :當選擇 兒童鎖 功能鎖定控制,此圖示亮起。 • z :當按 預約 按紐設定預約時間,此圖示亮起。...
-
Page 20: 洗滌程序
洗滌程序 大件 使用此程序洗滌標示手洗的毯子或床 洗滌程序可針對不同類型衣服提供最佳 罩 。 洗滌效果 。 • 對於羊毛床罩、亞克力毯、混紡毯、羊 • 按下 程序 按鈕以選擇所需程式。 毛毯、填充衣料 (聚酯 101) 和床單, • 選擇洗滌程序後,對應的洗滌程序指 如果上浮可能會造成損壞。建議購買 示燈亮起。 單獨的洗滌網來清洗。 • 分開床罩與一般衣服。因為可能會導 標準 致衣物不平衡,造成洗滌異常。 使用此程序清洗正常衣物量 。 內建傳感 • 如果床罩集中在一邊,脫水可能需要 器會偵測衣物量 , 分別計算洗衣 、 洗清與 更長時間才能平均分散衣物。 脫水設定 。 •... -
Page 21: 額外選項和功能
額外選項和功能 夜間洗 使用此程序可以靜音洗滌 , 尤其是在深夜 您可以在某些程序使用額外選項與功能 與清晨 。 來自訂程序 。 • 此程序的洗滌時間比 標準 程序長。 • 依照所選的程序、選項與功能,在操作 過程中按下 啟動/暫停 按鈕,可以改變 • 為了減少脫水時的噪音,此程序採用慢 額外選項與功能。 速脫水,避免損壞衣物,因此衣物溼度 較標準程序高。 水流 使用此選項選擇洗滌強度 。 預洗+標準 • 有 3 個等級可供選擇,強、中 與 弱。 使用此程序無需手洗即可預處理剛沾上 的污漬 。 提示音 • 對於未及時洗滌可能會發臭的衣服很 有必要。... - Page 22 過水 預約 • 使用此選項更改洗清次數。 使用此功能可以延遲結束時間 。 電器將 自動啟動 , 並在指定的時間間隔後結束 。 • 按下 過水 按鈕更改洗清次數。 • 當選取 過水 選項時, l 圖示亮起。 按下電源開/關按鈕 。 • 如果選擇最大清洗次數,此選項將會 停用。 選取洗滌程序 。 按預約按鈕設定所需的預約時間 。 附註 • 僅部分程序提供此選項。 按下啟動/暫停按鈕 。 脫水 附註 • 此功能是指到程序結束的時間,而非 使用此選項可以更改脫水強度 。 當您按 開始。實際運轉時間可能因水溫、衣...
- Page 23 兒童鎖 使用此功能可停用控制 。 此功能可防止 小童更改程序或操作本設備 。 附註 • 設定此功能後,除 電源開/關 按鈕外, 所有按鈕均會被鎖定。 • 當控制被鎖定時, CL 與剩餘時間會在 洗滌過程中顯示於顯示器,而同時鎖 上兒童鎖。 • 關閉電源並不會重設此功能。您須停 用此功能, 方可進入使用其他選項及 功能。 鎖定控制面板 開啟電源 。 同時按住 提示音 與 過水 按鈕 3 秒 以啟用此功能 。 解鎖控制面板 開啟電源 。 同時按住 提示音 與 過水 按鈕 3 秒 以停用此功能...
- Page 24 手洗 當需要清洗及脫水 、 僅脫水 、 清洗或僅洗滌程序時 , 可以手動設定這些項目 。 清洗及脫水 僅脫水 僅清洗 僅洗滌 t 或 s 按下電源開/關按鈕 。 按下過水按鈕 。 按下脫水按鈕 。 按下過水按鈕 。 按下洗滌按鈕 。 按下 脫水 按鈕直 將自動選擇過水 按下脫水按鈕調 將自動選擇過水 到脫水功能取消 及脫水 。 整脫水時間長度 。 及脫水 。 為止 。 按下...
-
Page 25: 智能系統
依照以下指示使用聲音診斷 。 安裝 LG ThinQ 應用程式 • 啟動 LG ThinQ 應用程式並從選單 選擇 Smart Diagnosis 功能。按照 從智能電話的Google Play商店或Apple LG ThinQ 應用程式提供的聲音診斷 app 商店尋找LG ThinQ 應用程式 。 請 說明。 按照說明下載並安裝 。 按下 電源開/關 電源按鈕開啟電器 。 LG ThinQ 應用程式功能 • 請勿按下任何按鈕 。 請將智能手機的話筒靠近 c 或 d Smart Diagnosis 標識... -
Page 26: 每次洗滌後的清潔
維護 定期清潔電器 警告 • 清潔電器之前,拔掉插頭,避免觸電 滾筒清潔 危險。如果未遵循此警告,可能導致 嚴重傷害、 火災、觸電或死亡。 此功能專門用於清潔電器內部 。 • 切勿使用刺激性化學物質、研磨型清 每月執行一次 (依據需要增加次數) 此功 潔劑或溶劑清潔電器。它們可能損壞 能 , 以清除積聚的清潔劑與其他殘渣 。 拋光面。 從電器中取出任何衣服或物品 。 每次洗滌後的清潔 打開洗滌劑抽屜盒 , 在主洗衣艙中加 入除垢劑 。 需要清潔的部分 緩慢關上分配器抽屜 。 關閉門 。 • 使用後關閉水龍頭,避免軟管爆裂時 造成淹水的風險。 按下電源開/關按鈕 。 •... - Page 27 清潔濾水入口 清潔絨毛過濾器 入口過濾層收集石灰或可能包含在供應 對於高效洗滌效果 , 過濾器非常重要 , 因 給電器的水中的任何微小物體 。 定期清 此要格外小心 。 定期清潔過濾器 。 潔入口過濾層 。 注意 • 如果要將電器放置一段時間 (例如:假 期) ,尤其是在緊鄰處沒有去水位 (水 • 至少在洗滌 2-3 次後,清潔絨毛過濾 溝) 的情況下,請關閉連接至電器的 器。 水龍頭。 • 請勿將過濾器掉在地板上。 • 如果水未進入清潔劑抽屜盒,控制面 • 處理過濾器時,請小心不要讓指甲被 板將出現 IE 錯誤訊息。 過濾器卡住。...
- Page 28 清洗過濾器 。 如何避免電器結冰 關閉水龍頭後 , 從水龍頭拆下冷水進水 口軟管 , 軟管開口朝下排水 。 合上蓋子 , 然後將過濾器的底部插入 洗滌滾筒 。 按下過濾器的頂部 , 直到 聽到喀噠聲 。 結冰處理 出現供水問題後 , 請採取以下措施 。 • 關上水龍頭,利用熱水布解凍水龍頭 與電器進水軟管的兩個接頭。 寒冷天氣下的保養 設備於結冰時無法正常操作 。 確保將設 備安裝在冬天不會結冰的位置 。 • 取下進水軟管,將其浸入 50 - 60 °C 以下的溫水。...
-
Page 29: 疑難排解
疑難排解 在致電尋求服務之前 電器的操作可能導致錯誤和故障 。 下表包含解決錯誤訊息和故障的可能原因和注意 事項 。 你可以自己解決大多數問題 , 無需致電 LG 電子服務中心 , 從而可以節省時間和 金錢 。 下表可以幫助你排除故障 。 錯誤訊息 該電器配有自動故障監測系統 , 以在早期階段檢測和診斷故障問題 。 如果此電器無法 正常運作或不運作 , 在聯絡維修服務之前請檢查以下部分 。 癥狀 可能的原因和解決方案 門未正確關閉 。 機門錯誤 • 完全關上門。如果仍出現錯誤代碼,請致電維修中心。 未正確鎖定機門 。 • 沒有任何東西被抓住在門外,包括運送材料或物品。 機門鎖定錯誤... - Page 30 癥狀 可能的原因和解決方案 諸如硬幣 、 針 、 夾等異物夾在洗滌板與內滾筒之間 。 • 關閉電器,然後按下電源按鈕。按下脫水按鈕,而不選擇 異物錯誤 一個程序來排水及脫水衣物。脫水完成後,取出衣服,然 後找到並清除夾在滾筒縫隙的任何物體。 排水管扭結 、 壓扎或堵塞 。 出水管錯誤 • 清潔並拉直排水管。 排水高於電器底部 1.2 米以上 。 • 調整軟管或重新配置排水管。最大排水高度為 1.2 m。 重新平衡操作不成功 。 • 自動嘗試重新平衡衣物不成功。程序已暫停,可以手動調 不平衡錯誤 整衣物。 衣物量太少 。 • 加入更多物品讓電器平衡衣物。 混合重量較重與較輕的物品 。 •...
- Page 31 癥狀 可能的原因和解決方案 衣物感應傳感器有暇疵 。 衣物感應錯誤 • 如果衣物打結,請手動重新分配衣物。 電機的轉速過低 。 連接器的接觸點故障 。 • 拔下電器插頭,等待 60 秒。重新連接電源,然後重試。 CL 不是錯誤 。 這可防止兒童更改循環或操作電器 。 兒童鎖定錯誤 • 欲停用,請同時按下 提示音 及 過水 按鈕 3 秒鐘。 您可能聽到噪音 癥狀 可能的原因和解決方案 滾筒中有異物 , 例如鑰匙 、 硬幣或安全扣針等 。 咔嗒聲和叮噹聲 • 停止電器,檢查滾筒中是否有異物。如果電器重啟後噪音仍 噪音...
- Page 32 操作 癥狀 可能的原因和解決方案 水龍頭或電器端的進水軟管接頭鬆動 。 漏水 • 檢查軟管是否有洩漏、裂縫及破裂。 • 擰緊軟管連接。 家用排水管堵塞 。 • 電器排水非常快。在排水期間檢查排水軟管是否有水回流。 如看到水從排水管回流,檢查排水軟管是否正確安裝,並檢 查排水口是否有限制。聯絡水管工修理排水管。 排水軟管從排水管出來 , 或者沒有插入足夠的空間 。 • 將排水軟管固定於進水軟管或豎管,以避免在排水時跑出排 水口。對於較小的排水軟管,儘可能將排水軟管插入排水法 蘭。對於較大的排水管,將排水軟管插入法蘭 2.5 - 5 公分。 諸如枕頭或毯子的大件物品位於鼓的頂部之上 。 • 停止電器並檢查物品。確保物品不在滾筒頂部邊緣上方。...
- Page 33 癥狀 可能的原因和解決方案 控制面板由於不活動而斷電 。 電器將無法運轉 。 • 這是正常現象。按下 電源開/關 按鈕開啟電器。 電器已拔下插頭 。 • 確保電源線牢固插入工作插座。 關閉供水 。 • 完全打開供水水龍頭。 控制器沒有正確設定 。 • 確保應正確設定程序。關上門,然後按下 啟動/暫停 按鈕。 門已開啟 。 • 完全關上門,確保沒有任何東西被門夾住。 斷路器/保險絲斷路/斷路 。 • 檢查房屋斷路器/保險絲。更換保險絲或重置斷路器。電器 應位於專用分支電路上。一旦電源恢復,電器將恢復停止的 循環。 控制需要重設 。 • 按下 電源開/關 按鈕,然後重新選擇所需的程序並按下 啟動/暫停...
- Page 34 癥狀 可能的原因和解決方案 過濾器堵塞 。 電器注水不正確 。 • 確保注水閥上的進水口過濾器沒有堵塞。 進水軟管可能打結 。 • 檢查進水軟管是否打結或堵塞。 供水不足 。 • 確保熱水與冷水龍頭都一路打開。 冷熱進水軟管相反 。 • 檢查進水軟管連接。 排水軟管打結 。 • 確保排水軟管沒有扭結。 電器將無法排水 。 排水管位於地面上方 1.2 公尺以上 。 • 確保排水軟管不高於電器底部 1.2 公尺。 使用過多的清潔劑 。 不完全或不分配洗 滌劑 • 遵循清潔劑製造商提供的指導。 衣物量太少...
- Page 35 癥狀 原因 漂白劑或軟化劑過早分配 。 • 分配器隔室過滿,引致漂白劑或軟化劑立即分配。始終測量 染色 漂白劑以防止過量填充。 • 輕輕關上分配器抽屜盒。 將漂白劑或柔順劑直接添加到滾筒的衣物中 。 • 始終使用分配器確保在循環中的正確時間正確分配洗衣產 品。 衣服沒有正確排序 。 • 始終將深色與淺色和白色衣物分開洗滌,以防止變色。 • 切勿一同清洗輕微污染的物品和嚴重污染的物品。 電器未及時取出衣物 。 起皺 • 循環完成後,請務必從電器中取出衣物。 電器已超負荷 。 • 電器可以滿負荷,但滾筒不應緊緊包裹衣物。應輕輕關閉電 器的門。 冷熱水進水軟管相反 。 • 熱水洗清可能造成衣物的皺褶。請檢查進水軟管的連接狀 態。 滾筒內未正確清洗 。 電器中發霉或有 霉味 •...
-
Page 36: 無限保固
• 由於事故、害蟲、雷電、風、 火、 水災或天災造成的產品損失。 • 由未授權修改或改正造成的損失或故障,或被用於其他用途,或組件未合適安裝造 成的滲水。 • 由於不正確的電氣線路、電壓或管道工程規程、商業或工業使用、或使用附件、部 件或未被 LG 認可的消耗清潔產品造成的損失或故障。 • 由於運輸和搬運造成的損傷,包括刮痕、凹痕、缺損處,和/或完成產品的其它損 傷,除非損傷是由於材料缺陷或工匠技藝造成的和在一個 (1) 星期內運輸報告的。 • 顯示的損壞或丟失衣物、已打開的箱子、打折產品或整修品。 • 產品的原始編號被移除、改變或不能清晰辨認的。 型號和編號和原始零售銷售收 據,是保養驗證所需的。 • 使用成本和其它使用費用的增加。 • 若您的產品不是用於正常和日常的家用 (例如,商業用途、在辦公室和娛樂設施) 或與產品使用者手冊所述相反操作產品造成的修理。 • 將產品從家裡移動出來進行修理的費用。 • 產品的移動和重新安裝,若產品安裝在不可接近的位置或未按照包括 LG 使用者和 安裝指引在內的安裝指引上發佈的內容安裝。 • 由於錯誤使用、濫用、不合適安裝、修理或維護造成的損壞。 不合適修理包括使用 不被 LG 認可或規定的部件。... - Page 37 Before beginning installation, read these instructions carefully. This will simplify installation and ensure that the product is installed correctly and safely. Leave these instructions near the product after installation for future reference. WT-13SNSV www.lg.com Copyright © 2020 LG Electronics Inc. All Rights Reserved...
- Page 39 Adding Detergents, Softeners and Bleaches ..........18 Control Panel ....................20 Washing Programme ..................22 Extra Options and Functions ................23 SMART FUNCTIONS ..............27 LG ThinQ Application ..................27 Smart Diagnosis ....................27 MAINTENANCE ................28 Cleaning after Every Wash ................28 Cleaning the Appliance Periodically ..............28 TROUBLESHOOTING ..............31 Before Calling for Service ................31...
-
Page 40: Safety Instructions
SAFETY INSTRUCTIONS The following safety guidelines are intended to prevent unforeseen risks or damage from unsafe or incorrect operation of the appliance. The guidelines are separated into ‘WARNING’ and ‘CAUTION’ as described below. This symbol is displayed to indicate matters and operations that can cause risk. - Page 41 • If the power cord is damaged, it must be replaced by the manufacturer, its service agent or similarly qualified persons in order to avoid a hazard. • Use a new hose or hose-set supplied with the appliance. Reusing old hoses can cause a water leak and subsequent property damage.
- Page 42 • Do not modify the power plug provided with the appliance. If it does not fit the power outlet, have a proper outlet installed by a qualified electrician. • This appliance must be grounded. In the event of malfunction or breakdown, grounding will reduce the risk of electric shock by providing a path of least resistance for electric current.
- Page 43 • Make sure that drainage is working properly. If water is not drained properly, your floor may get flooded. • If, during spinning, opening the door does not stop the drum within about 10 seconds, immediately discontinue operating the appliance and contact your dealer or LG Electronics service centre.
- Page 44 • Never unplug the appliance by pulling on the power cable. Always grip the power plug firmly and pull straight out from the socket outlet. • Only qualified service personnel from LG Electronics service centre should disassemble, repair, or modify the appliance. Contact an LG Electronics customer information centre if you move and install the appliance in a different location.
- Page 45 Disposal • Before discarding an old appliance, unplug it. Cut off the cable directly behind the appliance to prevent misuse. • Dispose of all packaging materials (such as plastic bags and styrofoam) away from children. The packaging materials can cause suffocation.
-
Page 46: Installation
INSTALLATION Parts and Specifications NOTE • Appearance and specifications may change without notice to improve the quality of the appliance. Front View * This feature is only available on some models. Door Tempered Glass Detergent Dispenser Drawer Fabric Softener Dispenser Bleach Dispenser Drum Levelling Feet... - Page 47 Cold Water Inlet Hose Drain Hose Tie strap* Anti-rat cover Screw for Anti-rat cover Speci cations Model WT-13SNSV Power Supply 220 V~, 50 Hz Size (Width x Depth x Height) 590 mm x 606 mm x 960 mm Product Weight 39 kg...
-
Page 48: Installation Place Requirements
WARNING • Repairs to the appliance must only be carried out by qualified personnel. Repairs carried out by inexperienced persons may cause injury or serious malfunctioning. Contact the LG Electronics service centre. 10 cm 2 cm 2 cm •... -
Page 49: Connecting The Water Inlet Hose
Connecting the Water Inlet Connecting the Hose to the Water Hose Before connecting the water inlet hose to the water Connecting Screw-Type Hose to Tap with tap, check the hose fitting type and then choose Thread the correct instruction. Screw the hose connector onto the water supply tap. -
Page 50: Installing The Drain Hose
Installing the Drain Hose Connecting the Hose to the Appliance Before connecting the drain hose, check your drain hose model and choose the correct instruction. Screw the water inlet hose to the water inlet valve on the back of the appliance. Installing the Drain Hose with the •... -
Page 51: Levelling The Appliance
Assembling the Anti-Rat Levelling the Appliance Cover Checking the Level Insert the Anti-Rat cover to the assembling hole from the front of the washing machine. Levelling the appliance prevents unnecessary noise and vibration. Check whether the appliance is perfectly level after installation. •... -
Page 52: Operation
OPERATION Operation Overview NOTE • The Auto Restart function allows the cycle to restart by itself in case of power failure. It Using the Appliance resumes from the stage where it stopped. Before the first wash, select the Normal programme and add a half amount of detergent. Preparing Laundry Start the appliance without laundry. - Page 53 Checking the Fabric Care Label • Wash delicates (stockings, underwired bras) in a wash net. This will tell you about the fabric content of your • Close zippers, hooks and strings to make sure clothes and how it should be washed. that these items do not snag other clothes.
-
Page 54: Adding Detergents, Softeners And Bleaches
Adding Detergents, CAUTION Softeners and Bleaches • Using liquid detergent without diluting, or leaving laundry for a long time after pouring diluted liquid detergent into the drum might Detergent Dosage cause the clothes to be damaged, bleached, discoloured. • Detergent should be selected according to fabric type, colour, soil level and washing temperature and should be used according to NOTE... - Page 55 Adding Fabric Softener Adding Liquid Bleaches • Dilute fabric softener with water. Undiluted • Before starting the appliance, pour the fabric softener may result in spots that look like measured amount of bleach directly into oil stain. the bleach dispenser a. Avoid splashing or overfilling.
-
Page 56: Control Panel
Control Panel Control Panel Features POWER Button • Press the POWER button to turn on or off the appliance. • The appliance automatically turns off once a certain time has passed after the wash has completed. START/PAUSE Button • Press the START/PAUSE button to start or pause a wash cycle. •... - Page 57 Display • The display shows the settings, remaining estimated time, options, and status messages. When the appliance is turned on, the default settings in the display will light up. 18:88 : When a programme is selected, the default time for that programme is displayed. The time •...
-
Page 58: Washing Programme
Washing Programme Duvet Use this programme to wash a blanket or Wash programmes are designed for the best wash bedclothes that have the hand wash sign on the performance for different types of clothes. care label. • Press the Program button to select the •... -
Page 59: Extra Options And Functions
Extra Options and Silent Functions Use this programme to wash clothes quietly especially during late night and dawn. You can use the extra options and functions on • This programme has a longer washing time some programmes to customize the cycle. than the Normal programme. - Page 60 Rinse Time Delay • Use this option to change the number of rinses. Use this function to delay ending time. The appliance will start automatically and finish after a • Press Rinse button to change the number of specified time interval. rinses.
- Page 61 Child Lock Use this function to disable the controls. This function can prevent children from changing programmes or operating this appliance. NOTE • Once this function is set, all buttons are locked except the POWER button. • When the controls are locked, and the remaining time are alternatively shown on the display during the wash while the child lock is...
- Page 62 Manual Washing When you need a rinse and spin, spin only, rinse only or wash only cycle, these can be set manually. Rinse and Spin Spin only Rinse only Wash only Press the POWER button. Press the Rinse Press the Rinse Press the Wash Press the Spin button.
-
Page 63: Smart Functions
Follow the instructions below to use the audible diagnosis method. Application • Launch the LG ThinQ application and select Search for the LG ThinQ application from the the Smart Diagnosis feature in the menu. Google Play Store or Apple App Store on a Follow the instructions for audible diagnosis smartphone. -
Page 64: Maintenance
MAINTENANCE Cleaning the Appliance WARNING Periodically • Unplug the appliance before cleaning to avoid the risk of electric shock. Failure to follow this warning may result in serious injury, fire, Tub Clean electric shock, or death. This function is a special to help to clean the inside •... - Page 65 Cleaning the Water Inlet Filter Cleaning the Lint Filter Water inlet filter collects lime or any small objects The filter is an important part for an efficient that may be in water supplied to the appliance. washing performance result, so take a special Clean the water inlet filter regularly.
- Page 66 How to Keep the Appliance from Freezing Wash the filter. After closing the tap, disconnect the cold water inlet hose from the tap, and remove water while keeping the hose facing downwards. Close the lid and then insert the lower part of the filter into the wash drum.
-
Page 67: Troubleshooting
You can remedy most of the problems by yourself, consequently save time and money, since you do not need to call LG Electronics service centre. The following table should assist you by troubleshooting. - Page 68 Symptoms Possible Cause & Solution Foreign objects, such as coins, pins, clips, etc., are caught between the pulsator and the inner drum. • Turn off the appliance and then press the POWER button. Press the FOREIGN OBJECTS Spin button without selecting a cycle to drain and spin the laundry. When ERROR the spin is complete, remove the clothes and then find and remove any objects caught in the pulsator gap.
- Page 69 Symptoms Possible Cause & Solution Sensor for clothes-sensing is defective. CLOTHES SENSING • Manually redistribute the laundry if laundry have become tangled. ERROR Motor’s revolution is too low. Contact-point of Connector is defective. • Unplug the appliance and wait 60 seconds. Reconnect power and try again.
- Page 70 Operation Symptoms Possible Cause & Solution Water inlet hose connection is loose at tap or appliance. Water leaking • Check hoses for leaks, cracks and splits. • Tighten hose connections. House drain pipes are clogged. • The appliance pumps out water very rapidly. Check for water backing up out of the drain pipe during drain.
- Page 71 Symptoms Possible Cause & Solution Control panel has powered off due to inactivity. Appliance will not operate. • This is normal. Press the POWER button to turn on the appliance. Appliance is unplugged. • Make sure that the cord is plugged securely into a working outlet. Water supply is turned off.
- Page 72 Symptoms Possible Cause & Solution Filter is clogged. Appliance is not filling properly. • Make sure the inlet filters on the fill valves are not clogged. Water inlet hose(s) may be kinked. • Check that inlet hose(s) are not kinked or clogged. Insufficient water supply.
- Page 73 Symptoms Reason Bleach or softener dispensed too soon. • Dispenser compartment is overfilled causing bleach or softener to Staining dispense immediately. ALWAYS measure bleach to prevent overfilling. • Close the dispenser drawer gently. Bleach or softener was added directly to the laundry in the drum. •...
-
Page 74: No Limited Warranty
• Costs associated with removal of your Product from your home for repairs. • The removal and reinstallation of the Product if it is installed in an inaccessible location or is not installed in accordance with published installation instructions, including LG’s owner’s and installation manuals. - Page 75 Memo...
Need help?
Do you have a question about the WT-13SNSV and is the answer not in the manual?
Questions and answers