Table of Contents
Advertisement
OWNER'S MANUAL
FRIDGE & FREEZER
Before beginning installation, read these instructions
carefully. This will simplify installation and ensure that the
product is installed correctly and safely. Leave these
instructions near the product after installation for future
reference.
ENGLISH
MFL71798701
Rev.00_050421
Copyright © 2021 LG Electronics Inc. All Rights Reserved.
www.lg.com
Advertisement
Table of Contents

Related Manuals for LG GSXV90MCDE


Summary of Contents for LG GSXV90MCDE
- Page 1 Before beginning installation, read these instructions carefully. This will simplify installation and ensure that the product is installed correctly and safely. Leave these instructions near the product after installation for future reference. ENGLISH www.lg.com MFL71798701 Rev.00_050421 Copyright © 2021 LG Electronics Inc. All Rights Reserved.
-
Page 2: Table Of Contents
Before Use ......................20 Product Features....................23 Control Panel ....................27 Ice and Water Dispenser.................29 Automatic Icemaker ..................31 InstaView......................34 Door in Door .....................35 Drawer.......................35 Shelf ........................36 Door Basket ......................36 SMART FUNCTIONS LG ThinQ Application ..................37 Smart Diagnosis ....................38 MAINTENANCE Cleaning ......................40 Water Filter .......................41... - Page 3 Air Filter ......................42 TROUBLESHOOTING Before Calling for Service................44...
-
Page 4: Safety Instructions
SAFETY INSTRUCTIONS SAFETY INSTRUCTIONS READ ALL INSTRUCTIONS BEFORE USE The following safety guidelines are intended to prevent unforeseen risks or damage from unsafe or incorrect operation of the appliance. The guidelines are separated into ‘WARNING’ and ‘CAUTION’ as described below. Safety Messages This symbol is displayed to indicate matters and operations that can cause risk. - Page 5 SAFETY INSTRUCTIONS appliance. Cleaning and user maintenance shall not be made by children without supervision. • This appliance is not intended for use by persons (including children) with reduced physical, sensory or mental capabilities, or lack of experience and knowledge, unless they have been given supervision or instruction concerning use of the appliance by a person responsible for their safety.
- Page 6 • Do not clean the appliance with brushes, cloths or sponges with rough surfaces or which are made of metallic material. • Only qualified service personnel from LG Electronics service centre should disassemble, repair, or modify the appliance. Contact an LG Electronics customer information centre if you move and install the appliance in a different location.
- Page 7 SAFETY INSTRUCTIONS Risk of Fire and Flammable Materials • If a leak is detected, avoid any naked flames or potential sources of ignition and air the room in which the appliance is standing for several minutes. In order to avoid the creation of a flammable gas air mixture if a leak in the refrigerating circuit occurs, the size of the room in which the appliance is used should correspond to the amount of refrigerant used.
- Page 8 • Ensure that the outlet socket is properly grounded, and that the earth pin on the power cord is not damaged or removed from the power plug. For more details on grounding, inquire at an LG Electronics customer information centre.
- Page 9 • Do not bend the power cable excessively or place a heavy object on it. • Immediately unplug the power plug and contact an LG Electronics customer information centre if you detect a strange sound, odour, or smoke coming from the appliance.
-
Page 10: Caution
SAFETY INSTRUCTIONS Disposal • When discarding the appliance, remove the door gasket while leaving the shelves and baskets in place and keep children away from the appliance. CAUTION CAUTION To reduce the risk of minor injury to persons, malfunction, or damage to the product or property when using this product, follow basic precautions, including the following: Installation... - Page 11 They may shatter if exposed to sudden temperature changes. • Do not insert the shelves upside down. The shelves may fall. • To remove frost from the appliance, contact an LG Electronics customer information centre. • Dispose of the ice inside the ice bin in the freezer compartment...
-
Page 12: Caring For The Environment
• You can take your appliance either to the shop where you purchased the product, or contact your local government waste office for details of your nearest authorised WEEE collection point. For the most up to date information for your country please see www.lg.com/global/recycling. -
Page 13: Installation Before Installation
INSTALLATION INSTALLATION Before Installation NOTE Dimensions and Clearances • Refer to the label inside the appliance to determine which type your appliance is. Too small of a distance from adjacent items may result in the degradation of freezing capability and increased electricity costs. -
Page 14: Removing The Fridge And Freezer Door
INSTALLATION Accessories collet to detach the water supply line. Unscrew the cover *1 This feature is only available on some models. Spanner A Spanner B Water Filter Water Tube Remove the screw from the hinge cover at the top of the appliance. Lift the hook, located at Tube Connector and Clip the bottom of the front side of the cover, with a flat-head screwdriver. - Page 15 INSTALLATION Removing the Fridge Door Rotate the hinge lever counterclockwise. Lift the top hinge free of the hinge lever latch Disconnect all wire harnesses CAUTION NOTE • When lifting the hinge free of the latch, be • The number of wire harnesses may vary careful that the door does not fall forward.
-
Page 16: Connecting The Water Line
INSTALLATION Not straight Damaged Stretched CAUTION • Place the door on a non-scratching surface with the inner side facing up. Connecting the Water Line This section is applied only to models with plumbed water or ice dispenser. Refitting the Fridge and Freezer Door Water Supply Requirements Refit the doors in the reverse sequence of their... -
Page 17: Levelling And Door Alignment
INSTALLATION Connecting Water to the NOTE Appliance Only For Germany Unscrew the metal threaded collar nut at the • Connect your appliance only to a water tap with back of the appliance and place it over one end a safety device (according to EN 1717) to avoid of the water tube. - Page 18 INSTALLATION • Some timber flooring may cause levelling NOTE difficulties if it flexes excessively. - Spanner Type A Door Alignment for Freezer and Fridge Door If the door of the appliance is not level, adjust the difference in the height of appliance door. - Spanner Type B Levelling the Appliance The appliance has two front levelling legs.
-
Page 19: Turning On The Power
INSTALLATION Use the spanner to fasten the keeper nut by Pull the power plug out, insert and fix it into the turning it to the right. power plug hook at the rear or on top of the appliance. Tape parts such as shelves and the door handle to prevent from falling off while moving the appliance. -
Page 20: Operation Before Use
NOTE • Contact the LG Electronics customer information centre if the alarm sound continues even after Suggestion for Energy Saving closing all doors. • For the most efficient use of energy, make sure that door bins, drawers and shelves are assembled properly. - Page 21 OPERATION • Note that a temperature rise after defrosting has temperature lower than the required a permissible range in the appliance temperature for the food to be stored correctly. specifications. If you wish to minimise the impact • If there are chill compartments in the appliance, on the food storage due to a temperature rise, do not store vegetables and fruits with higher seal or wrap the stored food in several layers.
- Page 22 OPERATION Two Star Compartment • Two star ( ) basket or drawer can be used to store ice and food from -12 °C to -18 °C for short periods. • Two star frozen food compartments are suitable for storing pre-frozen food, storing or making icecream and making ice cubes.
-
Page 23: Product Features
OPERATION Product Features The appearance or components of the appliance may differ from model to model. Exterior *1 This feature is only available on some models. Door in Door This is a convenient storage area for frequently-used items that require easy access. Door in Door Lever Opens Door-in-Door. - Page 24 OPERATION Interior *1 This feature is only available on some models. Door in Door Model: InstaView Door in Door Model: LED Lamp The LED lamps inside the appliance light up when you open the door. Temperature Sensor...
- Page 25 OPERATION This sensor senses the temperature of the fridge compartment. • Maintain the distance between the sensor and food to accurately sense the temperature. Automatic Icemaker This is where ice is automatically produced and stored. Freezer Shelf Stores frozen food such as meat, fish, and ice cream. •...
- Page 26 OPERATION CAUTION • Do not store any items at the front of the bottom shelf. The items may fall and cause an injury or appliance damage. Craft Icemaker This is where craft ice is automatically produced and stored.
-
Page 27: Control Panel
OPERATION Control Panel The actual control panel may differ from model to model. Control Panel and Functions *1 This feature is only available on some models. Control Panel Dispenser Control Panel Fridge Press this button repeatedly to select a desired temperature between 1 °C and 7 °C. •... - Page 28 Wi-Fi This button allows the appliance to connect to a home Wi-Fi network. Refer to Smart Functions for information on the initial setup of the LG ThinQ application. Express Cool This function can quickly cool a large amount of foods such as vegetable, fruit and so on.
-
Page 29: Ice And Water Dispenser
OPERATION • To change the Craft Ice mode: Press the Craft Ice button and the current mode appears. Press the Craft Ice button repeatedly to select a desired Craft Ice mode. After 5 seconds of idle time, the last mode set will be saved, and the display will return to normal. Water &... - Page 30 OPERATION Using the Ice and Water Cleaning the Dispenser Tray Wipe the entire area with a damp cloth. The Dispenser dispenser tray may become wet easily due to spilled ice or water. Press the dispenser selection button , and then the LED above the icon that you want illuminates.
-
Page 31: Automatic Icemaker
OPERATION Fill with bottle filtered or clean filtered water up NOTE to the reference line indicated inside the water dispenser tank. (Total capacity: 4 ℓ) • Before using the water dispenser tank after installing the appliance, it should be washed before filling it with water. - Page 32 48 hours after the appliance is tank and the water supply for a possible source. initially installed. If the problem continues, contact the LG • Throw away the first few batches of ice after Electronics customer information centre. Do not installation.
- Page 33 OPERATION Turn off the automatic icemaker. Press and NOTE hold the Ice On/Off button on the control panel for 3 seconds. • The icemaker begins producing ice approximately 48 hours after the appliance is initially installed. The first batches of ice may not Hold and remove the cover of the automatic be round and clear.
-
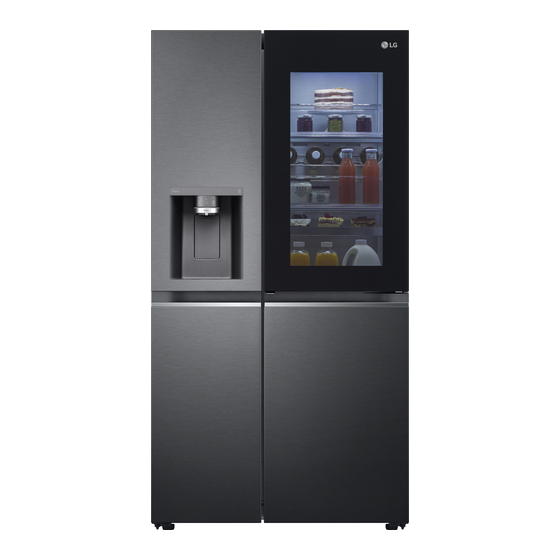
Page 34: Instaview
OPERATION Turning the Icemaker On/Off beverages and snacks, without opening the fridge door. To turn the automatic icemaker On/Off, press and hold the Ice On/Off button on the control panel for three seconds. Normal Sounds You May Hear • Keeping the power turned on to the icemaker before the water line is connected can damage the icemaker. -
Page 35: Door In Door
OPERATION Door in Door • If moved to the right side, the air guide will be closed and will maintain any humidity that is currently in the crisper drawer. This feature is only available on some models. Using the Door in Door Pull the lever at the bottom of the door upwards until the door in door opens. -
Page 36: Shelf
OPERATION Shelf Door Basket Removing/Refitting the Door CAUTION Basket • Glass shelves are heavy. Use special care when removing them. Hold both edges of the basket and remove it by • Do not clean glass shelves with warm water lifting it upward. while they are cold. -
Page 37: Smart Functions
Internet service provider or refer to your appliance improvement purposes without notice wireless router manual. to users. • LG ThinQ is not responsible for any network • Functions may vary by model. connection problems or any faults, malfunctions, or errors caused by network connection. -
Page 38: Smart Diagnosis
Installing the LG ThinQ LG Electronics will also provide open source code to Application you on CD-ROM for a charge covering the cost of performing such distribution (such as the cost of... - Page 39 LG ThinQ application. • Launch the LG ThinQ application and select the Smart Diagnosis feature in the menu. Follow the instructions provided in the LG ThinQ application.
-
Page 40: Maintenance Cleaning
MAINTENANCE MAINTENANCE Cleaning Cleaning the Interior • When removing a shelf or drawer from inside General Cleaning Tips the appliance, remove all stored foods from the shelf or drawer to prevent injury or damage to • Performing manual defrosting, maintenance or the appliance. -
Page 41: Water Filter
- Use replacement cartridge: ADQ736939** CAUTION - Visit your local dealer or distributor or contact the LG Electronics Customer Information • Do not install if water pressure exceeds 827 kPa. Centre. For further assistance, visit our If your water pressure exceeds 827 kPa, you website at lg.com... - Page 42 Push fit connector type CAUTION Remove the screw cap. • Failure to replace filters when required or using non LG authorised water filters can cause the filter cartridge to leak and result in property damage. NOTE • Application Guidelines/Water Supply Pull the pipe out from the water fitler.
- Page 43 MAINTENANCE Pull out the upper fridge drawer. Unscrew the screw at the air filter. Press on the hooks at the air filter and then take it out. Dry the air filter by using a hair dryer or by leaving it in the sunlight. •...
- Page 44 • Press I on the automatic icemaker switch or set ON for the automatic icemaker button on the control panel. (For more details on how to use, visit LG Electronics website or use your smart device.) Is the temperature of the freezer compartment set too high? •...
- Page 45 TROUBLESHOOTING Symptoms Possible Cause & Solution Ice is not dispensed. Unable to hear the sound of ice coming out? • In the control panel, select the modes for cubed ice and crushed ice alternately to dispense the ice. Is the ice path blocked? (You can check the ice passage by separating the ice bin.) •...
- Page 46 TROUBLESHOOTING Cooling Symptoms Possible Cause & Solution There is no Is there a power interruption? refrigeration or • Check the power of other appliances. freezing. Check the power of other appliances. • Plug the power plug in the outlet properly. A fuse in your home may be blown or the circuit breaker tripped.
- Page 47 TROUBLESHOOTING Condensation & Frost Symptoms Possible Cause & Solution There is condensation Did you store hot food without cooling it first? inside the appliance or • Cool the hot food first before putting it inside the fridge or freezer. on the bottom of the vegetable drawer Did you leave the appliance door open? cover.
- Page 48 The inside lamp in the Lamp failure appliance does not • Close the door and re-open. If the lamp does not turn on, please contact turn on. the LG Electronics customer information centre. Do not attempt removal of the lamp.
- Page 49 TROUBLESHOOTING Noises Symptoms Possible Cause & Solution The appliance is noisy Is the appliance installed on a weak floor or improperly levelled? and generates • Install the appliance on a solid and flat area. abnormal sounds. Does the rear of the appliance touch the wall? •...
- Page 50 • Spare parts referenced in Regulation EU 2019/2019 are available for 7 years (only door gaskets are available for 10 years). • To purchase spare parts, contact an LG Electronics customer information centre or our website at www.lg.com.
- Page 51 TROUBLESHOOTING NOTE • Regulation EU 2019/2019, valid from 1st March 2021, is related to the Energy Efficiency classes by Regulation EU 2019/2016. • For more information about the energy efficiency of the appliance, visit https://ec.europa.eu and search using the model name (valid from 1st March 2021). •...
- Page 52 Memo...
Need help?
Do you have a question about the GSXV90MCDE and is the answer not in the manual?
Questions and answers