
Subscribe to Our Youtube Channel
Related Manuals for Servonaut HS16WA3D


Summary of Contents for Servonaut HS16WA3D
- Page 1 User Manual Radio Zwo4 HS16 2,4 GHz Frequency Band • 16 Channels • Softkeys • Maximum Compatibility...
- Page 3 Please read all chapters attentively and information for you. keep the manual to consult at a later time. We wish you joy with your new HS16 your Servonaut Team Helpful tips are indicated with this symbol. HS16 Software Version 2.3 [..] Softkeys...
-
Page 4: Table Of Contents
10.7 Menu Control Info ......................31 10.8 Menu Servo Servo channels, Channel type ..............32 10.9 Menu Channel Info ......................37 11. Servonaut MultiBus........................38 12. Instructions for the Pistenking Kingpad .................39 13. Instructions for the Tamiya MFC-01 ..................40 14. Instructions for Robbe Superlichtset ..................41... - Page 5 15. Instructions for the ScaleART Truck Light Board..............42 16. Instructions for the Wedico MF2 ....................43 17. Instructions for using Multiswitch Decoder ................44 18. Tips for Mounting the Receiver ....................45 19. Tips for Mounting ESCs and Light Sets .................46 20. Tips & Tricks ..........................47 21.
-
Page 6: Specifications Hs16
Specifications HS16 Included • Radio incl. battery 3 levels 4 each / each 6 with Stick control channels • Charging cable 3D joysticks • SD Card Keybord control channels 3 levels 6 each • Instruction manual Usable receiver channels • DisplayCARD cable without multiswitch Usable channels with multiswitch decoder 14 + 2 x 8... -
Page 7: Safety Instructions
Safety instructions • The Zwo4 radio ist not licensed for flying models. • Only use the radio for controlling unmanned vehicles and if no living thing is in danger. • If you are making adjustments always place the model so it can’t drive acci- dentally or damage the servos. -
Page 8: Tips: The Difference To Model Flying
Each control can operate up to four because one control often has two functions joystick. The Servonaut HS16 makes it servo channels - one servo channel can be e.g. horn and starter. - Page 9 Mode (Control assignments) With the Zwo4 radio you can choose freely which function is assigned to which control. For a quick change use the settings under [Menu] > [Swap control]. It even allows you to switch the function of a joystick with that of a softkey pair.
-
Page 10: The Radio
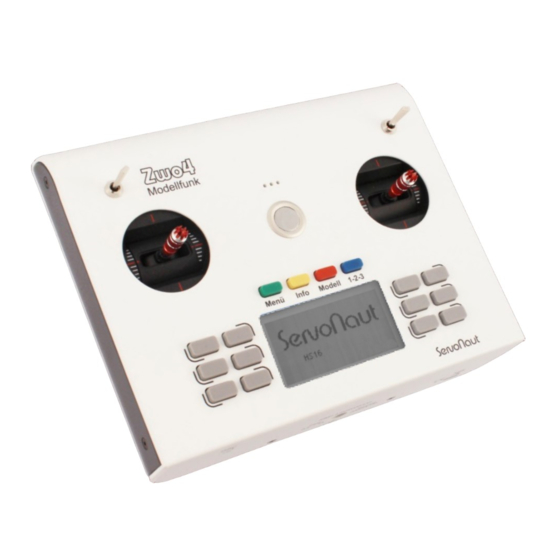
2. The Radio Level Switches Joysticks Loudspeaker On/Off Menu Buttons Charging Connector Softkey Pairs Display shows the assigned function DSC and DisplayCARD Connector Colored Menu Buttons Via the DSC connector a receiver and up to two servos Green button: Red button: can be connected for testing. -
Page 11: Quick Start: The First Steps
3. Quick Start: The First Steps Charging the battery New model Set up special functions Your Zwo4 radio has a NiMH battery with 4 Go to the model menu with If you want to set special functions for the cells and 4,8 V. There are two ways to [Menu] >... -
Page 12: Enter Names
4. Enter Names If there are many controls and channels you Menu Buttons lose track easily. Therefore with the Zwo4 [OK] Green radio you can name not only the servo chan- Back to the superordinate menu - your nels but each control individually. Because input will be saved one control often has two functions e.g. - Page 13 5. Telemetry Show data, adjust alarms Your Servonaut Zwo4 receiver measures Shortcut to Control info / Channel info the BEC respectively receiver supply In the model info menu you can directly voltage and also the driving battery voltage. switch to the control info menu by pressing...
- Page 14 6. Level Switches Two functions for softkeys and joysticks You can assign three functions to all Typical applications: softkey pairs and joysticks - switchable with the level switches. One control • More than 6 special functions: Assign element can have function on level 1 and the most used functions to the softkey additional on level 2 and 3.
- Page 15 7. Mixer Functions One control for several servos The Zwo4 radio offers a universal and clear Typical applications: For the steering control left/right also concept: Each control element choose the control type [Normal]. The • Mixer for controlling the rpm of a control up to four servo channels - one 1.
- Page 16 for rear steering. Adjust [Rate right] and [Rate left] for each servo. • Fast Trim: If you often need trimming for a function you can use a control for it. Choose the control type [Slider <--->]. Assign the mixer output 1 of this control to the servo channel you want to use and lower the efficiency rate for the servo channel.
- Page 17 [Reverse] if necessary. sary even if the light set doesn’t use one. the radio. With the Servonaut HS16 there is • To assign a channel to the control go to This doesn’t affect the function.
- Page 18 • Press [Change] and choose the receiver Setting the channel assignment channel connected to the mini multi- The light set templates use preset servo switch or mini light set. channels. If you want the light set to use • In the menu [Type] choose the control other servo channels you can change it with type [Impuls] on the second page.
-
Page 19: Model Quick Select
9. Model Quick Select With the Zwo4 radio you can switch between up to four ready to start models. Start the Quick Select Menu with the red menu button. The active model stops. The radio shows all available models that are connected. -
Page 20: Menu Receiver Binding
10. Main Menu These submenus are part of the main menu: Menu Buttons • Menu Receiver [OK] Green Bind, Telemetry, BEC Threshold, Back to the higher-level menu. Battery Threshold, Battery type [1v2] Blue To the next page. • Menu Radio Basic settings •... - Page 21 With the servo swap you can swap two Activates the DisplayCARD Mode. In this connections at the receiver. All functions mode you can program Servonaut modules and adjustments for these channels are that are connected with your HS16 via the swapped as well.
- Page 22 10.1 Menu Model Managing Models Green Button [Menu] > [Model] Template F14 - Channel assignment joysticks In this menu you can create new models, Left Right Menu buttons switch between them or delete them again. If you start the menu the active model stops. [OK] Green Back to the higher-level menu.
- Page 23 [OK] Green Back to the higher-level menu. [BEC threshold] The Servonaut Zwo4 receivers monitor the [Reset] Red supply voltage of the servos. If the Deletes all settings on this page and voltage falls below the preset value there is restores the factory settings.
- Page 24 Instructions for using Multiswitch Decoder [Pulsetrim] Allows the fine tuning of the impulse length. This adjustment is only an emergency option - contact the Servonaut Team via email at sender@servonaut.de. [Zero position] Allows the fine tuning of the impulse length.
- Page 25 10.4 Menu Radio Basic settings Green button [Menu] > [Radio] Softkeys Here you find all basic settings for the [Contrast] [Radio name] radio. The HS16 does not have mode Adjust the display contrast so you can easily Give your radio a name e.g. your first name. settings as known from radios for flying.
- Page 26 10.5 Menu Trim Trim the joysticks Green button [Menu] > [Trim] joystick vertical Trim the joysticks middle position by pressing the softkeys. Press the green axis of rotation 3D sticks button to get back to the main menu. (no function with standard joysticks) The trim settings are saved for each model number shows the active level individually.
- Page 27 10.6 Menu Control Control type, Mixer, Control assignment Green button [Menu] > [Control] Menu buttons [Type] With the type you set how the control works The two joysticks and the 2 x 3 softkey [OK] Green and reacts. pairs left and right of the display are the Back to the superordinate menu.
- Page 28 Assignment / Mixing Control type [Normal] Your radio has following control types: On page 2 to 5 of the Control Menu you can Typical joysticks: Steering, assign up to four servo channels to one Throttle control. • Normal • Joysticks: They work proportionally from -100% to +100% •...
- Page 29 Control type [Switch - +] • Joysticks: Shortly actuating to one side • Joysticks: Depending on how big the switches the control to -100%, again to deflection is the control value changes Typical use: Fifth wheel lock, differential lock 0%. Move it to the other side to set it to faster or slower.
- Page 30 Control type [PushB 1...5] (on page 2v2) Typical use: Control light sets See chapter Typical use: 2 step switching like gear Light Sets change on the Servonaut M24 speed controller. Caution: With some light sets e.g. the This control type has five positions like the...
-
Page 31: Menu Control Info
10.7 Menu Control Info By pressing the [Test] key you leave the Test If there are many mixer functions it is easy The menu now shows all servo channels to lose track which control has an effect on this control is assigned to as well as the mode. - Page 32 10.8 Menu Servo Servo channels, Channel type Green Button [Menu] > [Servo] Menu buttons Softkeys - different for each channel type: Servo channels are all the outputs of the [OK] Green receiver. Depending which Zwo4 Back to the higher-level menu (channel [Reverse] receiver you use there are 4, 6, 9, 12 or 16 selection).
- Page 33 • Two controls with a maximum control with constant speed not fast at first and then The radio has following deflection of +70% mixed (together slower like with a filter function of the control. channel types: +140%) and an endpoint value of 120% Caution: The transmission of multi- •...
- Page 34 (For models with hydraulic drives or a pump that moves forwards and or auxiliary drives. For Servonaut Sound- Function: You can adjust left and right full backwards. (Same as channel type [Servo] modules choose [Normal] for the channel...
- Page 35 Full deflection on this Test mode (yellow button): Yes channel is -100% in one direction Function: For servonaut ESCs you can set Attention if you use the test mode: If the and +100% in the other, center posi-...
- Page 36 Now adjust both controls of the joystick: Channel type [Switch] Channel type [5 Pos Servo] as sequencer 1. Control type [Normal] Used for controlling the channel with one In combination with the control type control of the joystick or a number of mixed [Seq1…5] you can get a 5 positions 2.
-
Page 37: Menu Channel Info
10.9 Menu Channel Info When many mixer functions are set it is difficult to keep track which control affects which channel. With the channel info you can see which controls affects a certain servo channel and you can adjust the control settings. -
Page 38: Servonaut Multibus
11. Servonaut MultiBus The Servonaut MultiBus is comparable to the You can change the softkey assignment with well known Multiswitch/Multiprop systems. Your [Menu] > [Radio] > [Control Swap]. HS16 radio has the Multiswitch/prop encoder built in. Two functions on softkeys next to each other can be swapped with [Menu] >... -
Page 39: Instructions For The Pistenking Kingpad
20. Your notes 12. Instructions for the Pistenking Kingpad Your Servonaut radio can simulate the the Kingpad defines (!) - see the Kingpad Kingpad function matching function of a Kingpad. We don’t recom- manual and the table on the right. Remem- control rate mend connecting an original Kingpad. -
Page 40: Instructions For The Tamiya Mfc-01
21. You 13. Instructions for the Tamiya MFC-01 • The ignition is assigned to both keys of Your Servonaut radio allows you to control Calibrate the MFC as follows: the light and special functions of the 1. Press a button of the MFC for about 1 a softkey pair - left and right key have MFC-01 with softkeys, trim is not needed. -
Page 41: Instructions For Robbe Superlichtset
20. Your notes 14. Instructions for Robbe Superlichtset • The control [Horn/Starter] e.g. for a Your Servonaut radio enables new func- tions with the light set like turning the Servonaut sound module is preset to indicator off automatically as well as more servo channel 7. -
Page 42: Instructions For The Scaleart Truck Light Board
[Menu] > [Control] > model switching we recommend using a [Reverse]. You may need to edit the Servonaut AN40 remote on/off switch for the names manually. power supply in your model. • With the left level switch you can display the trailer functions. -
Page 43: Instructions For The Wedico Mf2
16. Instructions for the Wedico MF2 • The control [Fifth wheel] is set to servo • There are different versions of the MF2. Your Servonaut radio enables new func- tions with the MF2 like turning the indicator channel 7, you can change that if you... -
Page 44: Instructions For Using Multiswitch Decoder
17. Instructions for using Multiswitch Decoder 20. Your notes Your Servonaut radio supports a multi- HS16 Robbe Robbe Graupner Servonaut switch decoder on channel 7 and 8. The Multi Channel Multi Decoder Multi Switch 16 2-16K Nautic MD12 channels are named with lower case letters. - Page 45 20. Your notes With your HS16 you can adjust all Servonaut modules with the DisplayCARD function by ra- dio. This only works if you use the Servonaut receiver Zwo4RX9. Connect the module you want to adjust to one of the first 8 channels of your RX9.
-
Page 46: Tips For Mounting The Receiver
18. Tips for Mounting the Receiver The 2.4 GHz model radio is especially inter- ference-proof but nevertheless: To avoid interference under difficult conditions e.g. events with many radios we have a few tips for mounting the receiver: • For best reception the last three centimeters of the receiver antenna should point vertically up and far away from any metals parts or cables. -
Page 47: Tips For Mounting Escs And Light Sets
Place servo and steering cables sepa- rate from the power cables to avoid interferences. • Only use interference suppressed motors. Servonaut motors are all inter- ference suppressed or delivered with suppression kit. • Some modules heat up and therefore shouldn’t be covered in foam. Check... -
Page 48: Tips & Tricks
20. Tips & Tricks Adjusting the joysticks Joystick length: Spring, spring power, brake and ratchet: Brake: Press the right brake spring down and screw it tight = brakes Hold lock nut, turn joystick head to the left to Loosen the six screws to open the casing. adjust it to the length you want. -
Page 49: Sd Card
21. SD Card [Menu] > [1v2] > [SD Card] on page 2 [Model - > SD Card] you can choose the model that will be over- written from a list in the next step. For clarity Saves a single model to the SD Card. After the model number is displayed in front of the pressing the key, you will see a list of An SD Card slot is in your radio casing (SD... - Page 50 21. SD Card [Read template from SD Card] (page 2) Enables installation of new templates in the radio. You can find these templates under [light set] when setting up a model. [Delete model from SD Card] (page 2) SD card slot in your radio Shows a list of files on the SD Card and lets you delete them directly in the radio.
-
Page 51: Software Updates
22. Software Updates • Your radio shows the following informa- If you receive a new official software version of the HS16 by Servonaut, you can tion: “Update fertig. Sender abschalten” proceed this way: which translates to: “Update: Completed. Turn the radio off.”... -
Page 52: Upgrade To 3D Joysticks
23. Upgrade to 3D Joysticks As an upgrade to your HS16 we offer a set with two 3D joysticks: the Zwo4StickSet3D. The 3D joysticks are especially for construction machinery, e.g. excavators and cranes because of the additional rotary knob. With the 3D sticks you don’t have the level switches - instead you use the push buttons on top of your sticks for switching between levels. -
Page 53: Troubleshooting
24. Troubleshooting The radio doesn’t start? Multiswitch decoder or multiswitch light The connected speed controller with set don’t work correctly? teaching function doesn’t react like it Check the battery and recharge if neces- should? sary. Make sure the radio is switched off Remember that after activating a multi- while charging. -
Page 54: Glossary
25. Glossary Control pressing [Reset] a second time deletes the steering. channel assignment for the current control A positive value on the other hand increases The term control stands for all control output. the effect of small deflections. In both cases elements of your radio with which you can the maximum deflection stays the same. - Page 55 Control filter several controls for this channel summed up Valve backlash compensation are more than 100%. [Backlash] With this filter you can adjust the reaction Tip: Always adjust the mechanics first Hydraulic valves often need a certain de- time of a control. While adjusting the value and only make small adjustments with first changes rapidly then a little slower.
-
Page 56: Liability And Warranty / Disposal Instructions
Subject to change without notice. "Servonaut" is the prevailing community regulations that apply to a registered trademark of tematik GmbH. All other the disposal of batteries/electronics. -
Page 57: Conformity Declaration
27. EU Conformity declaration Conformity declaration... - Page 58 28. Your notes Your notes 58...
- Page 59 GmbH • Feldstraße 143 • D-22880 Wedel • sender@servonaut.de • Phone: +49 4103 / 808989-0...
Need help?
Do you have a question about the HS16WA3D and is the answer not in the manual?
Questions and answers