Advertisement
Quick Links
welcoming
MODEL NUMBER
1694VA-60-241-900-UM
1694VA-60-241-901-UM
1694VA-60-241-925-UM
1694VA-60-241-926-UM
1694VA-60-274-900-UM
1694VA-60-274-901-UM
1694VA-60-274-925-UM
1694VA-60-274-926-UM
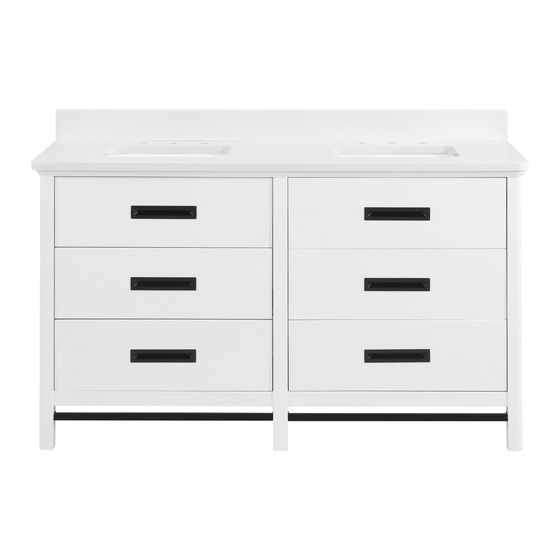
60-IN VANITY WITH TOP
MODEL #1694VA-60-241-900-UM; 1694VA-60-241-901-UM; 1694VA-60-241-925-UM; 1694VA-60-241-926-UM;
1694VA-60-274-900-UM; 1694VA-60-274-901-UM; 1694VA-60-274-925-UM; 1694VA-60-274-926-UM
ATTACH YOUR RECEIPT HERE
Serial Number__________________ Purchase Date__________________
Questions, problems, missing parts? Before returning to your retailer, call our customer service
department at 866-439-9800, 8 a.m. - 8 p.m., EST, Monday - Sunday.
•
sophisticated
DESCRIPTION
AR 60-IN LARSEN WHITE PAINTED OAK VANITY W/CARRARA MARBLE TOP
AR 60-IN LARSEN WHITE PAINTED OAK VANITY W/ENGINEERED WHITE TOP
AR 60-IN LARSEN WHITE PAINTED OAK VANITY W/ENGINEERED CARRARA TOP
AR 60-IN LARSEN WHITE PAINTED OAK VANITY W/ENGINEERED CALACATTA TOP
AR 60-IN LARSEN CERUSED NATURAL OAK VANITY W/CARRARA MARBLE TOP
AR 60-IN LARSEN CERUSED NATURAL OAK VANITY W/ENGINEERED WHITE TOP
AR 60-IN LARSEN CERUSED NATURAL OAK VANITY W/ENGINEERED CARRARA TOP
AR 60-IN LARSEN CERUSED NATURAL OAK VANITY W/ENGINEERED CALACATTA TOP
•
1
inspiring
Advertisement

Related Manuals for Allen + Roth 1694VA-60-241-901-UM


Summary of Contents for Allen + Roth 1694VA-60-241-901-UM
- Page 1 AR 60-IN LARSEN CERUSED NATURAL OAK VANITY W/ENGINEERED CARRARA TOP 1694VA-60-274-926-UM AR 60-IN LARSEN CERUSED NATURAL OAK VANITY W/ENGINEERED CALACATTA TOP 60-IN VANITY WITH TOP MODEL #1694VA-60-241-900-UM; 1694VA-60-241-901-UM; 1694VA-60-241-925-UM; 1694VA-60-241-926-UM; 1694VA-60-274-900-UM; 1694VA-60-274-901-UM; 1694VA-60-274-925-UM; 1694VA-60-274-926-UM ATTACH YOUR RECEIPT HERE Serial Number__________________ Purchase Date__________________ Questions, problems, missing parts? Before returning to your retailer, call our customer service department at 866-439-9800, 8 a.m.
-
Page 2: Table Of Contents
TABLE OF CONTENTS Package Contents...........................3 Hardware Contents..........................3 Safety Instructions...........................3 Preparation............................4 Assembly or Installation Instructions....................4 Care and Maintenance........................9 Warranty............................9 Replacement Parts List.........................10... -
Page 3: Package Contents
PACKAGE CONTENTS (Undermount Sink) PART DESCRIPTION QUANTITY CARTON Vanity Box 2 of 3 Box 1 of 3 Backsplash Sink Box 3 of 3 HARDWARE CONTENTS (NOT SHOWN ACTUAL SIZE) Bolt Sink Bracket Lock Washer Wrench Touch Up Pen Qty. 8 Qty. -
Page 4: Preparation
PREPARATION Before beginning assembly of product, make sure all parts are present. Compare parts with package contents list and hardware contents list. If any part is missing or damaged, do not attempt to assemble the product. Estimated Installation Time: 45 minutes (24 hours for silicone caulk to dry). Tools Required for Installation (not included): Phillips screwdriver, utility knife or scissors, silicone caulk, power drill with drill bit, measuring tape, level INSTALLATION INSTRUCTIONS (Undermount Sink) - Page 5 INSTALLATION INSTRUCTIONS (Undermount Sink) 3. Take out the top (B) and backsplash (C) according to the steps indicated by the drawings on the right, and place them face down onto a scratch free surface such as a Foam sheet foam sheet that came in the packaging. Remove the top foam sheet Remove the backsplash and place it on a scratch free surface...
- Page 6 INSTALLATION INSTRUCTIONS (Undermount Sink) 5. Screw bolts (EE) into the threaded holes of stone top (B). Hardware Used Bolt 6. Lower the sink brackets (FF) over the bolts (EE) and allow to rest on the sink lip. Adjust location of bracket to firmly grasp sink lip. Lower lock washers (HH) over bolts (EE) and secure with nuts (GG).
- Page 7 INSTALLATION INSTRUCTIONS (Undermount Sink) Note: A t this stage it may be easier to install the faucet and drain kit (not included) to top (B) per the manufacturer’s instructions, before moving on to Step 7. 7. Apply stain free silicone caulk (not included) to the top edge of vanity (A).
- Page 8 INSTALLATION INSTRUCTIONS (Undermount Sink) 9. To reinstall drawers into vanity (A), fully extend metal glide tracks. Gently lower and slide drawer box into rear glide catch. Next lower drawer box down to completely rest on extended glides. Then, push plastic levers to lock the drawer box in place.
-
Page 9: Care And Maintenance
CARE AND MAINTENANCE • Dust the vanity regularly with a soft, non-lint producing cloth or household dusting product. • You can clean the vanity with a gentle, non-abrasive household cleaner. • Make sure to dry the wood immediately with a soft cloth or towel. •... -
Page 10: Replacement Parts List
REPLACEMENT PARTS LIST FOR 1694VA-60-241-UM (Undermount Sink) For replacement parts, call our customer service department at 866-439-9800, 8 a.m. - 8 p.m., EST, Monday - Sunday. PART DESCRIPTION PART# Complete Set 60" Carrara Marble Top 4550VT-60-900 Complete Set 60" Engineered White Top 4550VT-60-901 Complete Set 60"... - Page 11 REPLACEMENT PARTS LIST FOR 1694VA-60-274-UM (Undermount Sink) For replacement parts, call our customer service department at 866-439-9800, 8 a.m. - 8 p.m., EST, Monday - Sunday. PART DESCRIPTION PART# Complete Set 60" Carrara Marble Top 4550VT-60-900 Complete Set 60" Engineered White Top 4550VT-60-901 Complete Set 60"...
Need help?
Do you have a question about the 1694VA-60-241-901-UM and is the answer not in the manual?
Questions and answers