Advertisement
Quick Links
Advertisement

Subscribe to Our Youtube Channel
Related Manuals for BenQ MP778


Summary of Contents for BenQ MP778
- Page 1 MP778/MP780 ST Digital Projector User Manual Welcome...
- Page 2 Table of contents Operating in a high altitude environment .........45 Important safety Adjusting the sound......46 Personalizing the projector menu instructions ......3 display ...........47 Controlling the projector through a LAN Introduction......7 environment .........47 Projector features ........7 Displaying image through Q Presenter57 Shipping contents........
- Page 3 Important safety instructions Your projector is designed and tested to meet the latest standards for safety of information technology equipment. However, to ensure safe use of this product, it is important that you follow the instructions mentioned in this manual and marked on the product. Safety Instructions P P lease read this manual before you A A lways open the lens shutter or...
- Page 4 Safety Instructions (Continued) The lamp becomes extremely hot Do not place this product on an during operation. Allow the unstable cart, stand, or table. The projector to cool for approximately product may fall, sustaining serious 45 minutes prior to removing the damage.
- Page 5 Safety Instructions (Continued) Do not place this projector in any of Do not block the ventilation holes. the following environments. - Do not place this projector on a blanket, bedding or any other soft surface. - Space that is poorly ventilated or - Do not cover this projector with a cloth or confined.
- Page 6 BenQ to have the projector serviced. Do not step on the projector or place any objects upon it. Besides probable...
- Page 7 • Component HDTV compatibility (YP • Less than 1 W power consumption in standby mode The MP778 also offers the following features. • Big zoom ratio (1.6x) provides the installation flexibility The MP780 ST also offers the following features. •...
- Page 8 The supplied accessories will be suitable for your region, and may differ from those illustrated. *The warranty card is only supplied in some specific regions. Please consult your dealer for detailed information. MP778 projector MP780 ST projector Remote control with batteries Power cord...
- Page 9 USB power adapter PointDraw PointDraw pen wrist holder strap Q Draw interactive PointDraw pen quick start guide software Optional accessories Spare lamp kit RS232 cable Ceiling mount kit Wireless dongle Soft carry case (standard accessory PointDraw for MP778) Introduction...
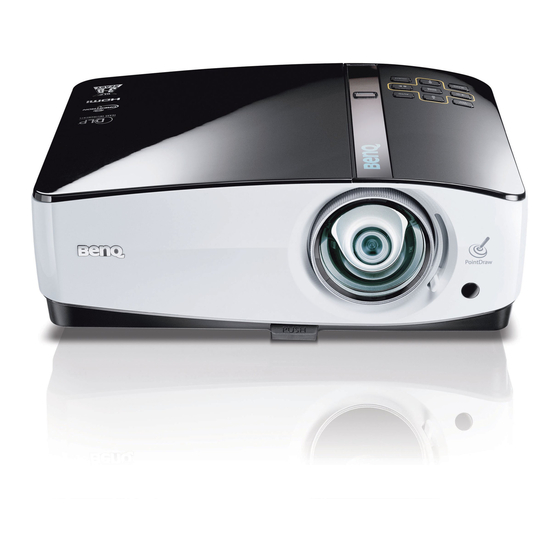
- Page 10 Focus ring (MP778) Focus slide lever (MP780 ST) Projection lens Lens cover Vent (heated air exhaust) Speakers Zoom slide lever (MP778 only) Front IR remote sensor Quick-release button Audio output jack Audio input jack S-Video input jack RGB signal output jack...
- Page 11 Controls and functions Projector AUTO Automatically determines the best picture timings for the displayed image. See "Auto-adjusting the image" on page 31 details. Power/POWER indicator light Toggles the projector between standby mode and on.See "Starting up the projector" on page 30 "Shutting down BLANK the projector"...
- Page 12 BenQ projector ceiling mount kit and that you ensure it is securely and safely installed. If you use a non-BenQ brand projector ceiling mount kit, there is a safety risk that the projector may fall from the ceiling due to an improper attachment through the use of the wrong gauge or length screws.
- Page 13 Remote control MODE/ENTER Selects an available picture setup mode. See "Selecting a picture mode" on page 39 for details. Activates the selected On-Screen Display (OSD) menu item. See "Using the menus" on page 33 for details. Left/ Starts the FAQ function. See "Utilizing FAQ function"...
- Page 14 AUTO ASPECT Automatically determines the best picture Selects the display aspect ratio. See timings for the displayed image. See "Selecting the aspect ratio" on page 37 "Auto-adjusting the image" on page 31 details. details. MIC/VOL Adjusts the microphone’s sound level. See Right/ for details.
- Page 15 Infra-Red (IR) remote control sensor is located on the front of the projector. The remote control must be held at an angle within 30 degrees perpendicular to the projector's IR remote control sensor to function correctly. The distance between the remote control and the sensor should not exceed 8 meters (~ 26 feet).
- Page 16 Rear Ceiling Select this location with the projector suspended upside- down from the ceiling behind the screen. Note that a special rear projection screen and the BenQ Projector Ceiling Mounting Kit are required for this installation location. Set R R ear Ceiling in the S S YSTEM SETUP: Basic >...
- Page 17 BenQ has provided a table of 4:3-aspect-ratio screen sizes for MP778 and a table of 16:9- aspect-ratio screen sizes for MP780 ST to assist you in determining the ideal location for your projector.
- Page 18 This will determine the final placement of the screen in relation to the horizontal plane of the projector. For example, if you are using the MP778 and your measured projection distance is 3.0 m (3000 mm), the closest match in the "Average"...
- Page 19 11050 13600 There is 3% tolerance among these numbers due to optical component variations. BenQ recommends that if you intend to permanently install the projector, you should physically test the projection size and distance using the actual projector in situ before you permanently install it, so as to make allowance for this projector's optical characteristics.
- Page 20 4572 3245 There is 3% tolerance among these numbers due to optical component variations. BenQ recommends that if you intend to permanently install the projector, you should physically test the projection size and distance using the actual projector in situ before you permanently install it, so as to make allowance for this projector's optical characteristics.
- Page 21 Connection When connecting a signal source to the projector, be sure to: Turn all equipment off before making any connections. Use the correct signal cables for each source. Ensure the cables are firmly inserted. • In the connections shown below, some cables may not be included with the projector (see "Shipping contents"...
- Page 22 Computer system requirements for USB display:: Operation System Requirements Minimum Hardware Requirements Windows XP Supports USB 2.0 Windows Vista CPU: Pentium 1G RAM: 512MB RAM Disk: 20MB hard driver space Computer system requirements for WiFi display:: Operation System Requirements Minimum Hardware Requirements Windows XP WiFi: 54 Mbps Windows Vista...
- Page 23 Connecting a computer or monitor Connecting a computer The projector can connect to both IBM® compatibles and Macintosh® computers. A Mac adapter is needed if you are connecting legacy version Macintosh computers. To connect the projector to a notebook or desktop computer (using VGA): Take the supplied VGA cable and connect one end to the D-Sub output socket of the computer.
- Page 24 computer, and the other end to the A A UDIO or A A UDIO (L/R) jack of the projector. When you connect audio output signal from a computer, please balance out the volume control bar to obtain an optimal sound effects. If you wish, you can use another suitable audio cable and connect one end of the cable to the A A UDIO OUT jack of the projector, and the other end to your external speakers (not supplied).
- Page 25 Connecting a monitor If you want to view your presentation close-up on a monitor as well as on the screen, you can connect the M M ONITOR OUT signal output jack on the projector to an external monitor following the instructions below: To connect the projector to a monitor: Connect the projector to a computer as described in "Connecting a computer"...
- Page 26 Connecting Video source devices You need only connect the projector to a Video source device using just one of the above connecting methods, however each provides a different level of video quality. The method you choose will most likely depend upon the availability of matching terminals on both the projector and the Video source device as described below: Terminal Terminal appearance...
- Page 27 Connecting an HDMI source device The projector provides an HDMI input jack that allows you to connect it to an HDMI source device like a DVD player, a DTV tuner, a display or a notebook computer. HDMI (High-Definition Multimedia Interface) supports uncompressed video data transmission between compatible devices like DTV tuners, DVD players and displays over a single cable.
Need help?
Do you have a question about the MP778 and is the answer not in the manual?
Questions and answers