BenQ Mainstream MP770 User Manual
Mainstream series digital projector
Hide thumbs
Also See for Mainstream MP770:
- Comparison chart (1 page) ,
- Specifications (1 page) ,
- Ceiling mounting manual (10 pages)
Table of Contents
Advertisement
Quick Links
Advertisement
Table of Contents

Related Manuals for BenQ Mainstream MP770


Summary of Contents for BenQ Mainstream MP770
- Page 1 MP770 Digital Projector Mainstream Series User's Manual Welcome...
- Page 2 Copyright Copyright 2006 by BenQ Corporation. All rights reserved. No part of this publication may be reproduced, transmitted, transcribed, stored in a retrieval system or translated into any language or computer language, in any form or by any means, electronic, mechanical, magnetic, optical, chemical, manual or otherwise, without the prior written permission of BenQ Corporation.
-
Page 3: Table Of Contents
Controls and functions ... 12 Positioning your projector ... 17 Choosing a location ... 17 Safety instructions for ceiling mounting of the projector 18 Obtaining a preferred projected image size ... 19 Connection ... 22 Wireless connection (optional) ... 22 Cable connection ... - Page 4 Lamp information...56 Troubleshooting... 62 Specifications... 64 Projector specifications ...64 Timing chart...65 Dimensions...66 Warranty... 67 Limited warranty ...67 Regulation statements... 68 FCC statement ...68 EEC statement ...68 MIC statement ...68 WEEE directive ...68 Table of contents...
-
Page 5: Important Safety Instructions
Important safety instructions Your BenQ projector is designed and tested to meet the latest standards for safety of information technology equipment. However, to ensure safe use of this product, it is important that you follow the instructions mentioned in this manual and marked on the product. - Page 6 Safety Instructions (Continued) The lamp becomes extremely hot during operation. Allow the projector to cool for approximately 45 minutes prior to removing the lamp assembly for replacement. Do not operate lamps beyond the rated lamp life. Excessive operation of lamps beyond the rated life could cause them to break on rare occasions.
- Page 7 Do not block the ventilation holes. - Do not place this projector on a blanket, bedding or any other soft surface. - Do not cover this projector with a cloth or any other item. - Do not place inflammables near the projector.
- Page 8 Liquids spilled into the projector may cause it to fail. If the projector does become wet, disconnect it from the power supply's wall socket and call BenQ to have the projector serviced. Important safety instructions This product is capable of displaying inverted images for ceiling mount installation.
-
Page 9: Introduction
The projector offers the following features. • Selectable password protected function • Off and Go function allowing presenters to unplug the projector right after the projector is turned off • Up to 11 sets of application modes providing multiple choices for different projection purposes •... -
Page 10: Shipping Contents
Shipping contents The projector is shipped with the cables required for connection to a PC or video equipment. Carefully unpack and verify that you have all of the items shown below. If any of these items are missing, please contact your place of purchase. -
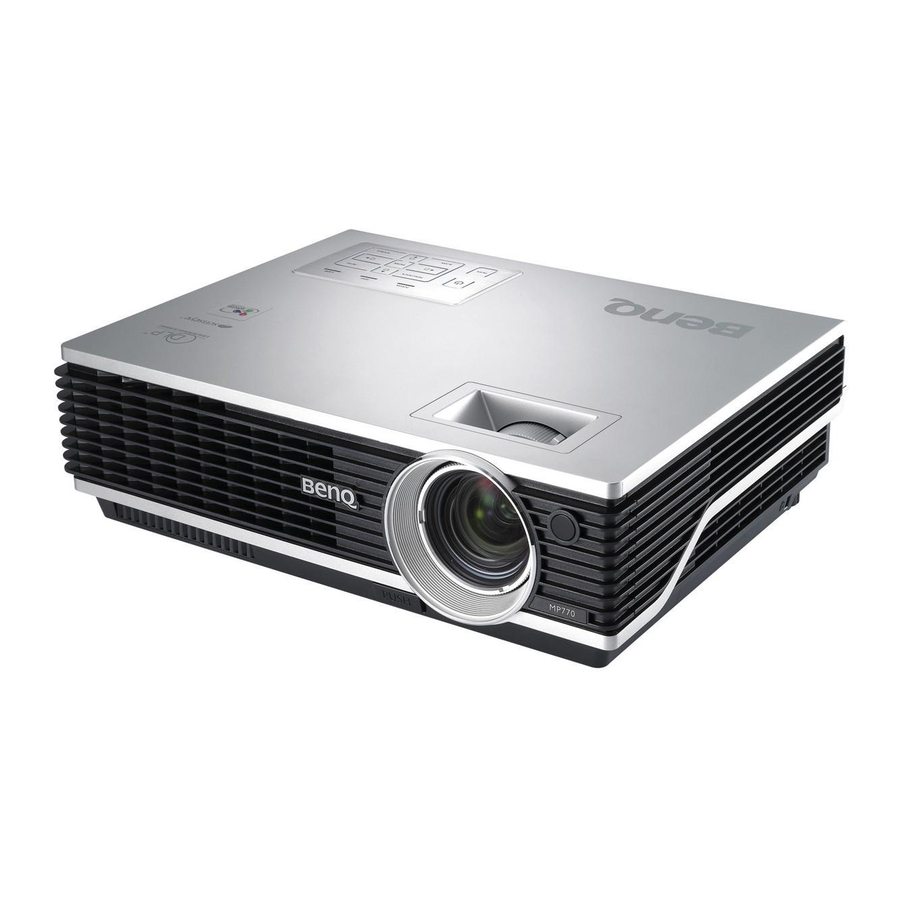
Page 11: Projector Exterior View
Rear IR remote sensor USB socket RS232 control port RGB signal output socket Lower/side view External control panel (See "Projector" on page 12 details.) Vent (heated air exhaust) Projection lens Quick-release button Lens cap Focus ring and Zoom ring Front IR remote sensor for details. -
Page 12: Controls And Functions
Zoom ring Adjusts the size of the image. See tuning the image size and clarity" on page for details. Power indicator light Lights up or flashes when the projector is under operation. See "Indicators" on page for details. MENU/BACK Turns on the On-Screen Display (OSD) menu. - Page 13 Wireless Connection menu is displayed and the IEEE 802.11 a is selected, press this button to search for a reliable channel. (The wireless module is available through BenQ retailers.) SOURCE Sequentially selects the input signal D- Sub (Analog RGB), Comp. (YPbPr), DVI-A, DVI-D, Video, or S-Video.
-
Page 14: Remote Control
When the projector is in standby mode, press once to turn the projector on. When the projector is on, press twice to turn the projector to standby. "Start up" on page 31 down the projector" on page 43 details. - Page 15 Wireless Connection menu is displayed, press this button to change among LAN, IEEE 802.11 a, and IEEE 802.11 b/g. (The wireless module is available through BenQ retailers.) FREEZE The image is frozen when FREEZE is pressed. To release the function, press any button (except LASER) on the projector or remote control.
-
Page 16: Remote Control Effective Range
Remote control effective range Infra-Red (IR) remote control sensors are located on the front and the back of the projector. The remote control must be held at an angle within 30 degrees perpendicular to the projector's IR remote control sensors to function correctly. The distance between the remote control and the sensors should not exceed 6 meters (~ 20 feet). -
Page 17: Positioning Your Projector
Your room layout or personal preference will dictate which installation location you select. Take into consideration the size and position of your screen, the location of a suitable power outlet, as well as the location and distance between the projector and the rest of your equipment. -
Page 18: Safety Instructions For Ceiling Mounting Of The Projector
20m away from your notebook, and switch between presentations on different notebooks instantly without fiddling with cables To use the wireless function, you need to install a BenQ wireless module to the projector and enable your notebook/desktop PC with wireless connection. For more information, refer to "Wireless connection (optional)"... -
Page 19: Obtaining A Preferred Projected Image Size
BenQ has provided a table of 4:3-aspect-ratio screen sizes to assist you in determining the ideal location for your projector. There are two dimensions to consider, the perpendicular horizontal distance from the center of the screen (projection distance), and the vertical offset height of the projector from the horizontal edge of the screen (offset). -
Page 20: How To Determine The Position Of The Projector For A Given Screen Size
302 mm. If you place the projector in a different position (to that recommended), you will have to tilt it down or up to center the image on the screen. In these situations, some image distortion will occur. - Page 21 7620 10327 There is 3% tolerance among these numbers due to optical component variations. BenQ recommends that if you intend to permanently install the projector, you should physically test the projection size and distance using the actual projector in situ before you permanently install it, so as to make allowance for this projector's optical characteristics.
-
Page 22: Connection
The Wireless module connects and attaches to the rear of the projector through the DVI-I socket. While the Wireless module is attached to the projector, you cannot use the DVI-I socket for DVI cable connections. Even though the projector may be using a wireless data connection, it still requires physical connection to a power outlet using its power cable. - Page 23 If you wish, you can use another suitable audio cable and connect one end of the cable to the AUDIO OUT socket of the projector, and the other end to your external speakers (not supplied). The audio output is a mixed mono signal. Once connected, the audio can be controlled by the remote control (MUTE) or projector On-Screen Display (OSD) menus.
-
Page 24: Connecting A Monitor
If you want to view your presentation close-up on a monitor as well as on the screen, you can connect the D-SUB OUT signal output socket on the projector to an external monitor with a VGA or VGA to DVI-A cable by following the instructions below. -
Page 25: Connecting Video Source Devices
• Video (composite) You need only connect the projector to a Video source device using just one of the above connecting methods, however each provides a different level of video quality. The method you choose will most likely depend upon the availability of matching terminals on both the... - Page 26 Connecting a DVI source device The projector provides a DVI-I input socket that allows you to connect it to a DVI source device like a DVD player, or a VGA output device like a notebook or desktop computer.
-
Page 27: Connecting A Component Video Source Device
Take the DVI (DVI-D or DVI-I) cable and connect one end to the DVI output socket of the DVI source device. Connect the other end of the cable to the DVI-I signal input socket on the projector. If you wish to make use the projector (mixed mono) speaker, take a suitable audio cable and connect one end of the cable to the audio output sockets of the video device, and the other end to the AUDIO IN socket of the projector. - Page 28 576i • 720p (50/ 60 Hz) • The projector is only capable of playing mixed mono audio, even if a stereo audio input is connected. See "Connecting Audio" on page 26 • Component Video is the only video input that delivers native 16:9 aspect ratio picture.
-
Page 29: Connecting An S-Video Source Device
The final connection path should be like that shown in the following diagram: AV device • The projector is only capable of playing mixed mono audio, even if a stereo audio input is connected. See "Connecting Audio" on page 26 •... -
Page 30: Connecting A Composite Video Source Device
The final connection path should be like that shown in the following diagram: AV device • The projector is only capable of playing mixed mono audio, even if a stereo audio input is connected. See "Connecting Audio" on page 26 •... -
Page 31: Operation
(If necessary) Rotate the focus ring to adjust the image clearness. If the projector is still hot from previous activity, it will run the cooling fan for approximately 90 seconds before energizing the lamp. If you are prompted for a password, press the arrow buttons to enter a six digit password. -
Page 32: Utilizing The Password Function
Setting a password Once a password has been set, the projector cannot be used unless the correct password is entered every time the projector is started. -
Page 33: Entering The Password Recall Procedure
Write down the number and turn off your projector. Seek help from the local BenQ service center to decode the number. You may be required to provide proof of purchase documentation to verify that you are an authorized user of the projector. -
Page 34: Switching Input Signal
Screw the rear adjuster foot in a reverse direction. If the projector is not placed on a flat surface or the screen and the projector are not perpendicular to each other, the projected image becomes trapezoidal. To correct this situation, adjust the value of Keystone in the DISPLAY menu, on the projector control panel, or remote control. -
Page 35: Searching For Details On The Projected Image
To correct the image's shape, you can perform the following steps. Adjust the projection angle. Move the projector to be in front of the center of the screen with the base of the lens level with the top or bottom edge of the screen. - Page 36 Continue pressing the same button or press the other buttons until you are satisfied with the shape. • Press MENU/BACK on the projector or remote control. Go to the DISPLAY > Keystone menu and press ENTER to display the Keystone correction page.
-
Page 37: Selecting The Aspect Ratio
The 'aspect ratio' is the ratio of the image width to the image height. Most analog TV and computers are in 4:3 ratio, which is the default for this projector, and digital TV and DVDs are usually in 16:9 ratio. -
Page 38: Optimizing The Image
Optimizing the image Selecting an application mode The projector is preset with several predefined application modes so that you can choose one to suit your operating environment and input source picture type. To select a operation mode that suits your need, press MODE repeatedly until your desired mode is selected. -
Page 39: Adjusting Brightness
There are many different shades that are considered to be "white" for various purposes. One of the common methods of representing white color is known as the “color temperature”. A Left/ Right on the projector or remote control. Left/ Right on the projector or remote control. -
Page 40: Operating In A High Altitude Environment
The length of time can be set from 5 to 30 minutes in 5-minute increments. -
Page 41: Pip (Picture In Picture) Operation
PIP (Picture In Picture) operation Your projector is capable of displaying images simultaneously from two input sources, which can be used to enhance your presentation in an interesting way. The PIP functions are available only when the input source is PC and the PIP source is Video or S-Video. -
Page 42: Remote Paging Operations
Creating your own startup screen In addition to selecting the projector preset startup screen from among BenQ logo, Black or Blue screen, you can make your own startup screen that is an image projected from your computer or video source. -
Page 43: Personalizing The Projector Menu Display
90 seconds to cool down the projector. To protect the lamp, the projector will not respond to any commands during the cooling process. The Power indicator light is a steady orange once the cooling process has finished and fans stop. -
Page 44: Menu Operation
Menu operation Menu system Please note that the on-screen display (OSD) menus vary according to the signal type selected. Main menu Sub-menu Aspect Ratio Keystone Position Phase H. Size Digital Zoom DISPLAY PIP Settings Application Mode Reference Brightness PICTURE Contrast Saturation Sharpness White Peak... - Page 45 Resolution Color System Lamp Timer Note that the menu items are available when the projector detects at least one valid signal. If there is no equipment connected to the projector or no signal detected, limited menu items are accessible. On/Off...
-
Page 46: Using The Menus
Using the menus The projector is equipped with On-Screen Display (OSD) menus for making various adjustments and settings. There are 17 different OSD menu languages. See details. Below is the overview of the English OSD menu. Main menu icon Main menu... -
Page 47: Display Menu
35 (100%) Displays the Pan page for searching the details of the projected image by using the directional arrow buttons on the projector or remote control after the image is magnified. (Off) Turns the PIP window on or off... -
Page 48: Picture Menu
Unavailable adjustments are not shown on the screen. FUNCTION DESCRIPTION (default setting / value) Pre-defined application modes are provided so you can optimize your Application projector image set-up to suit your program type. See Mode application mode" on page 38 (PC: Presentation; YPbPr/ S-Video/ Video: Movie) -
Page 49: Source Menu
Sets whether the projector searches automatically for input signals. If the Auto Source source scan is On, the projector will scan for input signals until it acquires Detection a signal. If the function is not activated, the projector selects the last used (On) input signal. -
Page 50: System Setup: Basic Menu
(Disable) page 40 Allows you to select which logo screen will display during projector start- Splash up. Four options are available: BenQ logo, My Screen, Black screen, or Screen Blue screen. (BenQ logo) Captures and stores the projected image as My Screen. See My Screen own startup screen"... -
Page 51: High Altitude
Once the lamp is renewed, select Reset to return the lamp timer to '0'. Password (Off) Limits use of the projector to only those who know the correct password. When the function is activated for the first time, you have to set a password for it. See details. -
Page 52: Information Menu
Information menu This menu shows you the current operating status of the projector. Some picture adjustments are available only when certain input sources are in use. Unavailable adjustments are not shown on the screen. FUNCTION DESCRIPTION Shows the current signal source. -
Page 53: Maintenance
Maintenance Care of the projector Your projector needs little maintenance. The only thing you need to do on a regular basis is to keep the lens clean and to clean the dust filter to prevent overheating. "Cleaning the lens" Never remove any parts of the projector except the lamp and dust filter. Contact your dealer if other parts need replacing. - Page 54 A warning message like the one pictured to the right will be displayed for 10 seconds every 500 hours of use to remind you to clean the filter. To leave the message, press ENTER on the projector or remote control. To clean the filter Turn the projector off and wait until the fans stop running.
- Page 55 1 minute. You can re-attach the case correctly anytime before the projector shuts down. That means you have 10- 11 minutes to get the re-attachment done from the time the first warning message was displayed. The projector will return to normal operation.
-
Page 56: Lamp Information
The Lamp indicator light and Temperature warning light will light up if the lamp becomes too hot. Turn the power off and let the projector cool for 45 minutes. If the Lamp or Temp indicator still lights up after turning the power back on, please contact your dealer. See "Indicators"... -
Page 57: Replacing The Lamp
To reduce the risk of electrical shock, always turn the projector off and disconnect the power cord before changing the lamp. • To reduce the risk of severe burns, allow the projector to cool for at least 45 minutes before replacing the lamp. •... - Page 58 • Do not insert your hands into the projector after the lamp is removed. If you touch the optical components inside, it could cause color unevenness and distortion of the projected images.
-
Page 59: Temperature Information
When the Temperature warning light is on, it is warning you of the following possible problems: The internal temperature is too high. The fans are not working. Turn the projector off and contact qualified service personnel for further help. For more detailed information, please refer to WARNING Reset Lamp Timer? Reset "Indicators"... - Page 60 The projector has just been connected to a power outlet. Stand-by mode. Powering up. Normal operation. The projector needs 90 seconds to cool down as it was abnormally shut down without the normal cooling down process. Or The projector needs to cool for 90 seconds after the power is turned off.
- Page 61 Light Status & Description Power Temp Lamp Thermal events The projector has shutdown automatically. If you try to re-start the projector, it will shutdown again. Please contact your dealer for assistance. Maintenance...
-
Page 62: Troubleshooting
Troubleshooting Remedy Plug the power cord into the AC inlet on the projector, and plug the power cord into the power outlet. If the power outlet has a switch, make sure that it is switched on. Wait until the cooling down process has completed. - Page 63 The computer's external monitor setting is locked in 640 x 480. My Window Media Player program works great on my computer, but the movie window is dark on my projector, while the Media Player tools display Cause The computer external display is set as a secondary display.
-
Page 64: Specifications
Specifications Projector specifications All specifications are subject to change without notice. Optical Resolution Display system Lens F/Number Lamp Electrical Power supply Power consumption Mechanical Weight Input terminals Computer input RGB input DVI-I input Video signal input S-VIDEO VIDEO SD/HDTV signal input... -
Page 65: Timing Chart
Timing chart Supported timing for PC (including DVI-I) input Horizontal Resolution Frequency (kHz) 640 x 400 31.47 31.469 37.861 640 x 480 37.500 43.269 37.879 48.077 800 x 600 46.875 53.674 48.363 56.476 1024 x 768 60.023 68.667 1280 x 1024 63.981 Supported timing for Component-YP Signal Format... -
Page 66: Dimensions
Dimensions 291 mm (W) x 94 mm (H) x 238 mm (D) Unit: mm Specifications... -
Page 67: Warranty
Proof of purchase date will be required with any warranty claim. In the event this product is found to be defective within the warranty period, BenQ's only obligation and your exclusive remedy shall be replacement of any defective parts (labor included). To obtain warranty service, immediately notify the dealer from which you purchased the product of any defects. -
Page 68: Regulation Statements
Regulation statements FCC statement CLASS B: This equipment generates, uses and can radiate radio frequency energy and, if not installed and used in accordance with the instructions, may cause harmful interference to radio communications. However, there is no guarantee that interference will not occur in a particular installation.
Need help?
Do you have a question about the Mainstream MP770 and is the answer not in the manual?
Questions and answers