Table of Contents
Advertisement
Quick Links
Part 15.21 statement
" Change or Modifications that are not expressly approved by the manufacturer could void
the user's authority to operate the equipment. "
Part 15.105 statement
This equipment has been tested and found to comply with the limits for a class B digital device,
pursuant to Part 15 of the FCC Rules.
These limits are designed to provide reasonable protection against harmful interference in a
residential installation.
This equipment generates uses and can radiate radio frequency energy and, if not installed and used
in accordance with the instructions, may cause harmful interference to radio communications.
However, there is no guarantee that interference will not occur in a particular installation. if this
equipment does cause harmful interference or television reception, which can be determined by
turning the equipment off and on, the user is encouraged to try to correct the interference by one or
more of the following measures:
- Reorient or relocate the receiving antenna.
- Increase the separation between the equipment and receiver.
- Connect the equipment into an outlet on a circuit different from that to
which the receiver is connected
- Consult the dealer or an experienced radio/TV technician for help.
Advertisement
Table of Contents

Related Manuals for LG ME850d


Summary of Contents for LG ME850d
- Page 1 Part 15.21 statement " Change or Modifications that are not expressly approved by the manufacturer could void the user's authority to operate the equipment. " Part 15.105 statement This equipment has been tested and found to comply with the limits for a class B digital device, pursuant to Part 15 of the FCC Rules.
- Page 2 (6) The customer shall bear the cost of shipping the product to the Customer Service Department of LG. LG shall bear the cost of shipping the product back to the consumer after the completion of service under this limited warranty.
- Page 7 KE850 USER GUIDE ME850d Some of contents in this manual may differ from your phone depending on the software version of the phone or your service provider. Disposal of your old appliance 1. When this crossed-out wheeled bin symbol is attached to a product it means the product is covered by the European Directive 2002/96/EC.
-
Page 8: Table Of Contents
CONTENTS INTRODUCTION 22 SELECTING FUNCTIONS AND 32 CALL HISTORY OPTIONS GUIDELINES FOR SAFE AND 32 All calls EFFICIENT USE 23 IN-CALL MENU 32 Missed calls 10 KE850 FEATURES 23 During a Call 32 Dialled calls 10 Part of the phone 24 Conference Calls 32 Received calls Display information... - Page 9 38 Templates 51 MP3 PLAYER 57 SETTINGS 38 Settings 51 All songs 57 DISPLAY 40 BROWSER 52 Settings 57 Wallpaper 40 Home 53 FM RADIO 57 Backlight 40 Bookmarks 54 GAMES & APPS 57 Clock 40 Go to URL 54 Default games 57 Brightness 40 Settings 54 Downloaded...
- Page 10 59 Call 60 Security 62 Connectivity 62 Flight mode 63 Reset setting 63 Memory status 64 BLUETOOTH 64 Bluetooth on/off 64 Device list 64 Bluetooth settings 64 Supported services 65 SIM SERVICE 66 ACCESSORIES 67 NETWORK SERVICE 68 TROUBLESHOOTING 70 TECHNICAL DATA...
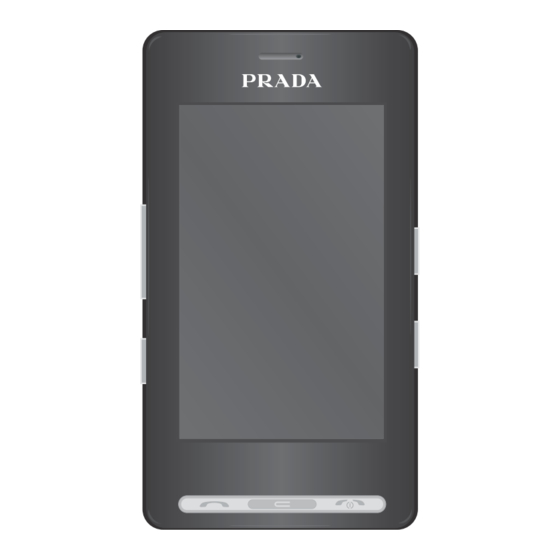
- Page 11 Congratulations on your purchase of the advanced and compact Prada phone by LG, designed to operate with the latest digital mobile communication technology. This user’s guide contains important information on the use and operation of this phone. Please read all the information carefully for optimal performance and to prevent any damage to or misuse of the phone.
- Page 12 Please read these simple guidelines. Not following these guidelines may be dangerous or illegal. Further detailed information is given in this manual. WARNING CAUTION Mobile Phones must be switched off at all times Switch off the phone in any area where required °...
- Page 13 While there may be differences between the TVs, radios, and personal computers. ° SAR levels of various LG phone models, they are The unit should be kept away from heat sources ° all designed to meet the relevant guidelines for such as radiators or cookers.
- Page 14 EFFICIENT PHONE BLASTING AREA OPERATION Do not use the phone where blasting is in progress. Observe restrictions, and follow any regulations or rules. ELECTRONICS DEVICES POTENTIALLY EXPLOSIVE All mobile phones may get interference, which ATMOSPHERES could affect performance. Do not use your mobile phone near medical °...
- Page 15 Unlike other battery systems, there is no memory effect that could compromise the battery’s performance. Use only LG batteries and chargers. LG chargers ° are designed to maximize the battery life. Do not disassemble or short-circuit the battery °...
-
Page 16: Part Of The Phone
ME85 7. SIDE KEYS PART OF THE PHONE When the screen is idle: Volume of key tone ° In menu: scroll up & down ° 1. EARPIECE During a call: volume of the earpiece ° 2. MAIN LCD 8. PROFILE KEY Top: Signal strength, battery level and various °... - Page 17 REAR VIEW ME85 CABLE CONNECTOR /BATTERY CHARGING CONNECTOR To connect the USB cable, wait until the phone has powered up and has registered to the network. SIM CARD SOCKET MEMORY CARD SLOT FLASH CAMERA LENS SELF PORTRAIT MIRROR BATTERY HANDSTRAP HOLE LOCK KEY CAMERA AND MP3 HOT KEY...
- Page 18 This product’s keys on the LCD screen are touch keys. ° Be sure to read “Cautions for Touch Keys” before using this product. ° 2. You do not need to press hard on the touch CAUTIONS FOR TOUCH keys to make them work. KEYS Do not subject the product to severe impact, as this may damage the touch key sensors.
-
Page 19: Display Information
DISPLAY INFORMATION If you tap the wallpaper "Analogue clock" once, you can set the alarm. Analogue clock is set as a default. ICON DESCRIPTION Used to enter menu directly. Used to make a call or send text/ multimedia message. Used to send the text/ multimedia message and to view the messages in the inbox. -
Page 20: On-Screen Icons
The screen displays several icons. These are described below. ON-SCREEN ICONS ICON/INDICATOR DESCRIPTION ICON/INDICATOR DESCRIPTION Tells you the strength of the Vibrate only menu in profile. network signal. General menu in profile. Indicates that you are using GPRS. Outdoor menu in profile. Indicates that you are using EDGE service. - Page 21 INSTALLING THE SIM 2. REMOVE THE BATTERY. Hold the top edge of the battery and lift the CARD AND THE HANDSET battery from the battery compartment. BATTERY Make sure the power is off before you remove the battery. 1. REMOVE THE BATTERY COVER. Press the battery release latch and lift the battery cover from the bottom of the phone.
- Page 22 3. INSTALL THE SIM CARD. 4. INSTALL THE BATTERY. Slide the SIM card into the SIM card holder. Make Insert the bottom of the battery first into the sure that the SIM card is inserted properly and bottom edge of the battery compartment. Ensure that the gold contact area on the card is facing the battery contacts align with the terminals on downwards.
-
Page 23: Charging The Battery
CHARGING THE BATTERY - Unplug the charger from the mains and phone during lightning storms to avoid Before connecting the charger to the phone you electric shock or fire. must first check the battery is installed. - Make sure that no sharp-edged items such as animal teeth or nails come into contact with the battery. -
Page 24: Memory Card
MEMORY CARD Slide the memory card into the slot until the memory card is fully inserted into the slot, as shown in the figure below: INSTALLING THE MEMORY CARD Remove the memory card - The memory card must be removed or inserted only when necessary as its removal/insertion may lead to failure. -
Page 25: Making A Call
MAKING A CALL ADJUSTING THE VOLUME 1. Make sure your phone is powered on. Use the up/down keys on the side of the phone to 2. In standby mode, tap icon. adjust the volume during a call. 3. Enter a phone number including the area code. ANSWERING A CALL To edit a number on the display screen, simply press the... -
Page 26: Entering Text
SIGNAL STRENGTH 123 MODE (NUMBERS If you are inside a building, being near a window MODE) may give you better reception. You can see the strength of your signal by the signal indicator Type numbers using one keystroke per number. To ) on your phone’s display screen. - Page 27 USING THE T9 MODE USING THE ABC MODE The T9 predictive text input mode allows you to Use the keys to enter your text. enter words easily with a minimum number of key 1. Tap the key labelled with the required letter: presses.
-
Page 28: In-Call Menu
The touch screen consists of the menus as follow: The top menu icons of title can be different depending on the theme. (The default mode is Black theme.) Title menu ICON DESCRIPTION Call menu Multimedia menu Tool menu Setting menu... -
Page 29: During A Call
Your phone provides a number of control ANSWERING AN INCOMING functions that you can use during a call. To access CALL these functions during a call, press the left soft [Options]. To answer an incoming call when the handset is If you activate Key lock, you can select Mute ringing, simply slide open the phone. -
Page 30: Conference Calls
SETTING UP A The display and keypad backlights will turn off after a few seconds while in a call if no CONFERENCE CALL keys are pressed. To turn on the backlight press any key. DTMF is not sent when the To set up a conference call, place one call on hold backlight is off. - Page 31 ENDING A CONFERENCE CALL A currently displayed caller from a conference call can be disconnected by pressing the key.
- Page 32 This icon refers to the menus 9 Voice mail related to call, message and 0 Info service browser. 11 Templates 12 Settings Dialling Browser Contacts 1 Home 1 Search 2 Bookmarks 2 New contact 3 Go to URL 3 Speed dials 4 Settings 4 Groups 5 Settings...
- Page 33 FM Radio This icon refers to the menus related to settings of device. Games & Apps 1 Default games Display 2 Downloaded 3 Information 1 Wallpaper 4 Settings 2 Backlight 3 Clock This icon refers to the menus 4 Brightness related to Tool for user's 5 Theme convienience.
- Page 34 Bluetooth 1 Bluetooth on/off 2 Device list 3 Bluetooth settings 4 Supported services SIM service This menu depends on SIM and the network services.
-
Page 35: Dialling
DIALLING (Menu 1) This icon stands for the menu related to Call. If you select this icon, you can make a call, and send a message. You can enter Dialing, Message and Contacts menu directly in standby mode by tapping the corresponding icon. -
Page 36: Contacts
CONTACTS New contact (Menu 2) (Menu 2.2) 1. Tap icon or menu icon in standby mode. You can add phonebook entry by using this 2. Select Contacts menu. function. The phone memory capacity is 1000 entries. The SIM card memory capacity depends Search on the SIM. -
Page 37: Groups
Groups Information (Menu 2.4) (Menu 2.6) You can list up to the members per each group. Service dial numbers ° There are 7 groups you can make lists to. Use this function to access a particular list of Set group ringtone: Allows you to specify ring services provided by your network operator (if °... -
Page 38: Call History
CALL HISTORY Received calls (Menu 3) (Menu 3.4) You can check the record of missed, received, and This option lets you view the last 40 incoming dialled calls only if the network supports the calls. You can also: Calling Line Identification (CLI) within the service View the number if available and call it or save it °... -
Page 39: Data Information
Set tariff: You can set the currency type and ° the unit price. Contact your service providers to obtain charging unit prices. To select the currency or unit in this menu, you need the PIN2 code. Auto display: This network service allows you to °... -
Page 40: Message
MESSAGE New multimedia message (Menu 4) (Menu 4.2) This menu includes functions related to SMS You can write and edit multimedia messages, (Short Message Service), MMS (Multimedia checking the message size. Message Service), Email, voice mail, as well as the 1. -
Page 41: New Email Message
Options menu in Slide tab - Incoming mail server: Enter the POP3 or IMAP4 address that receives your email. Insert: You can insert symbols, images, video ° - User name: Enter your email ID. clips, templates, and others to the message. - Password: Enter your email password. -
Page 42: Inbox
Signature Delete: You can delete the current message. ° (Menu 4.3.3) Reply: You can reply to the sender. ° You can make your signature. Reply all: You can send a reply to all recipients. ° Forward: You can forward the selected - For each e-mail account you may save up °... -
Page 43: Outbox
Info service Delete all: Deletes all of the messages in the ° (Menu 4.0) folder. (Dependent to network and subscription) Info service messages are text messages Outbox (Menu 4.7) delivered by the network to the your phone. They This menu allows to view the message which is provide general information such as weather about to send or is failed sending. -
Page 44: Templates
Templates Validity period: This network service allows you ° (Menu 4.11) to set how long your text messages will be stored at the message centre. Text template (Menu 4.11.1) Reply charging: When a message is sent, it ° You have 6 text templates as below; allows the recipients to reply and charge the •... - Page 45 Network profile: If you select multimedia Alert ° ° message server, you can set the URL for On: Your phone will beep when you have multimedia message server. received Info service message numbers. Permitted msg type Off: Your phone will not beep even though you °...
-
Page 46: Browser
To create a bookmark BROWSER (Menu 5) 1. Select icon. You can access various WAP (Wireless Application 2. Select New. Protocol) services such as banking, news, weather 3. After entering the desired URL and name, tap reports and flight information. These services are Save. - Page 47 Cache (Menu 5.4.2) The information or services you have accessed are saved in the cache memory of the phone. Clear cache: Removes all context saved in ° cache. Allow cache: If you select On, you can use ° cache memory to save the contents temporarily. Security certificates (Menu 5.4.3) A list of the available certification is shown.
-
Page 48: Multimedia
MULTIMEDIA If you tap the Multimedia icon, you can enter the menu related to Multimedia such as camera, video camera, voice recorder, MP3, Radio, and Java games. Do not change the default folder names, or it will not work properly. MY STUFF (Menu 1) Send via: You can send the image through MMS... -
Page 49: Sounds
If you tap icon in a JPG/BMP/GIF/PNG list, - You can store .JPG (.JPEG) files in both the you can view the submenus as follows (in List phone and memory card in the Photos view): folder. In the Images folder in both the Send via: You can send the image through °... - Page 50 Videos If you tap the icon in a list, you can view the (Menu 1.3) submenus as follows (in Thumbnail view): Shows the list of MP4, 3GP files in the Send via: Send the selected file to another ° Downloaded folder. device via MMS, Email and Bluetooth.
- Page 51 If you convert the screen to wide version, you can The maximum available file size that can be use the functions as follow: inserted into the MMS-message and email is 300 kb. If you try to attach the file over 300kb, the warning message "Oversized"...
- Page 52 My stuff...
-
Page 53: Camera
CAMERA Menu Icon Description (Menu 2) Do one of the following to display the camera Meter All, Centre capture screen: 1. Press the key at least two seconds to enter Filter Off, Negative, Gray, Sepia camera capture mode directly. Or, tap the Multimedia icon, and then select Camera menu. - Page 54 If you tap on the screen, you can view the menu After taking a picture, you can check the menu as as follows: follows: Brightness Zooming Delete Menu Icon Description Option If you tap this icon after taking a Menu Icon Description picture, you can set it as a...
-
Page 55: Camcorder
After taking a moving image, you can check the CAMCORDER (Menu 3) menu as follow: 1. Select Camcorder menu. Once the settings are displayed on the screen, Menu Icon Description you can scroll through them touching the icons. Option If you tap this icon after taking a Scroll to the setting you wish to change, tap the picture, you can set it as a screen and it will bring up the setting values. -
Page 56: Voice Recorder
VOICE RECORDER If you tap Option after saving the voice (Menu 4) memo, you can view the submenus as follow: You can record voice memo in Voice recorder New voice record: You can record new voice ° menu. memo. Send via: You can send the voice memo via °... -
Page 57: Mp3 Player
You can transfer MP3 files from a compatible PC MP3 PLAYER (Menu 5) to the memory in your phone using the Mass Storage. All songs (Menu 5.1) When you connect the phone to a PC using the The KE850 has an integrated MP3 player built-in. USB cable (supplied in the box), the phone will be You can enjoy listening to MP3 music files on a recognised as a removable disk through windows... -
Page 58: Settings
1. Press the MP3 key on the side of the phone to When an MP3 is playing on the MP3 player, open the MP3 player. Then select the play list to if you press MP3 short key, you can use BGM play. -
Page 59: Fm Radio
FM RADIO (Menu 6) Radio (Menu 6.1) You can search radio stations and enjoy listening to the radio. To improve the radio reception, extend the headset cord which functions as the FM antenna. 4. You can access the following option menus by pressing the left soft key [Options]. -
Page 60: Games & Apps
GAMES & APPS (Menu 7) In this menu, you can manage the Java applications installed in your phone. You can play or delete downloaded applications, or set the connect option. Default games (Menu 7.1) You can enjoy four default games. If you want to know the contents of games, you can use Help in a game. -
Page 61: Tools
TOOLS CALCULATOR (Menu 2) This contains the standard functions such as +, –, You can use various tools installed in the phone *, / : Addition, Subtraction, Multiplication and such as alarm, calculator, world clock, unit Division. converter, and scheduler. Furthermore, you can use the various function of calculator such as +/-, sin, cos, tan, log, ln, exp, ALARM CLOCK... - Page 62 Alarm clock...
-
Page 63: Settings
SETTINGS You can configure the settings related to the phone. DISPLAY (Menu 1) Wallpaper (Menu 1.1) You can select the background pictures in standby mode. A few items of background such as the butterfly or the clock can move with a finger. Backlight (Menu 1.2) You can set the light-up duration of the display. -
Page 64: Profile
• After 5 secs: After 5 seconds, the phone will PROFILE (Menu 2) answer automatically. In Profile, you can adjust and customise the • After 10 secs: After 10 seconds, the phone will phone tones for different events, environments, answer automatically. or caller groups. -
Page 65: Settings
SETTINGS Call divert (Menu 3) (Menu 3.4.1) The Call divert service allows you to divert Date & Time incoming voice calls, fax calls, and data calls to (Menu 3.1) another number. For details, contact your service You can set the date and time. provider. -
Page 66: Security
Send my number Send DTMF tones (Menu 3.4.2) (Menu 3.4.6) (network and subscription dependent) You can send touch tones during an active call to control your voice mailbox or other automated Set by network ° phone services. If you select this, you can send your phone number depending on two line service such as Information line 1 or line 2. - Page 67 The submenus: Auto key lock (Menu 3.5.2) - Activate If you activate this function, the key will be locked Allows to request the network to set call automatically in standby mode without requesting restriction on. the action of key. - Cancel Set the selected call restriction off.
-
Page 68: Connectivity
Connectivity GPRS attach (Menu 3.6) (Menu 3.6.3) You can set GPRS service depending on various Network selection situations. (Menu 3.6.1) Switch on ° You can select a network type. If you select this menu, the phone is Automatic: If you select Automatic mode, the °... -
Page 69: Reset Setting
Reset setting (Menu 3.8) You can initialize all factory defaults. You need Security code to activate this function. Restore default settings: Allows you to restore ° default settings. Clear multimedia memory: Allows you to ° format the multimedia memory and create a default directory. -
Page 70: Bluetooth
BLUETOOTH Device list (Menu 4) (Menu 4.2) Bluetooth enables compatible mobile devices, You can view all devices which are compatible peripherals and computers that are in close with Bluetooth on your phone. proximity to communicate directly with each Due to a compatibility problem, some other without wires. -
Page 71: Sim Service
SIM SERVICE (Menu 5) This menu depends on SIM and the network services. - In case the SIM card support SAT(i.e. SIM Application Toolkit) services, this menu will be the operator specific service name stored on the SIM card. - In case the SIM card does not support SAT services, this menu will be Profiles. -
Page 72: Accessories
ACCESSORIES There are various accessories for your mobile phone. You can select these options according to your personal communication requirements. Travel Adapter Hands free ear-microphone and music player controller combo This charger allows you to charge the battery while Stereo headset away from home or your Controller: Answer &... -
Page 73: Network Service
NETWORK SERVICE The wireless phone described in this guide is approved for use on the GSM 900, DCS 1800, PCS1900 network. Dualband is a network dependent feature. Check ° with your local service provider if you can subscribe to and use this feature. A number of features included in this guide are °... -
Page 74: Troubleshooting
TROUBLESHOOTING This chapter lists some problems that you might encounter while using your phone. Some problems require that you call your service provider, but most of problems you encounter are easy to correct yourself. MESSAGE POSSIBLE CAUSES POSSIBLE CORRECTIVE MEASURES Make sure that the SIM card is correctly There is no SIM card in the phone or SIM error... - Page 75 Plug in to a different socket or check Charger defective voltage. If the charger does not warm up, replace it. Wrong charger Only use original LG accessories. Replace battery. Battery defective Phone loses Reconnection to another service provider Signal too weak network is automatic.
-
Page 76: Technical Data
TECHNICAL DATA General Product name : KE850 System : GSM 900 / DCS 1800 / PCS 1900 Ambient Temperatures Max. : +55°C (discharging) +45°C (charging) Min : -10°C...
Need help?
Do you have a question about the ME850d and is the answer not in the manual?
Questions and answers