Table of Contents
Advertisement
Quick Links
Table of Contents ............................1
Usage Notice ...................................2
Safety Information ...............................2
Precautions .........................................3
Product Features ................................5
Introduction ......................................6
Package Overview ..............................6
Product Overview ...............................7
Main Unit .............................................. 7
Control Panel ....................................... 9
Input/Output Connections .................. 10
Remote Control .................................. 11
Installation .....................................12
Connecting the Projector ..................12
Connect to Computer/Notebook ........ 12
Connect to Video Sources ................. 13
Powering the Projector On / Off ........14
Powering On the Projector ................. 14
Powering off the projector .................. 16
Warning Indicator ............................... 16
Adjusting the Projected Image ..........17
Adjusting the Projector's Height ........ 17
Focus ................................................. 18
Adjusting Projection Image Size ........ 18
User Controls ................................21
Control Panel ..................................... 21
Remote Control .................................. 23
On-screen Display Menus ................27
How to operate .................................. 27
Menu Tree .......................................... 28
IMAGE ............................................... 30
IMAGE | Advanced ............................ 32
DISPLAY ............................................ 35
DISPLAY | 3D ................................... 38
SETUP ............................................... 39
Table of Contents
SETUP | Audio Settings ..................... 41
SETUP | Advanced ............................ 42
OPTIONS ........................................... 43
OPTIONS | Advanced ........................ 45
OPTIONS | Lamp Settings ................. 46
Appendices ....................................48
Troubleshooting ................................48
Replacing the Lamp ..........................54
Filter ..................................................56
Compatibility Modes .........................57
Compatibility ...................................... 57
3D Input Video Compatibility ............. 58
tion List .............................................59
RS232 Pin Assignments .................... 59
RS232 Protocol Function List ............ 60
Ceiling Mount Installation ..................64
Regulation & Safety Notices .............65
1
English
Advertisement
Table of Contents

Subscribe to Our Youtube Channel
Related Manuals for InFocus IN224


Summary of Contents for InFocus IN224
-
Page 1: Table Of Contents
Table of Contents SETUP | Audio Settings ..... 41 Table of Contents ......1 SETUP | Advanced ......42 Usage Notice ........2 OPTIONS ........... 43 Safety Information .......2 OPTIONS | Advanced ......45 Precautions .........3 OPTIONS | Lamp Settings ....46 Product Features ........5 OPTIONS | Optional Filter Settings ... -
Page 2: Usage Notice
Do not attempt to service the unit yourself. Opening or removing covers may expose you to dangerous voltages or other hazards. Please call InFocus before you send the unit for repair. 7. Do not let objects or liquids enter the projector. They may touch dangerous voltage points and short out parts that could result in fire or electric shock. -
Page 3: Precautions
Usage Notice Precautions Please follow all warnings, precautions and maintenance as recommended in this user’s guide. ▀■ Warning- Do not look into the projector’s lens when the lamp is on. The bright light may hurt and damage your eyes. ▀■ Warning- To reduce the risk of fire or electric shock, do not expose this projector to rain or moisture. - Page 4 Usage Notice Turn off and unplug the power plug from the AC outlet before cleaning the product. Use a soft dry cloth with mild detergent to clean the display housing. Disconnect the power plug from AC outlet if the product is not being used for a long period of time.
-
Page 5: Product Features
Usage Notice Product Features ▀■ SVGA (800x600) / XGA (1024x768) / WXGA (1280X800) Native resolution ▀■ HD compatible – 720p and 1080p supported ▀■ BrilliantColor Technology ▀■ Kensington Lock (*) For models with ▀■ RS232 control HDMI Input. Product features may ▀■... -
Page 6: Introduction
Introduction Package Overview Unpack and inspect the box contents to ensure all parts listed below are in the box. If something is missing, please contact your nearest customer service center. Projector Power Cord Enter Menu Zoom CR2025 Due to different applications in each Country, VGA Cable... -
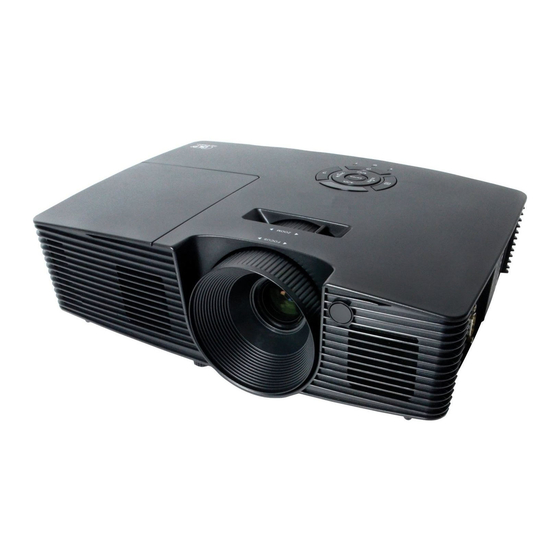
Page 7: Product Overview
Introduction Product Overview Main Unit The interface is subject to model’s specifi- Focus Ring cations. Zoom Lever Do not block IR Receiver projector in/out Control Panel air vents. Input / Output Connections (*) Lens cap Kensington Lock Port comes with Ventilation (inlet) IN226ST/ IN227ST... - Page 8 Introduction The interface is subject to model’s specifi- Focus Ring cations. Zoom Lever Do not block IR Receiver projector in/out Control Panel air vents. Input / Output Connections Kensington Lock Port Ventilation (inlet) Speaker Tilt-Adjustment Feet Ventilation (outlet) English...
-
Page 9: Control Panel
Introduction Control Panel Source Keystone Correction Enter Re-Sync Help Four Directional Select Keys Temp LED Power On/Standby LED Lamp LED Menu English... -
Page 10: Input/Output Connections
Introduction Input/Output Connections Composite Video Input Connector S-Video Input Connector VGA-Out Connector (Monitor Loop-through Output) Monitor loop VGA2-IN/YPbPr Connector through only sup- (PC Analog Signal/Component Video Input/HDTV/YPbPr) port in VGA2-IN/ VGA1-IN/YPbPr Connector YPbPr. (PC Analog Signal/Component Video Input/HDTV/YPbPr) The interface is subject to model’s HDMI Connector specifications. -
Page 11: Remote Control
Introduction Remote Control The interface is subject to model’s Source specifications. Re-Sync Video and S-Video HDMI Volume +/- Four Directional Select Keys Menu AV Mute Enter Mute IR LED Indicator Menu Zoom Power On/Off Keystone +/- Aspect Enter Zoom Brightness Mode Before using the remote control for the first time,... -
Page 12: Installation
Installation Connecting the Projector Connect to Computer/Notebook Monitor Output Audio Output Due to the difference in applications for each country, some regions may molex have different accessories. (*) Optional accessory The interface is subject to model’s specifications . 1..................*Audio Output Cable 2.....................*VGA Out Cable 3.....................VGA Cable 2....................*HDMI Cable... -
Page 13: Connect To Video Sources
Installation Connect to Video Sources Composite Video Output DVD Player, Set-top Box, S-Video Output HDTV receiver Due to the difference in applications for each country, some regions may have different accessories. (*) Optional accessory DVD Player, Set-top Box, The interface is HDTV receiver Audio Output subject to model’s... -
Page 14: Powering The Projector On / Off
Installation Powering the Projector On / Off Powering On the Projector 1. Remove the lens cap. 2. Securely connect the power cord and signal cable. When connected, the ON/STANDBY LED will turn Amber. When Power mode 3. Turn on the lamp by pressing “ ” button either on the top of (Standby) is set to the projector or on the remote. - Page 15 Installation Powering On the Projector 1. Securely connect the power cord and signal cable. When connected, the ON/STANDBY LED will turn Amber. 2. Turn on the lamp by pressing “ ” button either on the top of When Power mode the projector or on the remote.
-
Page 16: Powering Off The Projector
Installation Powering off the projector 1. Press the “ ” button on the remote control or on the control panel to turn off the projector. The following message will be displayed on the screen. Press the “ ” button again to confirm otherwise the message will disappear after 15 seconds. -
Page 17: Adjusting The Projected Image
Installation Adjusting the Projected Image Adjusting the Projector’s Height The projector is equipped with elevator feet for adjusting the image height. 1. Locate the adjustable foot you wish to modify on the underside of the projector. 2. Rotate the adjustable ring clockwise to raise the projector or counter clockwise to lower it. -
Page 18: Adjusting The Projector's Zoom / Focus
Installation Adjusting the Projector’s Zoom / Focus You may turn the zoom ring to zoom in or out. To focus the im- age, rotate the focus ring until the image is clear. XGA short throw: The projector will focus at distances from 1.31 to 32.8 feet (0.4 to 10 meters). - Page 19 Installation SVGA/XGA Screen Size W x H Projection Distance (D) Diagonal length Offset (Hd) (inch) size of (inch) (feet) 4:3 Screen Width Height Width Height wide tele wide tele (inch) 30.00 0.61 0.46 24.00 18.00 1.19 1.31 3.90 4.30 0.07 2.70 40.00 0.81...
- Page 20 Installation XGA SHORT THROW Screen Size W x H Projection Distance (D) Diagonal length Offset (Hd) (inch) size of (inch) (feet) 4:3 Screen Width Height Width Height wide tele wide tele (inch) 0.81 0.61 31.89 24.02 19.69 19.69 0.09 3.60 1.01 0.76 39.76...
-
Page 21: User Controls
User Controls Control Panel & Remote Control Control Panel Using the Control Panel Refer to the “Power On/Off the Projector” section on POWER pages 13-14. Automatically synchronize the projector to the input RE-SYNC source. ENTER Confirm your item selection. SOURCE Press “SOURCE”... -
Page 22: Remote Control Battery Installation
User Controls Remote Control Battery Installation Press firmly and slide the battery cover off. Install new battery into the compartment. Remove the old battery and install new one (CR2025). Ensure that the side with a “+” is facing Put the cover back. To ensure safe operation, please observe the following pre- cautions : Use CR2025 type battery. -
Page 23: Remote Control
User Controls Remote Control Using the Remote Control Refer to the “Power On/Off the Projector” Power section on pages 13-14. Source Press “Source” to select an input signal. Automatically synchronizes the projector to Re-Sync the input source. Press “Video” to choose Composite Video Video and S-video source. - Page 24 User Controls Using the HELP button The HELP function ensures easy setup and operation. Press the “?” button on the control panel to open the Help Menu. English...
- Page 25 User Controls Help menu button functions only when no input source is detected. Please refer to the “Troubleshooting” section on pages 48-53 for more details. If input source is detected and help button is pressed, the following pages will appear to help diagnose any problems. English...
- Page 26 User Controls English...
-
Page 27: On-Screen Display Menus
User Controls On-screen Display Menus The Projector has multilingual On-screen Display menus that allow you to make image adjustments and change a variety of settings. The projector will automatically detect the source. How to operate To open the OSD menu, press “Menu” on the Remote Control or Projector Keypad. -
Page 28: Menu Tree
User Controls Menu Tree Main Menu Sub Menu Settings Display Mode Presentation / Bright / Movie / sRGB / IMAGE Blackboard / User / 3D Brightness -50~50 Contrast -50~50 Sharpness 1~15 Color -50~50 Tint -50~50 Advanced Gamma Film / Video / Graphics / Standard BrilliantColorTM 1~10 Color Temp. - Page 29 User Controls Main Menu Sub Menu Settings Projector ID 0~99 SETUP Audio Settings Internal Speaker On / Off Mute On / Off Volume 0~10 Audio Input Default / AUDIO1 / AUDIO2 Advanced Logo Default / Neutral Closed Captioning Off / CC1 / CC2 Exit Input Source VGA1 / VGA2 / Video / S-Video / HDMI...
-
Page 30: Image
User Controls IMAGE Display Mode There are many factory presets optimized for various types of images. Presentation: Good color and brightness from PC input. Bright: Maximum brightness from PC input. Movie: For home theater. sRGB: Standardised accurate color. Blackboard: This mode should be selected to achieve optimum color settings when projecting onto a blackboard (green). - Page 31 User Controls Sharpness Adjust the sharpness of the image. Press the to decrease the sharpness. Press the to increase the sharpness. Color Adjust a video image from black and white to fully saturated color. “Color” and “Tint” Press the to decrease the amount of saturation in the image. functions are only supported under Press the...
-
Page 32: Image | Advanced
User Controls IMAGE | Advanced Gamma This allows you to choose a degamma table that has been fine-tuned to bring out the best image quality for the input. Film: for home theater. Video: for video or TV source. Graphics: for image source. Standard: for PC or computer source. - Page 33 User Controls Red/Green/Blue/Cyan/Magenta/Yellow: Use to select Hue, Saturation and Gain Colors. White: Use to select Red, Green and Blue Colors. Reset: Choose “Yes” to return the factory default settings for color adjustments. Color Space Select an appropriate color matrix type from AUTO, RGB, (*) For models with RGB(0-255) , RGB(16-235)
-
Page 34: Image | Advanced | Signal (Rgb)
User Controls IMAGE | Advanced | Signal (RGB) Automatic “Signal” is only supported in Analog Automatically selects the signal. If you use this function, the VGA (RGB) signal. Phase, frequency items are grayed out, and if Signal is not auto- matic, the phase, frequency items will appear for user to manually tune and saved in settings after that for next time projector turns off and on again. -
Page 35: Display
User Controls DISPLAY Format Use this function to choose your desired aspect ratio. SVGA/XGA 4:3: This format is for 4×3 input sources. 16:9: This format is for 16×9 input sources, like HDTV and DVD enhanced for Wide screen TV. Native: This format displays the original image without any scaling. - Page 36 User Controls Aspect ratio Resize image (SVGA) Resize image (XGA) (source detected) 800 x 600 center 1024 x 768 center 16:9 800 x 450 center 1024 x 576 center No resize image, 1:1 mapping and Native centered. This format shows the original image without scaling.
- Page 37 User Controls 16:10 Screen 480i/p 576i/p 1080i/p 720p 1066 x 800 center 16:10 1280 x 800 center 1:1 map- 1:1 mapping ping (960 x 1280 x 720 Native mapping centered. 540) display center centered. 1280 x 800 16:9 Screen 480i/p 576i/p 1080i/p 720p...
-
Page 38: Display | 3D
User Controls DISPLAY | 3D 3D Mode Off: Select “Off” to turn 3D settings off for 3D images. DLP Link: Select “DLP Link” to use optimized settings for DLP Link 3D images. “3D Sync Invert” is 3D -> 2D only available when 3D is enabled and 3D: Display 3D signal. -
Page 39: Setup
User Controls SETUP Language Choose the multilingual OSD menu. Press into the sub menu and then use the key to select your preferred language. Press “Enter” to finalize the selection. Projection Front-Desktop Rear-Desktop and This is the default selection. The image is projected straight on Rear-Ceiling are the screen. - Page 40 User Controls Menu Location Choose the menu location on the display screen. Screen Type Choose the screen type from16:10 or 16:9. “Screen Type” is for WXGA only. Projector ID ID definition can be set up by menu (range 0-99), and allow user control an individual projector by RS232.
-
Page 41: Setup | Audio Settings
User Controls SETUP | Audio Settings Internal Speaker Choose the “On” or “Off” to turn on or off the internal speaker. Mute Choose the “On” to turn mute on. Choose the “Off” to turn mute off. Volume Press the to decrease the volume. Press the to increase the volume. -
Page 42: Setup | Advanced
User Controls SETUP | Advanced Logo Press to capture an image of the picture currently displayed on screen. If changes are made they will take effect the next time the projector is powered on. Default: The default startup screen. Neutral: Logo is not displayed on startup screen. Closed Captioning Use this function to set the desired startup screen. -
Page 43: Options
User Controls OPTIONS Input Source Use this option to enable / disable input sources. Press to enter the sub menu and select which sources you require. Press “Enter” to finalize the selection. The projector will not search for inputs that are not selected. - Page 44 User Controls IR Function On: Choose “On”, the projector can be operated by the remote control. When you change the setting from “Off” to “On”, it will display a warning message: (*) The function de- pends on model’s specifications. Off: Choose “Off”, you will only be able to use the control panel keys.
-
Page 45: Options | Advanced
User Controls OPTIONS | Advanced Direct Power On Choose “On” to activate Direct Power mode. The projector will automatically power on when AC power is supplied, without pressing the “ ” key on the projector control panel or on the remote control. -
Page 46: Options | Lamp Settings
User Controls OPTIONS | Lamp Settings Lamp Hours Display the projection time. Lamp Reminder Choose this function to show or to hide the warning message when the changing lamp message is displayed. The message will appear 30 hours before suggested replacement of lamp. -
Page 47: Options | Optional Filter Settings
User Controls OPTIONS | Optional Filter Settings Optional Filter Installed Select “Yes” to display warning message after 500 hours of use. Select “No” to turn off warning message. The default setting for Filter is “No”. After assembling filter, please turn on the projector then press “Menu”, go to “OPTIONS -> Op- tional Filter Settings ->... -
Page 48: Appendices
Appendices Troubleshooting If you experience a problem with your projector, please refer to the following information. If a problem persists, please contact your local reseller or service center. No image appears on-screen Ensure all the cables and power connections are correctly and securely connected as described in the “Installation”... - Page 49 Appendices 7. Click on “Show all devices”. Next, select “Standard monitor types” under the SP box; choose the resolution mode you need under the “Models” box. 8. Verify that the resolution setting of the monitor display is lower than or equal to UXGA (1600 × 1200). If you are using a Notebook: 1.
- Page 50 Appendices Image is out of focus Make sure the Lens cap is removed. Adjust the Focus Ring on the projector lens. Make sure the projection screen is between the required distance. See pages 16-17. The image is stretched when displaying 16:9 DVD title When you play anamorphic DVD or 16:9 DVD, the projector will show the best image when the projector display mode is set to 16:9 in the OSD.
- Page 51 Appendices The projector stops responding to all controls If possible, turn off the projector, then unplug the power cord and wait at least 60 seconds before reconnecting power. Check that “Keypad Lock” is not activated by trying to control the projector with the remote control.
- Page 52 Appendices LED lighting message ON/STANDBY Message Temp-LED Lamp-LED (Green/Amber) (Red) (Red) Standby State Amber (Input power cord) Flashing Power on (Warming) Green Lamp lighting Green Flashing Power off (Cooling) Green Flashing Error (Over Temp.) Amber Steady light Flashing No light Error (Fan fail) Flashing Amber...
- Page 53 Appendices On Screen Messages Temperature warning: Fan failed: Lamp warning: Out of display range: If the remote control does not work Check the operating angle of the remote control is within ±20° both horizontally and vertically of one of the IR receivers on the projector.
-
Page 54: Replacing The Lamp
Appendices Replacing the Lamp The projector automatically detects the lamp life. When the lamp life is nearing the end of use, you will receive a warning message. When you see this message, please contact your local reseller or service center to change the lamp as soon as possible. Make sure the projector has been cooled down for at least 30 minutes before changing the lamp. - Page 55 Appendices The screws on the lamp cover and the lamp cannot be removed. The projector cannot be turned on if the lamp cover has not been placed back on the projector. Do not touch the glass area of the lamp. Hand oil can cause the lamp to shatter.
-
Page 56: Installing And Cleaning The Dust Filter
Appendices Installing and Cleaning the Dust Filter Installing the Dust Filter Procedure: Dust filters are Install two filters. only required/sup- Turn on the projector then press “Menu”, go to “OPTIONS -> Op- plied in selected tional Filter Settings -> Optional Filter Installed” and select “Yes”. regions with ex- cessive dust. -
Page 57: Compatibility Modes
Appendices Compatibility Modes Computer/Video/HDMI/Mac Compatibility Refresh Rate Signal Resolution Video Analog HDMI (Hz) NTSC 720 x 480 For widescreen resolution (WXGA), PAL/SECAM 720 x 576 the compatibility 640 x 480 support is depen- 640 x 480 dent on Notebook/ 640 x 480 72.8 PC models. -
Page 58: 3D Input Video Compatibility
Appendices Refresh Rate Signal Resolution Video Analog HDMI (Hz) UXGA 1600 x1200 1920 x 1080 1920 x 1080 HDTV (1080p) 1920 x 1080 1920 x 1080 1920 x 1080 HDTV (1080i) 1920 x 1080 1920 x 1200 (*4) (*4) WUXGA (*1) 1920 x 1200 SDTV (576i) -
Page 59: Rs232 Commands And Protocol Function List
Appendices RS232 Commands and Protocol Function List RS232 Pin Assignments Spec. Pin no. (from projector side) English... -
Page 60: Rs232 Protocol Function List
Appendices RS232 Protocol Function List XX=00-99, projector's ID, Baud Rate : 9600 XX=00 is for all projectors Data Bits: 8 Parity: None 1. There is a <CR> after Stop Bits: 1 all ASCII commands. Flow Control : None 2. 0D is the HEX code UART16550 FIFO: Disable for <CR>... - Page 61 Appendices --------------------------------------------------------------------------------------------------------------------------------------------------------------------------------------------------------------------- t a r t n i --------------------------------------------------------------------------------------------------------------------------------------------------------------------------------------------------------------------- i t a --------------------------------------------------------------------------------------------------------------------------------------------------------------------------------------------------------------------- ~XX61 n 7E 30 30 36 31 20 a 0D Edge mask n = 0 (a=30) ~ 10 (a=31 30) ~XX63 n 7E 30 30 36 33 20 a 0D H Image Shift n = -100 (a=2D 31 30 30) ~ 100 (a=31 30 30) ~XX64 n...
- Page 62 Appendices --------------------------------------------------------------------------------------------------------------------------------------------------------------------------------------------------------------------- ~XX79 n 7E 30 30 37 39 20 a 0D Projector ID n = 00 (a=30 30) ~ 99 (a=39 39) --------------------------------------------------------------------------------------------------------------------------------------------------------------------------------------------------------------------- ~XX82 1 7E 30 30 38 32 20 31 0D Logo Default ~XX82 3 7E 30 30 38 32 20 33 0D Neutral ~XX88 0 7E 30 30 38 38 20 30 0D...
- Page 63 Appendices --------------------------------------------------------------------------------------------------------------------------------------------------------------------------------------------------------------------- SEND from projector automatically --------------------------------------------------------------------------------------------------------------------------------------------------------------------------------------------------------------------- Function Projector Return Description 232 ASCII Code HEX Code --------------------------------------------------------------------------------------------------------------------------------------------------------------------------------------------------------------------- when Standby/Warming/Cooling/Out of Range/Lamp fail/Fan Lock/Over Temperature/ Lamp Hours Running Out/Cover Open INFOn Standby/Warming/Cooling/Out of Range/Lamp fail/Fan Lock/Over Temperature/Lamp Hours Running Out/Cover Open --------------------------------------------------------------------------------------------------------------------------------------------------------------------------------------------------------------------- READ from projector ---------------------------------------------------------------------------------------------------------------------------------------------------------------------------------------------------------------------...
-
Page 64: Ceiling Mount Installation
Ceiling Mount Installation 1. To prevent damage to your projector, please use the InFocus ceiling mount. 2. If you wish to use a third party ceiling mount kit, please ensure the screws used to attach a mount to the projector... -
Page 65: Regulation & Safety Notices
Appendices Regulation & Safety Notices This appendix lists the general notices of your projector. FCC notice This device has been tested and found to comply with the limits for a Class B digital device pursuant to Part 15 of the FCC rules. - Page 66 Appendices Operation conditions This device complies with Part 15 of the FCC Rules. Operation is subject to the following two conditions: 1. This device may not cause harmful interference and 2. This device must accept any interference received, including interference that may cause undesired operation.
Need help?
Do you have a question about the IN224 and is the answer not in the manual?
Questions and answers