Table of Contents
Advertisement
Available languages
Available languages
Quick Links
Thank you for choosing KitchenAid
We hold our company to highest quality standards and it is important to us that you have a positive experience owning a
KitchenAid
product.
®
Register your microwave oven at www.kitchenaid.com/owners. In Canada, register your microwave oven at
www.kitchenaid.ca/owners.
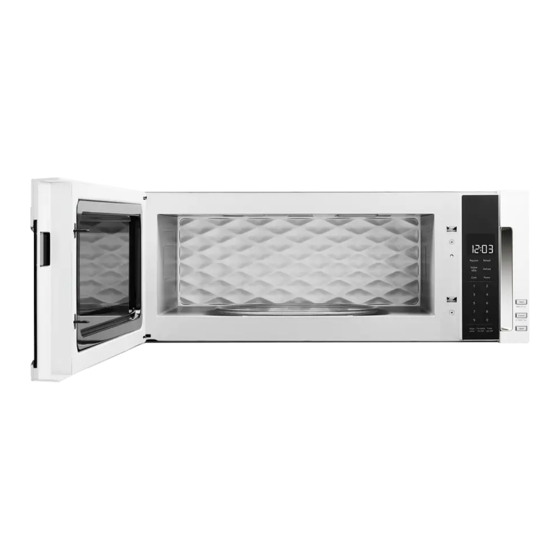
For future reference, please make a note of your model and serial number located on the front facing of the microwave oven
opening, behind the door.
Model Number _________________________________________
MICROWAVE HOOD COMBINATION SAFETY
We have provided many important safety messages in this manual and on your appliance. Always read and obey all safety
messages.
This is the safety alert symbol.
This symbol alerts you to potential hazards that can kill or hurt you and others.
All safety messages will follow the safety alert symbol and either the word "DANGER" or "WARNING."
These words mean:
DANGER
WARNING
All safety messages will tell you what the potential hazard is, tell you how to reduce the chance of injury, and tell you what can
happen if the instructions are not followed.
IMPORTANT SAFETY INSTRUCTIONS
When using electrical appliances basic safety precautions should be followed, including the following:
WARNING:
To reduce the risk of burns, electric shock, fire,
injury to persons, or exposure to excessive microwave energy:
Read all instructions before using the microwave oven.
I
Read and follow the specific "PRECAUTIONS TO AVOID
I
POSSIBLE EXPOSURE TO EXCESSIVE MICROWAVE
ENERGY" found in this section.
The microwave oven must be grounded. Connect only to
I
properly grounded outlet.
found in this section and in the provided Installation Instructions.
Appliances.
®
Your safety and the safety of others are very important.
See "GROUNDING INSTRUCTIONS"
SAVE THESE INSTRUCTIONS
User Guide
Microwave Hood Combination
Serial Number __________________________________________
You can be killed or seriously injured if you don't immediately
follow instructions.
You can be killed or seriously injured if you don't follow
instructions.
Install or locate the microwave oven only in
I
accordance with the provided Installation Instructions.
Some products such as whole eggs in the shell and
I
sealed containers - for example, closed glass jars -
are able to explode and should not be heated in the
microwave oven.
W11404392A
Advertisement
Table of Contents

Related Manuals for KitchenAid YKMLS311HWH


Summary of Contents for KitchenAid YKMLS311HWH
- Page 1 KitchenAid product. ® Register your microwave oven at www.kitchenaid.com/owners. In Canada, register your microwave oven at www.kitchenaid.ca/owners. For future reference, please make a note of your model and serial number located on the front facing of the microwave oven opening, behind the door.
-
Page 2: Important Safety Instructions
IMPORTANT SAFETY INSTRUCTIONS Liquids, such as water, coffee, or tea are able to be Use the microwave oven only for its intended use as described in the manual. Do not use corrosive chemicals or overheated beyond the boiling point without appearing to vapors in the microwave oven. -
Page 3: Electrical Requirements
Electrical Requirements WARNING GROUNDING INSTRUCTIONS For all cord connected appliances: The microwave oven must be grounded. In the event of an electrical short circuit, grounding reduces the risk of electric shock by providing an escape wire for the electric current. The microwave oven is equipped with a cord having a grounding wire with a grounding plug. -
Page 4: Cookware And Dinnerware
Standby Mode Fan Timer Set vent fan to run for exactly 30 minutes or to run for only 30 When no functions are working (12-hour clock is displayed or if minutes more (off after 30 minutes). The vent fan may be turned off the clock has not been set), oven will switch to Standby Power at any time using the Vent Fan keypad. - Page 5 MENU PROGRAMS: Touch the menu control repeatedly to scroll through program options. Rest on the desired program options. Follow display prompts to select submenu items and/or amounts, and then start the program. Any invalid entry will cause an Invalid Tone and be corrected to a value that is within range and closest to the entered value.
-
Page 6: Microwave Oven Care
MICROWAVE OVEN CARE Installing/Replacing Filters and Light Bulbs 2. Take out the charcoal filter from the bottom plate. NOTE: A Filter Status indicator (on some models) appears in the display when it is time to replace the charcoal filter, and clean or replace the grease filters. - Page 7 4. Replace a new LED, fasten the screw back. 3. Take out LED board. Terminal Screw 5. Using a Phillips screwdriver, reattach the 4 screws back to “T” shape bottom lighting cover. 4. Unplug the LED terminal. Terminal Cavity light: The cavity light is located at the top front of ■...
- Page 8 ACCESSORIES Following is a list of available parts and supplies which may be purchased separately. Please refer to the “Warranty” section for contact information. Cleaning Supplies Heavy-duty degreaser ■ Affresh Kitchen Appliance Cleaner ® ■ Affresh Stainless Steel Cleaner ® ■ Affresh Stainless Steel Wipes ®...
-
Page 9: Troubleshooting
First try the solutions suggested here. If you need further assistance or more recommendations that may help you avoid a service call, refer to the warranty page in this manual or visit www.kitchenaid.com/customer-service. In Canada visit www.kitchenaid.ca Contact us by mail with any questions or concerns at the address below: In the U.S.A.:... -
Page 10: If You Need Service
Please take a few minutes to review the Troubleshooting or Problem Solver section of the Use and Care Guide, or visit http://www.kitchenaid.com/customer-service. 2. All warranty service is provided exclusively by our authorized KitchenAid Service Providers. In the U.S. and Canada, direct all requests for warranty service to: KitchenAid Customer eXperience Center In the U.S.A., call 1-800-422-1230. -
Page 11: Importantes Instructions De Sécurité
® Enregistrez votre four à micro-ondes au www.kitchenaid.com/owners. Au Canada, enregistrez votre four micro-ondes au www.kitchenaid.ca/owners. Pour référence ultérieure, consignez par écrit les numéros de modèle et de série situés sur la partie avant face à l’ouverture du four à... - Page 12 IMPORTANTES INSTRUCTIONS DE SÉCURITÉ Comme pour tout appareil ménager, les enfants ne devraient Les liquides tels que l’eau, le café ou le thé peuvent trop utiliser ce four que sous une supervision adéquate. chauffer - au-delà du point d’ébullition - sans sembler bouillir.
-
Page 13: Spécifications Électriques
Spécifications électriques INSTRUCTIONS DE LIAISON AVERTISSEMENT À LA TERRE Pour tout appareil ménager connecté par un cordon de courant électrique : Il faut que le four à micro-ondes soit relié à la terre. En cas de court-circuit électrique, la liaison à la terre réduit le risque de choc électrique car le courant électrique Risque de choc électrique dispose d’un itinéraire direct d’acheminement à... -
Page 14: Caractéristiques
Son (signaux sonores) Minuterie de ventilateur Les signaux sonores et le volume des touches peuvent être Règle le ventilateur d’évacuation pour se mettre en marche ajustés. Appuyer sur SETUP/CLOCK (réglage/horloge) pour pendant 30 minutes exactement, ou pour se mettre en marche accéder au menu secondaire de Son. - Page 15 S’assurer que le four à micro-ondes est branché depuis au moins Maïs éclaté 1 minute. Utiliser un plat adapté au four à micro-ondes avec Deux choix; appuyer sur Popcorn (maïs éclaté) à plusieurs reprises un couvercle non hermétique, ou couvrir le plat de pellicule de si nécessaire.
-
Page 16: Entretien Du Four À Micro-Ondes
RAMOLLIR/FAIRE FONDRE : 5. Faire fondre beurre – 0,5, 1, 1,5 ou 2 bâtonnets : 1. Beurre mou – 0,5, 1, 1,5 ou 2 bâtonnets : Déballer et placer dans un plat allant au micro-ondes. Recouvrir d’une pellicule de plastique. Déballer et placer dans un plat allant au micro-ondes. - Page 17 3. Replacer un nouveau filtre au charbon et le fixer à la plaque 5. À l’aide d’un tournevis Phillips, revisser les 4 vis du couvercle inférieure. S’assurer que les côtés gauche et droit sont bien d’éclairage inférieur en forme “T”. insérés dans les fentes de la plaque inférieure.
- Page 18 5. Installer la nouvelle DEL et l’enclencher dans le crochet. 6. Refixer le couvercle supérieur gauche au moyen de la vis retirée à l’étape 1. Crochet Deuxième couvercle supérieur d’évent gauche Dessus avant du four à micro-ondes ACCESSOIRES Voici ci-dessous une liste des pièces et fournitures qui peuvent être achetées séparément. Consulter la section “Garantie” pour savoir qui contacter.
-
Page 19: Dépannage
Essayez d’abord les solutions suggérées ici. Pour obtenir de l’aide ou des conseils qui permettront peut-être d’éviter une intervention de dépannage, consultez la page de garantie de ce manuel ou visitez le site Web www.kitchenaid.com/customer-service. Au Canada, visitez le www.kitchenaid.ca. -
Page 20: Ce Qui Est Couvert
EXONÉRATION DE RESPONSABILITÉ DANS LES DOMAINES NON COUVERTS PAR LA GARANTIE KitchenAid décline toute responsabilité au titre de la qualité, de la durabilité ou en cas de dépannage ou de réparation nécessaire sur ce gros appareil ménager autre que les responsabilités énoncées dans la présente garantie. Si vous souhaitez une garantie plus étendue ou plus complète que la garantie limitée fournie avec ce gros appareil ménager, adressez-vous à...
Need help?
Do you have a question about the YKMLS311HWH and is the answer not in the manual?
Questions and answers