Table of Contents
Advertisement
Quick Links
To download the full user manual and register your product, visit:
HS2016/HS2016-4/HS2032/HS2064/HS2064 E/
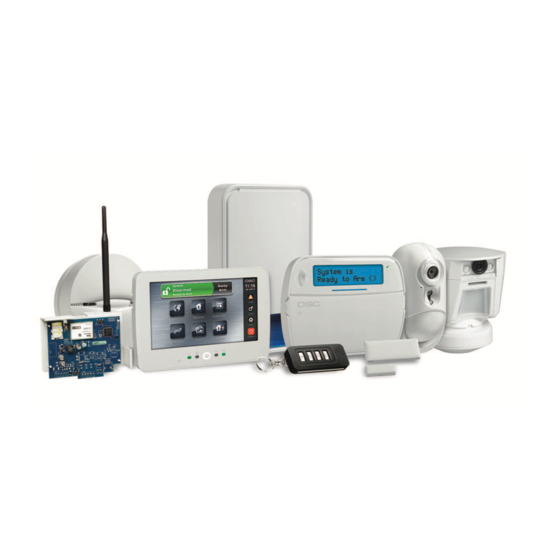
HS2128/HS2128 E Alarm Panel
WARNING: This manual contains information on limitations regarding product use and function and
information on the limitations as to liability of the manufacturer. The entire manual should be care-
fully read.
www.DSC.com/m/29009883 or scan the QR code to the right.
User Guide
Advertisement
Table of Contents

Subscribe to Our Youtube Channel
Related Manuals for Tyco Security Products DSC PowerSeries Neo HS2016


Summary of Contents for Tyco Security Products DSC PowerSeries Neo HS2016
- Page 1 To download the full user manual and register your product, visit: www.DSC.com/m/29009883 or scan the QR code to the right. HS2016/HS2016-4/HS2032/HS2064/HS2064 E/ HS2128/HS2128 E Alarm Panel User Guide WARNING: This manual contains information on limitations regarding product use and function and information on the limitations as to liability of the manufacturer.
-
Page 2: Table Of Contents
Table of Contents 1.0 Quick Reference 2.0 Understanding Your Keypad 2.1 Icon and LED Keypad Symbols 2.2 Keypad Models 3.0 The PowerSeries Neo Security System 3.1 General System Operation 3.2 Testing Your System 3.3 Monitoring 3.4 Maintenance 4.0 Setting/Arming the System 4.1 Arming the System (Infinite Exit Delay) 4.2 Away Arming the System with the Keypad 4.3 Exit Delay Time Restart 4.4 Alarm Cancel Window 4.5 Using 2-way Wireless Keys and Proximity Tags 4.5.1 Arming the System with a 2-Way Wireless Key 4.5.2 To Arm the System with a 2-way wireless key 4.5.3 Arming the System with a Proximity Tag 4.6 Disarming/Unsetting the System 4.7 To Disarm/Unset the System with a Proximity Tag 4.8 Disarming Error 5.0 Emergency Keys 6.0 Access Code Types 6.1 Opening the Access Code Menu 6.2 Adding, Changing and Deleting Access Codes... -
Page 3: Quick Reference
Chapter 1.0 Quick Reference 1.0 Quick Reference The PowerSeries Neo Alarm System uses shortcut keys to access features on all models of keypads. When using an LCD keypad, the PowerSeries Neo Alarm System uses a menu based nav- igation system. The scroll k eys can be used to navigate through the list of options contained within the current menu. For more information s ee: 2.0 “Understanding your Keypad”. Look up detailed information on any of the listed actions using the accompanying Section number. For detailed information about the PowerSeries Neo Alarm System, refer to the full online manual, which can be accessed from the DSC.com website. Note: Some features must be enabled by installer. Note: Bypass Groups are not permitted in UL listed installations. Function Emergency Status Lights Keys Keys Ready - Indicates system normal. Must be on to arm s ystem. All zones must be secured or bypassed and the system disarmed for this light to activate. Fire Stay Arm Armed - Indicates system is armed . If the Ready light and the Armed l ight are both on, an Exit Delay is in progress. Medical Away Arm Trouble - On indicates a system malfunction or tamper. Flashing indicates that the ... - Page 4 Chapter 1.0 Quick Reference Action Press Section Turn Chime ON/OFF 10.1 [*][4] + [Access Code*] OR Change Brightness [*][6] [Master Code] + [1][2] + Change Contrast [*][6] [Master Code] + [1][3] + Add/Delete User [*][5] + [Master Code] + [Access Code] + 1 Reset Smoke Detect- OR [*][7][2] View Troubles 8.15 [*][2] + [Access Code*] + View Alarms 5.1.5 [*][3] + [Access Code*] + Perform System Test [*][6] + [Master Code] + [0][4] + Buzzer Volume 8.10 [*][6] + [Master Code] + [1][4] + - 4 -...
-
Page 5: Understanding Your Keypad
Chapter 2.0 Understanding Your Keypad 2.0 Understanding Your Keypad The PowerSeries Neo Alarm System supports a variety of wireless, hardwired and proximity sensor LCD, LED and Icon keypads. All keypads come equipped with the LED status lights described in section 1 "Quick Reference". HS2LCD series keypads display system messages on their LCD screen. HS2ICN series keypads display messages, as described in the following section. HS2LED series keypads display messages via a series of numbered LEDs, as described in the fol- lowing section. All keypad versions will have a solid blue LED bar that is always on except when, if enrolled, a proximity tag is presented and successfully read by the keypad. 2.1 Icon and LED Keypad Symbols HS2ICN Series HS2LED Series 1. Clock Digits 1, 2 These clock digits indicate the hour when the local clock is active. Digit 2 is also used to identify the zone number. : (Colon) This icon is the hours/minutes divider and will flash once per second when the local clock is active. Clock Digits 3, 4 These a re the minute digits when the local clock is active. The digits 3 and 4 are used to indicate the zone number for open zones or alarm in memory. These two digits combined with the clock digit 2, scroll one zone per second from the lowest number to the highest, when scrolling through zones. 1 to 8 These numbers identify troubles when [*][2] is pressed. -
Page 6: Keypad Models
Chapter 2.0 Understanding Your Keypad OPEN This icon is used with clock digits 1 and 2 to indicate activated zones (not alarm) on the system. When zones are opened, the OPEN icon will turn on, clock digits 1 and 2 will scroll through the violated zones. Indicates that AC is present at the main panel. System Trouble Indicates that a system trouble is active. Night Indicates that the panel is armedin the Night Mode. Ready Light (green) If the Ready light is on, the system is ready for arming. If the toggle of the Ready LED flashes for Force Arming enabled, the LED flashes with force armable zones open on the partition. Armed Light (red) If the Armed light is on, the system has been armed successfully. Note: For UL listed installations, zones can only be bypassed manually. 2.2 Keypad Models Note: In the following list if x = 9 (the system operates in 912-919MHz), x=4 (the system operates in 433MHz band) or x=8 (the system operates in 868MHz band). Only models operating in 912- 919MHz band are UL/ULC listed. HS2LCD Alphanumeric LCD keypad HS2LCDP Alphanumeric LCD keypad with Prox. Tag support HS2ICN Icon keypad Icon keypad with Prox. Tag support HS2ICNP LED keypad HS2LED Alphanumeric LCD keypad with wireless receiver HS2LCDRFx HS2LCDRFPx... -
Page 7: The Powerseries Neo Security System
Chapter 3.0 The PowerSeries Neo Security System 3.0 The PowerSeries Neo Security System Your PowerSeries Neo has been designed to provide you with the greatest possible flexibility and convenience. Read this manual carefully and have your installer instruct you on how to operate your system and which features have been implemented in your system. All users of this system should be equally instructed in its use. Fill out section "System Information" with all of your zone inform- ation and access codes and store this manual in a safe place for future reference. Note: The PowerSeries Neo security system includes specific false alarm reduction features and is classified in accordance with ANSI/ SIA CP-01-2010 Control Panel Standard - Features for False Alarm Reduction. Please consult your installer for further information regarding the false alarm reduction features built into your system as all are not covered in this manual. 3.1 General System Operation Your security system is made up of a PowerSeries Neo control panel, one or more keypads and vari- ous sensors and detectors. The control panel will be mounted out of the way in a utility closet or in a basement. The metal cabinet contains the system electronics, fuses and standby battery. All the keypads have an audible indicator and command entry keys. LED keypads have a group of zone and system status lights. LCD keypads have an alphanumeric liquid crystal display (LCD). The keypad is used to send commands to the system and to display the current system status. The keypad(s) will be mounted in a convenient location inside the protected premises close to the entry/exit door(s). The security system has several zones of area protection and each of these zones is connected to one or more sensors (motion detectors, glassbreak detectors, door contacts, etc.). A sensor in alarm is indicated by the corresponding zone lights flashing on an LED keypad or by mes- sages on the LCD keypad. Note: Only the installer or service professional shall have access to the control panel. 3.2 Testing Your System Tests all system keypad LEDs, keypad sounders, bells and/or sirens. To ensure that your system con- tinues to function as intended, you must test your system weekly. -
Page 8: Monitoring
Chapter 3.0 The PowerSeries Neo Security System 3.3 Monitoring This system is capable of transmitting alarms, troubles and emergency information. If you initiate an alarm by mistake, immediately call the central station to prevent an unnecessary response. Note: For CP-01 systems, the monitoring function must be enabled by the installer before it becomes functional. There is a communicator delay of 30 seconds in this control panel. It can be removed, or it can be increased up to 45 seconds, at the option of the end-user by consulting with the installer. 3.4 Maintenance With normal use, the system requires minimum maintenance. Note the following points: Do not wash the security equipment with a wet cloth. Light dusting with a slightly moistened cloth should remove normal accumulations of dust. Use the system test described in “Testing Your System” to check the battery condition. We recommend, however, that the standby batteries be replaced every 3-5 years. For other system devices such as smoke detectors, passive infrared, ultrasonic or microwave motion detectors or glassbreak detectors, consult the manufacturer’s literature for testing and maintenance instructions. - 8 -... -
Page 9: Setting/Arming The System
Chapter 4.0 Setting/Arming the System 4.0 Setting/Arming the System The PowerSeries Neo system can be set/armed using a keypad, a 2-way wireless key or a proximity tag. 4.1 Arming the System (Infinite Exit Delay) In an attempt to reduce false alarms, your system is designed to notify you of an improper exit when arming the system. When using the Push to Set, or Final Door Set feature, attempting to arm your system will start an infinite exit delay. The keypad will sound a beep once per second. When you have opened and closed the final exit door, or after pressing the Push to Set button, the exit delay will be reduced to a programmable value, which is typically 10 seconds, after which the alarm will complete the setting. The panel used this time period to allow time for the detectors on the system to return to their normal state. When this time expires, the system checks for detect- ors/windows/doors that may be open. If any of these are open, the panel will cancel the arming. If this occurs, you must re-enter the premises, check the system, close any open zones, and then attempt to arm again. 4.2 Away Arming the System with the Keypad Away mode activates the complete alarm system by: Arming all perimeter sensors. Arming all interior sensors. -
Page 10: Exit Delay Time Restart
Chapter 4.0 Setting/Arming the System 6. Once the exit delay timer expires, thereby arming the system, System Armed the: in Away Mode Ready i ndicator turns off. Armed indicator remains on. Keypad stops sounding. Note: The installer configures the exit delay timer and whether or not an access code is required for arming the system. 4.3 Exit Delay Time Restart The control panel provides an option where, if a entry/exit zone is tripped a second time prior to the end of the exit delay, the exit delay time restarts. The exit delay timer can only be restarted once. 4.4 Alarm Cancel Window The control panel provides a period of time in which the user can cancel the alarm transmission. If the programmed alarm transmission delay has expired, canceling an alarm sends a message to the monitoring station. Upon a successful transmission of the cancellation message the keypad will beep 6 times. Note: Must be enabled and configured by installer. Note: For CP-01 systems, alarm transmission delay must not exceed 45 seconds. -
Page 11: To Arm The System With A 2-Way Wireless Key
Chapter 4.0 Setting/Arming the System 4.5.2 To Arm the System with a 2-way wireless key Press the desired Arming m ode button anytime the system Ready i ndicator is on. 4.5.3 Arming the System with a Proximity Tag Depending on how your keypad is programmed, proximity tags can be used to either arm/disarm the system or to perform a programmed function (e.g. unlock a cabinet or storeroom door). To Arm the System with a Proximity tag Present your Proximity tag to a keypad equipped with a proximity sensor anytime the sys- tem Ready ... -
Page 12: To Disarm/Unset The System With A Proximity Tag
Chapter 4.0 Setting/Arming the System 4.7 To Disarm/Unset the System with a Proximity Tag 1. Present your proximity tag to a keypad equipped with a proximity sensor anytime the system is armed . (Armed indicator is on) and if configured as required, enter your access code. If you walk through the entry door the keypad will beep. Present your proximity tag within _____ seconds to avoid an alarm condition. Note: Duration of Entry timer is programmed by installer. The installer will advise the maximum duration of entry delay that was programmed in the system. It cannot exceed 45 seconds. 4.8 Disarming Error If your code is invalid, the system will not disarm and a 2-second error tone will sound. If this occurs, press [ #] and re-enter your access code. - 12 -... -
Page 13: Emergency Keys
Chapter 5.0 Emergency Keys 5.0 Emergency Keys IMPORTANT: EMERGENCY USE ONLY! Pressing both the emergency keys generates a Fire, Medical, or Panic Alarm, and alerts the mon- itoring station. e.g., to generate a medical alarm press both of the medical alarm keys f or 2 seconds and the display on an LCD keypad will show Hold down keys for Med. Alarm.The keypad beeps to indicate that the alarm input has been accepted and sent to the monitoring station. Fire Alarm Medical Alarm Panic Alarm Note: Verify with your alarm company that your system is equipped with emergency keys. Note: Fire keys can be disabled by the installer. Note: Having an optional audio verification module installed in your system allows the monitoring station to open 2-way communication when notified of an alarm. - 13 -... -
Page 14: Access Code Types
Chapter 6.0 Access Code Types 6.0 Access Code Types The alarm system provides the following user access code types: Code Add User Delete Arm Disarm Access User Func- Installer User Codes tions Master Yes Yes Yes Yes User All but All but Yes Yes Supervisor Master Master Duress Yes Yes Yes 1/day One-time user Installer and Master code are system codes that can be changed but not deleted. The other codes are ... -
Page 15: Opening The Access Code Menu
Chapter 6.0 Access Code Types 6.1 Opening the Access Code Menu To add, change or delete Access Codes first open the Access Code Menu: LCD Display 1. Press [*][5] or press [ *] and use the scroll keys t o navigate to Press (*) for <> Access Codes and press [*]. Access Codes Enter Master or Supervisor code. Present Tag or Enter Code Enter [User #] or scroll through the list of users and press [*]. Press (*) for <> On an LED keypad the user number begins flashing. {User Label} To return to the Ready state press [#]. -
Page 16: Swinger Shutdown
Chapter 6.0 Access Code Types 6.4 Swinger Shutdown The Control Panel has a swinger shutdown feature that when enabled a programmable number of trips shall shut down the zone. All burglary zone types have this feature enabled in CP-01 install- ations. Note: Must be enabled and configured by installer. 6.5 Call Waiting The Control Panel includes a programmable option for call waiting to prevent a call waiting line from interfering with the alarm verification process. This option is disabled by default. Note: Must be enabled and configured by installer. 6.6 Fire Alarm Verification Fire Alarm Verification is an available option for Fire zones. If configured, once the conditions for alarm verification are met the fire alarm will sound and an alarm transmission will be sent to the monitoring station. Note: Must be enabled and configured by installer. 6.7 Silence Fire or CO Alarm Fire and CO alarms are silenced by entering a valid access code. A message "Bell Silenced" is dis- played on an LCD or touch screen keypad. The message is cleared once all the Fire zones or CO zones have been restored on system. 6.8 System Lockout due to Invalid Attempts If too many invalid access codes are entered, your system can be configured to automatically lock ... - Page 17 Chapter 6.0 Access Code Types Word Library Text Text Text Text Text Text Aborted 041 Communicator 081 Front 121 Memory 161 Screen 201 7 AC 042 Computer 082 Furnace 122 Menu 162 Second 202 8 Access 043 Control 083 Gallery 123 Monoxide 163 Sensor 203 9 Active...
-
Page 18: Trouble Conditions
Chapter 7.0 Trouble Conditions 7.0 Trouble Conditions Occasionally, you may have a problem with your Alarm Controller or telephone line. If this hap- pens, your Alarm Controller identifies the problem and displays an error message. Refer to the provided list when you see an error message on the display. If additional help is required, contact your distributor for service. When the system detects a trouble condition the following occurs: The Trouble indicator t urns on. The keypad beeps once every 10 seconds. Press the [ *] key to silence the keypad beeps. Press [*][2] to examine troubles. When viewing troubles, the trouble indicator f lashes to identify the level of trouble being viewed. One flash = level 1, two flashes = level 2 etc. Note: For UL installations, A ccess Code Required for [*][2] must be enabled by the installer. When enabled, trouble beeps are silenced when the [*][2] menu has been entered and exited. Note: If the wireless Fire or CO low battery/tamper troubles are not removed, trouble beeps restart every 4 hours after being silenced. Arming of your system may be impeded by a trouble. To override this condition, enter [*][2], scroll to Acknowledge All Troubles and press [*] or enter 99. ... - Page 19 Chapter 7.0 Trouble Conditions Trouble Trouble Trouble Trouble Trouble Description Notification Condition Types Level 2 Level 1 Level 3 Battery Trouble 02 The system has detected a bat- Low Battery tery trouble condition. Call (System for service. Label) No Battery service (Sys- tem Label) High Current Module 1-4 Output Low Battery High Current Module 1-4 Output No Battery Power Supply Module 1-4 Low Battery Power Supply ...
- Page 20 Chapter 7.0 Trouble Conditions Trouble Trouble Trouble Trouble Trouble Description Notification Condition Types Level 2 Level 1 Level 3 Device Faults The system has detected an issue with one or more con- Heat nected devices. Call for ser- vice. Freeze Probe Dis- connected Fire Zone Zone label or ...
- Page 21 Chapter 7.0 Trouble Conditions Trouble Trouble Trouble Trouble Trouble Description Notification Condition Types Level 2 Level 1 Level 3 Module Super- The system has detected a HSM2HOST 01 vision supervisory trouble condition Keypad Keypad 1-16 with one or more modules on Zone Zone the system. Call for service. Expander Expander 1- Power Supply 05 Power supply High Current Output ter- Output minal 1-4 Output ...
- Page 22 Chapter 7.0 Trouble Conditions Trouble Trouble Trouble Trouble Trouble Description Notification Condition Types Level 2 Level 1 Level 3 Not Networked 12 The system has detected a net- Zone Zone label work trouble condition with 001-128 one or more modules on the Keypad Keypad 1-16 system. If the trouble does not Siren Siren 1-16 restore within 20 minutes, Repeater Repeater 1-8 call for service. User Users 01- 1000 - 22 -...
-
Page 23: Safety Instructions
Chapter 8.0 Safety Instructions 8.0 Safety Instructions This equipment is stationary-fixed DIRECT PLUG-IN and must be installed by Service Persons only (Service Person is defined as a person having the appropriate technical training and experience necessary to be aware of hazards to which that person may be exposed in performing a task and of measures to minimize the risks to that person or other persons). It must be installed and used within an environment that provides the pollution degree max 2, over voltages category II, in non-haz- ardous, indoor locations only. WARNING! This equipment has no mains on/off switch; if the equipment must be quickly dis- connected, the plug of the direct plug-in power supply is intended to serve as the disconnecting device; it is imperative that access to the mains plug and associated mains socket/outlet, is never obstructed. When using equipment connected to the mains and/or to the telecommunication network, there are basic safety instructions that shall always be followed. Refer to the safety instructions provided with this product and save them for future reference. To reduce the risk of fire, electric shock and/or injury, observe the following: Do not attempt to service this product yourself. Opening or removing the cover may expose you to dangerous voltage or other risk. Refer servicing to service persons. Never open the device yourself. Use authorized accessories only with this equipment! DO NOT leave and/or deposit ANY object on the top of the cabinet of this equipment! The cabinet as it is installed on the wall, is not designed to support any supplementary weight! Do not touch the equipment and its connected cables during an electrical storm; there may be a risk of electric shock. Never touch un-insulated wires or terminals unless the equipment has been disconnected from the mains supply and from the telecommunication network! ... - Page 24 Chapter 8.0 Safety Instructions For other system devices such as smoke detectors, passive infrared, ultrasonic or microwave motion detectors or glassbreak detectors, consult the manufacturer’s literature for testing and maintenance instructions. This publication covers the following models: x = 9 (912-919MHz UL/ULC systems) 4 (433MHz) or 8 (868MHz). HS2016 HS2128 HS2LCDRF HS2LED HS2016-4 HS2128 E HS2ICN HS2LCDRFP HS2032 HS2TCHP HS2LCDWFx HS2ICNP HS2064 HS2LCD ...
-
Page 25: Reference Sheets
Chapter 9.0 Reference Sheets 9.0 Reference Sheets Fill out the following information for future reference and store this guide in a safe place. 9.1 System Information Mark if Buttons are Enabled [F] FIRE [ M] Medical [ P] PANIC The Exit Delay Time is _______ seconds. The Entry Delay Time is _______ s econds. 9.2 Service Contact Information Central Station Information Account #: ___________________ ... -
Page 26: Access Code And Sensor/Zone Information
Chapter 10.0 Access Code and Sensor/Zone information 10.0 Access Code and Sensor/Zone information Master Code [01] : _________________________ Access Code Reference Sheet Code Access Code Code Access Code Code Access Code Code Access Code ... - Page 27 Chapter 10.0 Access Code and Sensor/Zone information Sensor/Zone Information Sensor Protected Area Sensor Type Sensor Protected Area Sensor Type ...
- Page 28 Chapter 10.0 Access Code and Sensor/Zone information Sensor Protected Area Sensor Type Sensor Protected Area Sensor Type ...
-
Page 29: Locating Detectors And Escape Plan
Chapter 11.0 Locating Detectors and Escape Plan 11.0 Locating Detectors and Escape Plan The following information is for general guidance only and it is recommended that local fire codes and regulations be consulted when locating and installing smoke and CO alarms. 11.1 Smoke Detectors Research has shown that all hostile fires in homes generate smoke to a greater or lesser extent. Experiments with typical fires in homes indicate that detectable quantities of smoke precede detect- able levels of heat in most cases. For these reasons, smoke alarms should be installed outside of each sleeping area and on each storey of the home. The following information is for general guidance only and it is recommended that local fire codes and regulations be consulted when locating and installing smoke alarms. It is recommended that additional smoke alarms beyond those required for minimum protection be installed. Additional areas that should be protected include: the basement; bedrooms, especially where smokers sleep; dining rooms; furnace and utility rooms; and any hallways not protected by the required units. On smooth ceilings, detectors may be spaced 9.1m (30 feet) apart as a guide. Other spacing may be required depending on ceiling height, air movement, the presence of joists, uninsulated ceilings, etc. Consult National Fire Alarm Code NFPA 72, CAN/ULC-S553 or other appropriate national standards for installation recommendations. Do not locate smoke detectors at the top of peaked or gabled ceilings; the dead air space in these locations may prevent the unit from detecting smoke. Avoid areas with turbulent air flow, such as near doors, fans or windows. Rapid air move- ment around the detector may prevent smoke from entering the unit. Do not locate detectors in areas of high humidity. Do not locate detectors in areas where the temperature rises above 38ºC (100ºF) or falls ... -
Page 30: Fire Escape Planning
Chapter 11.0 Locating Detectors and Escape Plan Figure 3a Figure 4 11.2 Fire Escape Planning There is often very little time between the detection of a fire and the time it becomes deadly. It is thus very important that a family escape plan be developed and rehearsed. 1. Every family member should participate in developing the escape plan. Study the possible escape routes from each location within the house. Since many fires occur at night, special attention should be given to the escape routes from sleeping quarters. Escape from a bedroom must be possible without opening the interior door. Consider the following when making your escape plans: Make sure that all border doors and windows are easily opened. Ensure that they are not painted shut, and that their locking mechanisms operate smoothly. If opening or using the exit is too difficult for children, the elderly or handicapped, plans for rescue should be developed. This includes making sure that those who are to perform the rescue can promptly hear the fire warning signal. If the exit is above the ground level, an approved fire ladder or rope should be provided as well as training in its use. Exits on the ground level should be kept clear. Be sure to remove snow from exterior patio doors in winter; outdoor furniture or equipment should not block exits. Each person should know the predetermined assembly point where everyone can be accoun- ted for (e.g., across the street or at a neighbor's house). Once everyone is out of the build- ing, call the fire department. -
Page 31: Carbon Monoxide Detectors
Chapter 11.0 Locating Detectors and Escape Plan Figure 5 11.3 Carbon Monoxide Detectors Carbon monoxide is colorless, odorless, tasteless, and very toxic, it also moves freely in the air. CO detectors can measure the concentration and sound a loud alarm before a potentially harmful level is reached. The human body is most vulnerable to the effects of CO gas during sleeping hours; there- fore, CO detectors should be located in or as near as possible to sleeping areas of the home. For maximum protection, a CO alarm should be located outside primary sleeping areas or on each level of your home. Figure 5 indicates the suggested locations in the home. Do NOT place the CO alarm in the following areas: Where the temperature may drop below -10ºC or exceed 40ºC Near paint thinner fumes Within 5 feet (1.5m) of open flame appliances such as furnaces, stoves and fireplaces In exhaust streams from gas engines, vents, flues or chimneys Do not place in close proximity to an automobile exhaust pipe; this will damage the detector PLEASE REFER TO THE CO DETECTOR INSTALLATION AND OPERATING INSTRUCTION SHEET FOR SAFETY INSTRUCTIONS AND EMERGENCY INFORMATION. - 31 -... - Page 32 Chapter 12.0 Regulatory Agency Statements HS2032 Product Identifier 12.0 Regulatory Agency US:F53AL01BHS2128 Statements HS2064 Product Identifier US:F53AL01BHS2128 FCC COMPLIANCE STATEMENT HS2128 Product Identifier CAUTION: Changes or modifications not US:F53AL01BHS2128 expressly approved by Digital Security Controls USOC Jack: RJ-31X could void your authority to use this equipment. Telephone Connection Requirements This equipment has been tested and found to com- A plug and jack used to connect this equipment to ply with the limits for a Class B digital device, the premises wiring and telephone network must pursuant to Part 15 of the FCC Rules. These lim- comply with the applicable FCC Part 68 rules its are designed to provide reasonable protection and requirements adopted by the ACTA. A com- against harmful interference in a residential pliant telephone cord and modular plug is installation. This equipment generates, uses and provided with this product. It is designed to be can radiate radio frequency energy and, if not connected to a compatible modular jack that is ...
- Page 33 Chapter 12.0 Regulatory Agency Statements necessary modifications to maintain unin- cifications were met. It does not imply that terrupted service. ISED Canada approved the equipment. NOTICE: The Ringer Equivalence Number Equipment Maintenance Facility If trouble is experienced with this equipment (REN) for this terminal equipment is 0.1. The (HS2016, HS2032, HS2064, HS2128) for repair REN assigned to each terminal equipment or warranty information, contact the facility provides an indication of the maximum number indicated below. If-the equipment is causing of terminals allowed to be connected to a tele- harm to the telephone network, the Telephone phone interface. The termination on an interface Company may request that you disconnect the may consist of any combination of devices sub- equipment until the problem is solved. This equip- ject only to the requirement that the sum of the ment is of a type that is not intended to be Ringer Equivalence Numbers of all devices does repaired by the end user. Tyco Atlanta Dis- not exceed 5. tribution Center, 2600 West Pointe Dr., Lithia HS2016 Registration number I C:160A-HS2128 HS2032 Registration number I C:160A-HS2128 Springs, GA 3 0122 HS2064 Registration number ...
- Page 34 Chapter 12.0 Installer Warning high humidity, high or low temperatures, or large temperature fluctuations may Le present appareil est conforme aux CNR reduce the expected battery life. While each transmitting device has a low bat- d'Industrie Canada applicables aux appareils tery monitor which identifies when the batteries need to be replaced, this mon- itor may fail to operate as expected. Regular testing and maintenance will keep radio exempts de licence. L'exploitation est autor- the system in good operating condition. isee aux deux conditions suivantes: Compromise of Radio Frequency (Wireless) (1)l'appareil ne doit pas produire de brouillage, Devices Signals may not reach the receiver under all circumstances which could include et (2) l'utilisateur de l'appareil doit accepter tout metal objects placed on or near the radio path or deliberate jamming or other brouillage radioelectrique subi, meme si le brouil- inadvertent radio signal interference. System Users lage est susceptible d'en compromettre le fonc- A user may not be able to operate a panic or emergency switch possibly due to tionnement. permanent or temporary physical disability, inability to reach the device in Le present appareil est conforme aux CNR time, or unfamiliarity with the correct operation. It is important that all system users be trained in the correct operation of the alarm system and that they know d'Industrie Canada applicables aux appareils how to respond when the system indicates an alarm. Smoke Detectors radio exempts de licence. L'exploitation est autor- Smoke detectors that are a part of this system may not properly alert occupants isee aux deux conditions suivantes: of a fire for a number of reasons, some of which follow. The smoke detectors ...
- Page 35 Chapter 12.0 EULA keypads, consoles, alarm indicating devices and any other operational devices use such content. All rights not expressly granted under this EULA are reserved by DSC and its suppliers. that are part of the system. 4. EXPORT RESTRICTIONS - You agree that You will not export or re-export the Security and Insurance SOFTWARE PRODUCT to any country, person, or entity subject to Canadian Regardless of its capabilities, an alarm system is not a substitute for property export restrictions. or life insurance. An alarm system also is not a substitute for property owners, 5. CHOICE OF LAW - This Software License Agreement is governed by the laws of the Province of Ontario, Canada. renters, or other occupants to act prudently to prevent or minimize the harmful 6. ARBITRATION - All disputes arising in connection with this Agreement shall effects of an emergency situation. be determined by final and binding arbitration in accordance with the Arbitration EULA Act, and the parties agree to be bound by the arbitrator’s decision. The place of arbitration shall be Toronto, Canada, and the language of the arbitration shall be English. 7. Limited Warranty IMPORTANT - READ CAREFULLY: DSC Software purchased with or (a) N O WARRANTY - DSC PROVIDES THE SOFTWARE “AS IS” WITHOUT without Products and Components WARRANTY. DSC DOES NOT WARRANT THAT THE SOFTWARE WILL ...
- Page 36 © 2018 Tyco Security Products. All Rights Reserved. • w ww.dsc.com The trademarks, logos, and service marks displayed on this document are registered in the United States [or other countries]. A ny misuse of the trademarks is strictly prohibited and Tyco Security Products will aggress- ively enforce its intellectual property rights to the fullest extent of the law, including pursuit of criminal pro- secution wherever necessary. All trademarks not owned by Tyco Security Products are the property of their respective owners, and are used with permission or allowed under applicable laws. Product offerings and specifications are subject to change without notice. Actual products may vary from pho- tos. Not all products include all features. Availability varies by region; contact your sales representative. 29009865R003...
Need help?
Do you have a question about the DSC PowerSeries Neo HS2016 and is the answer not in the manual?
Questions and answers