Advertisement
Quick Links
Advertisement

Subscribe to Our Youtube Channel
Related Manuals for Smeg STC75


Summary of Contents for Smeg STC75
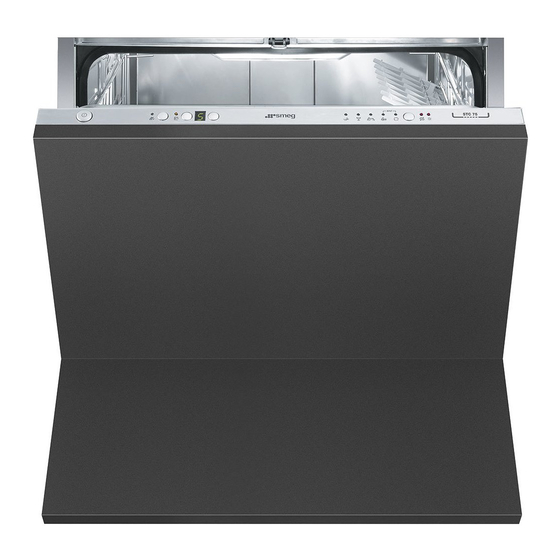
- Page 1 INSTRUCTION MANUAL DISHWASHER...
-
Page 2: Table Of Contents
Contents Safety and operating instructions __________________________ 38 Installation and hook-up__________________________________ 41 Description of the controls ________________________________ 45 Operating instructions ___________________________________ 56 Cleaning and maintenance _______________________________ 64 Troubleshooting ________________________________________ 68 Thank you for choosing this product. We advise you to carefully read all the instructions contained in this manual, in order to understand how to operate your dishwasher safely and correctly. -
Page 3: Safety And Operating Instructions
Safety instructions 1. Safety and operating instructions THIS MANUAL FORMS AN INTEGRAL PART OF THE APPLIANCE: IT MUST ALWAYS BE KEPT INTACT TOGETHER WITH THE DISHWASHER. BEFORE USING THE APPLIANCE, CAREFULLY READ ALL THE INSTRUCTIONS CONTAINED IN THIS MANUAL. INSTALLATION MUST BE PERFORMED BY A QUALIFIED TECHNICIAN, IN COMPLIANCE WITH THE REGULATIONS IN FORCE. - Page 4 Safety instructions THIS APPLIANCE IS MARKED ACCORDING TO THE EUROPEAN DIRECTIVE 2002/96/EC ON WASTE ELECTRICAL AND ELECTRONIC EQUIPMENT (WEEE). BY ENSURING THIS PRODUCT IS DISPOSED OF CORRECTLY, YOU WILL HELP PREVENT POTENTIAL NEGATIVE CONSEQUENCES FOR THE ENVIRONMENT AND HUMAN HEALTH, WHICH COULD OTHERWISE BE CAUSED BY INAPPROPRIATE WASTE HANDLING OF THIS PRODUCT.
- Page 5 Safety instructions DO NOT DRINK THE WATER RESIDUES WHICH MAY BE PRESENT INSIDE THE DISHES OR DISHWASHER AT THE END OF THE WASHING PROGRAM AND BEFORE THE DRYING CYCLE. KNIVES AND OTHER SHARP-POINTED KITCHEN UTENSILS MUST BE PLACED IN THE CUTLERY BASKET WITH THEIR TIPS FACING DOWNWARD. AQUASTOP MODELS THE AQUASTOP DEVICE PREVENTS FLOODING IN THE EVENT OF A WATER LEAK.
-
Page 6: Installation And Hook-Up
Installation instructions 2. Installation and hook-up Remove the polystyrene basket retainers. Position the appliance in the desired place of installation. The back or sides of the dishwasher may be placed up against walls or other furniture units. If the dishwasher is installed near a heat source, fit the special insulating panel to prevent overheating and malfunction of the appliance. - Page 7 Installation instructions 2.1 Water supply connection Preventing the risk of clogging or damage: if the water pipe is new or has not been used for a long time, before connecting to the water supply check that the water is clear and free of impurities, to prevent damage to the appliance.
- Page 8 Installation instructions IF THE APPLIANCE IS PROVIDED WITH A PLUGLESS SUPPLY CORD: IT IS NECESSARY TO INSTALL IN THE FIXED WIRING AN ALL-POLE DISCONNECTION DEVICE HAVING A GAP BETWEEN CONTACTS OF AT LEAST 3.5MM. AFTER INSTALLATION THE DISCONNECTION DEVICE HAS TO BE EASY TO REACH.
- Page 9 Installation instructions FOR UK ONLY: THIS APPLIANCE MUST BE EARTHED. Fuse replacement If the mains lead of this appliance is fitted with a BS 1363A 13amp fused plug, to change a fuse in this type of plug use an A.S.T.A. approved fuse to BS 1362 type and proceed as follows: Remove the fuse cover A and fuse B.
-
Page 10: Description Of The Controls
3.1 Upper panel All the dishwasher controls are grouped on the upper panel. Switch-on, programming, switch-off etc. procedures are only possible when the door is open. 11 10 Extra auto ° smeg Extra auto ° Extra smeg Extra ON/OFF BUTTON Pressing this button energises the appliance. - Page 11 SETTING THE WASHING PROGRAM AND SWITCHING ON To select the most suitable program for the dishes to be washed refer to the table below, which indicates the most appropriate program according to dish type and degree of soiling. 11 10 Extra smeg Extra Extra smeg Extra...
- Page 12 User instructions After using the table to identify the most appropriate washing program: press the ON/OFF button (1) and wait for the PROGRAM INDICATOR LIGHT (2) to illuminate; keep pressing the PROGRAM SELECTION button (3) until the indicator light corresponding to the desired program illuminates; close the door;...
- Page 13 User instructions MODELS WITH "AUTO" PROGRAM PROGRAMME CONSUMPTION (3) DURATION TYPE OF PROGRAM DETERGENT DISHES MINUTES WATER POWER DESCRIPTION GRAMS SYMBOL NAME (LITRES) (KWh) AND DIRT Clean mixed dishes requiring Cold rinse DISH rinsing and Rinse at 68°C 0,40 WARMER warming before taking to table Wash at 45°C...
- Page 14 User instructions After using the table to identify the most appropriate washing program: press the ON/OFF button (1) and wait for the PROGRAM INDICATOR LIGHT (2) to illuminate; keep pressing the PROGRAM SELECTION button (3) until the indicator light corresponding to the desired program illuminates; close the door;...
- Page 15 User instructions MODELS WITHOUT "AUTO" PROGRAMM PROGRAMME CONSUMPTION (3) DURATION TYPE OF PROGRAM DETERGENT DISHES MINUTES WATER POWER DESCRIPTION GRAMS SYMBOL NAME (LITRES) (KWh) AND DIRT Clean mixed dishes requiring Rinse at 68°C DISH 0,40 rinsing and WARMER warming before taking to table Wash at 45°C Crystal, porcelain...
- Page 16 User instructions The washing cycle will not take place if the dishwasher door is left open or not properly closed. TABLE FOR CERTIFICATION BODIES Reference standard EN 50242 Reference program Load 7 place-settings Type of detergent Amount of detergent 21 g Rinse aid setting 3.2 Washing programs Before starting a washing program make sure that:...
- Page 17 This function is retained in the memory, so the button has to be pressed again (the light goes out) if the user wishes to execute one of the 5 main programs at the next cycle. 11 10 Extra auto ° smeg Extra auto ° Extra smeg Extra "3/1"...
- Page 18 User instructions DELAYING THE PROGRAM (available in all programs except the soak program) The PROGRAM DELAY button (10) can be pressed to delay the start of the program by up to 9 hours. This means that the dishwasher can be operated at the time of day of your choice.
- Page 19 User instructions 11 10 Extra auto ° smeg Extra auto ° Extra smeg Extra ADJUSTING THE WATER SOFTENING SYSTEM N.B.: for the setting below to be possible, a washing program other than the soak program must be set. Press the PROGRAM DELAY button (10) and keep it pressed until the preset value appears followed by a full stop (normally 3.).
- Page 20 User instructions If the door has to be opened while washing is in progress, the program will be interrupted. The relative light will keep flashing and a beeper will signal that the cycle has not been completed. When the door is closed the program will continue from where it was interrupted.
-
Page 21: Operating Instructions
User instructions 4. Operating instructions Once the dishwasher has been correctly installed, prepare for use as follows: Adjust the water softening system; Add the regenerating salt; Add the rinse aid and detergent. 4.1 Using the water softening system The amount of scale contained in the water (water hardness index) can cause whitish staining on the dry dishes, which tend to become dull over time. - Page 22 User instructions Do not use table salt as it contains insoluble substances which, over time, may damage the water softening system. When necessary, refill the regenerating salt container before starting the washing program. In this way, the excess saline solution will be immediately removed by the water; the prolonged presence of salt water inside the tank may lead to corrosion.
- Page 23 User instructions ADDING THE RINSE AID The rinse aid helps the dishes dry faster and prevents the formation of scale deposits and staining; it is automatically added to the water during the final rinse cycle, from the container situated on the inner side of the door.
- Page 24 User instructions ADDING THE DETERGENT After adding the detergent, to close the lid slide it in the direction shown by the arrow as far as it will go then press gently to lock. During washing, the dispenser will be opened automatically. Use only detergents specially formulated for dishwashers.
- Page 25 User instructions "3/1" Products If you wish to use detergents which already contain salt and rinse aid, check whether your dishwasher is fitted with the "3/1 option button" on the "Controls description" page and then refer to the section which explains how to use this function. If the button is not provided, we recommend the use of conventional products (separate detergent, salt and rinse aid), because with conventional washing cycles "3/1"...
- Page 26 User instructions WARNING! Make sure that the dishes are securely in place so that they cannot tip over or obstruct the rotation of the spray arms during the washing cycle. Do not place very small objects in the baskets as these could fall and obstruct the spray arms or the wash pump.
- Page 27 User instructions 4.4 Using the baskets The dishwasher has a capacity of 7 place-settings, including serving dishes. CAUTION: do not place items in positions where they prevent the detergent dispenser hatch from opening properly.
- Page 28 User instructions The basket is fitted with plate racks which can be stowed horizontal if required. CUTLERY BASKET Cutlery must be placed with the tips facing downward.
-
Page 29: Cleaning And Maintenance
User instructions 5. Cleaning and maintenance Before carrying out any work, always disconnect the appliance from the electrical power supply. 5.1 General warnings and recommendations Avoid the use of acidic or abrasive detergents. Clean the outer surfaces and door-lining of the dishwasher regularly using a soft cloth moistened with water or with a normal detergent suitable for painted surfaces. - Page 30 User instructions To remove the top spray arm, take off the retainer ring-nut. Wash it in a jet of water and fit it into place correctly, checking that there are no impediments of any kind preventing it from turning freely. CLEANING THE FILTER UNIT The central filter C should be inspected regularly and cleaned if necessary.
- Page 31 User instructions GENERAL WARNINGS AND RECOMMENDATIONS FOR CORRECT MAINTENANCE: The filters should be cleaned under running water using a stiff brush. When removing the filter, take care that there are no food residues on it. If any residues fall into the washing pit they might block hydraulic components, or foul the spray arm nozzles.
- Page 32 User instructions If the dishes do not come out clean, check that: the correct amount of detergent has been added; there is regenerating salt inside the special container; the dishes are being loaded correctly; the selected program is suitable for the dish types and their degree of soiling;...
-
Page 33: Troubleshooting
User instructions 6. Troubleshooting The dishwasher is capable of signalling a number of faults through the simultaneous illumination of several indicator lights, with the following meanings: FAULT DESCRIPTION Water heating malfunction The water is not heated or the heating parameters are not correct. - Page 34 User instructions If an alarm occurs the appliance interrupts the program in progress and signals a fault. Alarms E3, E4 and E9 interrupt the current program immediately. The E5, E6 alarms interrupts the running program once the cause is resolved, it will bring bach the execution of the program. The alarm E7 is visualized at the end of the cycle that comes, however, brought to the end since the operation of the dishwasher is not harmed.
- Page 36 55 55 55 55 50 50 50 50 45 45 45 45 40 40 40 40 35 35 35 35 30 30 30 30 25 25 25 25 20 20 20 20 15 15 15 15 10 10 10 10...
Need help?
Do you have a question about the STC75 and is the answer not in the manual?
Questions and answers