
Related Manuals for Kohler K-6350


Summary of Contents for Kohler K-6350
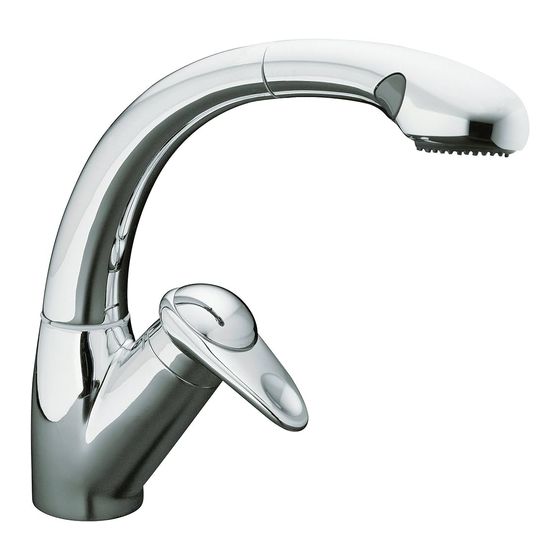
- Page 1 Installation Guide Single-Control Kitchen Faucet With Pull-Out Spray K-6350 Français, Page 8 Español, Página 14 1025490-2-...
-
Page 2: Recommended Tools And Materials
- Do not remove the faucet ground joints, as they contain important back-siphonage protection. - Do not attach a dishwasher to the faucet spray outlet. - Kohler Co. reserves the right to make revisions in the design of faucets without notice, as specified in the Price Book. 1025490-2-... - Page 3 - Apply plumbers putty or other sealant to the inlet end of the spout according to the putty manufacturer’s instructions. - Apply thread sealant to the nipple, and install the spout to the nipple. - Carefully tighten with a clean strap wrench and remove any excess putty. Kohler Co. 1025490-2-...
- Page 4 - Slide the rubber washer, escutcheon, and spacer (O-ring side down) over the faucet tubing and hose. - Insert the faucet tubing and hose into the center hole, carefully aligning the escutcheon. Press down on the escutcheon and remove any excess putty. 1025490-2- Kohler Co.
-
Page 5: Install The Faucet
- For best performance, attach the weight to the hose 23” (58.4cm) from the loose end of the hose. The weight may be moved to adjust the pull-out length of the hose. Carefully tighten the weight screws. Do not overtighten. - Reconnect the hose to the hose connector. Kohler Co. 1025490-2-... -
Page 6: Installation Checkout
- Turn on the main water supply, and open the valve for one minute to flush the fitting. - Reattach the spray head and screen. Turn on the water and check for leaks. Repair as needed. 1025490-2- Kohler Co. - Page 7 - Turn off the water by pulling the valve stem down. Reinstall the bonnet, handle, and setscrew. Kohler Co. 1025490-2-...
-
Page 8: Guide D'installation
- Ne connectez pas un lave vaisselle au flexible de la douchette. - La Société KOHLER se réserve le droit d’apporter toutes modifications sur le design des robinets et ceci sans préavis, comme spécifié dans le Catalogue des Prix. - Page 9 - Appliquez un ruban d’étanchéité sur la tige filetée, et installez le bec sur la tige. - Serrez doucement à l’aide d’une clé à sangle et enlevez tous excès de mastic. Kohler Co. 1025490-2-...
- Page 10 - Glissez la rondelle en caoutchouc, la rosace, le joint torique (face vers le bas) sur le tuyau est le flexible du robinet - Insérez le tuyau et le flexible dans le trou central, alignez les rosaces soigneusement. Appuyez sur les rosaces et enlevez tous excédents de mastic. 1025490-2- Kohler Co.
- Page 11 (58,4 cm) à la boucle du tuyau flexible. Le poids peut être déplacé pour régler la longueur du coulissage du tuyau flexible. Serrez soigneusement les vis de contrepoids. Ne pas trop serrer. - Reconnectez le tuyau à sa connexion. Kohler Co. 1025490-2-...
-
Page 12: Vérification De L'installation
- Ouvrez l’alimentation d’eau général, et ouvrez les valves pendant une minute pour remplir les tuyaux. - Attachez de nouveau la tête est le brise jet. Laissez couler l’eau et vérifiez si il y a des fuites. Réparez si besoin. 1025490-2- Kohler Co. -
Page 13: Réglage De La Température
- Arrêtez l’écoulement de l’eau en tirant vers vous la tige du mitigeur. Réinstallez la rosace, le levier et la vis. Kohler Co. 1025490-2-... -
Page 14: Guía De Instalación
- No conecte el lavaplatos a la salida del rociador de la grifería. - Kohler Co. se reserva el derecho de modificar el diseño de la grifería sin previo aviso, tal como se especifica en la lista de precios. - Page 15 - Aplique el sellador de rosca en el niple e instale el surtidor en el niple. - Apriete cuidadosamente con una llave de correa limpia y elimine el exceso de masilla. Kohler Co. 1025490-2-...
- Page 16 - Inserte la tubería y la manguera de la grifería en el orificio central, y con cuidado alinee el chapetón. Presione el chapetón hacia abajo y remueva el exceso de masilla de plomería. 1025490-2- Kohler Co.
- Page 17 (58,4cm) del extremo suelto de la manguera. La pesa se puede mover para ajustar la longitud del extremo extraíble de la manguera. Apriete con cuidado los tornillos de la pesa. No apriete en exceso. - Vuelva a conectar la manguera en el conector de la manguera. Kohler Co. 1025490-2-...
- Page 18 - Abra el suministro principal de agua y la válvula durante un minuto para limpiar el aparato sanitario. - Vuelva a conectar la cabeza del rociador y la rejilla. Abra el agua y verifique que no haya fugas. Repare según sea necesario. 1025490-2- Kohler Co.
- Page 19 - Presione el vástago de la válvula hacia abajo para cerrar el agua. Reinstale la base, la manija y el tornillo de fijación. Kohler Co. 1025490-2-...
- Page 20 USA : 1-800-4-KOHLER Canada : 1-800-964-5590 Mexico : 001-877-680-1310 kohler.com E2003 Kohler Co. 1025490-2- Kohler Co. 1025490-2-...
Need help?
Do you have a question about the K-6350 and is the answer not in the manual?
Questions and answers