
Related Manuals for Framery Q Flip 'n Fold


Summary of Contents for Framery Q Flip 'n Fold
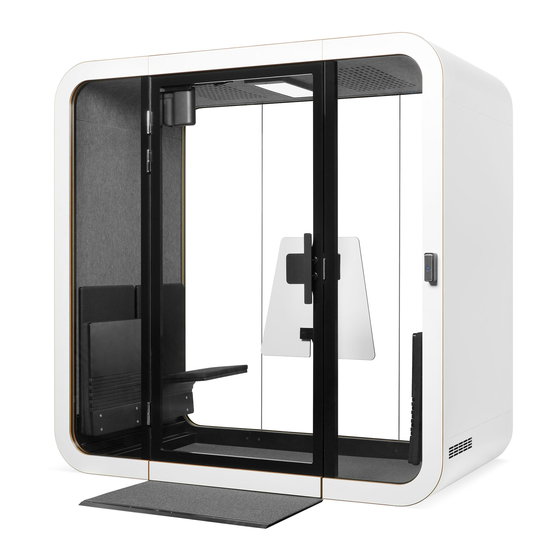
- Page 1 English Framery Q (UL) Flip 'n Fold Version 2.1 Tampere, Finland 27.6.2022 Installation instructions...
-
Page 3: Table Of Contents
Framery Q (UL) Flip 'n Fold Contents 1 Warranty checklist..................7 2 Important safety and product instructions..........8 2.1 Preface........................8 2.2 Product information....................8 2.3 Copyright.........................8 2.4 Manual contents..................... 8 2.5 Intended use......................8 2.5.1 Non-conventional use.................9 2.5.2 Ambient conditions for use.................9 2.6 Warning, information, and safety symbols in this manual........ - Page 4 Framery Q (UL) Flip 'n Fold 8 Front frames and glasses.................44 8.1 Remove the installation support................44 8.2 Install the optional seismic support brackets at the front........44 8.3 Install the front frames with glasses..............45 9 Straighten the pod..................48 10 Fasten the optional seismic support brackets........52 11 Install the seals..................54...
- Page 5 Framery Q (UL) Flip 'n Fold 21 Install the cover panels and plates............113 21.1 Install the roof panel and cover plates.............113 21.2 Install the wall cover panels................114 22 Install the body covers................. 116 22.1 Install the bottom body covers................. 116 22.2 Install the roof body covers................117...
- Page 6 Framery Q (UL) Flip 'n Fold...
-
Page 7: Warranty Checklist
Framery Q (UL) Flip 'n Fold 1 Warranty checklist For the product warranty to be valid: Fill this checklist and send it to Framery after pod installation. Take a photo or scan the filled list and send it to Framery at warranty@frameryacoustics.com. -
Page 8: Important Safety And Product Instructions
• Installation instructions 2.5 Intended use The Framery Q is a pod intended for short term indoor commercial and household use by one to four (1-4) people at a time. Warning: WARNING –To reduce the risk of burns, fire, electric shock, or injury to persons: Use this product only for its intended use as described in the user instructions. -
Page 9: Non-Conventional Use
Framery Q (UL) Flip 'n Fold 2.5.1 Non-conventional use Any use or maintenance of the product that is not specifically allowed in the installation, maintenance, troubleshooting or user instructions is prohibited, including the following: • Installation, maintenance or disassembly of the pod without reading and understanding the instructions for those actions •... -
Page 10: Main Safety Risks Related To The Installation, Maintenance, Disassembly, And Use Of The Product
Framery Q (UL) Flip 'n Fold 2.7 Main safety risks related to the installation, maintenance, disassembly, and use of the product 2.7.1 Installation, maintenance, and disassembly WARNING! To reduce the risk of burns, fire, electric shock, or injury to persons,... -
Page 11: Fire Safety
Do not connect any extension cords to the power outlet(s) of the product. 2.7.3 Fire safety The fire load for the Framery Q is approx. 5200 MJ. WARNING! To reduce the risk of burns, fire, electric shock, or injury to persons,... -
Page 12: Use
2.7.4 Use Maximum loads for Framery Q Flip 'n' Fold table is 131 lb (60 kg). Maximum load for the display bracket is 22 lbs (10 kg). Maximum load for the sofas is 600 lbs (272 kg). -
Page 13: Moving The Product On Casters (Optional)
Framery Q (UL) Flip 'n Fold Do not use the pod if you notice any defects in the electrical equipment or if the product is not working properly. Disconnect the power cord from the power outlet and contact your local dealer or the manufacturer immediately. -
Page 14: Location Of Product Markings
Framery Q (UL) Flip 'n Fold 2.8 Location of Product Markings Position Label Label text This furnishing has not been evaluated for flammability or cigarette ignition resistance L'inflammabilité ou la résistance à l'allumage d'une cigarette n'a pas été évaluée pour cette garniture Installation instructions info@frameryacoustics.com... - Page 15 Framery Q (UL) Flip 'n Fold Position Label Label text Framery MANUFACTURED / FABRICATION Product / Produit FRAMERY Q FNF Input / Entrée 100-240 VAC (10 A) 50-60 HZ Manufacturer / Fabricant: Framery Oy WEB: www.frameryacoustics.com Email: info@frameryacoustics.com Made in Finland / Fabriqué...
-
Page 16: Installation Requirements
Framery Q (UL) Flip 'n Fold 3 Installation requirements 3.1 Tools and accessories Figure 1: Tools and accessories needed for installation and maintenance Note: Use a white rubber mallet to prevent leaving marks on the body covers. Note: Use a plastic chisel to remove the body covers. -
Page 17: Main Dimensions
Framery Q (UL) Flip 'n Fold Note: Use a separate piece of carpet in the door installation. Note: Use a lint-free cloth to clean the pod. Note: Use a mild alcohol-based cleaning solution to clean the pod. Tip: Use glass washing liquid as a lubricant to help install the seal. -
Page 18: Operating Space
Framery Q (UL) Flip 'n Fold Figure 3: Installation space measurements 3.4 Operating space Make sure that the pod has enough space for the air to circulate correctly. Note: If the pod is placed in a corridor or a passageway, make sure that, when open, the pod door does not obstruct the required egress path. -
Page 19: Seismic Anchoring Requirements
Framery Q (UL) Flip 'n Fold 3.5 Seismic anchoring requirements Note: When installing the product, take into consideration all local laws, rules and regulations concerning seismic anchoring and seismic safety. For installations in the U.S., in buildings located in Seismic Design Categories A and B, anchoring to the floor is optional. -
Page 20: Floor
Framery Q (UL) Flip 'n Fold 4 Floor 4.1 Install the floor Press wooden pins (4 pcs) into the holes in the back I-beam. Stand the floor modules on their sides. Note: Support the pieces at all times. Installation instructions... - Page 21 Framery Q (UL) Flip 'n Fold Connect the I-beam to one of the floor modules. Note: Make sure that the countersunk holes are facing up. Note: Make sure that the countersunk hole is on the right side of the larger opening in the middle of the I-beam.
- Page 22 Framery Q (UL) Flip 'n Fold Press wooden pins (10 pcs) into the floor modules. Press the floor board onto the floor modules. Note: Make sure that the slots for the floor board connectors are in the doorway. Installation instructions...
- Page 23 Framery Q (UL) Flip 'n Fold Install 4x30 screws (20 pcs). Note: Install the screws from the ends of the floor modules towards the middle. Make sure that the wooden pins are in place. Note: Make sure that the screw heads are level with the floor or deeper.
- Page 24 Framery Q (UL) Flip 'n Fold Install guide pins (4 pcs) into the installation holes at the front of the pod. 10. Install the support beam onto the front of the pod with M8x40 countersunk screws (2 pcs). Installation instructions...
- Page 25 Framery Q (UL) Flip 'n Fold 11. Install guide pins (4 pcs) into the installation holes at the back of the pod. Note: Make sure that the flat side of the guide pin goes into the mounting hole. 12. Install the lower frame to the floor with black M8x50 countersunk screws (3 pcs).
-
Page 26: Install The Wall Modules
Framery Q (UL) Flip 'n Fold 5 Install the wall modules 5.1 Remove the wall cover panels Place the wall modules lengthwise against a wall. Unscrew the 4x30 screws (24 pcs) and remove the cover panels (4 pcs). Set the cover panels and screws aside. - Page 27 Framery Q (UL) Flip 'n Fold Lift one wall module into place. Note: Make sure that the "This side up" -sticker is on the top edge of the wall. Note: Support the wall until it is secured with the bolts.
- Page 28 Framery Q (UL) Flip 'n Fold Lift the other wall module into place. Note: Make sure that the "This side up" -sticker is on the top edge of the wall. Note: Support the wall until it is secured with the bolts.
-
Page 29: Roof
Framery Q (UL) Flip 'n Fold 6 Roof 6.1 Connect the roof modules Stand the roof modules on their sides. Note: Make sure that the precut hole in the ceiling felt faces upwards. This is the back edge of the roof. - Page 30 Framery Q (UL) Flip 'n Fold Unscrew the 4x20 screws (1 pcs each) and remove the roof cover plates (4 pcs) from both roof modules. Set the cover plates and screws aside. Install the guide pins (2 pcs) to the mounting holes in one of the roof modules.
-
Page 31: Install The Upper Frames
Framery Q (UL) Flip 'n Fold Push the roof modules together. Install flanged M8x50 bolts (4 pcs) and flanged M8 nuts (4 pcs). 6.2 Install the upper frames Installation instructions info@frameryacoustics.com... - Page 32 Framery Q (UL) Flip 'n Fold Install guide pins (4 pcs) to the mounting holes at the upper edge of the roof. Note: Make sure that the flat side of the guide pin goes into the mounting hole. Push the back upper frame into place.
- Page 33 Framery Q (UL) Flip 'n Fold Install with M8x35 bolts (3 pcs) and M8 washers (3 pcs). Note: Press the acoustic panel aside to reach the bolt holes. Make sure that you return the acoustic panel to its original position.
- Page 34 Framery Q (UL) Flip 'n Fold Install guide pins (4 pcs) to the mounting holes at the upper edge of the roof. Note: Make sure that the flat side of the guide pin goes into the mounting hole. Push the front upper frame into place.
-
Page 35: Install The Roof
Framery Q (UL) Flip 'n Fold Install with M8x35 bolts (3 pcs) and M8 washers (3 pcs). Note: Press the acoustic panel aside to reach the bolt holes. Make sure that you return the acoustic panel to its original position. - Page 36 Framery Q (UL) Flip 'n Fold Install the guide pins (4 pcs) to the mounting holes of the wall modules. Note: Make sure that the guide pins are installed to the correct holes (closer to the wall felt). Note: Make sure that the flat side of the guide pin goes into the mounting hole.
- Page 37 Framery Q (UL) Flip 'n Fold Lift the roof onto the wall modules. Warning: Plan the lift beforehand. Make sure that the installation site is neat and tidy to prevent tripping while lifting the roof. Warning: Make sure that everyone lifting the roof has sufficient reach.
-
Page 38: Back Frames And Glasses
Framery Q (UL) Flip 'n Fold 7 Back frames and glasses 7.1 Install the optional seismic support brackets at the back Note: The seismic support brackets are optional. The maximum size of the anchor bolt is M10. Follow the local regulations regarding seismic anchoring. - Page 39 Framery Q (UL) Flip 'n Fold Install guide pins (8 pcs) to the holes on the back of the pod. Note: Make sure that the flat side of the guide pin goes into the mounting hole. Lift the left-hand side frame into place.
- Page 40 Framery Q (UL) Flip 'n Fold Install the left-hand side frame with M8x35 bolts (2 pcs) and M8 washers (2 pcs), one M8x60 screw and M8 washer, and one hex head M8x60 screw and tighten by hand. Note: Support the frame until securely fastened.
-
Page 41: Install The Remaining Side Frame And Glass
Framery Q (UL) Flip 'n Fold Lift the center glass into the groove in the lower frame and slide it into place. Use a suction cup. Note: Make sure that the side glass is aligned and sitting snugly in the H- profile seal. - Page 42 Framery Q (UL) Flip 'n Fold Install the temporary seal between the right-hand side glass and frame. Note: Do not tip or turn the side frame with the glass onto the open side so the glass does not fall out of the frame.
- Page 43 Framery Q (UL) Flip 'n Fold Install the right-hand side frame with M8x35 bolts (2 pcs) and M8 washers (2 pcs), one M8x60 screw and M8 washer, and one hex head M8x60 screw. Tighten by hand. Note: Support the frame until securely fastened.
-
Page 44: Front Frames And Glasses
Framery Q (UL) Flip 'n Fold 8 Front frames and glasses 8.1 Remove the installation support Remove the installation support from the floor. Set the frame and bolts aside. Note: Make sure that you remove the guide pins (2 pcs) from the holes closest to the front center frame and the doorway. -
Page 45: Install The Front Frames With Glasses
Framery Q (UL) Flip 'n Fold 8.3 Install the front frames with glasses Install guide pins (6 pcs) to the holes on the front of the pod. Note: Make sure that there are no pins in the holes closest to the front center frame and the doorway. - Page 46 Framery Q (UL) Flip 'n Fold Lift the left-hand side glass and frame into place. Note: Make sure that the frame has the holes for the hinges. Note: Support the frame until securely fastened. Note: Push the roof upwards to fit the frame in place if needed.
- Page 47 Framery Q (UL) Flip 'n Fold Lift the right-hand side glass and frame into place. Note: Make sure that the frame has the strike plate. Note: Support the frame until securely fastened. Note: Push the roof upwards to fit the frame in place if needed.
-
Page 48: Straighten The Pod
Framery Q (UL) Flip 'n Fold 9 Straighten the pod Push the pod from the left-hand wall and measure the straightness of the strike plate- side glass frame with a spirit level. Adjust if needed and tighten the bolts of the strike plate-side glass frame. - Page 49 Framery Q (UL) Flip 'n Fold Measure the straightness from the righ-hand with a spirit level. Adjust if needed and tighten the bolts at the joints between the walls and the roof (8 pcs) and at the joints between the walls and the floor (8 pcs). Tighten the bolts between the walls and the glass frames (8 pcs).
- Page 50 Framery Q (UL) Flip 'n Fold Hold the pod in the straight position and tighten the screws at the back of the roof and side frame (2 pcs). Note: Make sure that you hold the pod in the straight position until all the loose bolts have been tightened.
- Page 51 Framery Q (UL) Flip 'n Fold Tighten the nylon screws (2 pcs each side) on the sides of the back of the pod with a flat-head screwdriver. When tightening the nylon screws, lightly push the glasses from the outside to make sure they settle closer to the inner edge of the frame groove.
-
Page 52: Fasten The Optional Seismic Support Brackets
Framery Q (UL) Flip 'n Fold 10 Fasten the optional seismic support brackets Remove the plastic plugs (4 pcs) from the inside frames in the front and back frames. Install M8x35 bolts (4 pcs) to the frames. Installation instructions info@frameryacoustics.com... - Page 53 Framery Q (UL) Flip 'n Fold Install the plastic plugs to the holes in the front and back frames. Installation instructions info@frameryacoustics.com...
-
Page 54: Install The Seals
Framery Q (UL) Flip 'n Fold 11 Install the seals Seal the back of the pod with a wedge-shaped seal between the glasses and frames. Note: Install the seal on the outside of the back of the pod and cut off any excess. -
Page 55: Install The Interior
Framery Q (UL) Flip 'n Fold 12 Install the interior 12.1 Install the seats Remove the M6x40 hex bolts (4 pcs) and flanged nuts (4 pcs) from the seat and remove the seat part from the seat bracket. Set the bolts and nuts aside. - Page 56 Framery Q (UL) Flip 'n Fold Place the seat part of the seat bracket against the protection plate on the wall and the back rest part 45 mm (1 ¾ in) from the edge of the wall felt. Attach the seat bracket to the wall with ball-headed 5x50 screws (4 pcs each).
- Page 57 Framery Q (UL) Flip 'n Fold Guide the back rest to the correct horizontal position and press the back rest against the wall to guide it onto the clasps on the bracket. Press the seat against the bracket and push the M6x40 bolts (4 pcs) through the seat and the bracket.
-
Page 58: Install The Carpet
Framery Q (UL) Flip 'n Fold Reinstall the seat bracket to the back rest with the 12 mm Phillips screws (2 pcs). 12.2 Install the carpet Install the floor board connectors onto the edge of the floor. Installation instructions info@frameryacoustics.com... -
Page 59: Install The Power Column
Framery Q (UL) Flip 'n Fold Install the carpet. Note: Make sure that the notch in the carpet is in the doorway of the pod. Note: Press the edges of the carpet under the wall felt. Note: Make sure that the carpet is firmly installed and there are no bumps. - Page 60 Framery Q (UL) Flip 'n Fold Connect the door opener adapter to the power outlet. Place the door opener adapter and the power outlet into the metal box with electrics. Installation instructions info@frameryacoustics.com...
- Page 61 Framery Q (UL) Flip 'n Fold Connect the power cord to the GST splitter. Place the metal box with electrics against the back wall of the pod. Installation instructions info@frameryacoustics.com...
- Page 62 Framery Q (UL) Flip 'n Fold Remove the angle iron from the front of the power column. Set the screws aside. Install the angle iron onto the ceiling with 4x30 screws (2 pcs). Use the ceiling felt center line as the midpoint reference and make sure that the angle iron is 15 mm (5/8 in) from the black ABS strip.
- Page 63 Framery Q (UL) Flip 'n Fold Fold the felt down at the partially pre-cut opening. Do not cut out the felt at the partiallly pre-cut opening, only fold it down. Remove the cord duct cover from the power column. Installation instructions...
- Page 64 Framery Q (UL) Flip 'n Fold 10. Feed the power outlet cord through the opening at the upper end of the cord duct, then feed it through the opening at the lower end of the cord duct. Note: Make sure that the power outlet cord is sitting snugly inside the cord duct.
- Page 65 Framery Q (UL) Flip 'n Fold 12. Lift the power column to its place. Note: Make sure that the cords are not pinched or damaged. 13. Install the upper end of the power column with black M6x10 screws (2 pcs).
- Page 66 Framery Q (UL) Flip 'n Fold 14. Connect the power outlet cord connector to the GST splitter. Note: Make sure that the cord from the power unit and the power cord are readily connected to the GST splitter. 15. Connect the internal power cord from the power unit to to the plug in the back frame.
- Page 67 Framery Q (UL) Flip 'n Fold 16. Check the straightness of the power column with a spirit level and install the lower end of the power column and the metal box with black 4,2x25 screws (2 pcs each). Installation instructions...
-
Page 68: Install The Ceiling Threshold
Framery Q (UL) Flip 'n Fold 13 Install the ceiling threshold Lift the ceiling threshold to the front center frame. Slide the threshold inwards against the door frame. Installation instructions info@frameryacoustics.com... - Page 69 Framery Q (UL) Flip 'n Fold Install the ceiling threshold with black 5x30 screws (4 pcs). Note: Make sure that the side frame seals are not between the threshold and the door frame. Neatly cut the side frame seal to the correct length, if needed.
-
Page 70: Install The Ramp
Framery Q (UL) Flip 'n Fold 14 Install the ramp Set the ramp board into place. Note: Make sure that the holes in the ramp board match the floor board connectors. Remove the protective sticker from the threshold. Note: The threshold has four screwholes. - Page 71 Framery Q (UL) Flip 'n Fold Install the threshold in the doorway with 3x12 screws (4 pcs). Note: Place the countersunk holes upwards. Note: Make sure that the side frame seals are not between the threshold and the door frame. Neatly cut the side frame seal to the correct length, if needed.
- Page 72 Framery Q (UL) Flip 'n Fold Guide the ramp carpet under the threshold and press the carpet onto the stickers on the ramp board. Note: Make sure that the threshold secures the ramp carpet in place. Remove the protective sticker from the metal strips (3 pcs).
- Page 73 Framery Q (UL) Flip 'n Fold Place the metal strip on the lower edge of the ramp board and push in place. Note: Make sure that you install the notches in the carpet against the side frames. Install the metal strips with M4x10 screws (11 pcs).
-
Page 74: Install The Door
Framery Q (UL) Flip 'n Fold 15 Install the door 15.1 Install the door Detach the halves of the hinges from each other. Note: Do not peel off the black tape from the hinges. The tape is needed to protect the glass parts from the metal hinges. - Page 75 Framery Q (UL) Flip 'n Fold Attach the upper frame leaves (2 pcs) to the door frame with 5x30 screws (4 pcs each). Note: Make sure that the seal is not squashed between the hinge and the door frame. Attach the lower frame leaf (1 pcs) to the door frame with 5x30 screws (4 pcs).
- Page 76 Framery Q (UL) Flip 'n Fold Attach the door leaves to the door with 5x30 screws (4 pcs each). Use a hand tool to tighten the screws. Lift the door into place in the open position (~130°). Warning: Lifting requires two people. Make sure that the lower hinge falls into place.
-
Page 77: Install The Lock Case
Framery Q (UL) Flip 'n Fold 15.2 Install the lock case 1. Install the lock case to the door with M5x30 screws (2 pcs). Note: Install the adapter plate under the lock case to the door. Note: Make sure that the adjusting screw is above the roller latch. -
Page 78: Install The Pushbutton
Framery Q (UL) Flip 'n Fold Insert the nylon cases into the holes in the door from the outside. Insert the handle through the nylon cases and attach it to the push plate with black M8x35 screws (2 pcs). Note: Make sure that the push plate is on the inside of the door. - Page 79 Framery Q (UL) Flip 'n Fold Note: Install the back plate of the other pushbutton at the height of 103 cm (3 ft 4 9/16 in) on the left-hand side glass frame inside the pod. Installation instructions info@frameryacoustics.com...
- Page 80 Framery Q (UL) Flip 'n Fold Install the back plate of the pushbutton with self-tapping Phillips screws (2 pcs). Note: Make sure that you install the back plate of the pushbutton in the middle of the frame so that the screws do not reach the glass.
- Page 81 Framery Q (UL) Flip 'n Fold Install the cover of the pushbutton. Push the round holes of the cover first onto the screws as far as they go. Then pull the cover down and push it fully into place. Tighten the hex head screws through the holes in the cover of the pushbutton.
-
Page 82: Install The Door Opener
Framery Q (UL) Flip 'n Fold 16 Install the door opener Cut out the partially precut opening in the ceiling felt. Install the base plate of the door opener arm with 5x30 screw (2 pcs). Note: Make sure that the countersunk hole are downwards. -
Page 83: Install The Electrical Duct
Framery Q (UL) Flip 'n Fold 16.1 Install the electrical duct Pull off the covers from the electrical ducts. Note: Set the covers aside. Cut an 11 mm (7/16 in) piece off from the short electrical duct. Leave a 2 mm (1/16 in) fold on the cut. -
Page 84: Install The Motor Of The Door Opener
Framery Q (UL) Flip 'n Fold Install the short electrical duct to the ceiling with 4x30 screws (2 pcs). Note: Make sure that the cut end of the duct is against the ceiling threshold. Note: Use the ceiling felt center line as the midpoint reference. - Page 85 Framery Q (UL) Flip 'n Fold Install the door opener plate and the front cover plate to the existing installation holes on the inside of the door with black 30 mm Phillips head screws (5 pcs) and washers (5 pcs).
-
Page 86: Install The Door Opener Arm Bracket
Framery Q (UL) Flip 'n Fold Push the top cover onto the threaded rods. Hang the door opener motor onto the threaded rods and attach with black socket screws (2 pcs). 16.3 Install the door opener arm bracket Installation instructions... - Page 87 Framery Q (UL) Flip 'n Fold Install the door opener arm bracket installation plate to the metal plate in the ceiling with black Phillips head screws (4 pcs). Note: Make sure that the screws are in the middle of the installation holes.
-
Page 88: Install The Door Opener Arm
Framery Q (UL) Flip 'n Fold Measure that the middle of the bolt in the bracket cover is 162 mm (6 3/8 in) from the closed door. Tighten the screws (4 pcs) on both sides of the bracket cover. 16.4 Install the door opener arm Installation instructions info@frameryacoustics.com... - Page 89 Framery Q (UL) Flip 'n Fold Place the larger end of the door opener arm onto the shaft at the top of the door opener motor. Bend the arm so that the joint touches the door frame. Note: Make sure that the arm touches the door frame before you tighten the bolts.
-
Page 90: Install The Door Opener Arm To The Door Opener Arm Bracket
Framery Q (UL) Flip 'n Fold Tighten each bolt in turn in a circular pattern, a ¼ turn at a time, until each bolt is fully tightened. 16.5 Install the door opener arm to the door opener arm bracket Close the door. - Page 91 Framery Q (UL) Flip 'n Fold Lever the hole at the end of the door opener arm to line up with the hole in the bracket. Position the hole at the end of the door opener arm slightly off center of the hole in the door opener arm bracket.
-
Page 92: Install The Electrics
Framery Q (UL) Flip 'n Fold 17 Install the electrics 17.1 Install the door opener electrics Install the wire holders to the ends of the spiral wire cover of the power cord of the door opener. Press the end of the cover into the center groove of the wire holder and guide the power cord out of the side of the wire holder. - Page 93 Framery Q (UL) Flip 'n Fold Install the wire holder with the block connector to the upper right-hand corner of the door frame with self-tapping Phillips screws (2 pcs). Note: Make sure that the edge of the wire holder is at minimum 12 mm (½ in) from the hinge-side edge and 117 mm (4 5/8 in) from the upper edge of the door.
- Page 94 Framery Q (UL) Flip 'n Fold Remove the dummy connector from the door opener battery. Note: Make sure that the battery is in the OFF position (the middle position). Connect the male connector from the door opener battery to the door opener motor.
- Page 95 Framery Q (UL) Flip 'n Fold Install the battery to the motor. Note: Make sure the wires are not pinched or damaged during the installation. Connect the door opener power cord to the door opener battery. Installation instructions info@frameryacoustics.com...
- Page 96 Framery Q (UL) Flip 'n Fold Install the cover to the battery. Note: Guide the cords out of the hole in the cover. Install the other wire holder to the hinge-side glass frame as close to the electrical duct as possible with self-tapping Phillips screws (2 pcs).
- Page 97 Framery Q (UL) Flip 'n Fold 10. Guide the power cord of the door opener into the electrical ducts. 11. Install the cover to the short electrical duct. Installation instructions info@frameryacoustics.com...
- Page 98 Framery Q (UL) Flip 'n Fold 12. Install the cover to the long electrical duct. 13. Guide the power cord of the door opener through the large opening in the center of the ceiling. Installation instructions info@frameryacoustics.com...
-
Page 99: Install The Control Unit
Framery Q (UL) Flip 'n Fold 14. Guide the power cord of the door opener through the small opening in the ceiling felt, down the power column and out of the opening at lower end of the power column. 15. Connect the power cord of the door opener to the adapter cord. - Page 100 Framery Q (UL) Flip 'n Fold Insert the control unit bracket into the back of the control unit. Turn the bracket into place. Installation instructions info@frameryacoustics.com...
- Page 101 Framery Q (UL) Flip 'n Fold Install the bracket with control unit into the opening in the ceiling with 4x20 screws (2 pcs). Note: Make sure that you install the control unit to the right-hand side of center beam. Connect the fan power cords to the FAN 1 and FAN 2 connectors.
- Page 102 Framery Q (UL) Flip 'n Fold Connect the DC extension cord to the PWR IN connector Guide the DC extension cord from the large opening in the center of the ceiling over the ceiling felt and to the back of the pod.
- Page 103 Framery Q (UL) Flip 'n Fold Guide the DC extension cord through the small opening in the ceiling felt, down the power column and out of the opening at the lower end of the power column. Connect the DC extension cord to the DC converter cord.
-
Page 104: Install The Motion Detector And Light
Framery Q (UL) Flip 'n Fold 17.3 Install the motion detector and light Remove the bracket from the motion detector. Install the motion detector bracket to the ceiling at the back of the pod with 4x20 screws (3 pcs). The distance between the edge of the bracket and the power column is 9 mm (3/8 in). - Page 105 Framery Q (UL) Flip 'n Fold Guide the motion detector cord through the opening to the control unit. Connect motion detector cord to the PIR connector of the control unit. Installation instructions info@frameryacoustics.com...
- Page 106 Framery Q (UL) Flip 'n Fold Lift the motion detector to the bracket and slide the motion detector into place. Connect the light cord to the LED 1 connector of the control unit. Installation instructions info@frameryacoustics.com...
-
Page 107: Finalize The Intallation Of The Electrics
Framery Q (UL) Flip 'n Fold Install the wire end of the light under the flap of the motion detector bracket and turn the light against the ceiling. The light attaches to the ceiling with magnets. Align the light to the center of the ceiling. - Page 108 Framery Q (UL) Flip 'n Fold Install the metal box cover with black M6x10 screws (4 pcs). Installation instructions info@frameryacoustics.com...
-
Page 109: Install The Table
Framery Q (UL) Flip 'n Fold 18 Install the table Remove the M6x16 screws (2 pcs) from the power column. Set the screws aside. Install the table with the same M6x16 screws (2 pcs) to the power column. Install the gas spring arm to the power column with one M6x12 screw and M6 cap nut. -
Page 110: Install The Coat Hooks
Framery Q (UL) Flip 'n Fold 19 Install the coat hooks Measure the places for the coat hooks at both walls. 170 cm (67 in) up from the base of the wall and 9 cm (3 ½ in) from the front glass wall. -
Page 111: Adjust The Automatic Door Seal
Framery Q (UL) Flip 'n Fold 20 Adjust the automatic door seal Pull out the adjustment stick from the lower inside frame of the door. Adjust the screw on the stick. The further the stick comes out of the door frame, the lower the door seal descends. - Page 112 Framery Q (UL) Flip 'n Fold Push the stick back into place with a snap. Close the door. Check with a flashlight that there is no gap under the door. If the light shines through from under the door, readjust the door seal.
-
Page 113: Install The Cover Panels And Plates
Framery Q (UL) Flip 'n Fold 21 Install the cover panels and plates 21.1 Install the roof panel and cover plates Install the roof cover panel with 4x30 screws (6 pcs). Note: Make sure that the countersunk screw holes are upwards. -
Page 114: Install The Wall Cover Panels
Framery Q (UL) Flip 'n Fold Install the roof cover plates (4 pcs) with 4x30 screws (1 pc each). Note: Make sure that the countersunk screw holes are upwards. Use the existing screw holes. 21.2 Install the wall cover panels Install the wall cover panels (4 pcs) with 4x30 screws (8 pcs each). - Page 115 Framery Q (UL) Flip 'n Fold Installation instructions info@frameryacoustics.com...
-
Page 116: Install The Body Covers
Framery Q (UL) Flip 'n Fold 22 Install the body covers 22.1 Install the bottom body covers Slide the left-hand bottom body cover under the pod. Guide the edge of the cover into the groove under the floor. Guide the other edge of the left-hand bottom body cover into the groove at the lower part of the left-hand wall. -
Page 117: Install The Roof Body Covers
Framery Q (UL) Flip 'n Fold Repeat the steps 1. and 2. for the right-hand side bottom covers. 22.2 Install the roof body covers Guide the edge of one of the curved roof body covers into the groove at the edge of the roof. - Page 118 Framery Q (UL) Flip 'n Fold Guide the edge of the straight roof body cover of the left-hand side into the groove at the center of the roof. Note: Make sure that the round circle in the body cover corresponds to the one in the roof.
-
Page 119: Install The Wall Body Covers
Framery Q (UL) Flip 'n Fold 22.3 Install the wall body covers Guide the edge of one wall body cover into the groove at the top of the wall. Note: If installing the optional whiteboard wall body covers, make sure that the sticker is in the upper right corner. - Page 120 Framery Q (UL) Flip 'n Fold Repeat steps 1 and 2 for the other wall body cover. Note: Make sure that there are no gaps between the body covers and the frames. Note: Make sure that the wall body covers are installed evenly and aligned correctly with the other body covers.
-
Page 121: Program The Door Opener
Framery Q (UL) Flip 'n Fold 23 Program the door opener 23.1 Program the initial settings To reset the door opener and make sure that the memory is clear, press and hold Enter. At the same time, press and release Reset. - Page 122 Framery Q (UL) Flip 'n Fold To enter the programming mode, press and hold Select and Enter for three seconds. Note: The LEDs PC–LA flash briefly and the CLOSE POSITION LED lights up in red and stays lit. To programme the door closed position, make sure that the door is in the closed position and press and release Enter.
- Page 123 Framery Q (UL) Flip 'n Fold To programme the door open position, make sure that the door is fully open and press and release Enter. The OPEN POSITION LED flashes briefly in green. Then the AUTO SETUP LED lights up in red.
-
Page 124: Enable The Power Close Function
Framery Q (UL) Flip 'n Fold 23.2 Enable the power close function To enter the programming mode, press and hold Select and Enter for three seconds. Note: The LEDs PC–LA flash briefly in green and the CLOSED POSITIONLED lights up and stays lit. - Page 125 Framery Q (UL) Flip 'n Fold Rotate the potentiometer to change the color of the LED to green. The green LED indicates that the power close function is on. The red LED indicates that the power close function is off.
- Page 126 Framery Q (UL) Flip 'n Fold Rotate the potentiometer to change the color of the LED to green. To store the chosen PG setting, press and release Enter. Repeat for the DB (Dynamic Braking) function. To exit the programming mode, press and hold Enter for 3 s.
- Page 127 Framery Q (UL) Flip 'n Fold To link an RF switch with the door contoller, press and hold LEARN until the LEDs PC-LA flash in green. 10. Push the RF push button. Note: The CLOSE POSITIONLED flashes in green incating that the operator has accepted the push button.
- Page 128 Framery Q (UL) Flip 'n Fold 12. Reinstall the bottom cover of the door opener. Installation instructions info@frameryacoustics.com...
-
Page 129: Finish The Installation
Framery Q (UL) Flip 'n Fold 24 Finish the installation Clean the glasses with glass washing liquid and a lint-free cloth. Connect the main power cord to the pod. Installation instructions info@frameryacoustics.com... - Page 130 Framery Q (UL) Flip 'n Fold Connect the main power cord to a power outlet. Switch the door opener battery ON. Installation instructions info@frameryacoustics.com...
- Page 131 Framery Q (UL) Flip 'n Fold Fill out the warranty checklist and send it to Framery. Note: The warranty is only valid with the filled-out warranty checklist. Installation instructions info@frameryacoustics.com...
-
Page 132: Troubleshooting
Framery Q (UL) Flip 'n Fold 25 Troubleshooting Condition The door is difficult to close. Cause: There is a gap between the roller latch and the strike plate. Remedy: Adjust the roller latch protrusion. Turn the screw in the front plate of the lock counter-clockwise to make the roller latch protrude more. - Page 133 Framery Q (UL) Flip 'n Fold Lift the door into place in the open position (~130°). Warning: Lifting requires two people. Make sure that the lower hinge falls into place. Attach the door opener arm to the door opener arm bracket.
- Page 134 Framery Q (UL) Flip 'n Fold Installation instructions info@frameryacoustics.com...
- Page 135 Framery Q (UL) Flip 'n Fold...
- Page 136 Framery Q (UL) Flip 'n Fold Installation instructions Patamäenkatu 7 33900 Tampere FINLAND VAT: FI 23527139...
Need help?
Do you have a question about the Flip 'n Fold and is the answer not in the manual?
Questions and answers