Table of Contents
Advertisement
Quick Links
Advertisement
Table of Contents

Related Manuals for Framery Q Flip 'n Fold

Summary of Contents for Framery Q Flip 'n Fold
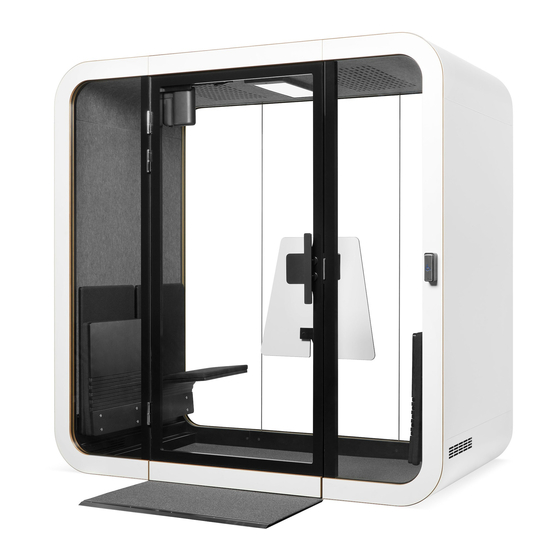
- Page 1 Framery Q Flip 'n Fold English Installation instructions Version 2.0...
-
Page 3: Table Of Contents
Contents 1 Warranty checklist..................5 2 Safety......................6 3 Installation requirements................8 3.1 Tools and accessories.................... 8 3.2 Main dimensions.....................9 3.3 Installation space....................9 3.4 Operating space....................10 4 Set the floor into place................11 5 Install the wall modules................12 5.1 Remove the wall cover panels................12 5.2 Connect the wall modules to the floor.............. - Page 4 14 Install the door..................55 14.1 Install the door....................55 14.2 Install the door handle..................57 14.3 Install the pushbutton..................58 15 Install the door opener................62 15.1 Install the electrical duct..................62 15.2 Install the motor of the door opener..............63 15.3 Install the door opener arm bracket..............65 15.4 Install the door opener arm................67 15.5 Install the door opener arm to the door opener arm bracket......69 16 Install the electrics..................
-
Page 5: Warranty Checklist
Circle the location of scratches or any other visual defects below. Attach pictures and descriptions of the defects to the warranty email. I certify that the pod is installed according to Framery installation instructions and the pod has been checked to be operating correctly. Signature and date: ___________________________________________________________ Framery Q Flip 'n Fold Installation instructions info@frameryacoustics.com... -
Page 6: Safety
Note: Never drop or insert any object into any opening unless instructed. Note: Do not place heavy objects on the roof of the pod. Note: Do not attach or hang extra weight from the door. Framery Q Flip 'n Fold Installation instructions info@frameryacoustics.com... - Page 7 Installation environment The pod is intended to be used in the following conditions. • Ambient temperature: +15°C ... +30°C (59°F ... 86°F) • Humidity: max. 50% Framery Q Flip 'n Fold Installation instructions info@frameryacoustics.com...
-
Page 8: Installation Requirements
Note: Use a white rubber mallet to prevent leaving marks on the body covers. Note: Use a plastic chisel to remove the body covers. Note: Use a separate piece of carpet in the door installation. Framery Q Flip 'n Fold Installation instructions info@frameryacoustics.com... -
Page 9: Main Dimensions
Tip: Use glass washing liquid as a lubricant to help install the seal. 3.2 Main dimensions Figure 2: Main dimensions of the pod 3.3 Installation space Make sure that you have enough installation space before you start the installation. Framery Q Flip 'n Fold Installation instructions info@frameryacoustics.com... -
Page 10: Operating Space
Figure 3: Installation space measurements 3.4 Operating space Make sure that the pod has enough space for the air to circulate correctly. Figure 4: Operating space measurements Framery Q Flip 'n Fold Installation instructions info@frameryacoustics.com... -
Page 11: Set The Floor Into Place
4 Set the floor into place Lay the floor down at the intended final location. Leave approximately 0.5 m (2 ft) of empty space behind the floor. Note: Make sure that the front support beam faces forward. Framery Q Flip 'n Fold Installation instructions info@frameryacoustics.com... -
Page 12: Install The Wall Modules
Place the wall modules lengthwise against a wall. Unscrew the 4x30 screws (24 pcs) and remove the cover panels (4 pcs). Set the cover panels and screws aside. Note: Make sure that the wall modules do not fall over. Framery Q Flip 'n Fold Installation instructions info@frameryacoustics.com... -
Page 13: Connect The Wall Modules To The Floor
Lift one wall module into place. Note: Make sure that the "This side up" -sticker is on the top edge of the wall. Note: Support the wall until it is secured with the bolts. Framery Q Flip 'n Fold Installation instructions info@frameryacoustics.com... - Page 14 Lift the other wall module into place. Note: Make sure that the "This side up" -sticker is on the top edge of the wall. Note: Support the wall until it is secured with the bolts. Framery Q Flip 'n Fold Installation instructions info@frameryacoustics.com...
- Page 15 Install M8x35 bolts (4 pcs) and M8 washers (4 pcs). Note: Support the wall until it is secured with the bolts. Framery Q Flip 'n Fold Installation instructions info@frameryacoustics.com...
-
Page 16: Roof
6.1 Connect the roof modules Stand the roof modules on their sides. Note: Make sure that the hole in the ceiling felt faces upwards. This is the back edge of the roof. Framery Q Flip 'n Fold Installation instructions info@frameryacoustics.com... - Page 17 Install the guide pins (2 pcs) to the mounting holes in one of the roof modules. Note: Make sure that the flat side of the guide pin goes into the mounting hole. Framery Q Flip 'n Fold Installation instructions info@frameryacoustics.com...
-
Page 18: Install The Upper Frames
Push the roof modules together. Install flanged M8x50 bolts (4 pcs) and flanged M8 nuts (4 pcs). 6.2 Install the upper frames Framery Q Flip 'n Fold Installation instructions info@frameryacoustics.com... - Page 19 Note: Make sure that the flat side of the guide pin goes into the mounting hole. Push the back upper frame into place. Note: Make sure that you install the correct frame to the roof. Note: Make sure that the magnets on the frame face upwards. Framery Q Flip 'n Fold Installation instructions info@frameryacoustics.com...
- Page 20 Install with M8x35 bolts (3 pcs) and M8 washers (3 pcs). Note: Press the acoustic panel aside to reach the bolt holes. Make sure that you return the acoustic panel to its original position. Lay down the joined half of the roof. Framery Q Flip 'n Fold Installation instructions info@frameryacoustics.com...
- Page 21 Note: Make sure that the flat side of the guide pin goes into the mounting hole. Push the front upper frame into place. Note: Make sure that you install the correct frame to the roof. Note: Make sure that the magnets on the frame face upwards. Framery Q Flip 'n Fold Installation instructions info@frameryacoustics.com...
-
Page 22: Install The Roof
6.3 Install the roof Warning: Heavy object, risk of injury. Lift carefully. Lifting requires a minimum of 2 people. Make sure that everyone lifting the roof has sufficient reach. Framery Q Flip 'n Fold Installation instructions info@frameryacoustics.com... - Page 23 Note: Make sure that the guide pins are installed to the correct holes (closer to the wall felt). Note: Make sure that the flat side of the guide pin goes into the mounting hole. Framery Q Flip 'n Fold Installation instructions info@frameryacoustics.com...
- Page 24 Note: Make sure that the opening for the power column is at the back of the pod. Install M8x35 bolts (8 pcs) and M8 washers (8 pcs). Framery Q Flip 'n Fold Installation instructions info@frameryacoustics.com...
-
Page 25: Back Frames And Glasses
7.1 Install one side frame and two back glasses Install guide pins (8 pcs) to the holes on the back of the pod. Note: Make sure that the flat side of the guide pin goes into the mounting hole. Framery Q Flip 'n Fold Installation instructions info@frameryacoustics.com... - Page 26 Install the left-hand side frame with M8x35 bolts (2 pcs) and M8 washers (2 pcs), one M8x60 screw and M8 washer, and one hex head M8x60 screw. Note: Support the frame until securely fastened. Framery Q Flip 'n Fold Installation instructions info@frameryacoustics.com...
- Page 27 Lift the side glass into the groove in the lower frame and slide it into place. Use a suction cup. Make sure that the center glass has seals on both sides. If not, install a seal strip on both sides of the center glass. Framery Q Flip 'n Fold Installation instructions info@frameryacoustics.com...
-
Page 28: Install The Remaining Side Frame And Glass
Note: Make sure that the side glass is aligned with the seal on the center glass. 7.2 Install the remaining side frame and glass Guide the right-hand side glass into the right-hand side frame. Framery Q Flip 'n Fold Installation instructions info@frameryacoustics.com... - Page 29 Lift the right-hand side glass and frame into place. Use a suction cup. Note: Make sure that the side glass is aligned with the seal on the center glass. Note: Support the frame until securely fastened. Framery Q Flip 'n Fold Installation instructions info@frameryacoustics.com...
- Page 30 Install the right-hand side frame with M8x35 bolts (2 pcs) and M8 washers (2 pcs), one M8x60 screw and M8 washer, and one hex head M8x60 screw. Note: Support the frame until securely fastened. Remove the temporary seal between the right-hand side glass and frame. Framery Q Flip 'n Fold Installation instructions info@frameryacoustics.com...
-
Page 31: Install The Front Frames With Glasses
Install guide pins (8 pcs) to the holes on the front of the pod. Note: Do not install guide pins in the holes closest to the front center frame and the doorway. Framery Q Flip 'n Fold Installation instructions info@frameryacoustics.com... - Page 32 Install the left-hand side frame with M8x35 bolts (2 pcs) and M8 washers (2 pcs), one M8x60 screw and M8 washer, and one hex head M8x60 screw. Tighten the screws by hand. Note: Support the frame until securely fastened. Framery Q Flip 'n Fold Installation instructions info@frameryacoustics.com...
- Page 33 Install the right-hand side frame with M8x35 bolts (2 pcs) and M8 washers (2 pcs), one M8x60 screw and M8 washer, and one hex head M8x60 screw. Tighten the screws by hand. Note: Support the frame until securely fastened. Framery Q Flip 'n Fold Installation instructions info@frameryacoustics.com...
-
Page 34: Straighten The Pod
Push the pod from the right-hand wall and measure the straightness of the wall with a spirit level. Hold in the straight position until all the loose bolts have been tightened. Framery Q Flip 'n Fold Installation instructions info@frameryacoustics.com... - Page 35 Tighten the bolts between the roof and the glass frames (6 pcs). Note: Press the acoustic panel aside to reach the bolt holes. Make sure that you return the acoustic panel to its original position. Framery Q Flip 'n Fold Installation instructions info@frameryacoustics.com...
- Page 36 Tighten the nylon screws (2 pcs each side) on the sides of the back of the pod with a flat-head screwdriver. Note: The glass adjustment screws are only for stiffening the glass structure. Tighten the screws until you feel resistance, then loosen half a turn. Do not overtighten. Framery Q Flip 'n Fold Installation instructions info@frameryacoustics.com...
-
Page 37: Install The Seals
Seal the back of the pod with a wedge-shaped seal between the glasses and frames. Note: Install the seal on the outside of the back of the pod and cut off any excess. Tip: Use glass washing liquid as a lubricant to help install the seal. Framery Q Flip 'n Fold Installation instructions info@frameryacoustics.com... - Page 38 Note: Install the seal on the inside of the front half of the pod and cut off any excess. Tip: Use glass washing liquid as a lubricant to help install the seal. Framery Q Flip 'n Fold Installation instructions info@frameryacoustics.com...
-
Page 39: Install The Interior
Set the bolts and nuts aside. Remove the 12 mm Phillips screws (2 pcs) and remove the seat bracket from the back rest of the seat. Set the screws aside. Framery Q Flip 'n Fold Installation instructions info@frameryacoustics.com... - Page 40 45 mm (1 ¾ in) from the edge of the wall felt. Attach the seat bracket to the wall with ball-headed 5x50 screws (4 pcs each). Note: Check with a spirit level that the bracket is straight. Framery Q Flip 'n Fold Installation instructions info@frameryacoustics.com...
- Page 41 Press the seat against the bracket and push the M6x40 bolts (4 pcs) through the seat and the bracket. Tighten the nuts (4 pcs) carefully with a hex key. Framery Q Flip 'n Fold Installation instructions info@frameryacoustics.com...
-
Page 42: Install The Carpet
Reinstall the seat bracket to the back rest with the 12 mm Phillips screws (2 pcs). 11.2 Install the carpet Install the floor board connectors onto the edge of the floor. Framery Q Flip 'n Fold Installation instructions info@frameryacoustics.com... -
Page 43: Install The Power Column
Note: Make sure that the notch in the carpet is in the doorway of the pod. Note: Press the edges of the carpet under the wall felt. Note: Make sure that the carpet is firmly installed and there are no bumps. 11.3 Install the power column Framery Q Flip 'n Fold Installation instructions info@frameryacoustics.com... - Page 44 Note: Make sure that the power outlet cord goes straight from the opening to the top of the power column. Remove the angle iron from the front of the power column. Set the screw aside. Framery Q Flip 'n Fold Installation instructions info@frameryacoustics.com...
- Page 45 Install the angle iron onto the ceiling with 4.2x25 screws (2 pcs). Use the ceiling felt center line as the midpoint reference and make sure that the back part of the angle iron is in butt joint with the black ABS strip. Framery Q Flip 'n Fold Installation instructions info@frameryacoustics.com...
- Page 46 Feed the excess of the cords into the power column. Attach the power column to the angle iron with one M6x30 screw. Note: Make sure that the cord is not damaged or pinched during the installation. Framery Q Flip 'n Fold Installation instructions info@frameryacoustics.com...
-
Page 47: Install The Table
Note: Check with a spirit level that the profile is straight before tightening the screws. 11.4 Install the table Remove the M6x16 screws (2 pcs) and one M6x60 screw from the power column. Set the screws aside. Framery Q Flip 'n Fold Installation instructions info@frameryacoustics.com... - Page 48 Install the table with the same M6x16 screws (2 pcs) and M6x60 screw to the power column. Framery Q Flip 'n Fold Installation instructions info@frameryacoustics.com...
-
Page 49: Install The Ceiling Threshold
Neatly cut the side frame seal to the correct length, if needed. Note: Make sure that the side frame seals and the threshold seal do not overlap. Neatly cut the side frame seal to the correct length, if needed. Framery Q Flip 'n Fold Installation instructions info@frameryacoustics.com... - Page 50 Install the ceiling threshold with black 5x30 screws (4 pcs). Framery Q Flip 'n Fold Installation instructions info@frameryacoustics.com...
-
Page 51: Install The Ramp
Set the ramp board into place. Note: Make sure that the holes in the ramp board match the ramp board connectors. Remove the protective sticker from the threshold. Note: The threshold has four screwholes. Framery Q Flip 'n Fold Installation instructions info@frameryacoustics.com... - Page 52 Note: Make sure that the side frame seals are not between the threshold and the door frame. Neatly cut the side frame seal to the correct length, if needed. Remove the protective papers from the stickers on the ramp board. Framery Q Flip 'n Fold Installation instructions info@frameryacoustics.com...
- Page 53 Note: Make sure that you install the notches in the carpet against the side frames. Note: Make sure that the threshold secures the ramp carpet in place. Remove the protective sticker from the metal strip. Framery Q Flip 'n Fold Installation instructions info@frameryacoustics.com...
- Page 54 Place the metal strip on the lower edge of the ramp board and install with 3x12 screws (5 pcs). Note: The metal strip has five screwholes. Framery Q Flip 'n Fold Installation instructions info@frameryacoustics.com...
-
Page 55: Install The Door
Note: Do not peel off the black tape from the hinges. The tape is needed to protect the glass parts from the metal hinges. Note: Make sure that the washers stay in place when detaching the halves of the hinges. Framery Q Flip 'n Fold Installation instructions info@frameryacoustics.com... - Page 56 Note: Make sure that the seal is not squashed between the hinge and the door frame. Attach the door leaves to the door with 5x30 screws (4 pcs each). Use a hand tool to tighten the screws. Framery Q Flip 'n Fold Installation instructions info@frameryacoustics.com...
-
Page 57: Install The Door Handle
Lift the door into place in the open position (~130°). Warning: Lifting requires two people. Make sure that the lower hinge falls into place. 14.2 Install the door handle Open the black M8x35 screws (2 pcs) behind the door handle assembly. Framery Q Flip 'n Fold Installation instructions info@frameryacoustics.com... -
Page 58: Install The Pushbutton
Note: Place the countersunk holes upwards. 14.3 Install the pushbutton Note: Install the back plate of one pushbutton at the height of 105 cm (3 ft 5 5/16 in) on the right-hand front frame outside the pod. Framery Q Flip 'n Fold Installation instructions info@frameryacoustics.com... - Page 59 Note: Install the back plate of the other pushbutton at the height of 103 cm (3 ft 4 9/16 in) on the left-hand side glass frame inside the pod. Framery Q Flip 'n Fold Installation instructions info@frameryacoustics.com...
- Page 60 Note: Do not allow the cover of the pushbutton hang freely from the cords. Install the hex head screws in the pushbutton case. Note: Install the screws only partly. Note: Do not allow the cover of the pushbutton hang freely from the cords. Framery Q Flip 'n Fold Installation instructions info@frameryacoustics.com...
- Page 61 Tighten the hex head screws through the holes in the cover of the pushbutton. Note: Tighten the upper and lower screws in turn until they are fully tightened. Repeat steps 1–4 for the pushbutton inside the pod. Framery Q Flip 'n Fold Installation instructions info@frameryacoustics.com...
-
Page 62: Install The Door Opener
Pull off the covers from the electrical ducts. Note: Set the covers aside. Cut an 11 mm (7/16 in) piece off from the short electrical duct. Leave a 2 mm (1/16 in) fold on the cut. Framery Q Flip 'n Fold Installation instructions info@frameryacoustics.com... -
Page 63: Install The Motor Of The Door Opener
Install the long electrical duct along the side of the ceiling threshold with 4x30 screws (3 pcs). Note: Make sure that the long duct touches the short duct. 15.2 Install the motor of the door opener Framery Q Flip 'n Fold Installation instructions info@frameryacoustics.com... - Page 64 Note: Make sure that the two holes in the door opener plate are on the hinge side of the door. Install the threaded rods (2 pcs) to the front cover plate. Use a wrench. Framery Q Flip 'n Fold Installation instructions info@frameryacoustics.com...
-
Page 65: Install The Door Opener Arm Bracket
Push the top cover onto the threaded rods. Hang the door opener motor onto the threaded rods and attach with black socket screws (2 pcs). 15.3 Install the door opener arm bracket Framery Q Flip 'n Fold Installation instructions info@frameryacoustics.com... - Page 66 Note: Make sure that the screws are in the middle of the installation holes. Note: Tighten the screws carefully so that the installation plate does not move. Slide the bracket cover onto the installation plate for the door opener arm bracket from the side. Framery Q Flip 'n Fold Installation instructions info@frameryacoustics.com...
-
Page 67: Install The Door Opener Arm
Measure that the middle of the bolt in the bracket cover is 162 mm (6 3/8 in) from the closed door. Tighten the screws (4 pcs) on both sides of the bracket cover. 15.4 Install the door opener arm Framery Q Flip 'n Fold Installation instructions info@frameryacoustics.com... - Page 68 Place the larger end of the door opener arm onto the shaft at the top of the door opener motor. Bend the arm so that the joint touches the door frame. Note: Make sure that the arm touches the door frame before you tighten the bolts. Framery Q Flip 'n Fold Installation instructions info@frameryacoustics.com...
-
Page 69: Install The Door Opener Arm To The Door Opener Arm Bracket
15.5 Install the door opener arm to the door opener arm bracket Close the door. Bend the door opener arm to the door opener arm bracket. Rotate the door opener arm to adjust its length. Framery Q Flip 'n Fold Installation instructions info@frameryacoustics.com... - Page 70 Attach the end of the door opener arm to the arm bracket with a black hex screw. Note: Install a washer between the door opener arm and the arm bracket. Framery Q Flip 'n Fold Installation instructions info@frameryacoustics.com...
-
Page 71: Install The Electrics
Install the wire holders to the ends of the spiral wire cover of the door opener power cord. Press the end of the cover into the center groove of the wire holder and guide the power cord out of the side of the wire holder. Framery Q Flip 'n Fold Installation instructions info@frameryacoustics.com... - Page 72 117 mm (4 5/8 in) from the upper edge of the door. Note: Guide the cord out of the side of the wire holder. Remove the bottom cover of the door opener. Framery Q Flip 'n Fold Installation instructions info@frameryacoustics.com...
- Page 73 Remove the dummy connector from the door opener battery. Note: Make sure that the battery is in the OFF position (the middle position). Connect the male connector from the door opener battery to the door opener motor. Framery Q Flip 'n Fold Installation instructions info@frameryacoustics.com...
- Page 74 Install the battery to the motor. Note: Make sure the wires are not pinched or damaged during the installation. Connect the door opener power cord to the door opener battery. Framery Q Flip 'n Fold Installation instructions info@frameryacoustics.com...
- Page 75 Note: Guide the cords out of the hole in the cover. Install the other wire holder to the to the hinge-side glass frame as close to the electrical duct as possible with self-tapping Phillips screws (2 pcs). Framery Q Flip 'n Fold Installation instructions info@frameryacoustics.com...
- Page 76 10. Guide the door opener power cord into the electrical ducts. 11. Attach the cover on the short electrical duct. Framery Q Flip 'n Fold Installation instructions info@frameryacoustics.com...
-
Page 77: Install The Control Unit
12. Attach the cover on the long electrical duct. 16.2 Install the control unit Insert the control unit bracket into the back of the control unit. Framery Q Flip 'n Fold Installation instructions info@frameryacoustics.com... - Page 78 Install the bracket with the control unit into the opening in the ceiling with 4x30 screws (2 pcs). Note: Make sure that you install the control unit to the right-hand side of the center beam. Framery Q Flip 'n Fold Installation instructions info@frameryacoustics.com...
-
Page 79: Install The Power Unit And The Electrical Connections
16.3 Install the power unit and the electrical connections Connect the fan power cords to the FAN 1 and FAN 2 connectors. Connect the short GST extension cord to the power unit. Framery Q Flip 'n Fold Installation instructions info@frameryacoustics.com... - Page 80 Note: Make sure you push the female connectors of the AC splitter to the GST connector. Place the power unit assembly on the roof between the roof beams at the back of the pod. Framery Q Flip 'n Fold Installation instructions info@frameryacoustics.com...
- Page 81 Connect the GST connector of the long GST extension cord to the AC splitter. Connect the converter to the PWR IN connector. Framery Q Flip 'n Fold Installation instructions info@frameryacoustics.com...
- Page 82 Note: Make sure that the plug is on the same side as the countersunk holes. Pull the AC extension cord and the door opener adapter power cord through the hole in the roof panel and guide the cords into the groove in the hole. Framery Q Flip 'n Fold Installation instructions info@frameryacoustics.com...
- Page 83 Place the roof panel onto the roof. 10. Connect the short GST extension cord to the AC splitter. Framery Q Flip 'n Fold Installation instructions info@frameryacoustics.com...
- Page 84 11. Connect the power cord to the power unit. 12. Pull the door opener adapter power cord inside the pod and connect it to the door opener power cord. Framery Q Flip 'n Fold Installation instructions info@frameryacoustics.com...
- Page 85 14. Install the roof cover panel with 4x30 screws (6 pcs). Note: Make sure that the cords are in the groove of the hole in the roof panel. Note: Make sure that the cords are not pinched or damaged during the installation. Framery Q Flip 'n Fold Installation instructions info@frameryacoustics.com...
-
Page 86: Install The Motion Detector And Light
Note: Make sure that you align the bracket with the opening as shown. The distance between the edge of the bracket and the glass is 125 mm (4 15/16 in). Note: Use the ceiling felt center line as the midpoint reference. Framery Q Flip 'n Fold Installation instructions info@frameryacoustics.com... - Page 87 Connect the motion detector cord to the motion detector. Guide the motion detector cord through the opening to the control unit. Framery Q Flip 'n Fold Installation instructions info@frameryacoustics.com...
- Page 88 Connect motion detector cord to the PIR connector of the control unit. Lift the motion detector to the bracket and slide the motion detector into place. Framery Q Flip 'n Fold Installation instructions info@frameryacoustics.com...
- Page 89 The light attaches to the ceiling with magnets. Align the light to the center of the ceiling. Note: Make sure that the cords are not damaged or pinched during the installation. Framery Q Flip 'n Fold Installation instructions info@frameryacoustics.com...
-
Page 90: Adjust The Automatic Door Seal
Pull out the adjustment stick from the lower inside frame of the door. Adjust the screw on the stick. The further the stick comes out of the door frame, the lower the door seal descends. The seal descends automatically when you close the door. Framery Q Flip 'n Fold Installation instructions info@frameryacoustics.com... - Page 91 Push the stick back into place with a snap. Check with a flashlight that there is no gap under the door. If the light shines through from under the door, readjust the door seal. Framery Q Flip 'n Fold Installation instructions info@frameryacoustics.com...
-
Page 92: Install The Cover Panels And Plates
Note: If you install for the first time, you need two extra screws per panel, in addition to the ones removed at the beginning of the installation. Install the two additional screws to the two vacant countersunk holes in the cover panels. Framery Q Flip 'n Fold Installation instructions info@frameryacoustics.com... - Page 93 Framery Q Flip 'n Fold Installation instructions info@frameryacoustics.com...
-
Page 94: Install The Body Covers
Guide the other edge of the left-hand bottom body cover into the groove at the lower part of the left-hand wall. Repeat steps 1 and 2 for the right-hand bottom body cover. Framery Q Flip 'n Fold Installation instructions info@frameryacoustics.com... -
Page 95: Install The Roof Body Covers
Guide the edge of one of the curved roof body covers into the groove at the edge of the roof. Note: Make sure that you install the cover correctly. The shorter straight section after the curve is installed to the edge of the roof. Framery Q Flip 'n Fold Installation instructions info@frameryacoustics.com... - Page 96 Note: Guide the power cord out of the cut in the cover. Make sure that the cord is not damaged during the installation. Note: Make sure that the round circle in the body cover corresponds to the one in the roof. Framery Q Flip 'n Fold Installation instructions info@frameryacoustics.com...
- Page 97 Guide the edge of the straight roof body cover on the right-hand side into the groove at the center of the roof. Note: Make sure that the round circle in the body cover corresponds to the one in the roof. Framery Q Flip 'n Fold Installation instructions info@frameryacoustics.com...
-
Page 98: Install The Wall Body Covers
Guide the edge of one wall body cover into the groove at the top of the wall. Note: If installing the optional whiteboard wall body covers, make sure that the sticker is in the upper right corner. Framery Q Flip 'n Fold Installation instructions info@frameryacoustics.com... - Page 99 Note: Make sure that the wall body covers are installed evenly and aligned correctly with the other body covers. Use a white rubber mallet to tap the wall covers into alignment if needed. Framery Q Flip 'n Fold Installation instructions info@frameryacoustics.com...
-
Page 100: Install The Door Opener Adapter Cover
Place the door opener adapter cover onto the roof. The cover attaches to the roof with magnets. Note: Make sure that the main power cord goes through the strain relief. Connect the main power cord to a power outlet. Framery Q Flip 'n Fold Installation instructions info@frameryacoustics.com... -
Page 101: Program The Door Opener
To reset the door opener and make sure that the memory is clear, press and hold Enter. At the same time, press and release Reset. The LEDs DS8–DS11 flash briefly in green. Framery Q Flip 'n Fold Installation instructions info@frameryacoustics.com... - Page 102 To programme the door closed position, make sure that the door is in the closed position and press and release Enter. The CLS position LED flashes briefly in green. Then the OP (open) position LED lights up in red. Framery Q Flip 'n Fold Installation instructions info@frameryacoustics.com...
- Page 103 To confirm the door opening automatic, make sure that the door is fully closed and press and release Enter. The door opens 30–45° and closes. The AUTO SETUP LED lights up in green. Framery Q Flip 'n Fold Installation instructions info@frameryacoustics.com...
-
Page 104: Enable The Power Close Function
Rotate the potentiometer to change the color of the LED to green. The green LED indicates that the power close function is on. The red LED indicates that the power close function is off. Framery Q Flip 'n Fold Installation instructions info@frameryacoustics.com... - Page 105 To store the chosen power close setting, press and release Enter. To exit the programming mode, press and hold Enter for 3 s. If further door adjustments are necessary, see the manufacturer's instructions. Framery Q Flip 'n Fold Installation instructions info@frameryacoustics.com...
- Page 106 Reinstall the bottom cover of the door opener. Framery Q Flip 'n Fold Installation instructions info@frameryacoustics.com...
-
Page 107: Finish The Installation
21 Finish the installation Clean the glasses with glass washing liquid and a lint-free cloth. Switch the door opener battery ON. Framery Q Flip 'n Fold Installation instructions info@frameryacoustics.com... - Page 108 Fill out the warranty checklist and send it to Framery. Note: The warranty is only valid with the filled-out warranty checklist. Framery Q Flip 'n Fold Installation instructions info@frameryacoustics.com...
-
Page 109: Troubleshooting
Screw out the 5x30 screws (4 pcs) and remove the lower hinge. Install a 1 mm (1/16 in) adjustment plate into the mounting hole of the lower hinge. Reinstall the hinge with 5x30 screws (4 pcs). Framery Q Flip 'n Fold Installation instructions info@frameryacoustics.com... - Page 110 11. Connect the door opener power cord and the power adapter cord. Tip: If the magnets on the door hit against the magnets on the side frame, push the magnets gently in with a rubber mallet. Framery Q Flip 'n Fold Installation instructions info@frameryacoustics.com...
- Page 112 Framery Q Flip 'n Fold Installation instructions Patamäenkatu 7 33900 Tampere FINLAND VAT: FI 23527139...
Need help?
Do you have a question about the Flip 'n Fold and is the answer not in the manual?
Questions and answers