Aluratek AWS17F Instruction Manual

Aluratek AWS17F Instruction Manual

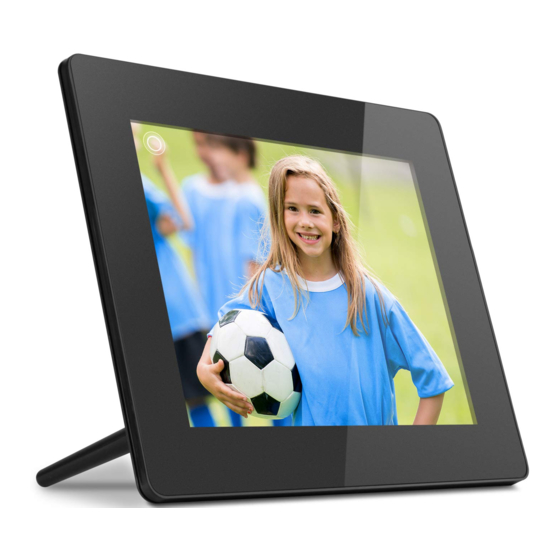
Wifi digital photo frame with touchscreen lcd display

Advertisement

WiFi Digital Photo Frame with Touchscreen LCD Display
Instructional Manual
aluratek.com
Copyright © 2019 Aluratek, Inc. All Rights Reserved.

Advertisement

Table of Contents
loading
Need help?

Need help?

Do you have a question about the AWS17F and is the answer not in the manual?

Questions and answers

Summary of Contents for Aluratek AWS17F

  • Page 1 WiFi Digital Photo Frame with Touchscreen LCD Display Instructional Manual aluratek.com Copyright © 2019 Aluratek, Inc. All Rights Reserved.
  • Page 2: Table Of Contents

    7” / 8” / 10” Frame Control Close-up ................Package Contents ......................Getting Started ......................Operating Instructions Configure Aluratek Smart Frame APP to Frame........... Enable the Email to Frame Feature................Link to Facebook....................Link to Twitter......................Transfer Pictures Directly From Your Computer To The Frame ......
  • Page 3 Table of Contents Alarm Function How To Set Alarm ..................... Technical Support ......................Radio and TV Interference Statement ................Warranty ........................
  • Page 4: Frame Features: 7" Frame

    Frame Features: 7” Frame 7” IPS LCD Menu Button Security Lock Touchscreen Directional Keypad Frame Stand Frame Power Button SD/SDHC Card Slot Wall Mount Hole Power Adapter Port Speakers USB 2.0 Ports Connect a USB hard drive, USB flash drive or SD/SDHC card to easily access and share your favorite pictures, music, or videos.
  • Page 6: Frame Features: 8" / 10" Frame

    Frame Features: 8” / 10” Frame 8” / 10” IPS LCD Menu Button Security Lock Touchscreen Directional Keypad Frame Stand Frame Power Button SD/SDHC Card Slot Wall Mount Hole Power Adapter Port Speakers USB 2.0 Ports Connect a USB hard drive, USB flash drive or SD/SDHC card to easily access and share your favorite pictures, music, or videos.
  • Page 8: Frame Features: 15.6" / 17.3" Frame

    Frame Features: 15.6” / 17.3” Frame 15.6” / 17.3” IPS LCD SD/SDHC Card Slot Security Lock Touchscreen Headphone Jack Frame Stand Frame Power Adapter Wall / VESA Mount Power Button Mini USB Port Wall Mount USB 2.0 Port Speakers Connect a USB hard drive, USB flash drive or SD/SDHC card to easily access and share your favorite pictures, music, or videos.
  • Page 10: 7" / 8" / 10" Frame Control Close-Up

    7” / 8” / 10” Frame Control Close-Up Power On / Off 2 - Menu (a) Press to return to previous screen (b) Press & hold to return to Main Menu 3 - ►║ Play / Pause (a) Press to select option on Main Menu (b) Press to pause slideshow, music or video 4 - |◄◄...
  • Page 11: Package Contents

    Package Contents Your order has been carefully packaged and inspected. The following accessories should be included in your package. Please inspect the contents of the package to ensure that you have received all items and that nothing has been damaged. If you discover a problem, please contact us immediately for assistance.
  • Page 12: Operating Instructions

    Operating Instructions Configure Aluratek Smart Frame APP to Frame Step 1: Download the ‘Aluratek Smart Frame” APP to your Smartphone / Tablet 1. Go to the App store on your Apple or Anroid device and search for “Aluratek Smart Frame” then install and open. (Image 1 & 2) NOTE: Make certain you download “Aluratek Smart Frame”...
  • Page 13 Operating Instructions Image 2 Image 1...
  • Page 14 Operating Instructions Step 2: Creating Your Account in the APP 1. Open the “Aluratek Smart Frame” APP (Allow notifications if prompted) 2. Select “Sign Up” (Image 3) 3. Create “Username” “Password” (write this down as you will need it later) 4.
  • Page 15 Operating Instructions Image 4 Image 3 Image 5...
  • Page 16 Operating Instructions Step 3: Bind Your Frame 1. Make sure you are signed in within the APP 2. Select “Devices” within the APP 3. Click the “+” next to My Devices (Image 6) 4. Enter a device Name that will help you identify this particular frame. For example “Kitchen123”.
  • Page 17 Operating Instructions Image 6 Image 7 Image 8...
  • Page 18 Operating Instructions Step 4: Send Pictures from your Smartphone / Tablet to the frame using the Aluratek Smart Frame APP 1. Select the photo or video icon within the APP to take a live photo / video. If prompted to access the camera, please “Allow”...
  • Page 19 Image 10 Image 9...
  • Page 20 Operating Instructions Step 5: Enjoy Your Photos! 1. On the main screen on your photo frame - select the photos in the upper left box 2. Use the menu on the left to select the source for your photos typically, that is “ALL” 3.
  • Page 21: Enable The Email To Frame Feature

    Operating Instructions Enable the Email to Frame Feature 1. Verify / enable your newly created email to the frame by sending a one time email to the frame to authorize it from your personal email 2. IMPORTANT: Email the frame with the subject ‘bd+frame id’ Example: To: alexkitchen@wififrame.com (Note: the email must match the email you created in the app)
  • Page 22: Link To Facebook

    How to link the frame to you Facebook account so that you can send pictures to the frame via Facebook. 1. Open Facebook app or go to Facebook from your browser and login to your Facebook account if you are not logged in already 2. Search for “Aluratek WiFi Frame”...
  • Page 23 Operating Instructions 3. Send a message with your frame ID to bind the frame. For example, if your frame ID is 123456, please send “bd123456”...
  • Page 24 Operating Instructions 4. You will see the binding message, “Successful Binding!” once the binding is completed 5. You can now send pictures to your frame by just attaching a picture and send via message.
  • Page 25: Link To Twitter

    How to link the frame to your Twitter account so that you can send picture directly from your Twitter account to the frame. 1. Open Twitter app or go to Twitter from your browser 2. Search for “Aluratek WiFi Frame” 3. Click on “Follow” 4. Please login to your Twitter account. If you are already logged...
  • Page 26 Operating Instructions 6. Type ‘bd+frame ID’ to bind. For example, if the frame ID is 123456, please type bd123456 in the message. Once the binding is successful, you will see a reply for confirmation. 7. Congratulations! Your Twitter account is now linked to the frame. To post a picture to your frame, you can just send a private message to the frame like below.
  • Page 27: Transfer Pictures Directly From Your Computer To The Frame

    Operating Instructions Transfer Pictures Directly From Your Computer To The Frame To transfer pictures from your computer to the WiFi frame directly, the frame and the computer will need to be in the same network. Follow the steps below to transfer the pictures. 1.
  • Page 28 Album > Internal memory of the frame to see the pictures. Note: If the computer and the frame is not on the same network, you can send / transfer the pictures to the frame via Facebook / Twitter or Aluratek Smart Frame app.
  • Page 29: Main Menu Function

    Main Menu Function Main Menu...
  • Page 30: Album Function

    Album Function Album Settings 1. From the main menu, tap on “Settings”. 2. Tap on “Album Settings”.
  • Page 31 Album Function Full Screen: Set photo play in original size or to full screen. Slideshow: If enabled, the slideshow will start automatically. based on the time selected. The slideshow will display pictures from the cloud media folder unless you are in the thumbnail page of the Internal memory or USB/SD Card folder then the slideshow will show pictures in those folders only.
  • Page 32: System Function

    System Function System Settings 1. From the main menu, tap on “Settings”. 2. Tap on “System Settings”.
  • Page 33 System Function Sound: To adjust the media volume and notification volume, enable the touch sounds. Display: To adjust the brightness of the display. Date and time: To set the date and time for the frame. Auto ON / OFF: Enable the auto on / off feature. Auto OFF: Set the time for the frame to auto power off.
  • Page 34: Alarm Function

    Alarm Function How To Set Alarm 1. From the main menu, tap on “Alarm”. 2. To edit an existing alarm, tap on “Edit alarm” or tap “Add alarm” to create a new alarm. 3. Once you have set the days, time and ringtone of the alarm, tap OK to set the alarm.
  • Page 35: Technical Support

    We are committed to providing the best customer service support. If you need assistance with your Aluratek product, please contact the Aluratek Technical Support department prior to returning this device. Reach out to us in any of the following ways: E-mail: support@aluratek.com...
  • Page 36: Radio And Tv Interference Statement

    Radio and TV Interference Statement WARNING!!! This equipment has been tested and found to comply with the limits of a Class B digital device, pursuant to part 15 of the FCC rules. These limits are designed to provide reasonable protection against harmful interference in a residential installation This equipment generates, uses and can radiate radio frequency energy and, if not in- stalled and used in accordance with the instruction, may cause harmful interference to radio communications.
  • Page 37: Warranty

    Technical Support Warranty Aluratek warrants this product against defect in material or workmanship for 1 Year from the date of purchase. This warranty becomes invalid if the factory-supplied serial number or “warranty void” sticker has been removed or altered on the product.
  • Page 40 Aluratek, Inc. 15241 Barranca Pkwy. Irvine, CA 92618 sales@aluratek.com 714.586.8730 • office 714.586.8792 • fax...

This manual is also suitable for:

Awdmpf208fAwdmpf107fAwdmpf8bbAws10f

Table of Contents