Table of Contents

Subscribe to Our Youtube Channel
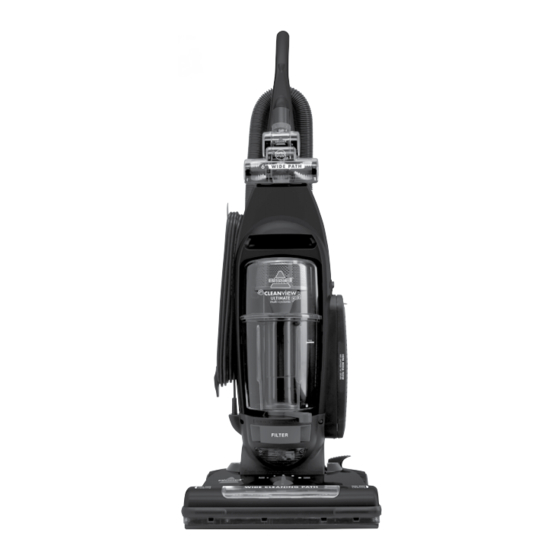
Related Manuals for Bissell Cleanview Pet Ultimate 22T2 Series


Summary of Contents for Bissell Cleanview Pet Ultimate 22T2 Series
- Page 1 USER'S GUIDE 22T2 SERIES 220-240V Thank You Safety Instructions Product View Assembly Operations Maintenance and Care 8-13 Troubleshooting 13-14 Replacement Parts Accessories Warranty Consumer Services...
- Page 2 Everything we know about floor care went into the design and construction of this complete, high-tech home cleaning system. Your BISSELL Cleanview Pet Ultimate vacuum is well made, and we back it with a limited one year warranty. We also stand behind it with a knowledgeable, dedicated Consumer Services department, so, should you ever have a problem, you’ll receive fast, considerate...
-
Page 3: Important Safety Instructions
(ASTA approved to BS 1362) fuse is fitted in the carrier contained in the plug. (Spares may be obtained from your BISSELL supplier). If for any reason the plug is cut off, it must be disposed of, as it is an electric shock hazard should it be inserted into a mains socket. -
Page 4: Product View
roduct view Handle Quick Release ™ Hose Clip Cord Wrap Stretch Hose Dusting Brush/ Carry Upholstery Tool TurboBrush ™ Handle Pet Tool Crevice Tool Twist ‘n Snap™ Power Hose Cord Inner Cyclone Hose Power Switch Wand Upper Tank Extension Wand Easy HEPA Media Empty... -
Page 5: Attach Handle To Vacuum
ssembly The only tool you’ll need to assemble your vacuum cleaner is a Phillips screwdriver. Attach handle to vacuum 1. Locate the handle and cord wrap. Remove the screw packet taped to the handle. 2. Stand the vacuum upright and from the rear of the unit, slide the base of the handle firmly into the grooves at the top of the vacuum body. -
Page 6: Power Switch
perations Power switch CAUTION: The Power Switch is located on the left side of the vacuum. Push the rocker To avoid personal injury switch “ON” (I) to vacuum, and “OFF” and to prevent the cleaner (O) when cleaning is complete. from falling when cleaning stairs, always place it at the bottom of the stairs. -
Page 7: Special On-Board Tools
perations Special on-board tools Your vacuum is not only a powerful carpet and rug cleaner, it’s also a Dusting Brush/ versatile above floor vacuum cleaner Upholstery Tool when you select one of the special tools. 1. Raise the handle to the upright position. Crevice Tool 2. -
Page 8: Power Cord Usage
perations Power cord usage 1. To use your vacuum, remove the cord and plug it into an electrical outlet. For your convenience, there is a quick release cord wrap for easy cord remov- al. There is also a cord clip that is part Quick Release of the upper cord wrap where you can Cord Wrap... -
Page 9: Emptying The Dirt Container
aintenance and care Emptying the dirt container The dirt container should to be emp- tied before the dirt reaches the “Full” line on the container. 1. Unplug the vacuum from electrical out- let. 2. Slide the Lock ‘n Seal Lever to the “Unlock”... -
Page 10: Check Rotating Floor Brush And Drive Belt
aintenance and care Check rotating floor brush and drive belt You should check your vacuum cleaner’ s rotating floor brush and drive belt regu- larly for wear or damage. You should also clean the brush and brush ends of strings, hair and carpet fibers. -
Page 11: Replacing Light Bulb
3. Place new drive belt over motor pulley and loop other end over rotating floor brush in the space between the bristles. NOTE: It is important that you use only genuine BISSELL replacement belts. Generic belts may not meet Motor the exact specifications required... -
Page 12: Clearing Clogs
aintenance and care Maintaining TurboBrush Pet tool continued ™ 3. Remove the brush from the belt and clean debris. 4. Replace the brush inside the belt and place ends into slots on sides as shown. 5. Reposition top cover making sure to line up inside tab at the front with the open- ing on the cover. -
Page 13: Troubleshooting
aintenance and care Cleaning the upper tank continued The inner cyclone and filtration disk may be washed using a mild detergent. Be sure it is completely dry before reassem- bling or damage to your unit may result. Once cleaning is completed, reassemble the filtration disk over the inner cyclone by sliding it straight down on the top of the inner cyclone and turning left. - Page 14 3. Pull out and re-insert dirt container correctly Other maintenance or service not included in the manual should be performed by an authorized service representative. Thank you for selecting a BISSELL product. Please do not return this product to the store. eplacement parts Item Part No.
-
Page 15: Limited One Year Warranty
Limited One Year Warranty Subject to the *EXCEPTIONS AND EXCLUSIONS identified below, BISSELL Homecare, Inc., will replace (with new or remanufactured components), at BISSELL’s option, free of charge from the date of purchase by the original purchaser, for one year any defective or malfunctioning part do to manufacturers defect. - Page 16 ISSELL consumer services If your BISSELL product should require service: Call BISSELL Consumer Services at the numbers below and we will give you the location of a BISSELL Authorized Service Center in your area. For all other countries, contact your local in country distributor for questions, service, or repair.
Need help?
Do you have a question about the Cleanview Pet Ultimate 22T2 Series and is the answer not in the manual?
Questions and answers