
Subscribe to Our Youtube Channel
Related Manuals for E-TOP BR485d


Summary of Contents for E-TOP BR485d
-
Page 1: Table Of Contents
E-TOP 11n Broadband Router BR485d Smart 300N Broadband Router User Manual User Manual v1.0.0 http://www.sapido.com.tw/... -
Page 2: Table Of Contents
Build Network Connection..............9 2.1.1 Router Mode.................. 9 2.1.2 AP Mode ..................10 2.1.3 Wi-Fi AP Mode................10 Connecting BR485D ................10 Network setup..................11 2.3.1 Windows 2000 ................12 2.3.2 Windows XP ................12 2.3.3 Windows Vista / Windows 7............13 Router IP Address Lookup .............. - Page 3 4.1.3 Wireless Basic Setup from Web GUI ........... 44 4.1.3.1 Multiple APs................47 4.1.3.2 Enable Universal Repeater Mode......... 48 Wireless Security Setup..............49 Wireless Access Control ..............51 Chapter 5 Router Mode Security Setup............... 54 NAT..................... 54 5.1.1 Virtual Server ................54 5.1.2 Virtual DMZ..................
- Page 4 Logout....................85 Chapter 7 Samba Server..................86 How to use BR485D as a Samba server ..........86 Chapter 8 DDNS Service Application ..............87 Chapter 9 Q & A ....................92 Installation................... 92 LED..................... 92 IP Address ..................92 OS Setting ..................93 BR485D Setup..................
-
Page 5: Fcc Caution
FCC statement in User's Manual (for class B) Federal Communication Commission Interference Statement This equipment has been tested and found to comply with the limits for a Class B digital device, pursuant to Part 15 of the FCC Rules. These limits are designed to provide reasonable protection against harmful interference in a residential installation. -
Page 6: Chapter 1 Introduction
Chapter 1 Introduction Hardware Features User Manual v1.0.0 http://www.sapido.com.tw/... -
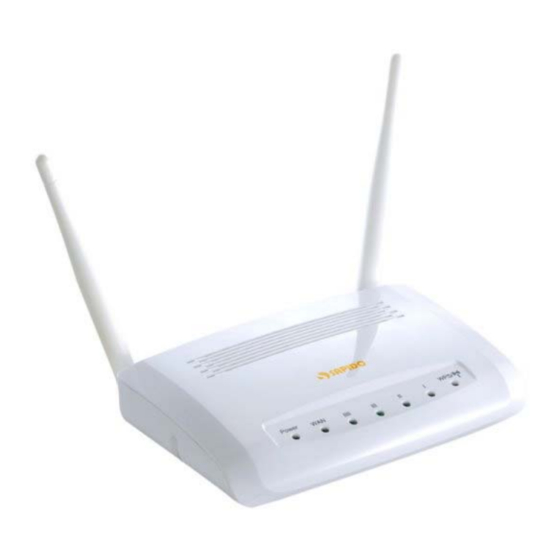
Page 7: Product Appearance
Product Appearance LED Indicator Status Description: User Manual v1.0.0 http://www.sapido.com.tw/... - Page 8 User Manual v1.0.0 http://www.sapido.com.tw/...
-
Page 9: Chapter 2 System And Network Setup
Chapter 2 System and Network Setup The BR485D is an easy to setup and wireless device for various application and environment, especially for large installs such as hotels, offices space, warehouses, hot-spots and more. To begin with BR485D, you must have the following minimum system requirements. If your system can’t correspond to the following requirements, you might get some unknown troubles... -
Page 10: Ap Mode
2.1.3 Wi-Fi AP Mode Switch to WiFi AP Mode when you connect to the internet wirelessly through PC and wireless device without wireless LAN function equipped. Connecting BR485D Prepare the followings before the connection: λ PC or Notebook for setup λ... -
Page 11: Network Setup
Make sure you are under “Router Mode”. Connect BR485D to xDSL/ Cable modem with the Ethernet cable, WAN to LAN. Turn on your Computer. Network setup After the network connection is built, the next step is setup the router with proper network parameters, so it can work properly in your network environment. -
Page 12: Windows 2000
2.3.1 Windows 2000 Click “Start” button (it should be located at lower-left corner of your computer), then click control panel. Double-click Network and Dial-up Connections icon, double click Local Area Connection, and Local Area Connection Properties window will appear. Select “Internet Protocol (TCP/IP)”, then click “Properties”. -
Page 13: Windows Vista / Windows 7
click control panel. Double-click Network and Internet Connections icon, click Network Connections, then double-click Local Area Connection, Local Area Connection Status window will appear, and then click “Properties”. Select “Obtain an IP address automatically” and “Obtain DNS server address automatically”, then click “OK”. 2.3.3 Windows Vista / Windows 7 User Manual v1.0.0... - Page 14 Click “Start” button (it should be located at lower-left corner of your computer), then click control panel. Click View Network Status and Tasks, and then click Manage Network Connections. Right-click Local Area Network, then select “Properties”. Local Area Connection Properties window will appear, select “Internet Protocol Version 4 (TCP / IPv4)”, and then click “Properties”.
-
Page 15: Router Ip Address Lookup
Router IP Address Lookup After the IP address setup was completed, please clicks “start” → “run” at the bottom-lower corner of your desktop: Input “cmd”, and then click “OK”. Input “ipconfig”, then press “Enter” key. Please check the IP address followed by “Default Gateway”... -
Page 16: Log Into Web Gui
IP address of the wireless router in address bar, and the following message should be shown. Please click “admin” to login the BR485D. Enter the User name and Password in to the blank and then Click Login. The default values for User Name and Password are admin (all in lowercase letters). - Page 17 User Manual v1.0.0 http://www.sapido.com.tw/...
-
Page 18: Chapter 3 Internet Connection
Chapter 3 Internet Connection This Chapter describes how to setup BR485D to the internet. The BR485D is delivered with the following factory default parameters. Default IP address: 192.168.1.1 (Router Mode) 192.168.1.254 (AP Mode) 192.168.1.254 (WiFi AP Mode) Default IP subnet mask: 255.255.255.0... -
Page 19: Router Mode- Using As A Broadband Router
Step 2. Select “USB Tethering” as connection type. Step 3. Click on “Done”. Step 4. Wait few seconds for pairing. When WAN LED on, the Internet is ready to access. Note: 1. iPhone: (1) Due to difference in 3G service bundled in various carriers, please check your 3G service supports Internet tethering. -
Page 20: Wan Interface- Ethernet Port
http://192.168.1.1 Open a Web browser, and enter (Default Gateway) into the blank. Enter the User name and Password into the blank and then click Login. The default values for User Name and Password are admin (all in lowercase letters). 3.2.1 One button setup This page is used to configure all of the server router function. - Page 21 Time Zone Select Change Password Set a new password There are several different WAN interface,Ethernet port、3.5G usb WAN Type Setup dongle、wireless BR485d support 2.4GHz and 5GHz band Wireless Setup Input DNS information which is provided by your ISP Encryption 3.2.2 Parental Control 3.2.2.1...
- Page 22 Item Description Please select Enable MAC Filtering to filter MAC addresses Enable URL Filtering Please enter the MAC address that needs to be filtered. URL Address Click on Apply Changes to save the setting data. Or you may click on Apply Changes &...
- Page 23 Item Description Please select Enable MAC Filtering to filter MAC addresses. Enable MAC Filtering Please enter the MAC address that needs to be filtered. MAC Address You can add comments for this regulation. Comment Click on Apply Changes to save the setting data. Or you may click Apply Changes &...
- Page 24 3.2.3 AirCloud Storage 3.2.3.1 FTP server User Manual v1.0.0 http://www.sapido.com.tw/...
- Page 25 The WAN access type is depended on the service that you contract with the provider. The BR485D provides five selections for the WAN access type, Static IP, DHCP Client, PPPoE, PPTP and L2TP. Check with your ISP if you don’t know the WAN type.
-
Page 26: Static Ip
3.2.4.1 Static IP Select WAN under the IP Config menu, and choose Ethernet Port for the WAN Interface. Its associated setting will show up. User Manual v1.0.0 http://www.sapido.com.tw/... - Page 27 Item Description Select “Static IP” WAN Access Type Enter the IP address which is provided by your ISP. IP Address Please enter the Subnet Mask address Subnet Mask Input ISP Default Gateway Address, . Default Gateway Input DNS information which is provided by your ISP Select 3G as a back up solution or none.
-
Page 28: Dhcp Client
the MAC address registered to the provider to "Clone MAC Address" Click on Apply Change to save the setting date, or you may click Apply Change & Reset on Reset to clear all the input data. 3.2.4.2 DHCP Client Item Description Select "DHCP Client"... -
Page 29: Pppoe
Select Attain DNS Automatically. Or select Set DNS Manually, if you want to specify the DNS, and enter the DNS provided by your ISP in DNS 1 2 3. Select 3G as a back up solution or none. Backup select Some ISPs require MAC address registration. - Page 30 Item Description Select "PPPoE" WAN Access Type Input your user name provided by your ISP. If you don’t know, User Name please check with your ISP. Input the password provided by your ISP. Password Input the service name provided by your ISP. Service Name Three types for select: Continues, Connect on Demand, and Connection Type...
-
Page 31: Pptp
3.2.4.4 PPTP Item Description Select "PPTP" WAN Access Type Input your server IP address provided by your ISP. If you don’t Server IP Address know, please check with your ISP. User Manual v1.0.0 http://www.sapido.com.tw/... -
Page 32: L2Tp
Input PPTP account provided by your ISP. User Name Input the password provided by your ISP. Password Select Attain DNS Automatically. Or select Set DNS Manually, if you want to specify the DNS, and enter the DNS provided by your ISP in DNS 1 2 3. - Page 33 Item Description Select "PPTP" WAN Access Type Input your server IP address or Host Name provided by your ISP. Server IP Address / Host If you don’t know, please check with your ISP. Name Input PPTP account provided by your ISP. User Name Input the password provided by your ISP.
-
Page 34: Advance Function
Select 3G as a back up solution or none. Backup select Some ISPs require MAC address registration. In this case, enter Clone Mac Address the MAC address registered to the provider to "Clone MAC Address" Click on Apply Change to save the setting date, or you may click Apply Change &... - Page 35 Item Description Enter the access point name. If you do not know the setting APN (Access Point Name) information for APN, check with your 3G service provider. Enter the User Name supplied by the provider. User Name Enter the password supplied by the provider. Password Enter the subscribing access point's phone number.
-
Page 36: Wan Interface- Wireless
internet. Enable IGMP Proxy to provide the service for IP hosts and Enable IGMP Proxy adjacent multicast routers to establish multicast group memberships. Enable Ping Access on WAN will make WAN IP address Enable Ping Access on response to any ping request from Internet users. However, it is also a comma way for hacker to ping public WAN IP address, to see is there any WAN IP address available. -
Page 37: Ap Mode-Using As A Access Point
Item Description You can see a list of available Wireless networks. Select the Refresh preferred one. Select the Encryption type form the drop-down list. Encryption type Select Static IP, DHCP, PPPoE, PPTP or L2TP. WAN Access Type Select Attain DNS Automatically. Or select Set DNS Manually, if you want to specify the DNS, and enter the DNS provided by your ISP in DNS 1 2 3. - Page 38 Make sure to shift the mode into AP Mode. When this product is used as an access point, the IP address has to be changed. The default IP under AP mode is 192.168.1.254. http://192.168.1.254 Open a Web browser, and enter (Default Gateway) into the blank.
-
Page 39: Wifi Ap Mode- Using As A Network Converter
Item Description Input a name for this router. Device Name The default IP address is 192.168.1.254 IP Address Enter the Subnet Mask address Subnet Mask Enter the Default Gateway address for LAN interfaces Default Gateway Select DHCP type: Client, Disable, or Server under different DHCP environment. - Page 40 http://192.168.1.254 The default gateway is and for User Name and Password are admin (all in lowercase letters). Click Login to enter. User Manual v1.0.0 http://www.sapido.com.tw/...
- Page 41 Item Description Input a name for this router. Device Name The default IP address is 192.168.1.254 IP Address Enter the Subnet Mask address Subnet Mask Enter the Default Gateway address for LAN interfaces Default Gateway Select DHCP type: Client, Disable, or Server under different DHCP environment.
-
Page 42: Chapter 4 Wireless Setup
Chapter 4 Wireless Setup Wireless Setup There are two ways to setup wireless LAN with BR485D. You can use either way to setup Wireless LAN. 4.1.1 Setup Wireless LAN by WPS button You can setup wireless LAN easily by using the WPS button if both WLAN router and the WLAN adapter (client) are WPS supported. - Page 43 (7) Back to the WLAN adapter utility and click its “PBC” (C) button. The utility will start searching the destination connection. (8) Confirm the information form the Utility User Manual v1.0.0 http://www.sapido.com.tw/...
-
Page 44: Wireless Band Mode
(9) After completes the WPS setup. Please confirm that it can be connected to the Internet. Note: The setup image might be some differences when using other branded Adapter. 4.1.2 Wireless band mode Support switchable 802.11n single-band or dual-band radio frequency 4.1.3 Wireless Basic Setup from Web GUI The Wireless Basic Settings include Band, Mode, SSID, Channel Number and other wireless... - Page 45 User Manual v1.0.0 http://www.sapido.com.tw/...
- Page 46 Item Description Turn off the wireless service. Disable Wireless LAN Interface Select the frequency. It has 6 options: 2.4 GHz 2.4G Band (B/G/N/B+G/G+N/B+G+N). Select the frequency. It has 3 options: 5 GHz (A / N / A+N). 5G Band Select the mode. It has 3 modes to select: (AP, Client,). Mode Multiple AP * In Wi-Fi AP mode only support Client mode.
- Page 47 4.1.3.1 Multiple APs The BR485D can support several SSIDs (wireless LAN group). It can be used as if there are multiple wireless LAN access points with one product. Each SSID could be set with different data rate, WMM and access type.
- Page 48 Display the properties of the client which is connecting successfully. Active Client List Click on Apply Change to save the setting date, or you may click on Apply Change & Reset Reset to clear all the input data. 4.1.3.2 Enable Universal Repeater Mode The router can act as Station and AP at the same time.
- Page 49 Wireless Security Setup Here users define the security type and level of the wireless network. Selecting different methods provides different levels of security. Please note that using any encryption may cause a significant degradation of data throughput on the wireless link. There are five Encryption types supported: “None”, “WEP”, “WPA (TKIP)”, ”WPA2(AES)”, and “WPA2 Mixed”.
- Page 50 Encryption- WEP Key (1) Set WEP Key: This section provides 64bit and 128bit WEP encryptions and two different shared key formats (ASCII and Hex) for wireless network. (2) 802.1x Authentication It is a safety system by using authentication to protect your wireless network. User Manual v1.0.0 http://www.sapido.com.tw/...
Need help?
Do you have a question about the BR485d and is the answer not in the manual?
Questions and answers