Table of Contents
Advertisement
Quick Links
INSTALLATION & OPERATING
ULTRA HIGH EFFICIENCY
Models 1005A–2005A
Types H, WH & P
WARNING: Improper installation, adjustment, alteration, service or maintenance can
cause property damage, personal injury, exposure to hazardous materials* or loss of
life. Review the information in this manual carefully. *This unit contains materials that
have been identified as carcinogenic, or possibly carcinogenic, to humans.
FOR YOUR SAFETY: Do not store or use gasoline or other flammable vapors and
liquids or other combustible materials in the vicinity of this or any other appliance. To
do so may result in an explosion or fire.
WHAT TO DO IF YOU SMELL GAS:
• Do not try to light any appliance.
• Do not touch any electrical switch; do not use any phone in your building.
• Immediately call your gas supplier from a neighbor's phone. Follow the gas
supplier's instructions.
• If you cannot reach your gas supplier, call the fire department.
Installation and service must be performed by a qualified installer, service agency or
the gas supplier.
This manual should be maintained in legible condition and kept adjacent to the heater or in a safe place for future
reference.
CATALOG NO. 3400.552
INSTRUCTIONS
Effective: 08-02-13
Replaces: NEW
P/N 241513 Rev. 1
Advertisement
Table of Contents

Subscribe to Our Youtube Channel
Related Manuals for Rheem Raypak XTherm 1005A


Summary of Contents for Rheem Raypak XTherm 1005A
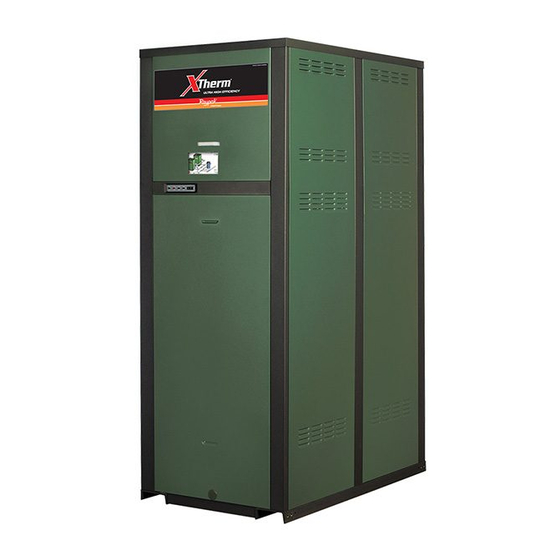
- Page 1 INSTALLATION & OPERATING INSTRUCTIONS ULTRA HIGH EFFICIENCY Models 1005A–2005A Types H, WH & P WARNING: Improper installation, adjustment, alteration, service or maintenance can cause property damage, personal injury, exposure to hazardous materials* or loss of life. Review the information in this manual carefully. *This unit contains materials that have been identified as carcinogenic, or possibly carcinogenic, to humans.
-
Page 3: Table Of Contents
CONTENTS Venting Installation Tips WARNINGS Venting Configurations BEFORE INSTALLATION Product Receipt Outdoor Installation Model Identification Controls Ratings and Certifications User Interface Installations at Elevation WIRING DIAGRAM Component Locations START-UP General Information Pre Start-up Start-Up GENERAL SAFETY Time/Temperature Relationships in OPERATION Scalds Lighting Instructions To Turn Off Gas To Appliance... -
Page 4: Warnings
WARNINGS Pay Attention to These Terms Indicates the presence of immediate hazards which will cause severe DANGER: personal injury, death or substantial property damage if ignored. Indicates the presence of hazards or unsafe practices which could cause WARNING: severe personal injury, death or substantial property damage if ignored. Indicates the presence of hazards or unsafe practices which could cause CAUTION: minor personal injury or product or property damage if ignored. -
Page 5: Before Installation
BEFORE INSTALLATION the upper rear jacket panel of the heater. The model number will have the form H7 or similar depending on the heater size and configuration. The letter(s) in the Raypak strongly recommends that this manual be re- first group of characters identifies the application (H = viewed thoroughly before installing your XTherm Hydronic Heating, WH = Domestic Hot Water (DHW), heater. -
Page 6: Component Locations
Component Locations HEATER PUMP INJECTOR PUMP(S) Fig. 3: Component Locations – Rear Panels omitted for clarity Fig. 1: Component Locations – Side Top panel, blower and gas train omitted for clarity Fig. 4: Component Locations – Top General Information Water Conn Gas Conn Vent... -
Page 7: General Safety
GENERAL SAFETY To meet commercial hot water use needs, the high limit safety control on this water heater will shut off the main gas valve before the outlet temperature reaches 210°F. However, water temperatures over 125°F can cause instant severe burns or death from scalds. When supplying general purpose hot water, the rec- ommended initial setting for the temperature control is 125°F. -
Page 8: Installation
INSTALLATION CAUTION: This heater should be located in an area where water leakage will not result in damage to the area adjacent to the appliances or to the Installation Codes structure. When such locations cannot be avoided, it is recommended that a suitable catch pan, adequately drained, be installed under the Installations must follow these codes: appliance. -
Page 9: Combustion And Ventilation Air
The combustion air intake elbow MUST be used for outdoor installations. It is shipped loose to be installed on the air filter intake at the rear of the heater at the job site. The elbow MUST be oriented with the opening facing downward (shipped loose). - Page 10 Fig. 7: Minimum Clearances from Vent/Air Inlet Terminations – Indoor and Outdoor Installations U.S. Installations Canadian Installations Clearance above grade, veranda, porch, 1 ft (30 cm) 1 ft (30 cm) deck, or balcony 4 ft (1.2m) below or to side Clearance to window or door that may be of opening;...
-
Page 11: Conventional Combustion Air Supply
Combustion Air Filter This heater is supplied with an integral combustion air filter. This filter will reduce the amount of particulates passed through the combustion system and heat exchanger but will not protect against chemical air contamination (See Appendix). The filter must be checked periodically to verify that adequate combus- tion air is being supplied to the heater. - Page 12 cross-sectional area should be at least 1in.² of free (305 mm) of the bottom of the enclosure. The mini- area per 10,000 BTUH (222 mm² per kW) of total mum dimension of air openings shall be not less than input rating of all equipment in the room, when the 3 in.
-
Page 13: Water Piping
Canadian Installations 4. Refer to the B149 Installation Code for additional information CAUTION: All combustion air must be drawn from Water Piping the air outside of the building; the mechanical equip- ment room must communicate directly with the outdoors. General The heater should be located so that any water leaks will not cause damage to the adjacent area or struc- 1. -
Page 14: Hydronic Heating
Piping 3. Check for leaks. Repair any that are found. Raypak Integral Cold Water All high points should be vented. A heater installed above radiation level must be provided with a low wa- Protection ter cut-off device (sales order option F-10). This heater, when used in connection with a refrigeration XTherm heaters are equipped with an integral cold system, must be installed so that the chilled medium is... - Page 15 System Model 1005 Model 1505 Model 2005 Return Temp Supply Temp Minimum Pipe Size Supply Temp Minimum Pipe Size Supply Temp Minimum Pipe Size (°F) (°F) <80' equiv. 80-200' equiv. (°F) <80' equiv. 80-200' equiv. (°F) <80' equiv. 80-200' equiv. 2"NPT 2 1/2"NPT 2"NPT...
-
Page 16: Applications & Modes
Fig. 13: MODE 1 - Single Boiler with Primary/Secondary Piping Mode 1 (Type H Units Only) This mode selection is for hydronic heating systems with single or multiple boilers (Maximum 4 boilers) in primary/secondary piping configuration with or without Three-Way Valves Outdoor Air Reset (S4). -
Page 17: Domestic Hot Water
NOTE: MODE 1 can also be used for process heat- ing applications in conjunction with a buffer/storage tank when operating temperatures above 160°F are required. Care must be given to ensure water hard- ness is no more than 15 grains per gallon for scale free operation. - Page 18 Tank Model 1005 / t f Minimum Tubing Size Med Sup. Hard Sup Minimum Tubing Size / t f Minimum Tubing Size (°F) Temp (°F) Temp (°F) <80' equiv. 80-200' equiv. Temp (°F) Temp (°F) Temp (°F) <80' equiv. 80-200' equiv. Sup. Temp (°F) <80' equiv.
-
Page 19: Pool Heating
Automatic Chemical Feeders All chemicals must be introduced and completely dilut- ed into the water before being circulated through the heater. High chemical concentrations will result when the pump is not running (e.g. overnight). NOTE: High chemical concentrates from feeders CPVC, COPPER OR BRASS that are out of adjustment will cause rapid corrosion AUTO LIMIT... - Page 20 Other Pool and Spa Recommended Level(s) Fiberglass Pools Fiberglass Spas Types Water Temperature 68-88°F (20-31°C) 89-104°F (31-40°C) 68-104°F (20-40°C) 7.3-7.4 7.3-7.4 7.6-7.8 Total Alkalinity (ppm) 120-150 120-150 80-120 Calcium Hardness (ppm) 200-300 150-200 200-400 Salt (ppm) 3000 Maximum 3000 Maximum 3000 Maximum Free Chlorine (ppm)* Total Dissolved Solids...
-
Page 21: Gas Supply
Gas Supply CAUTION: Do not use Teflon tape on gas line pipe thread. A pipe compound rated for use with natural DANGER: Make sure the gas on which the heater and propane gases is recommended. Apply will operate is the same type as specified on the sparingly only on male pipe ends, leaving the two heater’s rating plate. -
Page 22: Electrical Power Connections
1-1/4” NPT 1-1/2” NPT 2” NPT 2-1/2” NPT Model No. 1005A 1505A 2005A • Natural Gas – 1,000 BTU/ft , 0.60 specific gravity at 0.5 in. WC pressure drop • Propane Gas – 2,500 BTU/ft , 1.53 specific gravity at 0.6 in. WC pressure drop Table I: Maximum Equivalent Pipe Length XTherm heaters are wired for 120VAC single phase Manifold Gas Pressure... - Page 23 WARNING: Using a multi-meter, check the following voltages at the circuit breaker panel prior to connecting any equipment. Make sure proper polarity is followed and house ground is proven. (See Fig. 19.) Check the power source: AC = 108 VAC Minimum, 132 VAC MAX AB = 108 VAC Minimum, 132 VAC MAX BC = <1 VAC Maximum Fig.
-
Page 24: Field Wiring Connection
Fig. 23: Wiring Location Fig. 24: Locator Dimples for Optional Components NOTE: A grounding electrode conductor shall be contact closure (including a remote thermostat) across used connect equipment grounding these terminals will enable the XTherm unit to run. conductors, the equipment enclosures, and the Caution should be used to ensure neither of the termi- grounded service conductor to the grounding nals becomes connected to ground. - Page 25 Wiring the Indirect Sensor (DOWN) setpoint. 3. For a 4-20mA application, refer to the VERSA IC 1. An indirect sensor connection is not required if an manual (Cat. 5000.72). indirect water heater is not used in the installation. 4. Connect an Energy Management system or other 2.
- Page 26 MASTER FOLLOWERS VERSA MASTER Fig. 27: XTherm Cascade System Wiring Cascade System Pump and Sensor Wiring 1. On the boiler designated as the Master, connect the system pump enable wiring to the terminal block at the rear of the unit. The connections are dry contacts rated for pilot duty only (5A maxi- mum).
-
Page 27: Venting
er(s) have a lockout condition. The alarm output of the NOTE: This dry contacts closure can come from a follower boilers will only energize if a lockout condition room thermostat or a remote relay. No power of any occurs on that specific boiler. kind should be applied to either of these terminals. - Page 28 CAUTION: Condensate drains for the vent piping NOTE: During winter months check the vent cap are required for installations of the XTherm. Follow and make sure no blockage occurs from build-up of vent manufacturer instructions for installation and snow or ice. location of condensate drains in the vent.
- Page 29 Combustion Exhaust Heater Venting Certified Combustion Air Air Supply Configuration Category Materials Inlet Material Vertical Venting From Inside Building CAT IV (Non-Direct Venting) Horizontal Through- (AL29-4C) the-Wall Venting CPVC Vertical Galvanized Steel Polypropylene* Venting From Outside Building (Direct Venting) Horizontal Through- CPVC the-Wall Venting * Only Centrotherm polypropylene material is approved for use with the XTherm.
-
Page 30: Venting Installation Tips
Total Effective Air Inlet Certified Combustion Air Model Vent Size Length (ft) Max. Length* (ft) Vent Intake Pipe (in.) Material Material Min. Max. 6” Ø 8” Ø 10” Ø Category IV Galvanized 1005A 100** (AL29-4C) Steel, PVC, 1505A CPVC ABS, 85** Polypropylene*** CPVC... - Page 31 Common Venting 8’ OR LESS The NFGC does not address sizing guidelines for the common venting of multiple Category IV heaters. This is covered in the NFGC under “Engineered Vent Sys- tems”. Table N provides the volume of flue products at full fire for the calculation of appropriate vent sizing and extractor for common venting.
- Page 32 Horizontal Through-the-Wall and Direct Venting (Category IV) Fig. 27: Horizontal Through-the-Wall Direct Venting Fig. 25: Horizontal Through-the-Wall Venting CAUTION: This venting system requires the installation of a condensate drain in the vent piping per the vent manufacturer’s instructions. Failure to install a condensate drain in the venting system may cause a non-wrrantable failure.
- Page 33 The vent must be installed to prevent flue gas leakage. CAUTION: This venting system requires the Care must be taken during assembly to ensure that all installation of a condensate drain in the vent piping joints are sealed properly and are airtight. The vent per the vent manufacturer’s instructions.
-
Page 34: Outdoor Installation
cap to the side of the adjacent vent cap(s). 84. Install above grade level and above normal snow levels. Combustion air supplied from outdoors must be free of particulate and chemical contaminants. To avoid a Vent terminal must be at least 3 ft above any blocked flue condition, keep the vent cap clear of forced air inlet located within 10 ft. - Page 35 Top View SIDEWALL VENT TERMINATION OPTION D-15 STAINLESS STEEL CONDENSING HEAT EXCHANGER Fig. 30: PVC Vent Adapter 38°F, the VERSA starts the burner at the minimum fir- DANGER: Primer, cleaner, and cements are ing rate. The burner cycle will terminate when both the extremely flammable.
- Page 36 Termination CAUTION: The inlet water temperature to the XTherm must not exceed 190ºF at 100% fire to use Termination should be accomplished using the adapter the Polypropylene venting option. The venting system thimble as shown. The adapter thimble is supplied by must conform to local codes and/or the current edition Raypak as part of the D-32 option.
-
Page 37: Controls
Top View Fig. 31: Centrotherm Polypropylene Vent Adapter CAUTION: Risk of electric shock: More than one Storage disconnect switch may be required to de-energize the equipment before servicing. Components should be stored in a clean, dry environ- ment in their original packaging. Non-UV stabilized Ignition Control Functions plastic components must be protected from prolonged exposure to UV light. - Page 38 1 - OFF 2 - ON 3 - ON 4 - OFF 5 - OFF 120ºF 75ºF SETPOINT (B) INJECTOR PUMP WIRING S3 S2 S1 Com Fig. 38: High Limit (Manual Reset) High Limit—Auto Reset (Optional) This heater may be equipped with an optional adjust- able auto reset high limit temperature device.
- Page 39 sure switch), as necessary. If the gas pressure regula- tor in the valve fails, the high gas pressure switch automatically shuts down the burner. Operation of either the High or Low Gas Pressure Switch will turn on an LED inside the switch housing. Push the top of the plastic switch housing as shown in Fig.
-
Page 40: User Interface
User Interface Adjusting the XTherm Setpoint The user interface consists of several Menu options. Press the MENU button to scroll through the different To adjust the setpoint on the XTherm: menus in the interface. Press the ITEM button to scroll through available items within a selected menu. - Page 41 Item Application Range Description Default Enable or Disable the operation of boilers. 4 boiler range, 1 is BOILER 1 ON <> OFF enabled by default TARGET H MODE 1,2,3 RSET <> SETP RSET = Outdoor Reset, SETP =Setpoint SETP TANK SETP OFF, 50°F to 150°F Tank set point temperature 125°F...
- Page 42 Boiler Menu The Boiler View displays various items regarding ignition, temperature monitoring, and modulation rates. As well as software and hardware information Item Application Description IGNITION Current State of Ignition LIMIT TEMP Current Limit Temperature AUX TEMP H MODE 3 Current Auxiliary Temperature EMS Vdc Current EMS signal in Volts DC...
- Page 43 Monitor Menu The Monitor Menu records and displays critical Boiler information, such as, Cycle times, Run times, and Maximum/Minimum temperature readings depending on the setup. Item Application Description RUN TIME Burner 1 Burner run time (hours). Press UP/DOWN for 1 sec to clear. Cycles Burner Number of burner cycles.
- Page 44 Toolbox Menu The Toolbox Menu logs all error codes from the BTCII and PIM™, as well as other functions. Up to 15 error codes can be logged for a maximum of 24 days. Item Description Lookup Active Error Look up and display the active error info. Select ON to start the function.
- Page 45 RESET RATIO The control uses the four following settings to determine the reset ratio: Boiler Start (Boil START) The Boil START temperature is the theoretical boiler supply water temperature that the heating system requires when the outdoor air temperature equals the OUT START temperature setting. The Boil START is typically set to the desired building temperature. Outdoor Start (OUT START) The OUT START temperature is the outdoor air temperature at which the control provides the Boil START water temperature to the system.
-
Page 46: Wiring Diagram
WIRING DIAGRAM - Models 1005A–2005A... -
Page 47: Start-Up
START-UP BEFORE OPERATING, smell all around the appliance area for gas. Be sure to smell near the floor because some gas is heavier than air and will settle on the floor. NOTE: The following steps must be performed by a factory-trained technician. -
Page 48: Start-Up
Preparation 3. If the gas pressure is greater than 14.0 in. WC, turn off the main gas shut-off valve, upstream of the heater. WARNING: Do not turn on gas at this time. Start-Up Check Power Supply NOTE: The values in Tables T and V represent the With multi-meter at incoming power, check voltage conditions when the heater is at full firing rate at sea between:... - Page 49 Manifold Check User Test 1. Check manifold gas pressure at the gas valve out- Set DIP switch #1 on the VERSA IC control to “ON”. let pressure tap (connection “D” in Fig. 43). This Set USER TEST = ON in the 'ToolBox' Menu to start pressure should read per the values in Table U for the user test function.
- Page 50 Leak Test Procedure: Dual-Seat Gas Safety Inspection Valve 1. Check all thermostats and high limit settings. Proper leak testing requires three pressure test points 2. During the following safety checks leave manome- in the gas train. Remove the upper front panel and ters hooked up, check and record.
- Page 51 8. To test the fixed manual reset high limit built into the PIM™, first set dip switch #8 on the PIM™ to the ON position. This will activate a Commission Test Mode which will turn on the amber Alarm/Test LED on the PIM™. The fixed high limit setting is temporarily overridden to match the setpoint potentiometer position on the PIM™.
-
Page 52: Operation
OPERATION d. Gas is on at the meter and the heater. e. Incoming dynamic gas pressure to the gas valve is NOT less than 4.0 in. WC for natural Lighting Instructions gas or propane gas. 1. Before operation, make sure you have read all of To Turn Off Gas To Appliance the safety information in this manual. - Page 53 2. Note the error code, either through the flash code WARNING: When servicing or replacing any on the PIM™ and/or from the Toolbox menu on the components of this unit be certain that: user interface, and reference the explanation of •...
- Page 54 LED Error Code Listing Active errors detected are indicated by LED lights on the PIM™. LED Code Error Mode Recommended Troubleshooting Normal Operation Red LED steady ON, Check that the proper ID card is securely connected. Perform a ID Card Fault Green Power power and system restart.
-
Page 55: Maintenance
MAINTENANCE Sensor Resistance Values Suggested Minimum Water Sensor / Outdoor Sensor Maintenance Schedule Water Temperature (°F) Resistance (ohms) 32550 Regular service by a qualified service agency and 25340 maintenance must be performed to ensure maximum operating efficiency. 19870 15700 Daily and monthly maintenance as outlined below may be performed by onsite maintenance staff. -
Page 56: Preventative Maintenance Schedule
3. Check that area is free from combustible materi- Weekly als, gasoline, and other flammable vapors and liquids. For low-pressure heaters, test low-water cut-off device. (With heater in pre-purge, depress the low 4. Check air filter and replace as necessary. water cut-off test button. -
Page 57: Filter Maintenance
6. Perform leakage test on gas valves. (See Fig. 47.) 7. Inspect and clean burner using shop air. As Required 1. Recondition or replace low water cut-off device (if equipped). 2. Check sediment trap and gas strainers. 3. Check flame failure detection system. (See “Post Start-Up Check,”... -
Page 58: Appendix
APPENDIX • metal fabrication plants • beauty shops • refrigeration repair shops Inside Air Contamination • photo processing plants • auto body shops • plastic manufacturing plants All heaters experience some condensation during • furniture refinishing areas and establishments start-up. The condensate from flue gas is acidic. •... -
Page 59: Important Instructions For The Commonwealth Of
Important Instructions for the Commonwealth of Massachusetts The Commonwealth of Massachusetts requires compliance (b) EXEMPTIONS: The following equipment is exempt from with regulation 248 CMR 4.00 and 5.00 for installation of 248 CMR 5.08(2)(a)1 through 4: through – the – wall vented gas appliances as follows: 1. - Page 61 START-UP CHECKLIST FOR FAN-ASSISTED RAYPAK PRODUCTS This start-up checklist is to be completely filled out by the service technician starting up the Raypak Boiler or Heater for the first time. All information may be used for warranty purposes and to ensure that the installation is correct. Additionally this form will be used to record all equipment operation functions and required settings.
- Page 62 LIMITED PARTS WARRANTY XTHERM – TYPES H AND WH MODELS 1005A-2005A SCOPE Raypak, Inc. (“Raypak”) warrants to the original owner that all parts of this heater which are actually manufactured by Raypak will be free from failure under normal use and service for the specified warranty periods and subject to the conditions set forth in this Warranty. Labor charges and other costs for parts removal or reinstallation, shipping and transportation are not covered by this Warranty but are the owner’s responsibility.
- Page 64 www.raypak.com Raypak, Inc., 2151 Eastman Avenue, Oxnard, CA 93030 (805) 278-5300 Fax (805) 278-5468 Litho in U.S.A.
Need help?
Do you have a question about the Raypak XTherm 1005A and is the answer not in the manual?
Questions and answers
Burner Make / Model, Combustion Air Requirements and Boiler HP Rating for the XTherm 1005A high-efficiency, vertical modulating condensing boiler from Raypak.