Table of Contents
Advertisement
Quick Links
OPERATOR'S MANUAL
A Division of Snow Joe
, LLC
®
THANKS
OF A REMANUFACTURED PRODUCT.
To make sure you get the most out of
your product, be sure to register online at
CORDLESS SNOW BLOWER
R
24-INCH | 80-VOLT MAX*
Model iON24SB-XRP-RM
FOR
snowjoe.com
to enjoy full product support.
AFFIX SERIAL NUMBER LABEL
YOUR
Form No. SJ-iON24SB-XRP-RM-880E-V1
PURCHASE
Advertisement
Table of Contents

Related Manuals for SNOWJOE iON24SB-XRP-RM


Summary of Contents for SNOWJOE iON24SB-XRP-RM
- Page 1 24-INCH | 80-VOLT MAX* OPERATOR’S MANUAL Model iON24SB-XRP-RM A Division of Snow Joe , LLC ® Form No. SJ-iON24SB-XRP-RM-880E-V1 THANKS YOUR PURCHASE OF A REMANUFACTURED PRODUCT. To make sure you get the most out of your product, be sure to register online at snowjoe.com...
-
Page 2: General Safety Rules
® ® • Keep bystanders away – All bystanders and pets should service center at 1-866-SNOWJOE (1-866-766-9563). be kept a safe distance away from the work area. • Surfaces – This snow blower is intended for use on • Dress properly – Do not wear loose clothing or jewelry. -
Page 3: Battery + Charger Safety Instructions
® ® battery pack. 1-866-SNOWJOE (1-866-766-9563) for assistance. • Avoid dangerous environments – Do not charge the • Battery chemicals cause serious burns – Never let a battery pack in rain, snow or in damp or wet locations. -
Page 4: Information About The Battery
® ® ® 1. The battery packs supplied with your cordless snow customer service center at 1-866-SNOWJOE blower are only partially charged. The battery packs have (1-866-766-9563). to be charged completely before you use the tool for the 3. Electrical plugs must match the outlet. Never modify first time. -
Page 5: Additional Safety Instructions
+ Sun Joe customer ® ® ® service center at 1-866-SNOWJOE (1-866-766-9563) for Additional Safety Instructions assistance. • Noise control – When using the snow blower, respect Safety Instructions for Walk-Behind the local laws and regulations regarding noise control and environmental protection. -
Page 6: Electrical Safety
• Skid shoes – Adjust skid shoes to clear gravel or crushed rock surfaces safely. • Prevent unauthorized use – Never leave snow blower unattended with key in. Always stop the motor, remove the key and battery packs to prevent unauthorized use. • Check all controls frequently –... -
Page 7: Safety Symbols
Safety Symbols The following table depicts and describes safety symbols that may appear on this product. Read, understand and follow all instructions on the machine before attempting to assemble and operate. Symbols Descriptions Symbols Descriptions READ THE OPERATOR'S MANUAL(S) – Read, understand WARNING! Do not expose the and follow all instructions in the unit to rain or wet conditions. -
Page 8: Technical Data
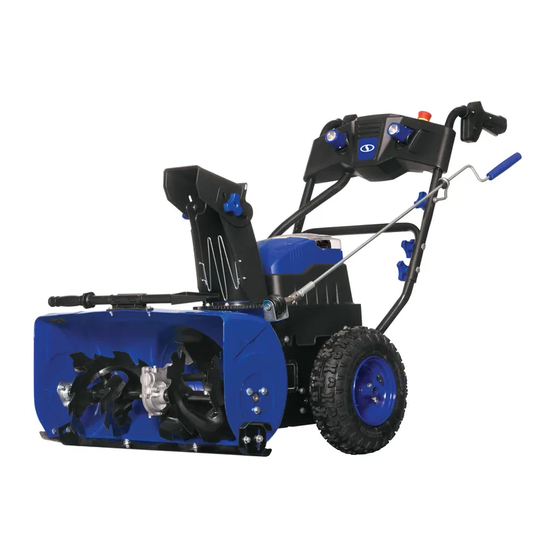
Know Your Cordless Snow Blower Read the owner’s manual and safety rules carefully before operating your cordless snow blower. Compare the illustration below to the actual unit in order to familiarize yourself with the location of the various controls and adjustments. Save this manual for future reference. -
Page 9: Carton Contents
+ Sun Joe customer service center at ® ® 1-866-SNOWJOE (1-866-766-9563). NOTE: Do not discard the shipping carton and packaging material until you are ready to use the electric snow thrower. The packaging is made of recyclable materials. Properly dispose of these materials in accordance with local regulations or save the packaging for long-term product storage. - Page 10 Discharge Chute Assembly 2. Remove the cotter pin from the chute control head (Fig. 3). 1. Place the discharge chute assembly onto the gear plate, Fig. 3 aligning the 4 holes in the gear plate, and push down until the chute is flush and flat against the housing (Fig. 6). Fig.
-
Page 11: Battery Pack Operation
Chute Clean-Out Tool 4. Make certain the entire bottom surface of skid shoe is against the ground to avoid uneven wear on the skid The chute clean-out tool is fastened to the top of the auger shoes. housing with a mounting clip (Fig. 9). 5. -
Page 12: Charging The Battery Packs
+ Sun Joe customer service center at ® ® 1-866-SNOWJOE (1-866-766-9563) for assistance. Fig. 11 6. When charging is complete, remove the battery from the charger by pulling the push lock button and sliding the battery backward to unlock it from the charger (Fig. 13). -
Page 13: Controls & Features
Lithium-Ion Charging Status Fig. 15 LED Lights button Battery Pack Red Charger Charging Temperature Indicator Light Status Too hot Flashing Not charging Normal range Continuous Normal charging Too cold Flashing Not charging Controls + Features WARNING! AVOID INJURY. Read and understand the entire safety section before proceeding. - Page 14 To clear the discharge chute: Fig. 17 1. Release both the auger trigger and the drive trigger. 2. Press the safety switch down and turn the key to OFF position. Remove the key. STOP 3. Wait 10 seconds and make sure impeller blades have stopped rotating.
-
Page 15: Emergency Stop
Starting the Machine Always orient the discharge chute in the opposite direction from where the operator, bystanders, surrounding vehicles, or IMPORTANT! Disengage safety switch and release both windows are located. triggers before turning power switch to ON position. Scraper Blade 1. - Page 16 To Engage Auger 2. Squeeze drive trigger against the left-handle and the snow blower will move. Release it and drive motion will stop NOTE: Auger trigger should be engaged before drive trigger (Fig. 24). when throwing snow. 1. To engage the auger, press the safety button then squeeze Fig.
-
Page 17: Stopping The Machine
2. Engage drive trigger without engaging auger trigger. (Right-handle) Maintenance To order genuine replacement parts or accessories for the Snow Joe iON24SB-XRP cordless snow blower, please visit ® snowjoe.com or contact the Snow Joe + Sun Joe customer ® ® service center at 1-866-SNOWJOE (1-866-766-9563). WARNING! -
Page 18: Check Tire Pressure
3. Use only mild soap on a damp cloth to clean the battery pack and charger, keeping away from all electrical Fig. 27 contacts. Certain cleaning agents and solvents are harmful to plastics and other insulated parts. Some of these include gasoline, turpentine, lacquer thinner, paint thinner, chlorinated cleaning solvents, ammonia and household detergents containing ammonia. - Page 19 Call the Snow Joe + Sun Joe customer service ® ® center at 1-866-SNOWJOE (1-866-766-9563) for assistance. Occasionally a foreign object may enter the auger/impeller housing and jam the auger, breaking the shear bolts which Battery Screw + compartment secure the auger to the shaft.
- Page 20 4. Disassemble the housing by removing the cotter pin from 7. Disassemble the auger and impeller by removing the nuts the chute control head and 6 housing bolts (3 on each and bolts from the side of the auger housing (Fig. 36). side) then remove the chute crank (Fig.
-
Page 21: Replacing Drive Belt
Replacing Impeller Fig. 41 1. To uninstall the impeller, repeat steps 1 to 7 (Figs. 30 – 36). Open motor cover 2. Disassemble the worn impeller from the impeller shaft by removing the 2 spring pins (Fig. 39). Fig. 39 Spring pin Impeller 3. -
Page 22: Auger Gearcase
2. Remove the nuts and bolts from each side of the tire axle, 5. Remove the drive belt (Fig. 47). as shown (Fig. 44). Fig. 47 Tire Fig. 44 Nut + bolt Drive belt 6. Roll the new drive belt onto the gear assembly then 3. -
Page 23: Battery Caution + Disposal Information
Snow Joe + Sun Joe ® ® ® customer service center at 1-866-SNOWJOE WARNING! To reduce the risk of injury or explosion, (1-866-766-9563) for assistance. never burn or incinerate a battery pack even if it is damaged, 2. -
Page 24: Federal Communications Commission (Fcc)
iCHRG40-DPC Federal Communications Commission (FCC) WARNING! Any changes or modifications to this unit not expressly approved by the party responsible for compliance could void the user's authority to operate the equipment. Class B device: NOTE: This equipment has been tested and found to comply with the limits for a Class B digital device, pursuant to part 15 of the FCC Rules. - Page 25 NOTE: Accessories are subject to change without any obligation on the part of Snow Joe + Sun Joe to provide notice of such ® ® changes. Accessories can be ordered online at snowjoe.com or via phone by contacting the Snow Joe + Sun Joe customer ® ®...
- Page 26 NOTES...
- Page 27 We’re here to help Monday through Friday from 9AM to 6PM EST. You can reach us at 1-866-SNOWJOE (1-866-766-9563), online EXCLUSIONS: at snowjoe.com, via email at help@snowjoe.com or tweet us • Wearing parts like belts, augers, chains and tines are @snowjoe.
- Page 28 snowjoe.com...
Need help?
Do you have a question about the iON24SB-XRP-RM and is the answer not in the manual?
Questions and answers