
Subscribe to Our Youtube Channel
Related Manuals for Siemens WD4HU541ES


Summary of Contents for Siemens WD4HU541ES
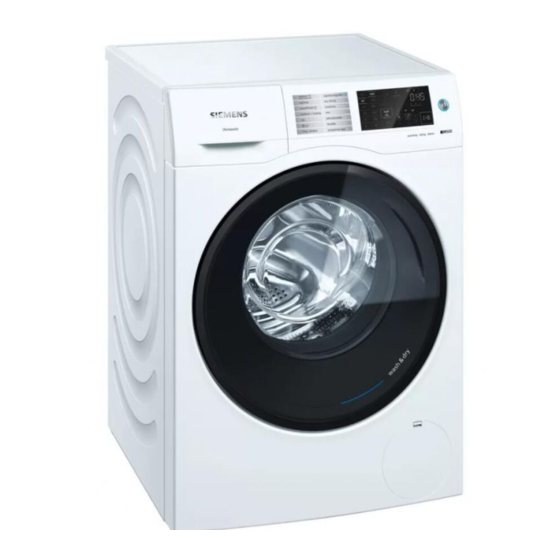
- Page 1 Washer dryer WD4HU541ES siemens-home.bsh-group.com/welcome Register your product online...
- Page 2 Your new washer dryer Display rules : Warning! You have chosen a Siemens washer dryer. This combination of symbol and signal word indicates a possibly dangerous Please take a few minutes to read and situation. Not heeding the warning can become familiar with the advantages of cause death or injuries.
-
Page 3: Table Of Contents
Contents e n I n s t r u c t i o n M a n u a l a n d I n s t a l l a t i o n I n s t r u c t i o n s Intended use. -
Page 4: Intended Use
Intended use Activating/deactivating Wi-Fi ..47 Intended use Resetting your network settings..48 Updating the software ... 48 This appliance is intended for private Information on data protection. -
Page 5: Safety Instructions
Safety instructions Do not allow children to Safety instructions ■ clean or maintain this appliance unsupervised. T he following safety information Keep children under 3 years S a f e t y i n s t r u c t i o n s and warnings are provided to ■... -
Page 6: Installation
Safety instructions The mains plug and the Warning ■ protective contact socket Risk of poisoning! must match and the earthing Detergents and care products system must be correctly may result in poisoning if installed. consumed. The installation must have an If accidentally swallowed, seek ■... - Page 7 Safety instructions Warning Warning Risk of fire/material damage/ Risk of injury! damage to the appliance! The appliance is very heavy. ■ The use of extension cords or Lifting it may result in injury. power strips may result in fire Do not lift the appliance on due to overheating or short your own.
-
Page 8: Operation
Safety instructions If the water hoses are altered Operation ■ or damaged, this may result Warning in material damage or Risk of explosions/fire! damage to the appliance. Laundry that has come into The water hoses must not be contact with solvents, oil, wax, kinked, crushed, altered or wax remover, paint, grease or severed. - Page 9 Safety instructions Certain objects may ignite Warning ■ when drying is in progress, Risk of poisoning! or even cause the appliance Poisonous fumes may be given to catch fire or explode. off by cleaning agents that Remove any lighters or contain solvents, e.g.
-
Page 10: Cleaning/Maintenance
Safety instructions If you pour the wrong Warning ■ quantity of detergent or Eye/skin irritation! cleaning agent into the Detergent and care products appliance, this may result in may spray out if the detergent material damage or damage drawer is opened while the to the appliance. - Page 11 Safety instructions Repairs and any other work Warning ■ on the appliance must only Risk of injury/material be conducted by our damage/damage to the customer service or by an appliance! electrician. The same applies The use of spare parts and for replacing the mains cable accessories supplied by other (when necessary).
-
Page 12: Environmental Protection
Environmental protection Reduce the washing temperature for Environmental lightly and normally soiled laundry. protection At low temperatures, the appliance ■ consumes less energy. For light to P ackaging/used appliance normal soiling, lower temperatures E n v i r o n m e n t a l p r o t e c t i o n than indicated on the care label are Dispose of packaging in an also sufficient. -
Page 13: Positioning And Connecting
Positioning and connecting Bag: Positioning and Installation and operating ■ connecting instructions Customer Service location ■ S tandard accessories directory* P o s i t i o n i n g a n d c o n n e c t i n g Warranty* ■... -
Page 14: Installation Surface
Positioning and connecting If the hose and mains cables are not On wooden joist floors, install the Note: ■ routed properly, there is a risk of appliance: tripping and injury. In a corner, if possible, ■ Lay hoses and cables in such a way On a water-resistant wooden board ■... - Page 15 Positioning and connecting b) Remove the sleeves. Take the hoses out of the holders. Fit the covers. Unscrew and remove all four Lock the covers firmly in place by transport brace screws. applying pressure to the snap-in hooks. a) Remove the mains cable from the holders.
-
Page 16: Removing The Support Struts
Positioning and connecting Removing the support struts Hose and cable lengths Connection on left side Unscrew and remove all screws in the vertical transport struts. Remove the transport struts. ( ~ 145 cm 0 ~ 150 cm 8 ~ 95 cm @ 60 cm ~ 100 cm Connection on right side Undo and remove the screws on the... -
Page 17: Water Inlet
Positioning and connecting Water inlet Connection Connect the water supply hose to Warning the water tap (¾" = 26.4 mm) and to Risk of death! the appliance: There is a risk of electric shock if you – Model: Standard touch live components. Do not immerse the Aqua-Stop safety valve* in water (it contains an electric valve). -
Page 18: Water Outlet
Positioning and connecting Open the water tap carefully, Connection checking the leak tightness of the Drainage into a siphon connection points. The screw ■ The connection point must be connection is under mains water secured using a hose clamp with a pressure. -
Page 19: Alignment
Positioning and connecting Alignment Tighten the lock nut against the housing. Level the appliance using a spirit level. In doing so, hold the foot tight and do not adjust its height. Incorrect levelling may result in intense The lock nuts on all four appliance noise, vibrations and "wandering". -
Page 20: Before Washing For The First Time
Positioning and connecting No multiple plugs/couplings or Close the detergent drawer. ■ extension cables are used. Select I. If an earth-leakage circuit breaker is When the programme ends, press ■ used, only a type which displays this the # button till the indicator lamp symbol is used: z. - Page 21 Positioning and connecting Insert all four sleeves. Before switching on the appliance again: Notes The support struts must be ■ removed. ~ Page 16 The transport braces must be ■ removed. ~ "Removing the transport locks" on page 14 Pour approx. 1 litre of water into ■...
-
Page 22: Getting To Know The Appliance
Getting to know the appliance Getting to know the appliance A ppliance G e t t i n g t o k n o w t h e a p p l i a n c e Detergent drawer Control panel Loading door Service flap... -
Page 23: Control Panel
Getting to know the appliance Control panel ( Programmes that can be selected. 0 Touch-Display 8 Start/Pause button Touch I button to start, interrupt (e.g. reload washing) and cancel the programme. @ Power button Press the # button to switch the appliance on/off. -
Page 24: Touch-Display
Getting to know the appliance Touch-Display Additional programme settings Programme default settings Display Setting ( Speed Display Setting Description s (Prewash) Ž - 90° Temperature Temperature that l (Rinse plus) can be set in °C ~ "Additional programme Ý (Easy iron) Ž... -
Page 25: Laundry
Laundry Keep detergents and agents for the Further settings ■ pretreatment of laundry (e.g. stain remover, prewash sprays, etc.) away from the surfaces of the appliance. Using a damp cloth, immediately remove any fine spray residue and other residue or droplets. Empty any pockets. -
Page 26: Preparing Laundry For Drying
Laundry – Stains: Remove/pretreat stains Preparing laundry for drying while they are fresh. First dab with soapy water; do not rub. To ensure an even drying result, Note: Then wash the items of laundry sort the laundry according to the: with the appropriate programme. -
Page 27: Detergents And Care Products
Detergents and care products Detergents and care products Y ou can protect your appliance and D e t e r g e n t s a n d c a r e p r o d u c t s your laundry by selecting and using the correct detergents and care products. -
Page 28: Detergent Recommendation
Detergents and care products Detergent recommendation This information is intended to help you to choose the right detergent for your items. Fabrics Detergent Programme Temperature Heat-resistant white fab- Standard detergent with optical Cottons From cold up to 90 °C rics made from cotton or brighteners linen Coloured fabrics made... -
Page 29: Overview Of Programmes
Overview of programmes Overview of programmes S electable programme O v e r v i e w o f p r o g r a m m e s Programme/Type of laundry Options/Information Name of the programme Max. load for washing/ Max. - Page 30 Overview of programmes Programme/Type of laundry Options/Information eco 40-60 10,0 kg/6,0 kg Wash items made from cotton, linen or blended fabrics. Suita- ble for normally soiled items. 400 - 1400 rpm Suitable for washing normally soiled cotton textiles, and drying z (Water plus), Ý...
- Page 31 Overview of programmes Programme/Type of laundry Options/Information delicado/seda (Delicates/Silk) 2,0 kg/- For delicate, washable fabrics, e.g. made of silk, satin, synthetic Ž - 40 °C fibres or blends (e.g. silk blouses, silk scarves). 2 - 800 rpm z (Water plus), Ý (Easy iron), l (Rinse plus), s (Prewash), â...
- Page 32 Overview of programmes Programme/Type of laundry Options/Information Single spinning program with selectable spin speed and subse- quent draining. To select the p program, set the spin speed to 2 - 1400 rpm Ý (Easy iron), â (Memory) wash+dry è (¾è, »è, Øè) dry - not possible For rinsing with a subsequent spin cycle.
- Page 33 Overview of programmes Programme/Type of laundry Options/Information myTime 2,0 kg/6,0 kg Mixed fabrics; for lightly soiled laundry made of cotton and syn- Ž - 40 °C thetics. 400 - 1200 rpm The length of the programme can be set each time. The maxi- z (Water plus), Ý...
- Page 34 Overview of programmes Programme/Type of laundry Options/Information R Curtains *** 4,0 kg/- For cleaning heavy and light crutains. Reduced sinning pre- Ž - 40 °C vents creases. We recommend using a special detergent. 400 - 800 rpm ( Speed, z (Water plus), l (Rinse plus), s (Prewash), ç...
-
Page 35: Drying Table
Overview of programmes Drying table Estimated drying time (min) Recommended drying programme Drying load Ø (Iron » (Cup- ¾ (Cup- (kg) dry) board dry) board dry+) algodón/algodão (Cottons) + dry 1.0-2.0 40-50 50-70 65-90 2.0-4.0 50-75 70-95 90-135 4.0-6.0 75-90 95-120 135-160 mix + dry... -
Page 36: Programme Default Settings
Programme default settings The maximum speed that can be set Programme default depending on the model and the programme that has been selected. settings Ready in Y ou can change the default settings for P r o g r a m m e d e f a u l t s e t t i n g s selected programmes. -
Page 37: Wash+Dry Or Dry
Additional programme settings After starting the programme (if a Ø (Iron dry): Normal, single-layered ■ “Finish in” time has been selected and laundry that still needs to be damp the programme has not yet started), you after drying and is suitable for can change the preselected number of ironing or hanging up. -
Page 38: S (Prewash)
Additional programme settings By selecting additional programme l (Rinse plus) settings, you can better adapt the Additional rinse cycle depending on the washing/drying process to your items of programme; longer programme length laundry. for particularly sensitive skin and/or for The settings can be selected or areas with very soft water. -
Page 39: (Remote Start)
Operating the appliance } (Remote start) Notes Never switch on a damaged ■ Touching } (Remote start) allows you appliance! to start the programme remotely via the Inform customer service! ■ Home Connect app or to call up the Home Connect settings. Insert mains plug. -
Page 40: Adjusting The Selected Programme
Operating the appliance If you have activated the If the buttons can be selected, they Note: ■ childproof lock, you have to deactivate it will be half lit in the display, then turn before you can set a into full lit after activated. programme.~ "Childproof lock"... -
Page 41: Placing Laundry Into The Drum
Operating the appliance Placing laundry into the drum Dosing and adding detergent and care products Open the door, place laundry in the drum, make sure that no items of Caution! laundry are trapped between the door Damage to the appliance and the rubber seal, and close the door. -
Page 42: Starting The Programme
Operating the appliance Pour in detergent and/or cleaning Pull out the detergent drawer. Press product. down the insert and fully remove the drawer. Dispenser I Detergent for pretreat and clothing disinfectant. (only for Slide the measuring aid forwards, the appliance with pretreat and fold it down and click it into place. -
Page 43: Childproof Lock
Operating the appliance Note: Foam detection To continue the programme, touch the If the symbol o also lights up in the I button. The programme continues display panel, the appliance has automatically. detected too much foam during the Notes wash cycle and automatically activated Do not leave the door open for too additional rinse cycles to remove the ■... -
Page 44: Programme End
Home Connect Programme end Wipe the rubber seal dry. ■ End lights up on the Touch-Display and I and Õ displays are off. If you have selected 2, the water is only drained after rinse process, no spin cycle. Notes If Hot flashes in the display before ■... -
Page 45: Calling Up The Home Connect Menu
Home Connect Connect your appliance to your Calling up the Home Connect home network automatically or menu manually (you only need to do this the first time). In the Home Connect menu, you can Connect your appliance to the Home create and view network connections, Connect app. - Page 46 Home Connect Set the programme to position 2. Connecting to your home network automatically Step 2.1 Ensure that you are in the Home Connect menu. ~ Page 45 Press I. The appliance now attempts to connect to your home network. † flashes in the display.
-
Page 47: Activating/Deactivating Wi-Fi
Home Connect Once you have connected Once your appliance is displayed in successfully, open the the app, carry out the last steps in Home Connect app on your mobile the Home Connect app. device and carry out the steps in the If you were not able to establish Note: app. -
Page 48: Resetting Your Network Settings
Home Connect If Wi-Fi is switched off and your Updating the software ■ appliance was previously connected You can update the Home Connect to your home network, this software on your appliance. As soon as connection will be re-established a new software update is available, a automatically when Wi-Fi is switched note appears in the display: ž˜š... -
Page 49: Declaration Of Conformity
Directive 2014/53/EU. A detailed RED Declaration of Conformity can be found online at www.siemens-home.bsh-group.com among the additional documents on the product page for your appliance. You can change the following basic settings: The volume of the end signal. - Page 50 Appliance settings End signal Brightness You can select position 1 and use the Possible setting values: 1 - 4 ˜ button to adjust the volume of the You can select position 3 and use the end signal, e.g. ‘- „. ˜...
-
Page 51: Sensors
Sensors Appliance housing/control Sensors panel U nbalanced load detection Remove the detergent residue S e n s o r s ■ system immediately. Wipe the housing and the control ■ The automatic unbalanced load panel with a soft, damp cloth. detection system detects imbalances Do not use abrasive cloths, sponges ■... -
Page 52: Drain Pump Is Blocked
Cleaning and maintenance To remove the insert: Push the insert Push in the detergent drawer. upwards from below with your finger. Leave the detergent drawer open Note: so that any residual water can Clean the detergent dispenser tray evaporate. and insert with water and a brush, and dry it. -
Page 53: The Drain Hose At The Siphon Is Blocked
Cleaning and maintenance Take the drain hose out of the Close the service flap. retainer. Remove the sealing cap and pour the water out into a suitable container. Replace the sealing cap and place the drain hose back in the retainer. To prevent unused detergent Note: from flowing straight into the drain... -
Page 54: Filter In The Water Supply Is Blocked
Cleaning and maintenance Filter in the water supply is Clean the filter with a small brush. blocked Release water pressure in the supply hose: Turn off the water tap. Select the algodón/algodão (Cottons) (activate ( Speed setting) programme. Select the I button. Allow the programme to run for approx. -
Page 55: Faults And What To Do About Them
Faults and what to do about them Caution! Faults and what to do Water damage! about them Any escaping water may cause water damage. E mergency release Do not open the door if water can be F a u l t s a n d w h a t t o d o a b o u t t h e m seen through the glass. -
Page 56: Information On The Display Panel
Faults and what to do about them Information on the display panel Display Cause/Remedy Flashes fast + signal: The door was opened and the water level is too high. Õ ■ Close the door, continue the programme with I button or select 0 pro- gramme. -
Page 57: Faults And What To Do About Them
Faults and what to do about them Display Cause/Remedy The indicator lamp of Run the limp. tambor (Drum Clean) 90°C programme to clean and care for the the limp. tambor drum and the outer tub. (Drum Clean) pro- Notes gramme flashes Run the programme without laundry. - Page 58 Faults and what to do about them Faults Cause/Remedy The programme will not Have you touched the I button or selected f (Ready in) time? ■ start. Is the door closed? ■ Childproof lock activated? Deactivate childproof lock. ■ Shop mode activated? If the display shows àœ©˜ for 5 s after you have ■...
- Page 59 Faults and what to do about them Faults Cause/Remedy The programme is taking Not a fault – the unbalanced load detection system is adjusting an imbal- ■ longer than usual. ance by repeatedly distributing the laundry. Not a fault – the foam detection system is activated – a rinse cycle has ■...
- Page 60 Faults and what to do about them Faults Cause/Remedy There is detergent resi- Some phosphate-free detergents contain water-insoluble residue. ■ due on the laundry. Select q or brush the laundry after washing. ■ Spin during the drying This is an innovative process known as thermal spinning used to reduce energy phase.
- Page 61 Faults and what to do about them Faults Cause/Remedy The drying result is not After the end of the programme, warm laundry feels damper than it actu- ■ satisfactory (laundry is ally is. Spread the laundry out and allow the heat to disperse. not dry enough).
-
Page 62: Customer Service
Customer Service If you contact Customer Service, you Customer Service will require the product number (E-Nr.) and the production number (FD) of your I f you have any queries on use, are appliance. C u s t o m e r S e r v i c e unable to rectify faults on the appliance The contact details for Customer yourself or if your appliance needs to be... -
Page 63: Consumption Values
Consumption values Consumption values T he following information is provided in accordance with the EU-Ecodesign- C o n s u m p t i o n v a l u e s Regulation. The values given for programs other than the Eco 40-60 are indicative only and were determined in accordance with the applicable standard EN60456 and EN62512. -
Page 64: Technical Data
Technical data Technical data Aqua-Stop warranty D imensions: O nly for appliances with Aqua-Stop T e c h n i c a l d a t a A q u a - S t o p w a r r a n t y 84,8 cm x 59,8 cm x 62,0 cm In addition to warranty claims against (height x width x depth) - Page 68 01450 2655 (0.03 € per minute at peak. Off peak 0.0088 € per minute.) You can find the contact information for all countries in the attached after-sales service directory. BSH Hausgeräte GmbH Carl-Wery-Straße 34 81739 München GERMANY siemens-home.bsh-group.com *9001493632* 9001493632 (0006)
Need help?
Do you have a question about the WD4HU541ES and is the answer not in the manual?
Questions and answers