
Subscribe to Our Youtube Channel
Related Manuals for D-Link DIR-863


Summary of Contents for D-Link DIR-863
- Page 1 Version 1.0 | 2014/01/20 User Manual Wireless AC1600 Dual Band Gigabit Cloud Router DIR-862L...
- Page 2 Preface D-Link reserves the right to revise this publication and to make changes in the content hereof without obligation to notify any person or organization of such revisions or changes. Manual Revisions Revision Date Description December 20, 2013 • Initial release for Revision A1...
-
Page 3: Table Of Contents
L2TP ..................39 Wi-Fi Protected Setup (WPS) ..........96 Wireless Settings ..............42 Advanced Network Settings ...........97 Wireless Connection Setup wizard ......42 Guest Zone ................98 Wi-Fi Protected Setup (WPS) Wizard .......45 IPv6 Firewall ................99 Manual Wireless Network Setup ......46 D-Link DIR-862L User Manual... - Page 4 IPv6 ..................116 IPV6 Routing ..............117 Support ..................118 Connect a Wireless Client to your Router ....119 WPS Button ................119 Windows® 7 ................120 WPA/WPA2 ................. 120 WPS ..................123 Windows Vista® ................. 127 D-Link DIR-862L User Manual...
-
Page 5: Product Overview
If any of the above items are missing, please contact your reseller. Note: Using a power supply with a different voltage rating than the one included with the DIR-862L will cause damage and void the warranty for this product. D-Link DIR-862L User Manual... -
Page 6: System Requirements
• Internet Explorer 7 or higher mydlink Requirements • Firefox 3 or higher • Safari 5 or higher • Chrome 5 or higher iPhone, iPad, and iPod touch are registered trademarks of Apple Inc. Android is a trademark of Google, Inc. D-Link DIR-862L User Manual... -
Page 7: Introduction
Monitor in real time websites that are being visited with recent browser history displayed on the mydlink™ Lite app – which is great for parents. The D-Link Cloud Service can detect and block unwelcome guests who try to access your wireless network, and suspicious activities will be displayed right on your mydlink™... -
Page 8: Features
* Maximum wireless signal rate derived from IEEE Standard 802.11a, 802.11g, 802.11n and draft 802.11ac specifications. Actual data throughput will vary. Network conditions and environmental factors, including volume of network traffic, building materials and construction, and network overhead, lower actual data throughput rate. Environmental conditions will adversely affect wireless signal range. D-Link DIR-862L User Manual... -
Page 9: Hardware Overview
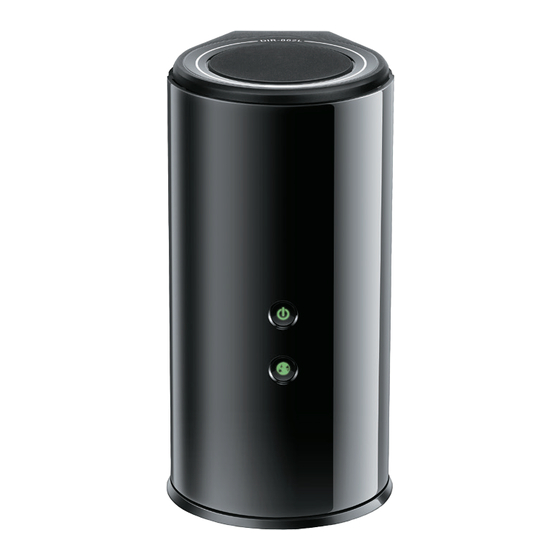
Connect Gigabit Ethernet devices such as computers, switches, storage (NAS) devices, and game consoles. Internet Port Using an Ethernet cable, connect your broadband modem to this port. Power Button Press the power button to power on and off. Power Receptor Receptor for the supplied power adapter. D-Link DIR-862L User Manual... -
Page 10: Leds
WPS process. The light will blink orange during boot up. A solid green light indicates a connection to the Internet. If the LED is orange, a cable is connected but the Internet LED router can not communicate with the Internet. D-Link DIR-862L User Manual... -
Page 11: Installation
• If you have DSL and are connecting via PPPoE, make sure you disable or uninstall any PPPoE software such as WinPoet, Broadjump, or Enternet 300 from your computer or you will not be able to connect to the Internet. D-Link DIR-862L User Manual... -
Page 12: Wireless Installation Considerations
1. Keep the number of walls and ceilings between the D-Link router and other network devices to a minimum - each wall or ceiling can reduce your adapter’s range from 1-30 meters (3-90 feet). Position your devices so that the number of walls or ceilings is minimized. -
Page 13: Hardware Setup
3. Unplug the Ethernet cable from your modem (or existing router if upgrading) that is connected to your computer. Plug it into the LAN port labeled 1 on the back of your router. The router is now connected to your computer. INTERNET POWER DIR-862L Computer D-Link DIR-862L User Manual... - Page 14 Try opening a web browser and enter a web site. A solid green light indicates connection on the Internet port and the router can connect to the Internet. If the LED is orange, the connection is good but the router cannot connect to the Internet. It may need to be configured. See next page. D-Link DIR-862L User Manual...
-
Page 15: Configuration
There are several different ways you can configure your router to connect to the Internet and connect to your clients: • D-Link Setup Wizard - This wizard will launch when you log into the router for the first time. Refer to ”Quick Setup Wizard”... -
Page 16: Quick Setup Wizard
If this is your first time logging into the router, this wizard will start automatically. This wizard is designed to guide you through a step-by-step process to configure your new D-Link router and connect to the Internet. Click Next to continue. - Page 17 Internet connection you have, this screen will appear. Click Guide me through the Internet Connection Settings to display a list of connection types to choose from. Select your Internet connection type and click Next to continue. D-Link DIR-862L User Manual...
- Page 18 ISP. Click Next to continue. If the router detected or you selected L2TP, enter your L2TP username, password, and other information supplied by your ISP. Click Next to continue. D-Link DIR-862L User Manual...
- Page 19 Click Next to continue. In order to secure your router, please enter a new password. Check the Enable Graphical Authentication box to enable CAPTCHA authentication for added security. Click Next to continue. D-Link DIR-862L User Manual...
- Page 20 If you want to create a bookmark to the router, click OK. Click Cancel if you do not want to create a bookmark. If you clicked Yes, a window may appear (depending on what web browser you are using) to create a bookmark. D-Link DIR-862L User Manual...
- Page 21 If you clicked Yes, enter your mydlink account name (email address) and password. Click Login to register your router. If you clicked No, fill out the requested information and click Sign Up to create your mydlink account. D-Link DIR-862L User Manual...
- Page 22 Touch (iOS 3.0 or higher), Android device (1.6 or higher). To download the "mydlink lite" app, visit the Apple Store, Android Market or http://mydlink.com/Lite. PC and Mac users can use the mydlink portal at http://mydlink.com. D-Link DIR-862L User Manual...
-
Page 23: Qrs Mobile App
Section 3 - Configuration QRS Mobile App D-Link offers an app for your iOS/Android device to install and configure your router. Step 1 From your iPad, Touch, or iPhone, go to the iTunes Store and search for ‘D-Link’ . Select QRS Mobile and then download it. -
Page 24: Shareport Mobile App
Setup > Storage page (refer to page 68) for this app to work properly. 1. Insert your USB flash drive into DIR-862L. 2. Scan the QR code to download the SharePort Mobile app to your iOS or Android device. 3. From your iOS mobile device, click Settings. Settings D-Link DIR-862L User Manual... - Page 25 6. The following screen will appear. 7. Click on Settings icon located on the right top corner of the screen. Click Edit to enter your User Name and Password. Once you finish, click Done to continue. D-Link DIR-862L User Manual...
- Page 26 11. For the Files section, click on the Files icon to view your files from your USB flash drive. Supported formats for iOS are Microsoft Office and Adobe Acrobat. Supported formats for Android vary by device. D-Link DIR-862L User Manual...
- Page 27 14. You can access files on a USB drive from a web browser: http://shareport.local. Note: If you change your device/admin password, you will need to use the new password in the SharePort Mobile app. D-Link DIR-862L User Manual...
- Page 28 To access the configuration utility, open a web-browser such as Internet Explorer and enter address of the router (http://dlinkrouter.local.). You may also connect by typing http://192.168.0.1 in the address bar. Leave the password blank by default. D-Link DIR-862L User Manual...
-
Page 29: Setup
DIR-862L If you want to configure your router to connect to the Internet using the wizard, click Internet Connection Setup Wizard. You will be directed to the Quick Setup Wizard. D-Link DIR-862L User Manual... -
Page 30: Internet Connection Setup Wizard
Click Next to continue. Step 1: Set Your Password By default, the D-Link Router does not have a password configured for administrator access to the Web-based configuration pages. To secure your new networking device, please enter and verify a password in the spaces provided. - Page 31 L2TP: Choose this option if your Internet con- nection requires an L2TP username and password to get online. Static IP Address: Choose this option if your ISP provided you with IP Address information that has to be manually configured. D-Link DIR-862L User Manual...
- Page 32 User Name: Enter the PPPoE account user name used here. This information is given by the ISP. Password: Enter the PPPoE account password used here. This information is given by the ISP. Click Next to continue. D-Link DIR-862L User Manual...
- Page 33 Secondary DNS Address: Enter the Secondary DNS IP address used here. This field is normally optional. Only one DNS address is required for a functional Internet connection, but using a second DNS address provides more stability. Click Next to continue. D-Link DIR-862L User Manual...
- Page 34 Secondary DNS Address: Enter the Secondary DNS IP address used here. This field is normally optional. Only one DNS address is required for a func- tional Internet connection, but using a second DNS address provides more stabil- ity. Click Next to continue. D-Link DIR-862L User Manual...
- Page 35 Internet connection, but using a second DNS address provides more stabil- ity. Click Next to continue. Setup Complete! This is the last page of the Internet Connection Setup Wizard. Click the Connect button to save your settings. D-Link DIR-862L User Manual...
-
Page 36: Internet (Manual)
At any given point the user can save the configuration on this page by clicking on the Save Settings button. If you choose to discard the changes made, click on the Don’t Save Settings button. D-Link DIR-862L User Manual... - Page 37 MAC address unless required by your ISP. You can use the Copy Your PC’s MAC Address button to replace the Internet port’s MAC address with the MAC address of your Ethernet card. D-Link DIR-862L User Manual...
- Page 38 MAC address unless required by your ISP. You can use the Copy Your PC’s MAC Address button to replace the Internet port’s MAC address with the MAC address of your Ethernet card. D-Link DIR-862L User Manual...
- Page 39 Schedules page. To create a new schedule, click the New Schedule button to open the Schedules page. Schedules will be discussed later. D-Link DIR-862L User Manual...
- Page 40 MAC address unless required by your ISP. You can use the Copy Your PC’s MAC Address button to replace the Internet port’s MAC address with the MAC address of your Ethernet card. D-Link DIR-862L User Manual...
- Page 41 New Schedule button to open the Schedules page. Schedules will be discussed later. Maximum Idle Time: Enter a maximum idle time during which the Internet connection is maintained during inactivity. To disable this feature, enable Auto-reconnect. D-Link DIR-862L User Manual...
- Page 42 MAC address unless required by your ISP. You can use the Copy Your PC’s MAC Address button to replace the Internet port’s MAC address with the MAC address of your Ethernet card. D-Link DIR-862L User Manual...
-
Page 43: L2Tp
Schedules page. To create a new schedule, click the New Schedule button to open the Schedules page. Schedules will be discussed later. D-Link DIR-862L User Manual... - Page 44 MAC address unless required by your ISP. You can use the Copy Your PC’s MAC Address button to replace the Internet port’s MAC address with the MAC address of your Ethernet card. D-Link DIR-862L User Manual...
- Page 45 IPv6 WAN Default Gateway Once connected, the IPv6 WAN Default Gateway address will be displayed here. Click on the Save Settings button to accept the changes made. Click on the Don’t Save Settings button to discard the changes made. D-Link DIR-862L User Manual...
-
Page 46: Wireless Settings
Click on the Prev button to return to the previous page. Click on the Next button to continue to the next page. Click on the Cancel button to discard the changes made and return to the main wireless page. D-Link DIR-862L User Manual... - Page 47 Click on the Prev button to return to the previous page. Click on the Cancel button to discard the changes made and return to the main wireless page. Click on the Save button to accept the changes made. D-Link DIR-862L User Manual...
- Page 48 After clicking the Save button the device will save the settings made and return to the main wireless page. End of Wizard. D-Link DIR-862L User Manual...
-
Page 49: Wi-Fi Protected Setup (Wps) Wizard
Click on the Prev button to return to the previous page. Click on the Next button to continue to the next page. Click on the Cancel button to discard the changes made and return to the main wireless page. D-Link DIR-862L User Manual... -
Page 50: Manual Wireless Network Setup
To initiate the Manual Wireless Setup page, click on the Manual Wire- less Connection Setup button. On this page the user can configure all the parameters related to the wireless connectivity of this router. D-Link DIR-862L User Manual... - Page 51 If you are not using encryption then they could connect to your network. When Invisible mode is enabled, you must enter the Wireless Network Name (SSID) on the client manually to connect to the network. D-Link DIR-862L User Manual...
- Page 52 WEP key box, in which case it will be converted into a hexadecimal key using the ASCII values of the characters. A maximum of 5 text characters can be entered for 64-bit keys, and a maximum of 13 characters for 128-bit keys. D-Link DIR-862L User Manual...
- Page 53 Pre-Shared Key: Enter the shared secret used here. This secret phrase needs to be the same on all of the wireless clients for them to be able to connect to the wireless network suc- cessfully. D-Link DIR-862L User Manual...
- Page 54 RADIUS Server Shared Enter the shared secret used here. This secret phrase needs to be the same on all of the wireless clients for them to Secret: be able to connect to the wireless network successfully. D-Link DIR-862L User Manual...
- Page 55 If you are not using encryption then they could connect to your network. When Invisible mode is enabled, you must enter the Wireless Network Name (SSID) on the client manually to connect to the network. D-Link DIR-862L User Manual...
- Page 56 WEP key box, in which case it will be converted into a hexadecimal key using the ASCII values of the characters. A maximum of 5 text characters can be entered for 64-bit keys, and a maximum of 13 characters for 128-bit keys. D-Link DIR-862L User Manual...
- Page 57 Pre-Shared Key: Enter the shared secret used here. This secret phrase needs to be the same on all of the wireless clients for them to be able to connect to the wireless network successfully. D-Link DIR-862L User Manual...
- Page 58 RADIUS Server Shared Enter the shared secret used here. This secret phrase needs to be the same on all of the wireless clients for them to Secret: be able to connect to the wireless network successfully. D-Link DIR-862L User Manual...
- Page 59 WEP key box, in which case it will be converted into a hexadecimal key using the ASCII values of the characters. A maximum of 5 text characters can be entered for 64-bit keys, and a maximum of 13 characters for 128-bit keys. D-Link DIR-862L User Manual...
- Page 60 Click on the Save Settings button to accept the changes made. Click on the Don’t Save Settings button to discard the changes made. D-Link DIR-862L User Manual...
-
Page 61: Wireless Security
8 and 63 characters long. The password can include symbols (!?*&_) and spaces. This key must be the exact same key entered on your wireless router or access point. WPA/WPA2 incorporates user authentication through the EAP. EAP is built on a more secure public key encryption system to ensure that only authorized network users can access the network. D-Link DIR-862L User Manual... -
Page 62: Network Settings
Local Domain: Enter the Domain name (Optional). Enable DNS Relay: Uncheck the box to transfer the DNS server information from your ISP to your computers. If checked, your computers will use the router for a DNS server. D-Link DIR-862L User Manual... -
Page 63: Dhcp Server Settings
Network Neighborhood. Learn NetBIOS If NetBIOS announcement is switched on, it will cause WINS information to be learned from the WAN side, if available. Turn this from WAN: setting off to configure manually. D-Link DIR-862L User Manual... - Page 64 B-Node indicates to use local network broadcast ONLY. This setting is useful where there are no WINS servers available, however, it is preferred you try M-Node operation first. This setting has no effect if the ‘Learn NetBIOS information from WAN’ is activated. WINS IP Enter your WINS Server IP address(es). Address: D-Link DIR-862L User Manual...
-
Page 65: Dhcp Reservation
(name of your computer or device), MAC Address, and IP address. Enable: Check to enable the reservation. Edit: Click the edit icon to make changes to the reservation entry. Delete: Click to remove the reservation from the list. D-Link DIR-862L User Manual... -
Page 66: Storage
Verify Password: In the Verify Password field, the user can re-enter the password that will be associated with the user account. Click the Add/Edit button the add a new user account or modify an existing account. D-Link DIR-862L User Manual... - Page 67 Click the Append button to add a blank account with the access path and permission specified. Click the OK button to accept the changes made for the existing account. Click the Cancel button to discard the changes made. D-Link DIR-862L User Manual...
- Page 68 DNS page, the WAN IP address will be used. If, however, a DDNS account is specified, then the domain name will be used. Click on the Save Settings button to accept the changes made. Click on the Don’t Save Settings button to discard the changes made. D-Link DIR-862L User Manual...
-
Page 69: Ipv6
For the advanced user that has configured a router before, click on the Manual IPv6 Internet Connection Setup button to input all the settings manually. To configure the IPv6 local settings, click on the IPv6 Local Connectivity Setup button. D-Link DIR-862L User Manual... -
Page 70: Ipv6 Internet Connection Setup Wizard
The router will try to detect whether its possible to obtain the IPv6 Internet connection type automatically. If this succeeds then the user will be guided through the input of the appropriate parameters for the connection type found. D-Link DIR-862L User Manual... - Page 71 Cancel button to discard all the changes made and return to the main page. Click on the Next button to continue. Click on the Prev button to return to the previous page. Click on the Cancel button to discard all the changes made and return to the main page. D-Link DIR-862L User Manual...
- Page 72 Password: Enter the PPPoE password used here. If you do not know your password, please contact your ISP. Verify Password: Re-enter the PPPoE password used here. Service Name: Enter the service name for this connection here. This option is optional. D-Link DIR-862L User Manual...
- Page 73 These are the settings of the LAN (Local Area Network) IPv6 interface for the router. The router’s LAN IPv6 Address configuration is based on the IPv6 Address and Subnet assigned by your ISP. (A subnet with prefix /64 is supported in LAN.) D-Link DIR-862L User Manual...
- Page 74 The IPv6 Internet Connection Setup Wizard is complete. Click on the Connect button to continue. Click on the Prev button to return to the previous page. Click on the Cancel button to discard all the changes made and return to the main page. D-Link DIR-862L User Manual...
-
Page 75: Ipv6 Manual Setup
Note: If using the PPPoE option, you will need to ensure that any PPPoE client software on your computer has been removed or disabled. Auto Detection Select Auto Detection to have the router detect and automatically configure your IPv6 settings from your ISP. D-Link DIR-862L User Manual... - Page 76 Enter the start IPv6 Address for the DHCPv6 range for your Start: local computers. IPv6 Address Range Enter the end IPv6 Address for the DHCPv6 range for your End: local computers. IPv6 Address Lifetime: Enter the IPv6 Address Lifetime (in minutes). D-Link DIR-862L User Manual...
- Page 77 Enter the start IPv6 Address for the DHCPv6 range for your Start: local computers. IPv6 Address Range Enter the end IPv6 Address for the DHCPv6 range for your End: local computers. IPv6 Address Lifetime: Enter the IPv6 Address Lifetime (in minutes). D-Link DIR-862L User Manual...
- Page 78 Enter the primary and secondary DNS server addresses. Address: LAN IPv6 Address: Enter the LAN (local) IPv6 address for the router. LAN Link-Local Address: Displays the Router’s LAN Link-Local Address. Enable Autoconfiguration: Check to enable the Autoconfiguration feature. D-Link DIR-862L User Manual...
- Page 79 Enter the start IPv6 Address for the DHCPv6 range for your local computers. IPv6 Address Range End: Enter the end IPv6 Address for the DHCPv6 range for your local computers. IPv6 Address Lifetime: Enter the IPv6 Address Lifetime (in minutes). D-Link DIR-862L User Manual...
- Page 80 Enter the start IPv6 Address for the DHCPv6 range for your local Range Start: computers. IPv6 Address Enter the end IPv6 Address for the DHCPv6 range for your local Range End: computers. Pv6 Address Enter the Router Advertisement Lifetime (in minutes). Lifetime: D-Link DIR-862L User Manual...
- Page 81 Enter the start IPv6 Address for the DHCPv6 range for your local Start: computers. IPv6 Address Range Enter the end IPv6 Address for the DHCPv6 range for your local End: computers. IPv6 Address Enter the IPv6 Address Lifetime (in minutes). Lifetime: D-Link DIR-862L User Manual...
- Page 82 LAN Link-Local Address: Displays the Router’s LAN Link-Local Address. Enable Check to enable the Autoconfiguration feature. Autoconfiguration: Autoconfiguration Type: Select Stateful (DHCPv6), SLAAC+RDNSS or SLAAC + Stateless DHCPv6. Router Advertisement Enter the Router Advertisement Lifetime (in minutes). Lifetime: D-Link DIR-862L User Manual...
- Page 83 Section 3 - Configuration Link-Local Connectivity My IPv6 Connection: Select Link-Local Only from the drop-down menu. LAN IPv6 Address Displays the IPv6 address of the router. Settings: D-Link DIR-862L User Manual...
-
Page 84: Mydlink Settings
Click the Next button to proceed to the next step. Click the Cancel button to discard the changes made and return to the main page. D-Link DIR-862L User Manual...
Need help?
Do you have a question about the DIR-863 and is the answer not in the manual?
Questions and answers