Table of Contents
Advertisement
Quick Links
ARTISAN
FOODPROCESSOR
™
INSTRUCTIES EN RECEPTEN
ARTISAN
FOOD PROCESSOR
™
INSTRUCTIONS AND RECIPES
ROBOT MÉNAGER ARTISAN
MODE D'EMPLOI ET RECETTES
ARTISAN
FOOD PROCESSOR
™
BEDIENUNGSANLEITUNG UND REzEPTE
FOOD PROCESSOR ARTISAN
ISTRUzIONI PER L'USO E RICETTE
PROCESADOR DE
ALIMENTOS ARTISAN
INSTRUCCIONES Y RECETAS
ARTISAN
MATBEREDARE
™
INSTRUKTIONER OCH RECEPT
ARTISAN
FOODPROSESSOR
™
BRUKSANvISNING OG OPPSKRIFTER
ARTISAN
MONITOIMIKONE
™
KÄYTTÖOHJEET JA RESEPTIT
ARTISAN
FOOD PROCESSOR
™
INSTRUKTIONER OG OPSKRIFTER
PROCESSADOR DE
ALIMENTOS ARTISAN
INSTRUÇÕES E RECEITAS
ARTISAN
MATVINNSLUVÉL
™
LEIÐBEININGAR OG UPPSKRIFTIR
ARTISAN
KOyzINOMhxANh
™
OΔhΓIEΣ KAI ΣyNTAΓEΣ
™
™
™
™
1
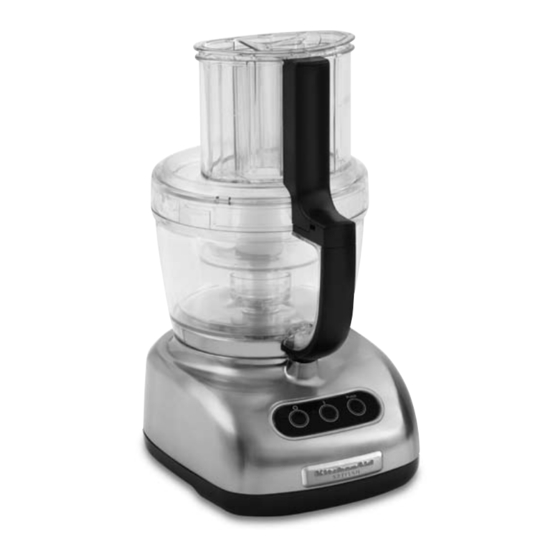
Models 5KFPM776 (shown),
5KFPM771, 5KFPM775
(not shown)
Advertisement
Table of Contents

Related Manuals for KitchenAid ARTISAN 5KFPM776


Summary of Contents for KitchenAid ARTISAN 5KFPM776
- Page 1 ARTISAN FOODPROCESSOR ™ INSTRUCTIES EN RECEPTEN ARTISAN FOOD PROCESSOR ™ INSTRUCTIONS AND RECIPES ROBOT MÉNAGER ARTISAN ™ MODE D’EMPLOI ET RECETTES ARTISAN FOOD PROCESSOR ™ BEDIENUNGSANLEITUNG UND REzEPTE FOOD PROCESSOR ARTISAN ™ ISTRUzIONI PER L’USO E RICETTE PROCESADOR DE ALIMENTOS ARTISAN ™...
-
Page 2: Table Of Contents
Using the Multipurpose Blade.................17 Using a Slicing or Shredding Disc ................18 Using the Dough Blade ...................19 Using the Egg Whip ....................19 Helpful Hints ........................20 Recipes ..........................22 Warranty and Service Information Household KitchenAid™ Food Processor Warranty ...........27 Service Centers .......................27 Customer Service ....................28... -
Page 3: Food Processor Safety
Food Processor Safety Your safety and the safety of others are very important. We have provided many important safety messages in this manual and on your appliance. Always read and obey all safety messages. This is the safety alert symbol. This symbol alerts you to potential hazards that can kill or hurt you and others. -
Page 4: Important Safeguards
IMPORTANT SAFEGUARDS When using electrical appliances, basic used but must be used only when the safety precautions should always be Food Processor is not running. followed, including the following: 9. Blades are sharp. Handle carefully. 1. Read all instructions. 10. To reduce the risk of injury, never place 2. -
Page 5: Food Processor Features
Food Processor Features* Work Bowl Cover Mini Bowl and Mini Blade with Ultra Wide Mouth 950 ml bowl and stainless Feed Tube steel blade are perfect for small One of the industry’s chopping and mixing jobs. largest, the ultra wide mouth feed tube Fine (2 mm) Slicing Disc accommodates large items –... - Page 6 Food Processor Features* Disc Stem Heavy-Duty Base Stem fits over the power shaft The base features the on the base and into the bottom “O”, “I”, and Pulse of a slicing or shredding disc. Buttons along with the power shaft, which rotates the blades and discs.
-
Page 7: Preparing The Food Processor For Use
Preparing the Food Processor for Use 4. Insert the desired accessory into WARNING the work bowl. See pages 8–11 for accessory instructions. 5. Place the work bowl cover on the work Cut Hazard bowl with the feed tube just to the left Handle blades carefully. -
Page 8: Multipurpose Blade & Dough Blade Assembly
Preparing the Food Processor for Use WARNING WARNING Cut Hazard Handle blades carefully. Failure to do so can result in cuts. Multipurpose Blade and Electrical Shock Hazard Dough Blade Assembly Plug into a grounded 3 prong outlet. Place the blade on the power shaft. Rotate the blade so it falls into place on Do not remove ground prong. -
Page 9: Mini Bowl Assembly
Preparing the Food Processor for Use WARNING Cut Hazard Handle blades carefully. Failure to do so can result in cuts. 2. Fit the disc over the metal pin on the disc stem with the raised-blade side up. The disc has a raised nub on the top and grooves underneath to help 3. -
Page 10: Egg Whip Assembly & Use
Preparing the Food Processor for Use Egg Whip Assembly and Use 5. Place the work bowl cover on the work bowl with the feed tube just to the left The egg whip is designed to whip egg of the handle. Make sure the center whites or heavy cream to create toppings pin of the egg whip fits into the center or soft meringues. - Page 11 Preparing the Food Processor for Use 4. The 2-piece cone offers two sizes; 9. Operate the citrus press by pressing choose the right size for the fruit you the “I” Button or the “Pulse” Button. are juicing. Use the outer cone for 10.
-
Page 12: Using The Food Processor
Using the Food Processor Maximum Liquid Level WARNING This line on the work bowl indicates the maximum level of liquid that can be processed by the Food Processor. Rotating Blade Hazard Always use food pusher. Keep fingers out of openings. Turning the Food Processor Keep away from children. -
Page 13: Using The Pulse Control
Using the Food Processor and remove. Use the center feed tube and Using the Pulse Control pusher to process small or slender items, The pulse control allows precise control of or to add liquid while the Food Processor the duration and frequency of processing. is running. - Page 14 Disassembling the Food Processor 4. If using a disc, remove it before 6. Turn the work bowl to the left to unlock removing the bowl. Place two fingers it from the base. Lift to remove. under each side of the disc and lift it straight up.
-
Page 15: Care And Cleaning
Care and Cleaning 5. To prevent damage to the interlock WARNING system, always store the work bowl and work bowl cover in the unlocked position when not in use. Cut Hazard Handle blades carefully. Failure to do so can result in cuts. 1. -
Page 16: Troubleshooting
If the Food Processor still does not work, with the steps in this section, see the check the fuse or circuit breaker on the KitchenAid warranty and after sales service electrical circuit the Food Processor is section on pages 27-28. Do not return the connected to and make sure the circuit Food Processor to the retailer –... -
Page 17: Food Processing Tips
Food Processing Tips USING THE To mince garlic or to chop fresh herbs MULTIPURPOSE BLADE or small quantities of vegetables: With processor running, add food through the small feed tube. Process until chopped. For best results, make sure work bowl and To chop fresh fruits or vegetables: herbs are very dry before chopping. -
Page 18: Using A Slicing Or Shredding Disc
Food Processing Tips To grate hard cheeses, such as To slice or shred fruits or vegetables Parmesan and Pecorino: that are long and relatively small in diameter, such as celery, carrots, and Never attempt to process cheese that bananas: cannot be pierced with the tip of a sharp knife. -
Page 19: Using The Dough Blade
Food Processing Tips To shred USING THE DOUGH BLADE spinach and The dough blade is specially other leaves: designed for mixing and Stack leaves. Roll kneading yeast dough quickly up and stand and thoroughly. One minute or less of up in feed tube. operating time is all that is needed to form Process, using a dough ball. -
Page 20: Helpful Hints
Helpful Hints 1. To avoid damage to the blade or motor, 7. Soft and medium-hard cheese may do not process food that is so hard or spread out or roll up on the shredding firmly frozen that it cannot be pierced disc. - Page 21 Helpful Hints 15. After removing the work bowl cover, 17. Your Food Processor is not designed to place it upside down on the counter. perform the following functions: This will help keep the counter clean. • grind coffee beans, grains, or hard 16. To remove the contents of the work spices bowl without removing the multi- • grind bones or other inedible parts...
-
Page 22: Recipes
White Balsamic vinaigrette 1 tablespoon fresh Position mini bowl and mini blade in work bowl. With basil leaves processor running, add basil, oregano, and garlic through the small feed tube. Process until chopped, 5 to 8 seconds. 1 tablespoon fresh Scrape sides of bowl. - Page 23 Cheddar Broccoli Soup 230 g sharp Cheddar Position 4 mm shredding disc in work bowl. Add cheese. cheese, chilled Process to shred. Remove and set aside. 1 small onion, cut into Exchange shredding disc for 2 mm slicing disc in work halves lengthwise bowl.
- Page 24 Spring Mix Basmati Rice 1 clove garlic Position multipurpose blade in work bowl. With processor running, add garlic through the small feed tube. Process 1 medium shallot, cut 5 seconds. Add shallot. Pulse 2 to 3 times, about 2 seconds into quarters each time, or until chopped.
- Page 25 Chicken Satay with Peanut Sauce Chicken Position multipurpose blade in work bowl. With processor 2 cloves garlic running, add garlic and gingerroot through the small feed tube. Process until chopped, 5 to 10 seconds. Add 1 teaspoon coarsely soy sauce, oil, and brown sugar. Process until blended chopped gingerroot and sugar dissolves, 15 to 20 seconds.
- Page 26 Fresh Fruit Tart Crust Position multipurpose blade in work bowl. Add flour, 125 g (1 cup) all-purpose sugar, and salt. Process until mixed, about 2 seconds. Add flour butter and shortening. Pulse 3 to 4 times, 2 to 3 seconds each time, or until crumbly.
-
Page 27: Household Kitchenaid Food Processor Warranty
One Year Full Warranty local electrical codes. from date of purchase. KITCHENAID DOES NOT ASSUME ANY RESPONSIBILITY FOR INDIRECT DAMAGES. Service Centers All service should be handled locally by In the U.K.: an Authorized KitchenAid Service Center. -
Page 28: Customer Service
Helpline number on: +44 (0) 20 8616 5148 Address: KitchenAid Europa, Inc. PO BOX 19 B-2018 ANTWERP 11 BELGIUM www.KitchenAid.co.uk www.KitchenAid.com ® Registered Trademark/™ Trademark of KitchenAid, U.S.A. © 2009. All rights reserved. Specifications subject to change without notice. (6463dZw309)
Need help?
Do you have a question about the ARTISAN 5KFPM776 and is the answer not in the manual?
Questions and answers