Table of Contents
Advertisement
Quick Links
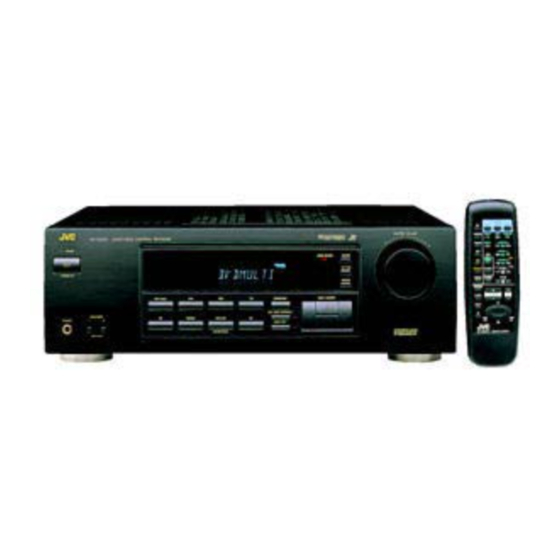
AUDIO/VIDEO CONTROL RECEIVER
RECEPTOR DE CONTROL DE AUDIO/VÍDEO
RECEPTOR DE COMANDO AUDIO/VÍDEO
RX-5000VBK / RX-5001VGD
CD
TV
VCR
AUDIO
TAPE/MD
DELAY
TEST
SURROUND
5
1
2
3
FM/AM
EFFECT
– CENTER +
4
5
6
VCR
– REAR•L +
8
5
9
7/P
SOUND
MENU
DVD
CONTROL
– REAR•R +
10
+10
ENT
DVD MULTI
CD-DISC
TV VOL.
–
+
PHONO
TV/VIDEO
TV CH
–
+
STANDBY
ONE TOUCH
OPERATION
+
+
/I
VOLUME
VCR CH
MUTING
–
–
STANDBY/ON
£
SLEEP
8
4
4
1
1
7
RM-SR558XU REMOTE CONTROL
SPEAKERS
PHONES
1
_ ON
— OFF
AUDIO/VIDEO CONTROL RECEIVER
DVD MULTI
DVD
VCR
FM
CD
PHONO
TAPE/MD
AM
2
SOURCE NAME
INSTRUCTIONS
MANUAL DE INSTRUCCIONES
INSTRUÇÕES
MASTER VOLUME
–
+
BASS BOOST
ADJUST
SETTING
MEMORY
MULTI CURSOR
SURROUND
ONE TOUCH OPERATION
INPUT ATT.
For Customer Use:
Enter below the Model No. and Serial
No. which are located either on the rear,
bottom or side of the cabinet. Retain this
information for future reference.
Model No.
Serial No.
LVT0384-006A
[U, US]
Advertisement
Table of Contents

Related Manuals for JVC RX-5001VGD


Summary of Contents for JVC RX-5001VGD
- Page 1 AUDIO/VIDEO CONTROL RECEIVER RECEPTOR DE CONTROL DE AUDIO/VÍDEO RECEPTOR DE COMANDO AUDIO/VÍDEO RX-5000VBK / RX-5001VGD AUDIO TAPE/MD DELAY TEST SURROUND FM/AM EFFECT – CENTER + – REAR•L + SOUND MENU CONTROL – REAR•R + DVD MULTI CD-DISC TV VOL. MASTER VOLUME –...
- Page 2 Warnings, Cautions and Others / Avisos, precauciones y otras notas / Advertêcias, precauções e outras notas / CAUTION To reduce the risk of electrical shocks, fire, etc.: 1. Do not remove screws, covers or cabinet. 2. Do not expose this appliance to rain or moisture. PRECAUCIÓN Para reducir riesgos de choques eléctricos, incendio, etc.: 1.
- Page 3 Espacio de 15 cm o más Espaço de 15 cm ou mais Front Frente Frente RX-5000VBK/ RX-5001VGD Wall or obstructions Pared u obstrucciones Parede ou obstáculo Stand height 15 cm or more Allura del soporte 15 cm o más Base com altura de 15 cm ou mais...
-
Page 4: Table Of Contents
Available DSP Modes According to the Speaker Arrangement .. 16 Adjusting the 3D-PHONIC Modes .......... 17 Adjusting the DAP Modes ............17 Adjusting the Surround Modes — Dolby Surround and JVC Theater Surround ............... 18 Activating the DSP Modes ............19 Using the DVD MULTI Playback Mode .. -
Page 5: Parts Identification
Parts Identification Become familiar with the buttons and controls on the receiver before use. Refer to the pages in parentheses for details. MASTER VOLUME AUDIO/VIDEO CONTROL RECEIVER – STANDBY BASS BOOST ADJUST SETTING STANDBY/ON MEMORY DVD MULTI MULTI CURSOR SURROUND ONE TOUCH OPERATION SPEAKERS PHONO... -
Page 6: Getting Started
Getting Started This section explains how to connect audio/video components and speakers to the receiver, and how to connect the power supply. Before Installation Connecting the FM and AM Antennas General FM Antenna Connections • Be sure your hands are dry. •... -
Page 7: Connecting The Speakers
RIGHT LEFT REAR SPEAKERS... -
Page 8: Connecting Audio/Video Components
Connecting the subwoofer speaker Turntable You can enhance the bass by connecting a subwoofer. Connect the input jack of a powered subwoofer to the If an earth cable is SUBWOOFER OUT jack on the rear panel, using a cable with RCA provided for your ANTENNA turntable, connect the... - Page 9 Video component connections DVD player Use the cables with RCA pin plugs (not supplied). • When you connect the DVD player with stereo output jacks: Connect the white plug to the audio left jack, the red plug to the audio right jack and the yellow plug to the video jack. DVD player TV (as the monitor) TV (or Monitor)
-
Page 10: Connecting The Power Cord
Connecting the Power Cord Putting Batteries in the Remote Control Before plugging the receiver into an AC outlet, make sure that all Before using the remote control, put two supplied batteries first. connections have been made. When using the remote control, aim the remote control directly at the remote sensor on the receiver. -
Page 11: Basic Operations
Basic Operations The following operations are commonly used when you play any sound source. Turning the Power On and Off (Standby) MUTE TUNED SLEEP 3D-PHONIC On the front panel: AUTO STEREO PRO LOGIC HALL VOLUME To turn on the power, press STANDBY/ON STANDBY The STANDBY lamp goes off. -
Page 12: Adjusting The Volume
Listening only with headphones Adjusting the Volume 1. Connect a pair of headphones to the PHONES jack on the front On the front panel: panel. 2. Press SPEAKERS 1 and SPEAKERS 2 to set them in the — To increase the volume, turn MASTER MASTER VOLUME OFF position. -
Page 13: Attenuating The Input Signal
Attenuating the Input Signal Reinforcing the Bass When the input level of the playing source is too high, the sounds With this Bass Boost function, you can boost the bass level. will be distorted. If this happens, you need to attenuate the input Before you start, remember... -
Page 14: Basic Settings
Basic Settings Some of the following settings are required after connecting and positioning your speakers in your listening room, while others will make operations easier. 3. Press MULTI CURSOR @ / # to MULTI CURSOR Changing the Source Name select your center speaker size. When you have connected an MD recorder to the TAPE/MD jacks LARGE SMALL... -
Page 15: Storing The Basic Settings And Adjustments - One Touch Operation
(in Adjustments — One Touch Operation minutes): JVC’s One Touch Operation function is used to assign and store different sound settings for each different playing source. By using (Canceled) this function, you do not have to change the settings every time you When the shut-off time comes change the source. -
Page 16: Receiving Radio Broadcasts
Receiving Radio Broadcasts You can browse through all the stations or use the preset function to go immediately to a particular station. Setting the AM Tuner Interval Spacing Using Preset Tuning Some countries space AM stations 9 kHz apart, and other countries Once a station is assigned to a channel number, the station can be use 10 kHz spacing. -
Page 17: Selecting The Fm Reception Mode
To tune in a preset station Selecting the FM Reception Mode On the front panel: When an FM stereo broadcast is hard to 1. Press FM or AM. receive or noisy The last station of the selected band is tuned You can change the FM reception mode while receiving an FM •... -
Page 18: Using The Dsp Modes
Using the DSP Modes The built-in Surround Processor provides three types of the DSP (Digital Signal Processor) mode — 3D-PHONIC mode, DAP (Digital Acoustic Processor) mode and Surround mode (Dolby Pro Logic and JVC Theater Surround). 3D-PHONIC modes Surround Modes The 3D-PHONIC mode gives you such a nearly surround effect as it With this receiver, you can use two types of the Surround modes. -
Page 19: Available Dsp Modes According To The Speaker Arrangement
Available DSP Modes According to the Speaker Arrangement Available DSP modes will vary depending on how many speakers are used with this receiver. Make sure that you have set the speaker information correctly (see page 11). Speaker arrangements Available DSP modes Each time you press SURROUND, the DSP modes change as follows: Front... -
Page 20: Adjusting The 3D-Phonic Modes
Adjusting the 3D-PHONIC Modes Adjusting the DAP Modes Before you start, remember... Before you start, remember... • Make sure that you have set the speaker information correctly • Make sure that you have set the speaker information correctly (see page 11). (see page 11). -
Page 21: Adjusting The Surround Modes - Dolby Surround And Jvc Theater Surround
• There is a time limit in doing the following steps. If the setting is EFFECT 4 EFFECT 5 canceled before you finish, start from step 1 again. • You can only adjust the effect level when selecting JVC Theater As the number increases, JVC Theater Surround becomes Surround. stronger. -
Page 22: Activating The Dsp Modes
16 for more details.) level (from –10 to +10). 2. Select and play a sound source. • To enjoy the 3D-PHONIC, Dolby Surround, and JVC Theater Surround, play back a software which was processed with MULTI CURSOR 5. Press MULTI CURSOR % / fi... -
Page 23: Using The Dvd Multi Playback Mode
Using the DVD MULTI Playback Mode This receiver provides the DVD MULTI playback mode for reproducing the analog discrete output mode of the DVD player. Before playing back a DVD, refer also to the manual supplied with the DVD player. 7. -
Page 24: Compu Link Remote Control System
COMPU LINK Remote Control System The COMPU LINK remote control system allows you to operate JVC audio components through the remote sensor on the receiver. Automatic Power On/Off (Standby): only possible To use this remote control system, you need to connect JVC audio... -
Page 25: Operating Jvc's Audio/Video Components
Operating JVC’s Audio/Video Components You can operate JVC’s audio and video components with this receiver’s remote control, since control signals for JVC components are preset in the remote control. Sound control section (Amplifier) IMPORTANT: After pressing SOUND CONTROL, you can perform the following To operate JVC’s audio components using this remote control:... - Page 26 DVD player or TV, not on the receiver. For detailed menu operations, refer to the instructions supplied • Some JVC VCRs can accept two types of the control signals — with the discs or the DVD player. remote code “A” and “B.” Before using this remote control, make sure that the remote control code of the VCR connected to the VCR jacks is set to code “A.”...
-
Page 27: Troubleshooting
Troubleshooting Use this chart to help you solve daily operational problems. If there is any problem you cannot solve, contact your JVC service center. PROBLEM POSSIBLE CAUSE SOLUTION The display does not light up. The power cord is not plugged in. -
Page 28: Specifications
8 Ω at 1 kHz, with no more than 0.8% total harmonic distortion. Total Harmonic Distortion (8 Ω, 1 kHz): 0.8%* at 100 W output (* Measured by JVC Audio Analysis System) Audio Audio Input Sensitivity/Impedance (1 kHz): 2.7 mV/47 k Ω... - Page 29 FM tuner (IHF) Tuning Range: 87.50 MHz to 108.00 MHz Monaural: 12.8 dBf (1.20 µV/75 Ω) Usable Sensitivity: 50 dB Quieting Sensitivity: 21.3 dBf (3.2 µV/75 Ω) Monaural: 41.3 dBf (31.5 µV/75 Ω) Stereo: Signal-to-Noise Ratio (IHF-A weighted): Monaural: 78 dB at 85 dBf Stereo: 73 dB at 85 dBf Total Harmonic Distortion:...
- Page 30 Mains (AC) Line Instruction (not applicable for Europe, U.S.A., Canada, Australia and U.K.) Instrucción sobre la línea de la red (CA) (no aplicable para Europa, EE.UU., Canadá, Australia, ni el Reino Unido) Instrução sobre a tensão da rede eléctrica (CA) (não aplicável para a Europa, os E.U.A., o Canadá, a Austrália e o Reino Unido) VOLTAGE SELECTOR 127V...
Need help?
Do you have a question about the RX-5001VGD and is the answer not in the manual?
Questions and answers