Advertisement
Quick Links
Chipsmall Limited consists of a professional team with an average of over 10 year of expertise in the distribution
of electronic components. Based in Hongkong, we have already established firm and mutual-benefit business
relationships with customers from,Europe,America and south Asia,supplying obsolete and hard-to-find components
to meet their specific needs.
With the principle of "Quality Parts,Customers Priority,Honest Operation,and Considerate Service",our business
mainly focus on the distribution of electronic components. Line cards we deal with include
Microchip,ALPS,ROHM,Xilinx,Pulse,ON,Everlight and Freescale. Main products comprise
IC,Modules,Potentiometer,IC Socket,Relay,Connector.Our parts cover such applications as commercial,industrial,
and automotives areas.
We are looking forward to setting up business relationship with you and hope to provide you with the best service
and solution. Let us make a better world for our industry!
Contact us
Tel: +86-755-8981 8866 Fax: +86-755-8427 6832
Email & Skype: info@chipsmall.com Web: www.chipsmall.com
Address: A1208, Overseas Decoration Building, #122 Zhenhua RD., Futian, Shenzhen, China
Advertisement

Subscribe to Our Youtube Channel
Related Manuals for TECO SG2-DNET


Summary of Contents for TECO SG2-DNET
- Page 1 Chipsmall Limited consists of a professional team with an average of over 10 year of expertise in the distribution of electronic components. Based in Hongkong, we have already established firm and mutual-benefit business relationships with customers from,Europe,America and south Asia,supplying obsolete and hard-to-find components to meet their specific needs.
- Page 2 SG2 Smart PLC USER Manual SG2 Programmable Logic Smart Relay 0086-0510-8522-7555 4KA72X023 Version: 03 2009.07.03 w w w .taian-technology.com Apply to: SG2 firmware version 3.0, PC client program software version 3.0...
-
Page 3: Table Of Contents
4KA72X023 Contents Contents ..........................I Summary of changes ....................... Ⅳ Chapter 1: Getting Started ....................1 Examination before Installation ..........................2 Environmental Precautions ............................. 2 SG2 Model Identification............................2 Quick Start Setup....................... 4 Install SG2 Client Software..........................4 Connect Power to SG2 smart relay ........................4 Connect Programming Cable .......................... - Page 4 4KA72X023 Chapter 4: Relay Ladder Logic Programming ..............45 Common Memory Types............................45 Specialty Memory Types............................48 Output Instructions..............................49 Analog memory type..............................50 Timer Instruction..............................51 Counter Instructions.............................. 59 Real Time Clock (RTC) Instructions ........................69 Comparator Instructions............................76 HMI Display Instructions............................79 PWM Output Instruction (DC Transistor Output Models Only)................82 Data Link/Remote I/O Instruction (SG2-20Vxxx model only)................85 SHIFT (shift output)..............................
- Page 5 4KA72X023 MD (MUL-DIV) function block ........................115 PID (Proportion- Integral- Differential) function block................116 MX (Multiplexer) function block.........................116 AR (Analog-Ramp) function block......................116 DR (Data-Register) function block ......................116 MU (MODBUS) function block ........................117 Chapter 6: Hardware Specification ................118 Normal Specification ............................118 Product Specifications............................119 Power Specifications............................120 Normal model machine Specifications ......................120 12V DC model Specifications........................121...
-
Page 6: Summary Of Changes
4KA72X023 Summary of changes This user manual is modified by firmware V3.0 and SG2 Client programming software V3.0. SG2 V3.0 adds some new functions with firmware version V3.0 to strong SG2 function. The upgrade content is shown as the 2 tables below simply. -
Page 7: Chapter 1: Getting Started
Chapter 1: Getting Started Chapter 1: Getting Started The SG2 tiny smart Relay is an electronic device. For safety reasons, please carefully read and follow the paragraphs with "WARNING" or "CAUTION" symbols. They are important safety precautions to be aware of while transporting, installing, operating, or examining the SG2 Controller. -
Page 8: Environmental Precautions
Chapter 1: Getting Started case the SG2 smart relay operation must be shut down immediately. Examination before Installation Every SG2 smart relay has been fully tested and examined before shipment. Please carry out the following examination procedures after unpacking your SG2 smart relay. •... -
Page 9: Quick Start Setup
Quick Start Setup Quick Start Setup This section is a simple 5-steps guide to connecting, programming and operating your new SG2 smart relay. This is not intended to be the complete instructions for programming and installation of your system. Many steps refer to other sections in the manual for more detailed information. -
Page 10: Connect Programming Cable
Quick Start Setup Connect Programming Cable Remove the plastic connector cover from the SG2 using a flathead screwdriver as shown in the figure below. Insert the plastic connector end of the programming cable into the SG2 smart relay as shown in the figure below. Connect the opposite end of the cable to an RS232 serial port on the computer. -
Page 11: Write Simple Program
Quick Start Setup c. Select the correct Com Port number where the programming cable is connected to the computer then press the “Link” button. d. The SG2 Client will then begin to detect the connected smart relay to complete its connection. Write simple program a. - Page 12 Quick Start Setup b. Use the “A” key on your keyboard (or the “A” icon on the ladder toolbar) to draw the horizontal circuit line from the M contact to the right most cell, as shown below. c. Select the “Q” coil icon from the ladder toolbar and drop it on the right most cells. Select Q01 from the dialog and press OK as shown below.
- Page 13 Quick Start Setup d. Test the simple program. From the Operation menu, select the Write function and write the program to the connected smart relay as shown below. e. Select the RUN icon from the toolbar, and select “No” when the pop-up message asks “Do you want to read program from module?”, as shown below.
- Page 14 Quick Start Setup f. On the Input Status dialog, click on M01 to activate the contact M01 which will turn ON the Output Q01 as shown below. The highlighted circuit will show active and the first Output (Q01) on the connected smart relay will be ON. See Chapter 3: Programming Tools for more detailed software information.
-
Page 15: Chapter 2 Installation
Chapter 2 Installation Chapter 2: Installation General Specifications SG2 is a miniature smart Relay with a maximum of 44 I/O points and can be programmed in Relay Ladder Logic or FBD (Function Block Diagram) program. The SG2 can expand to its maximum I/O count by adding 3 groups of 4-input and 4-output modules. - Page 16 Chapter 2 Installation Analog compare Maximum Number Ladder: 31;FBD: 250 Analog, Timer, Counter, Temperature Input (AT), Compare versus other inputs Analog Output (AQ), Analog*gain + Offset, AS, MD, PI, MX, AR , DR , or Numeric values Environmental Enclosure Type IP20 Maximum Vibration 1G according to IEC60068-2-6...
- Page 17 Chapter 2 Installation Analog Inputs Basic unit: 12 bit Resolution Expansion unit: 12bit Basic unit: Analog input: 0-10VDC voltage, 24VDC when used as discrete input; Voltage Range acceptable Expansion unit: Analog input: 0-10VDC voltage or 0-20mA current Input Signal ”OFF” Threshold <...
-
Page 18: Product Specifications
4 Analog SG2-4PT 4 Analog SG2-2AO 2 Analog N/A SG2-MBUS 24 VDC Communications Module, RS-485 ModBus RTU slaver SG2-DNET Communications Module, DeviceNet Group2 slaver SG2-PBUS Communications Module, Profibus-DP slaver EN01 Communications Module, TCP/IP OEM “Blind” Models, No Keypad, No Display SG2-12KR-D... -
Page 19: Mounting
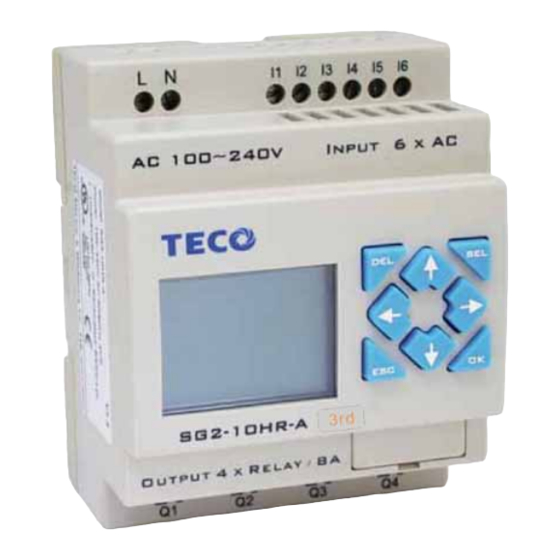
Chapter 2 Installation Mounting DIN-rail Mounting The SG2 smart relay should always be mounted vertically. Press the slots on the back of the SG2 and expansion module plug CONNECTOR onto the rail until the plastic clamps hold the rails in place. Then connect the expansion module and CONNECTOR with the Master (press the PRESS-BUTTON simultaneously) X1 X2 X3 Input... - Page 20 Chapter 2 Installation It is recommended to apply a DIN-rail end clamp to hold the SG2 in place. Input X3 X4 4 × AC AC 100~240V DC 24V Input 8 x DC(A1,A2 0~10V) SG2-8ER-A SG2-12HR-D Output 4 x Relay / 8A Output 4 x Relay / 8A Direct Mounting Use M4 screws to direct mount the SG2 as shown.
-
Page 21: Wiring
Chapter 2 Installation Wiring WARNING: The I/O signal cables should not be routed parallel to the power cable, or in the same cable trays to avoid the signal interference. To avoid a short circuit on the load side, it is recommended to connect a fuse between each output terminals and loads. - Page 22 Chapter 2 Installation Input 100~240V /24V AC I5 I6 I5 I6 AC ..V Input ..AC ..V INPUT ..Output (Relay) Output 4 x Relay / 8A Output 8 x Relay / 8A Output (Transistor) OUTPUT 4 x TR / 0.5A OUTPUT 8 x TR / 0.5A...
-
Page 23: Indicator Light
Chapter 2 Installation Data Link OR Remote I/O Link A1 A2 A1 A2 RS485 RS485 RS485 The power supply and the I/O supply should share the same power source. Only short circuit the first and the last module. When I/O link, the net can connect 8 products in max. (ID: 0-7). When Remote I/O is available, it only can connect 2 products max (Master &... -
Page 24: Chapter 3 Program Tools
Chapter 3 Program Tools Chapter 3: Program Tools PC Programming Software “SG2 Client” The SG2 Client programming software provides two edit modes, Ladder Logic and Function Block Diagram (FBD). The SG2 Client software includes the following features: 1. Easy and convenient program creation and editing. 2. -
Page 25: Connecting The Software
Chapter 3 Program Tools Connecting the Software Remove the plastic connector cover from SG2 using a flathead screwdriver as shown in the figure below. Insert the plastic connector end of the programming cable into the SG2 smart relay as shown in the figure below. Connect the opposite end of the cable to an RS232C serial port on the computer. -
Page 26: Ladder Logic Programming Environment
Chapter 3 Program Tools Ladder Logic Programming Environment The Ladder Logic Programming Environment includes all the functions for programming and testing the SG2 using the Ladder Logic programming language. To begin a new program select File-->New, and select the desired model of SG2, and the number of connected expansion units if applicable, as shown below.
Need help?
Do you have a question about the SG2-DNET and is the answer not in the manual?
Questions and answers