Table of Contents
Advertisement
Quick Links
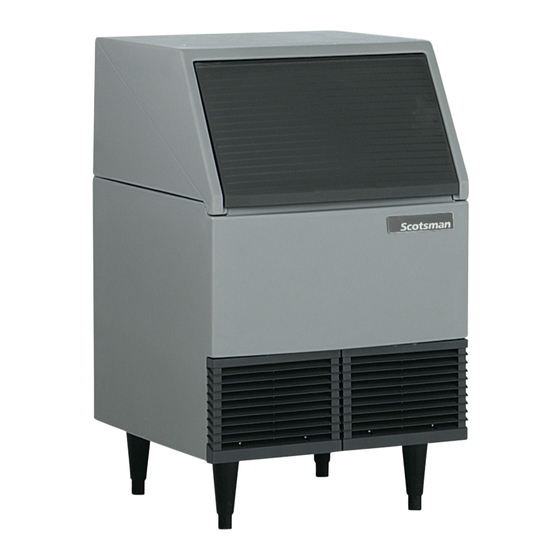
AFE424
INTRODUCTION
To the owner or user: This service manual is
intended to provide you, and the maintenance or
service technician, with the information needed to
install, start up, clean, maintain and repair this
product.
The AFE424 is an ice machine that produces
flaked ice and stores it in a insulated bin. It
automatically maintains the level of ice by turning
on when the ice level falls and switches off when it
is full.
Specifications · · · · · · · · · · · · · · · · · · · · · · · · · · · · · · · · · · · · · · · · · · · Page 2
For The Installer: Environmental Limitations · · · · · · · · · · · · · · · · · · · · · · · · · · · Page 3
Installation: · · · · · · · · · · · · · · · · · · · · · · · · · · · · · · · · · · · · · · · · · · · · Page 4
Installation: · · · · · · · · · · · · · · · · · · · · · · · · · · · · · · · · · · · · · · · · · · · · Page 5
Installation · · · · · · · · · · · · · · · · · · · · · · · · · · · · · · · · · · · · · · · · · · · · Page 6
Removal of the Cabinet · · · · · · · · · · · · · · · · · · · · · · · · · · · · · · · · · · · · · · Page 7
Component Location · · · · · · · · · · · · · · · · · · · · · · · · · · · · · · · · · · · · · · · Page 8
Electrical Sequence
Initial Start Up · · · · · · · · · · · · · · · · · · · · · · · · · · · · · · · · · · · · · · · · · · · Page 10
Maintenance and Cleaning · · · · · · · · · · · · · · · · · · · · · · · · · · · · · · · · · · · · Page 11
Maintenance and Cleaning · · · · · · · · · · · · · · · · · · · · · · · · · · · · · · · · · · · · Page 12
Maintenance and Sanitation · · · · · · · · · · · · · · · · · · · · · · · · · · · · · · · · · · · Page 13
Water Schematic · · · · · · · · · · · · · · · · · · · · · · · · · · · · · · · · · · · · · · · · · Page 14
Refrigeration Schematic · · · · · · · · · · · · · · · · · · · · · · · · · · · · · · · · · · · · · Page 15
Service Diagnosis: Condition - No Ice Being Produced · · · · · · · · · · · · · · · · · · · · · Page 16
Service Diagnosis: Condition - No Ice Being Produced · · · · · · · · · · · · · · · · · · · · · Page 17
Technical Characteristics · · · · · · · · · · · · · · · · · · · · · · · · · · · · · · · · · · · · · Page 18
Removal And Replacement - Bin Thermostat · · · · · · · · · · · · · · · · · · · · · · · · · · Page 19
Removal And Replacement - Gearmotor Assembly · · · · · · · · · · · · · · · · · · · · · · · Page 20
Removal And Replacement
Water Seal Installation - all models · · · · · · · · · · · · · · · · · · · · · · · · · · · · · · · · Page 22
Removal And Replacement - Gearmotor Assembly · · · · · · · · · · · · · · · · · · · · · · · Page 23
Removal and Replacement - Evaporator · · · · · · · · · · · · · · · · · · · · · · · · · · · · · Page 24
Removal and Replacement: Refrigeration System · · · · · · · · · · · · · · · · · · · · · · · · Page 25
Keep this manual for reference.
Table of Contents
· · · · · · · · · · · · · · · · · · · · · · · · · · · · · · · · · · · · · · · Page 9
· · · · · · · · · · · · · · · · · · · · · · · · · · · · · · · · · · · Page 21
This unit in serviceable in place; the ice storage bin
and hood may be removed from the chassis to
allow service access without removing the ice
machine from its installed location. The
refrigeration system uses R-134a as the
refrigerant.
March 2012
Page 1
Advertisement
Table of Contents

Related Manuals for Scotsman AFE424W1A


Summary of Contents for Scotsman AFE424W1A
- Page 1 AFE424 INTRODUCTION To the owner or user: This service manual is This unit in serviceable in place; the ice storage bin intended to provide you, and the maintenance or and hood may be removed from the chassis to service technician, with the information needed to allow service access without removing the ice install, start up, clean, maintain and repair this machine from its installed location.
-
Page 2: Specifications
AFE424 Specifications 14.25 The nameplate is located on the back panel. A serial number plate is SERIAL located behind the right NUMBER grill, in front of the control PLATE box, on the base. The unit is equipped with an electrical power cord, but should only be plugged into a circuit dedicated to the ice machine. -
Page 3: For The Installer: Environmental Limitations
(1/8") on the left and right sides so that standards of UL, NSF, and CUL. the cabinet may be easily removed when the Scotsman assumes no liability or responsibility of machine is in place. any kind for products manufactured by Scotsman... -
Page 4: Installation
AFE424 Installation: Water This ice machine may be installed in the open or under a counter. No clearance is required at the The water supply for this ice machine has been in sides or top beyond what’s needed to place the contact with many materials since it fell from the cabinet into position. -
Page 5: For The Plumber
AFE424 Installation: For The Plumber 1. Connect cold potable water to the 3/8" male · Drain tube material must be rigid and meet local flare at the top back of the cabinet. A water filter is code. recommended. Flush the water line prior to ·... -
Page 6: For The Electrician
11. Has the Customer Evaluation & Warranty Registration form been filled out? Check for correct model and serial numbers from the nameplate, then mail the completed form to Scotsman. 12. Has the owner/user been given the name and telephone number of the authorized Scotsman... -
Page 7: Removal Of The Cabinet
AFE424 Removal of the Cabinet One of the most useful features of this ice machine STEP 2 is the ability to remove the cabinet from the ice machine without removing the ice machine from its installed position. To Remove: 1. Switch the master switch to OFF. Be certain the ice machine has been switched off. -
Page 8: Component Location
AFE424 Component Location The ice machine is designed for front service. High Pressure Cut Out: The pressure switch is Many components are serviceable from the front designed to open and shut off the machine should without removing the cabinet. With the cabinet the high side refrigeration pressure become too removed, nearly all components are serviceable. -
Page 9: Electrical Sequence
AFE424 Electrical Sequence There are two circuits in the AFE424: one is a · Power is initially connected to the gearmotor series circuit with several switches connected in through contacts 3 and 2 of the auger delay series to the compressor. The other is a parallel pressure control. -
Page 10: Initial Start-Up
AFE424 Initial Start Up After the final check list has been gone through, the ice machine may be started up. 1. Open the water shut off valve and allow the reservoir to fill with water. The ice machine will not operate without 20 pounds of water pressure. -
Page 11: Maintenance And Cleaning
Scrub the outside and inside of the cabinet become fouled with dirt, and must be cleaned. frequently with soap and water. Scotsman recommends that only the surface of · Sanitize the bin interior once a month. the condenser be cleaned with the bin in place. - Page 12 14. Mix a solution of 1.5 quarts of warm (95 F. - 4. Remove cover plate over reservoir. F.) water and 4 ounces of Scotsman Clear 1 5. Block the float up to shut off water flow. Ice Machine Scale Remover.
-
Page 13: Maintenance And Sanitation
Be sure and wipe the joint between the hood and bin with the 1. Mix a cleaning solution of 4 ounces of Scotsman Ice Machine Scale Remover to 4 pints of hot sanitizing solution. Use a clean brush to thoroughly swab all interior surfaces with the sanitizing F.-110... -
Page 14: Water Schematic
AFE424 Water Schematic Water flows into the ice machine from its inlet connection at the back of the cabinet, through the float valve and into the reservoir. The water in the reservoir then flows by gravity into the bottom of the evaporator. -
Page 15: Refrigeration Schematic
AFE424 Refrigeration Schematic From the compressor, hot discharge gas is From the evaporator, the refrigerant flows back to the compressor through the suction line. pumped to the condenser, either air or water cooled. At the condenser, heat from the refrigerant flows into the cooling medium, either air or water, and the refrigerant condenses into a liquid. -
Page 16: Service Diagnosis: Condition - No Ice Being Produced
AFE424 Service Diagnosis: Condition - No Ice Being Produced STATUS: ICE MAKER DOES NOT OPERATE A. Check: Voltage to the unit, restore it if there is none. Compare to the nameplate. If the voltage is correct and the unit will not start, go to B. B. - Page 17 AFE424 Service Diagnosis: Condition - No Ice Being Produced STATUS: GEARMOTOR OPERATES, COMPRESSOR DOES NOT Check the compressor 1. Check the compressor start relay. 2. Check the overload. It could be open due to too much heat or too many amps. Too much heat could be too much superheat or not enough refrigerant to cool the compressor.
-
Page 18: Technical Characteristics
AFE424 Technical Characteristics Typical Low Side Pressure: · 12 PSIG Typical Discharge Pressure · 125 PSIG at 70 F. room air temperature (air cooled) & 50 F. water · 160 PSIG at 90 F. room air temperature (air cooled) & 70 F. - Page 19 AFE424 Removal And Replacement - Bin Thermostat The bin thermostat controls the On and Off operation of the ice machine. The machine may take a long time to come on if the cabinet is in a cold environment. Do not change a bin thermostat because of reaction time if the ambient temperatures are extreme.
-
Page 20: Removal And Replacement - Gearmotor Assembly
(biggest) top of the rotor. gear. This takes 5 oz. Use Scotsman oil, part 5. The motor and housing may now be removed. number A32379-027. -
Page 21: Removal And Replacement
AFE424 Removal And Replacement Ice Breaker and Auger Removal Note: When the unit is installed under the counter, there is not enough room to remove the auger unless the evaporator is dismounted from the gearmotor or the ice machine is pulled out from under the counter. - Page 22 2. Remove the old rotating half of the water seal from the auger and clean the auger at the seal mounting area. 3. Apply Scotsman part number 19-0529-01 food grade sealant to the auger shoulder before pushing on the water seal. Place just enough...
- Page 23 AFE424 Removal And Replacement - Gearmotor Assembly Note: Some bearing grease should be placed in all 4. Bench test the gearmotor assembly. bearings before assembly to insure proper Test for noise, amp draw (must not be in excess of lubrication upon start up. ice maker nameplate for gearmotor) and oil leaks.
-
Page 24: Removal And Replacement - Evaporator
AFE424 Removal and Replacement - Evaporator The evaporator may be removed from the ice 12. After the evaporator has been removed from machine without removing the ice machine from its the ice machine, the auger and bearings may be installed position. The evaporator should only need removed. -
Page 25: Removal And Replacement: Refrigeration System
Halide torches will not locate the normal position. very small leaks. If an ice machine is to be discarded and still contains refrigerant, Scotsman recommends that the refrigerant be recovered, reclaimed, or recycled so that it is not discharged into the air. April 2010...
Need help?
Do you have a question about the AFE424W1A and is the answer not in the manual?
Questions and answers