
Related Manuals for D-Link DCS-4701E-VB1


Summary of Contents for D-Link DCS-4701E-VB1
- Page 1 Version 1.01 | 07/05/2016 User Manual Vigilance HD Outdoor PoE Mini Bullet Camera DCS-4701E...
- Page 2 Preface D-Link reserves the right to revise this publication and to make changes in the content hereof without obligation to notify any person or organization of such revisions or changes. Information in this document may become obsolete as our services and websites develop and change.
-
Page 3: Table Of Contents
Technical Specifications ..........56 Live Video ................19 Setup ..................21 Regulatory Information ..........59 Setup Wizard ..............21 Network Setup ..............26 Dynamic DNS ..............29 Image Setup ..............30 Video ...................32 Preset ...................34 Motion Detection ............36 Time and Date ..............37 Event Setup ...............38 D-Link DCS-4701E User Manual... -
Page 4: Product Overview
If any of the above items are missing, please contact your reseller. Safety Notice: Installation and servicing should be done by certified technicians so as to conform to all local codes and prevent voiding your warranty. D-Link DCS-4701E User Manual... -
Page 5: Introduction
• Computer with Microsoft Windows® 8, 7, or Vista® (for CD-ROM Setup Wizard), Mac OS or Linux • Internet Explorer 7, Firefox 20, Chrome 20, or Safari 6 or higher • Existing 10/100 Ethernet-based network with an available 802.3af Power over Ethernet (PoE) port D-Link DCS-4701E User Manual... -
Page 6: Features
The D-ViewCam application adds enhanced features and functionality for the Network Camera and allows administrators to configure and access the Network Camera from a remote site via Intranet or Internet. Other features include image monitoring, recording images to a hard drive, viewing up to 32 cameras on one screen, and taking snapshots. D-Link DCS-4701E User Manual... -
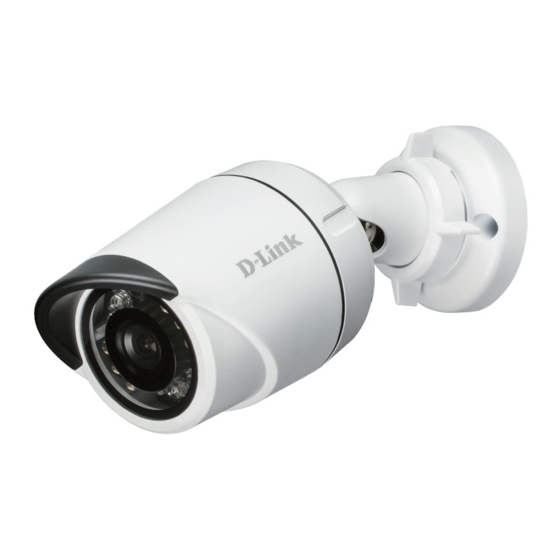
Page 7: Hardware Overview
Can be attached to a grounding wire if desired Reset Button Press and hold for 10 seconds to reset camera back to the factory default settings Adjustment Ring Loosen to adjust camera angle and tighten to lock camera angle D-Link DCS-4701E User Manual... -
Page 8: Sides
Section 1: Product Overview Sides RJ-45 connector for Ethernet, can also be used to power the camera using Ethernet Jack Power over Ethernet (PoE) Power Connector Connects to an optional 12 V / 1.5 A power adapter (not included) D-Link DCS-4701E User Manual... -
Page 9: Mounting The Camera
Step 2 Use the screws provided to mount the camera to the wall. If you are running the camera cables out the side of the camera, guide the camera cables through the cable channel on the base. D-Link DCS-4701E User Manual... - Page 10 When you are finished, turn the adjustment ring clockwise to tighten it. If you need to waterproof your installation, please continue to the next page. D-Link DCS-4701E User Manual...
-
Page 11: Waterproofing Your Installation
Step 1 Place the washer around the base of the Ethernet connector as shown. Step 2 Thread bare Ethernet cable through the waterproof connector as shown, then crimp an RJ-45 plug onto the cable. D-Link DCS-4701E User Manual... - Page 12 Screw the back part of the waterproof connector clockwise until there is a tight seal around the Ethernet cable. If you are using PoE to power your camera, use the included rubber power connector plug to the power connector. D-Link DCS-4701E User Manual...
- Page 13 Section 2: Assembly and Installation If you are using a power adapter(not included) to power your camera, wind waterproof tape around the connection in an overlapping manner to cover it. D-Link DCS-4701E User Manual...
-
Page 14: Software Installation
Insert the DCS-4701E CD into your computer's CD-ROM drive to begin the installation. If the Autorun function on your computer is disabled, or if the D-Link Launcher fails to start automatically, click the Start button and type D:\autorun.exe (where D: represents the drive letter of your CD-ROM drive) and press Enter. - Page 15 Admin ID is admin with the password left blank. Click the checkboxes if you wish to change the admin ID and password for the camera, and enter the new ID and password you wish to use. Click Next to continue. D-Link DCS-4701E User Manual...
- Page 16 Select Static IP if you want to manually enter the IP settings for the camera. Click Next to continue. Step 6 Take a moment to confirm your settings and click Restart. D-Link DCS-4701E User Manual...
-
Page 17: Configuration
Installation Wizard. If you did not create a password, the default password is blank. After entering your password, click OK. Step 1 Click on the D-Link Setup Wizard SE icon that was created in your Windows Start menu (Start > D-Link > Setup Wizard SE). Step 2 Select the camera and click Link to access the web configuration. - Page 18 Enter admin as the default username and leave the password blank. Click OK to continue. Step 4 This section displays your camera’s live video. You can select your video profile and view or operate the camera. D-Link DCS-4701E User Manual...
-
Page 19: Live Video
Auto Pan Starts the automatic panning function. The ROI will pan from back and forth within the FOV. Stop Stops the camera ePTZ motion. Preset Path Starts the camera's motion along the predefined path. D-Link DCS-4701E User Manual... - Page 20 Set a Storage Folder Video Profile 3 Full screen mode Take a Snapshot Go To: If any presets have been defined, you can select them here to move the (Preset List) camera to the selected preset. D-Link DCS-4701E User Manual...
-
Page 21: Setup
To quickly configure your Network Camera’s motion detection settings, click Motion Detection Setup Wizard. If you want to enter your settings without running the wizard, click Manual Motion Detection Setup and skip to"Motion Detection" on page 36. D-Link DCS-4701E User Manual... - Page 22 Section 3: Configuration Internet Connection Setup Wizard This wizard will guide you through a step-by-step process to configure your new D-Link Camera and connect the camera to the internet. Click Next to continue. Select how the camera will connect to the Internet.
- Page 23 If you have selected DHCP, you will see a summary of your settings, including the camera's IP address. Please write down all of this information as you will need it in order to access your camera. Click Apply to save your settings. D-Link DCS-4701E User Manual...
- Page 24 Refer to "Motion Detection" on page 36 for information about how to configure motion detection. Step 2 This step allows you to enable motion detection based on a customized schedule. Specify the day and hours. You may also choose to always record whenever motion is detected. D-Link DCS-4701E User Manual...
- Page 25 Click Next to continue. Step 4 You have completed the Motion Detection Wizard. Please verify your settings and click Apply to save them. Please wait a few moments while the camera saves your settings and restarts. D-Link DCS-4701E User Manual...
-
Page 26: Network Setup
Invalid gateway settings may cause the failure of transmissions to a different subnet. Primary DNS: The primary domain name server translates names to IP addresses. Secondary DNS: The secondary DNS acts as a backup to the primary DNS. D-Link DCS-4701E User Manual... - Page 27 For instance, live1.sdp can be accessed at rtsp://x.x.x.x/video1.sdp where the x.x.x.x represents the IP address of your camera. Enable CoS: Enabling the Class of Service setting implements a best-effort policy without making any bandwidth reservations. D-Link DCS-4701E User Manual...
- Page 28 Enable Bonjour: Enable this to allow other network devices to connect to this camera using Bonjour. Bonjour Name: Enter the name to identify this camera on Bonjour. D-Link DCS-4701E User Manual...
-
Page 29: Dynamic Dns
DDNS account. Password: Enter the password used to connect to your DDNS server account. Timeout: Enter the DNS timeout values you wish to use. Status: Indicates the connection status, which is automatically determined by the system. D-Link DCS-4701E User Manual... -
Page 30: Image Setup
Select the frequency used by your power lines to avoid interference or distortion. White Balance: Use the drop-down box to change white balance settings to help balance colors for different environments. You can choose from Auto, Outdoor, Indoor, Fluorescent, and Push Hold. D-Link DCS-4701E User Manual... - Page 31 3D filtering reduces the amount of image noise when viewing a low-light environment. Higher levels of 3D filtering will apply stronger levels of noise reduction. Reset Default: Click this button to reset the image to factory default settings. D-Link DCS-4701E User Manual...
-
Page 32: Video
Lower frame rates will result in stuttering motion, and requires less bandwidth. Video Quality: This limits the maximum frame rate, which can be combined with the "Fixed quality" option to optimize D-Link DCS-4701E User Manual... - Page 33 The bps will affect the bit rate of the video recorded by the camera. Higher bit rates result in higher video quality. Fixed quality: Select the image quality level for the camera to try to maintain. High quality levels will result in increased bit rates. D-Link DCS-4701E User Manual...
-
Page 34: Preset
Clicking the Remove button will delete the currently selected preset. Preset Sequence: This section allows you to create a preset sequence, which automatically moves the camera's view between a set of preset views. D-Link DCS-4701E User Manual... - Page 35 Clicking the trash can button will remove the currently selected preset from the sequence. If you want to change the dwell time for a preset, select it from the list, enter a new dwell time, then click the Update button. D-Link DCS-4701E User Manual...
-
Page 36: Motion Detection
Right click on the camera image to bring up the following menu options: Select All: Draws a motion detection area over the entire screen. Clear All: Clears any motion detection areas that have been drawn. Restore: Restores the previously specified motion detection areas. D-Link DCS-4701E User Manual... -
Page 37: Time And Date
Set the Date and Time Manually: This option allows you to set the time and date manually. Copy Your Computer's Time This will synchronize the time information from your PC. Settings: D-Link DCS-4701E User Manual... -
Page 38: Event Setup
Snapshot, Video Clips Email, FTP To start plotting an event, it is suggested to configure server and media columns first so that the Network Camera will know what action shall be performed when a trigger is activated. D-Link DCS-4701E User Manual... - Page 39 Enter the unique name of your server. E-mail: Enter the configuration for the target e-mail server account. FTP: Enter the configuration for the target FTP server account. Network Storage: Specify a network storage device. Only one network storage device is supported. D-Link DCS-4701E User Manual...
- Page 40 1 pic. 2 pic. 3 pic. 4 pic. 5 pic. 6 pic. 7 pic. 8 pic. 9 pic. The moment the trigger is activated. File name prefix: The prefix name will be added to the file name. D-Link DCS-4701E User Manual...
- Page 41 This is the prefix that will be added to the filename of saved video clips. System log: Select this option to set the media type to system logs. This will save the event to the camera system log, but will not record any snapshots or video. D-Link DCS-4701E User Manual...
- Page 42 Action: If you have created Server and Media entries, you will see them appear here. Select which Server you want to send to and which Media you want the camera to send. D-Link DCS-4701E User Manual...
- Page 43 Please note that if the free HDD space is not enough, the recording will stop. Before you set up this option please make sure your HDD has enough space, and it is better to not save other files in the same folder as recording files. D-Link DCS-4701E User Manual...
- Page 44 Time of each file for recording: If this is selected, files will be separated based on the maximum length you specify. File Name Prefix: The prefix name will be added on the file name of the recording file(s). D-Link DCS-4701E User Manual...
-
Page 45: Advanced
The IR light will always be on. Sync with ICR: The IR light will turn on when the ICR filter is disabled (night mode). Schedule: The IR light will turn on or off according to the schedule that you specify below. D-Link DCS-4701E User Manual... -
Page 46: Https
ƒ Create a certificate request and install Status: Displays the status of the certificate. Note: The certificate cannot be removed while HTTPS is still enabled. To remove the certificate, you must first uncheck Enable HTTPS secure connection. D-Link DCS-4701E User Manual... -
Page 47: Access List
Delete deny list: Select an entry to remove from the Deny List, then click Delete. Note: All addresses in the Deny List will be denied access, even if they are also in the Allow List. D-Link DCS-4701E User Manual... -
Page 48: Snmp
Enter the authentication password used for your read/ write SNMP server. Encryption Password: Enter the encryption password used for your read/write SNMP server. Read Only Security Name Enter a name for the read-only community of your read- only SNMP server. D-Link DCS-4701E User Manual... - Page 49 Enter the type of authentication used by your read-only SNMP server. Authentication Password: Enter the authentication password used for your read- only SNMP server. Encryption Password: Enter the encryption password used for your read-only SNMP server. D-Link DCS-4701E User Manual...
-
Page 50: Maintenance
Enter a label for the camera, which will be shown on the OSD when it is enabled. Show Time: Select this option to enable the time-stamp display on the video screen. LED: You may specify whether or not to illuminate the status LED on the camera. D-Link DCS-4701E User Manual... -
Page 51: System
This will restart your camera. Enable Schedule Reboot: If you want your camera to reboot on a regular schedule, check the Enable Schedule Reboot checkbox, then select the days and time you want the camera to reboot D-Link DCS-4701E User Manual... -
Page 52: Firmware Upgrade
Section 3: Configuration Firmware Upgrade The camera's current firmware version will be displayed on this screen. You may visit the D-Link Support Website to check for the latest available firmware version. To upgrade the firmware on your DCS-4701E, please download and save the latest firmware version from the D-Link Support Page to your local hard drive. -
Page 53: Status
Section 3: Configuration Status Device Info This page displays detailed information about your device and network connection. D-Link DCS-4701E User Manual... -
Page 54: Logs
Section 3: Configuration Logs This page displays the log information of your camera. You may download the information by clicking Download. You may also click Clear to delete the saved log information. D-Link DCS-4701E User Manual... -
Page 55: Help
Section 3: Configuration Help This page provides helpful information regarding camera operation. D-Link DCS-4701E User Manual... -
Page 56: Technical Specifications
ƒ PPPoE ƒ UDP ƒ UPnP port forwarding ƒ ICMP ƒ RTP / RTSP/ RTCP ƒ DHCP client ƒ IP filtering ƒ NTP client (D-Link) ƒ QoS ƒ DNS client ƒ CoS ƒ DDNS client (D-Link) ƒ Multicast ƒ SMTP client ƒ... - Page 57 Power Consumption 4.7 watts ± 5% Temperature Operating: -30 to 50 °C (-22 to 122 °F) Storage: -20° to 70° C (-4° to 158° F) Humidity Operating: 20% to 80% non-condensing Storage: 5% to 95% non-condensing Certifications CE LVD C-Tick D-Link DCS-4701E User Manual...
- Page 58 Appendix A: Technical Specifications Dimensions 98.1 66.6 164.7 D-Link DCS-4701E User Manual...
-
Page 59: Regulatory Information
Cet appareil numérique de la classe A est conforme à la norme NMB-003 du Canada. European Union CE EMI Class A Warning This equipment is compliant with Class A of CISPR 32. In a residential environment this equipment may cause radio interference. D-Link DCS-4701E User Manual... - Page 60 • Halten Sie das Produkt von Heizkörpern und anderen Quellen fern, die Wärme erzeugen. • Trennen Sie das Produkt immer von der Stromzufuhr, bevor Sie es reinigen und verwenden Sie dazu ausschließlich ein trockenes fusselfreies Tuch. D-Link DCS-4701E User Manual...
- Page 61 • Mantenga el producto alejado de los radiadores y de otras fuentes de calor. • Desenchufe siempre el producto de la alimentación de red antes de limpiarlo y utilice solo un paño seco sin pelusa. D-Link DCS-4701E User Manual...
- Page 62 • Houd het product uit de buurt van radiators en andere warmtebronnen. • U dient het product steeds los te koppelen van de stroom voordat u het reinigt en gebruik uitsluitend een droge pluisvrije doek. D-Link DCS-4701E User Manual...
- Page 63 D-Link designs and builds its products to be as environmentally friendly as possible, by using recyclable, low toxic materials in both products and packaging. D-Link recommends that you always switch off or unplug your D-Link products when they are not in use. By doing so you will help to save energy and reduce CO2 emissions.
- Page 64 D-Link et l’environnement Chez D-Link, nous sommes conscients de l'impact de nos opérations et produits sur l'environnement et nous engageons à le réduire. Pour limiter cet impact, D-Link conçoit et fabrique ses produits de manière aussi écologique que possible, en utilisant des matériaux recyclables et faiblement toxiques, tant dans ses produits que ses emballages.
- Page 65 D-Link zijn producten zo milieuvriendelijk mogelijk, door het gebruik van recycleerbare producten met lage toxiciteit in product en verpakking. D-Link raadt aan om steeds uw D-Link producten uit te schakelen of uit de stekker te halen wanneer u ze niet gebruikt. Door dit te doen bespaart u energie en beperkt u de CO2-emissies.
- Page 66 D-Link a životní prostředí Ve společnosti D-Link jsme si vědomi vlivu našich provozů a výrobků na životní prostředí a snažíme se o minimalizaci těchto vlivů. Proto své výrobky navrhujeme a vyrábíme tak, aby byly co nejekologičtější, a ve výrobcích i obalech používáme recyklovatelné a nízkotoxické materiály.
- Page 67 D-Link produkter som er så miljøvennlig som mulig, ved å bruke resirkulerbare, lav-toksiske materialer både i produktene og forpakningen. D-Link anbefaler at du alltid slår av eller frakobler D-Link-produkter når de ikke er i bruk. Ved å gjøre dette hjelper du å spare energi og å redusere CO2-utslipp.
- Page 68 D-Link sine produkter, så de er så miljøvenlige som muligt, ved at bruge genanvendelige materialer med lavt giftighedsniveau i både produkter og emballage. D-Link anbefaler, at du altid slukker eller frakobler dine D-Link-produkter, når de ikke er i brug. Ved at gøre det bidrager du til at spare energi og reducere CO2-udledningerne.
- Page 69 D-Link och miljön På D-Link förstår vi och är fast beslutna att minska den påverkan våra verksamheter och produkter kan ha på miljön. För att minska denna påverkan utformar och bygger D-Link sina produkter för att de ska vara så miljövänliga som möjligt, genom att använda återvinningsbara material med låg gifthalt i både produkter och förpackningar.
Need help?
Do you have a question about the DCS-4701E-VB1 and is the answer not in the manual?
Questions and answers