Table of Contents
Advertisement
Quick Links
Advertisement
Table of Contents

Subscribe to Our Youtube Channel
Related Manuals for TP-Link neffos Y50


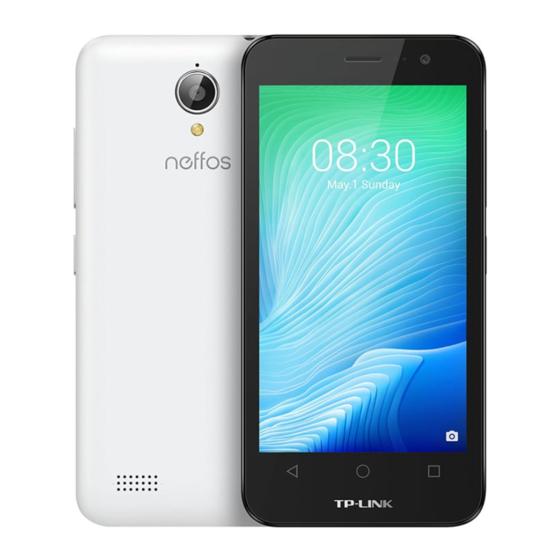
Summary of Contents for TP-Link neffos Y50
- Page 1 1910100115 REV1.0.0...
-
Page 2: Table Of Contents
Contents About this guide Chapter 1 Get started 1. 1 Overview ..............1 1. - Page 3 Chapter 6 Contacts 6. 1 Manage contacts ............19 6.
- Page 4 Chapter 13 Weather 13. 1 Add a city ..............31 13.
- Page 5 18. 9 Location ..............41 18.
-
Page 6: About This Guide
About this guide This guide is a complement to Quick Start Guide. The Quick Start Guide provides instructions for quick setup, while this guide provides details of each function and shows how to configure the smart phone appropriate to your needs. When using this guide, please notice that features of the device may vary slightly depending on the model and software version you have, and on your location, language, and Internet service provider. -
Page 7: Chapter 1 Get Started
Get started This chapter introduces the smart phone’s hardware information and guides you how to assemble your phone when you get started on using your new phone. • Overview • Assemble your device • Power on • Charge your device 1. -
Page 8: Assemble Your Device
• Turn Neffos off: Press and hold the Power button until a pop-up window appears and then tap Power off. Volume button You can adjust the audio volume on the right side when you’re on the phone or listening to songs, movies, or other media. -
Page 9: Charge Your Device
Replace the back cover Align the cover and press all the way around the cover’s edges, making sure it snaps into place. 1. 4 Charge your device Connect the device to a power outlet using the included USB cable and power adapter. Connect the USB cable into the port. -
Page 10: Chapter 2 Basics
Basics This chapter introduces the smart phone’s basic feature. • Touchscreen gestures • Unlock and lock the screen • Home screen • Quick settings panel • Notification panel • Type text 2. 1 Touchscreen gestures Touch: Simply tap an item to select or launch it. Touch and hold: Touch and leave your finger on the screen for 2 seconds or more to activate onscreen items. - Page 11 Swipe: Place your finger on the screen, and drag your finger to the direction you want. For example, you can swipe to scroll through the Home screen or a list. Drag: To drag, touch and hold an item and then move it to a new position. For example, you can rearrange a widget on the home screen.
-
Page 12: Home Screen
Zoom in: Pinch two fingers apart on the screen. For example, pinch two fingers out to zoom in while viewing a picture or a web page. 2. 2 Home screen Status bar Widget Multi-touch display APP icons Status bar: Status and notification icons are displayed in the status bar. Widget: Self-contained applications that run on the Home screen (not shortcuts). -
Page 13: Quick Settings Panel
Battery full Signal strength No signal GPRS network connected 3G network connected 4G network connected Enhanced Data Rates for GSM EvolutioN network connected High Speed Packet Access(HSPA) network connected Evolved HSPA network connected Connected to a PC using USB cable Wi-Fi Hotspot MicroSD card... - Page 14 Touch the shortcut switches on the Quick Settings Panel to turn the functions on or off. WLAN: Tap to enable WLAN. No SIM card: Tap to view the data usage. Flashlight: Tap to enable flashlight. Airplane mode: Tap to enable airplane mode. Location: Tap to enable location services.
-
Page 15: Type Text
2. 5 Type text The onscreen keyboard enables you to enter text when needed. Enter text Tap Shift to type uppercase, or touch and hold the key to slide to the uppercase. Double-tap Shift for caps lock. To enter numbers, punctuations, or symbols, tap Tap to enter a comma, or tap and hold the key to open the input options. - Page 16 If you have several keyboards, you can tap to switch to the last one you used. You can also touch and hold it to choose the keyboard you need. Tap to enter a space, or you can double-tap the space bar quickly to end a sentence with a period or space. Tap to enter a period.
-
Page 17: Chapter 3 Connection
Connection Learn how to connect to WLAN, computer and how to use Bluetooth and hotspot helps you a lot. This chapter contains the following sections. • Connect to WLAN • Connect to computer • Bluetooth • Tethering & portable hotspot 3. -
Page 18: Tethering & Portable Hotspot
Tap and hold to enter the Bluetooth settings. Bluetooth Tap the switch to turn it on and find the device you want to connect, then follow the pop-up prompts to complete the connection. (You can also turn Bluetooth on in Settings ->... -
Page 19: Chapter 4 Calls
Calls This chapter contains the following sections. • Make a call • Answer & end a call • Options during a call • Call log • Call settings 4. 1 Make a call Dial directly by entering numbers On the Home screen, tap Phone ->... -
Page 20: Answer & End A Call
Make a conference call The conference calling enables multiple persons to talk simultaneously. Call the first participant. After connected, tap and enter another phone number. When the second call is connected, the first participant will be placed on hold. 4. 2 Answer &... -
Page 21: Call Log
4. 4 Call log All incoming, outgoing and missed calls are recorded in the call log. Save a recent call to your contact list Go to Phone -> Recents -> Creat new contact. Configure the contact information and save. Delete a call from the call log Phone ->... -
Page 22: Chapter 5 Messenger
Messenger Use Messenger to keep in touch with your friends through SMS or MMS messages. This chapter contains the following sections. • Type of messages • Send & receive messages • Message Management 5. 1 Type of messages Text Messages (SMS) The Short Messages Service (SMS) lets you send and receive text messages to and from other mobile phones. -
Page 23: Message Settings
Delete a conversation On the Home screen, tap Messenger. In the message list, tap and hold the conversation you want to delete all its conversation and tap -> DELETE. Share a message On the Home screen, tap Messenger. Tap and hold the message you want to share and tap Forward a message On the Home screen, tap Messenger. - Page 24 Outgoing message sounds: Turn the switch on to turn on the outgoing message sounds. Notifications: Turn the switch on to enable notifications when you receive messages. Sound: Tap to choose the ringtone when new message comes. Vibrate: Turn the switch on to make the phone vibrate when new message comes. Advanced: Tap to configure some advanced settings.
-
Page 25: Chapter 6 Contacts
Contacts Organize your contacts and easily stay in touch with them via calls, SMS messages, emails, or other social networks. This chapter contains the following sections. • Manage contacts • Import/export contacts • Contacts settings 6. 1 Manage contacts Add a contact On the Home screen, tap Contacts ->... -
Page 26: Contacts Settings
6. 3 Contacts settings On the Home screen, tap Contacts -> -> Settings. Set the contacts order. • Sort by: You can make the contacts sort by first name or last name. • Name format: You can choose the name format (fisrt name first/ last name first). Contacts Chapter 6... -
Page 27: Chapter 7 Phone Manager
Phone Manager Use Phone Manager to better manage and protect your phone. This chapter contains the following sections. • Phone accelerator • Power saving • Permission manager • Harassment filter 7. 1 Phone accelerator Clean up the unnecessary to accelerate your phone’s operation. On the Home screen, tap Phone manager ->... -
Page 28: Chapter 8 Camera
Camera Use Camera to capture your precious moments. This chapter contains the following sections. • Get to know Camera • Take a photo • Record a video 8. 1 Get to know Camera Launch the camera app • On the Home screen: Tap Camera. -
Page 29: Take A Photo
View the photos and videos you have taken. Tap to switch to video mode. Tap to take a photo. 8. 2 Take a photo to choose camera mode, then tap the or press Volume button to take a photo. If you want to take a selfie, please tap to switch to selfie mode. -
Page 30: Chapter 9 Calendar
Calendar Use Calendar to manage your event and tasks. This chapter contains the following sections. • Use the calendar • Calendar settings 9. 1 Use the calendar View the calendar On the Home screen, tap Calendar. at the top of the screen to select Day, Week, Month, Agenda and Year to switch the calendar view. Create an event On the Home screen, tap Calendar. -
Page 31: Chapter 10 Clock
Clock Use Clock to customize the time zone settings of your device, set alarms, and use your device as a stop watch or timer. This chapter contains the following sections: • Alarm • Worldclock • Timer • Stopwatch 10. 1 Alarm Create an alarm On the Home screen, tap Clock ->... -
Page 32: Stopwatch
10. 4 Stopwatch Stopwatch contributes to recording precise time. On the Home screen, tap Clock -> Stopwatch. to start counting. to stop counting, and then tap to continue or tap to restart. once or several times to count the time when counting. The time of your each tap and the interval time between every two taps will be displayed. -
Page 33: Chapter 11 Browser
Browser Use your phone browser to browse the Internet and find out all that you are curious about. This chapter contains the following sections. • Go to a webpage • Browser tabs • Bookmarks • History • Browser settings 11. 1 Go to a webpage View a website On the Home screen, tap Chrome, then tap the address bar on top of the page and enter the web... -
Page 34: Browser Tabs
• Help & feedback: Tap to search for help or send your feedback. 11. 2 Browser tabs You can view multiple pages simultaneously using tabs. Tap the icon and all the pages will be displayed. The number on the icon means the current number of the web pages. Open a tab Chrome ->... -
Page 35: Chapter 12 File Manager
File Manager Access files stored on your device (including AUDIO, VIDEO, IMAGE, DOCUMENT, COMPRESS and APP). This chapter contains the following sections. • View files (AUDIO, VIDEO, IMAGE, DOCUMENT, COMPRESS, APP) • Manage your files & folders 12. 1 View files (AUDIO, VIDEO, IMAGE, DOCUMENT, COMPRESS, APP) On the Home screen, tap File Manager. - Page 36 Move a folder File Manager -> Internal storage. Find the folder you want to move. Tap and hold the folder and tap Select the folder you want to move into and tap Delete a folder File Manager -> Internal storage. Find the folder you want to remove. Tap and hold the folder and tap to remove it.
-
Page 37: Chapter 13 Weather
Weather Use Weather to get current temperature for one or more cities around the world. This chapter contains the following sections. • Add a city • Check the weather • Remove a city • Weather settings 13. 1 Add a city Add a city to check its real-time weather information. -
Page 38: Chapter 14 Gallery
Gallery Use Gallery to view the photos stored in your phone. This chapter contains the following sections. • Manage your photos • Screenshot 14. 1 Manage your photos View photos On the Home screen, tap Gallery. Choose an option to view your photos. •... -
Page 39: Screenshot
14. 2 Screenshot Capture a screenshot Press the Volume down button and Power button at the same time to capture a screenshot. View a screenshot Option One: Slide down from top of the screen to open the notification panel and tap the screenshot you have capture. -
Page 40: Chapter 15 Notes
Notes Use Notes to record your important information for later reference. This chapter contains the following sections. • Compose a note • Note options 15. 1 Compose a note On the Home screen, tap Notes -> and begin composing your new note. When finishing composing, tap to save the note. -
Page 41: Chapter 16 Applications
Applications Enjoy the applications from Google and learn how to manage them. This chapter contains the following sections. • Manage applications • Google applications 16. 1 Manage applications Download applications from • Google Play Store • Phone browser • Computer browser Install an application On the Home screen, tap File Manager. - Page 42 Play Music With Google Play Music, you can play music from local file or copied from your computer. Play Movies & TV Watch movies and TV shows purchased from Google Play. You can stream them instantly, or download them for viewing when you’re not connected to the Internet. You can also view videos in local storage. Hangouts Use Hangouts to meet friends and family, share photos and host video calls.
-
Page 43: Chapter 17 Tools
Tools This chapter contains the following sections. • FM Radio • Flashlight • Sound Recorder • Calculator • Downloads • System Update • Feedback • SIM Toolkit 17. 1 FM Radio Scan stations Connect a headset to the phone. On the Home screen, tap Tools -> FM Radio. -
Page 44: Calculator
17. 4 Calculator On the Home screen, tap Tools -> Calculator. Tap numbers and use the arithmetic feature to complete an operation. 17. 5 Downloads On the Home screen, tap Tools -> Downloads to view the download information. 17. 6 System Update On the Home screen, tap Tools ->... -
Page 45: Chapter 18 Settings
Settings This chapter contains the following sections. • SIM cards • Airplane mode • Display • Cast screen • Sound and notification • Storage • Battery • Apps • Location • Security • Accounts • Language and input • Backup and reset •... -
Page 46: Lock Screen
You can set the following options. • Brightness level: Tap to adjust screen brightness. • Adaptive brightness: Turn on the switch to enable your phone to optimize brightness level for available light. • Sleep: Tap to select the time when the phone starts to sleep. •... -
Page 47: Battery
18. 7 Battery On the Home screen, tap Settings -> Battery -> Configure the following settings to better use your battery feature. • Power plan: Choose the power plan you like to better save your phone power. • Battery optimization: .Tap to optimize the battery. 18. -
Page 48: Language And Input
Then select the account you want to delete. -> Remove account to delete the account. 18. 12 Language and input Manage your phone’s language and input settings. Select your default language On the Home screen, tap Settings. Tap Language and input -> Language. Select the language from the list. -
Page 49: Date & Time
18. 14 Date & time On the Home screen, tap Settings. Tap Date & time. You can set the following options: • Automatic date & time: Turn the switch on to use network-provied time. • Automatic time zone: Turn the switch on to use the network-provided time zone. •... -
Page 50: Appendix A: Specifications
Appendix A: Specifications Specifications Height: 133.4mm Width: 66.6mm Size and Weight Depth: 9.8mm Weight: 128 g Color White/Black/Yellow 4.5inches, FWVGA 854 x 480 Display 220PPI Qualcomm MSM8909 ARM Cortex-A7 1.1 GHz GPU: Adreno™ 304 ROM: 8 GB Memory RAM: 1 GB Memory Slot MicroSD card (up to 32 GB) Front 2 Mega-pixel... - Page 51 WCDMA: band (1/5/8) Network Standard LTE: band(1/3/5/7/8/20) TP803C: GSM: band (2/3/5) WCDMA: band (2/4/5) FDD-LTE: band (2/4/7/28A&B) Navigation GPS/GLONASS Cloud Service Supported Operation System Android 6.0 Battery 2020mAh TP-LINK Neffos Y50 Charger In the box USB Cable Quick Start Guide...
-
Page 52: Appendix B: Technical Support
Appendix B: Technical Support Contact our technical support if you have any questions related to this product. Support Countries/Regions Tel: +86 755 26504400 (English Service) Fee: Depending on rate of different carriers, IDD. Global E-mail: support@neffos.com(English Service) Service Time: 24 hours a day, 7 days a week. Tel: +86 755/ 26504400 (englischsprachig) Germany E-mail: support@neffos.com (englischsprachig) - Page 53 Support Countries/Regions Toll Free:1800 2094 168 India E-mail:support.in@neffos.com Service Time:10:00AM to 6:00PM, Monday to Saturday. Local No.: (+62) 021 63861936 E-mail: support.id@neffos.com Indonesia Service Time: 09:00AM to 12:00AM & 01:00PM to 06:00PM, Monday to Friday. Tel: + 60 (3) 2141 4358 (Mon-Sun, 10.30am-8.00pm) Malaysia E-mail: support.my@neffos.com Service Time: 24 hours a day, 7 days a week...
-
Page 54: Appendix C: Explanation Of The Symbols On The Product Label
Appendix C: Explanation of the symbols on the product label The meaning of symbols on the product label is explained below. Symbol Explanation RECYCLING This product bears the selective sorting symbol for Waste electrical and electronic equipment (WEEE). This means that this product must be handled pursuant to European directive 2012/19/ EU in order to be recycled or dismantled to minimize its impact on the environment. - Page 55 No part of the specifications may be reproduced in any form or by any means or used to make any derivative such as translation, transformation, or adaptation without permission from TP-Link Technologies Co., Ltd. Copyright © 2016 TP-Link Technologies Co., Ltd. All rights reserved.
- Page 56 • If you have concerns about the security of your personal information and data, please contact support@ neffos.com. Legal notice Copyright © 2017 TP-Link Technologies Co., Ltd. All rights reserved. Trademarks and permissions is a registered trademark of TP-Link Technologies Co., Ltd.
- Page 57 Third-party software and applications services may be interrupted or terminated at any time, and Neffos does not guarantee the availability of any content or service. Third-party service providers provide content and services through network or transmission tools outside of the control of Neffos. To the greatest extent permitted by applicable law, it is explicitly stated that Neffos shall not compensate or be liable for services provided by third-party service providers, or the interruption or termination of third-party contents or services.
- Page 58 • Avoid using your device within a 15 cm range of a pacemaker if possible, as your device can interfere with the pacemaker. To minimize possible interference with a pacemaker, use your device only on the side of your body that is opposite the pacemaker. •...
- Page 59 • Using generic batteries or chargers may shorten the life of your device or cause the device to malfunction. They may also cause a fire or cause the battery to explode. • TP-LINK cannot be responsible for the user’s safety when using accessories or supplies that are not approved by TP-LINK.
- Page 60 • If you notice strange smells or sounds coming from your device or the battery, or if you see smoke or liquids leaking from the device or battery, stop using the device immediately and take it to a TP-LINK Service Centre.
- Page 61 • If the device screen is broken in a collision, immediately stop using the device. Do not touch or attempt to remove the broken parts. Promptly contact an authorized service center. • Do not store your device with metal objects, such as coins, keys, and necklaces. Your device may be scratched or may malfunction.
- Page 62 Bluetooth(BLE): 2402~2480; Power Class: Class 1; Statement Hereby, TP-Link Technologies Co., Ltd. declares that this device is in compliance with the essential requirements and other relevant provisions of Directive 2014/53/EU and 2011/65/EU. For the declaration of conformity, visit the web site “http://www.neffos.com/en/ce”.
Need help?
Do you have a question about the neffos Y50 and is the answer not in the manual?
Questions and answers