
Related Manuals for Samsung DV15K6500GV


Summary of Contents for Samsung DV15K6500GV
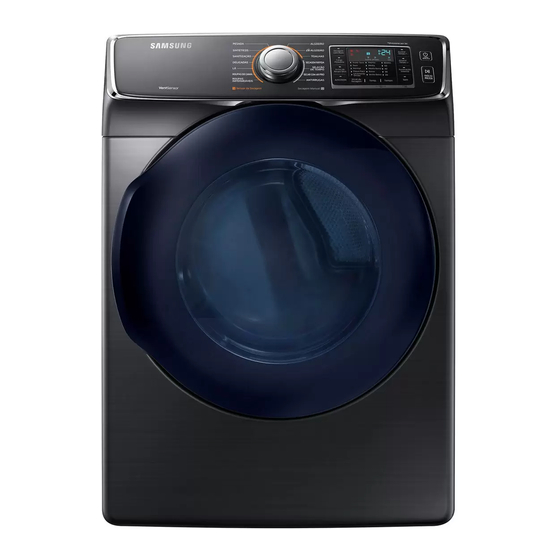
- Page 1 Dryer User manual DV15K6500GV DV6500K_DC68-03381D-04_EN.indd 1 2019-06-03 12:53:52...
-
Page 2: Table Of Contents
Contents Safety information What you need to know about the safety instructions Important safety symbols Important safety precautions Installation requirements Key installation requirements Location considerations Alcove or closet installations Ducting requirements Exhausting requirements Gas requirements Electrical requirements Installation What’s included Step-by-step installation Vent blockage test Exhaust ducting guide... - Page 3 Maintenance Vent sensor Cleaning Troubleshooting Checkpoints Information codes Specifications Fabric care chart Protecting the environment Specification sheet Cycle chart English 3 DV6500K_DC68-03381D-04_EN.indd 3 2019-06-03 12:53:52...
-
Page 4: Safety Information
Safety information Congratulations on your new Samsung dryer. This manual contains important information on the installation, use, and care of your appliance. Please take the time to read this manual to take full advantage of your dryer’s many benefits and features. -
Page 5: Important Safety Precautions
Important safety precautions WARNING To reduce the risk of fire, electric shock, or injury to persons when using your appliance, follow basic precautions, including the following: 1. This appliance is not to be used by persons (including children) with reduced physical, sensory or mental capabilities, or lack of experience and knowledge, unless they have been given supervision or instruction concerning use of the appliance by a person responsible for their safety. - Page 6 Safety information 8. CAUTION: In order to avoid a hazard due to inadvertent resetting of the thermal cut-out, this appliance must not be supplied through an external switching device, such as a timer, or connected to a circuit that is regularly switched on and off by the utility.
- Page 7 18. Remove all objects from pockets such as lighters and matches. 19. WARNING: Never stop a tumble dryer before the end of the drying cycle unless all items are quickly removed and spread out so that the heat is dissipated. 20.
- Page 8 Safety information Critical installation warnings WARNING The installation of this appliance must be performed by a qualified technician or service company. • Failure to do so may result in electric shock, fire, an explosion, problems with the product, or injury. Plug the power cord into a wall socket that meets local electrical specifications.
- Page 9 Do not pull the power cord, when unplugging the power plug. • Unplug the power plug by holding the plug. • Failure to do so may result in electric shock or fire. This appliance must be properly grounded. Never plug the power cord into a receptacle that is not grounded adequately and in accordance with local and national codes.
- Page 10 The use for business purposes qualifies as product misuse. In this case, the product will not be covered by the standard warranty provided by Samsung and no responsibility can be attributed to Samsung for malfunctions or damages resulting from such misuse.
- Page 11 Do not dry laundry contaminated by vegetable oil or cooking oil as a large amount of the oil will not be removed when washing the laundry. In addition, use the Cool Down cycle so that the laundry is not heated. •...
-
Page 12: Installation Requirements
Installation requirements Read through the following instructions before installing the dryer and keep this manual for future reference. WARNING The control board and inlet valve are intentionally not grounded and may present a risk of electric shock only during servicing. Service personnel - Do not contact these parts while the appliance is energized. -
Page 13: Alcove Or Closet Installations
Alcove or closet installations WARNING • No other fuel-burning appliance should be installed in the same closet as the • The dryer must be exhausted to the dryer. outside to reduce the risk of fire when • Place the dryer at least 18 in. (460 mm) installed in an alcove or closet. - Page 14 Installation requirements Installation with pedestal 38.7 in. (984 mm) 53 in. (1345 mm) 53.3 in. (1355 mm) 32.4 in. (823 mm) 27 in. (686 mm) 5.9 in. (150 mm) English DV6500K_DC68-03381D-04_EN.indd 14 2019-06-03 12:53:53...
- Page 15 (A) and bottom (D). External exhaust elbow requires additional space (L). • Stacking (MODEL NO: SKK-7B) Samsung’s Washer and Dryer can be stacked to maximize usable space. You can purchase an optional stacking kit from your Samsung retailer. For details about stacking and compatible models, refer to the user manual included in the stacking kit you purchase.
-
Page 16: Ducting Requirements
Installation requirements Ducting requirements Recommended Use only for short-run installation Weather hood type 4” (10.2 cm) 2.5” (6.4 cm) No. of 90° Rigid Rigid elbows 80 ft. (24.4 m) 74 ft. (22.6 m) 68 ft. (20.7 m) 62 ft. (18.9 m) 57 ft. -
Page 17: Exhausting Requirements
Exhausting requirements The dryer must not be exhausted into a chimney, a wall, a ceiling, an attic, a crawl space, or a concealed space of a building. Exhausting the dryer to the outside will prevent large amounts of lint and moisture from being blown into the room. -
Page 18: Gas Requirements
Installation requirements Gas requirements WARNING • Gas dryers installed in residential garages must be raised 18 inches • Use only natural or LP (liquid propane) (46 cm) above the floor. gases. • Additionally, a 1/8” (0.3 cm) N.P.T. • The installation must be conformed (National Pipe Thread) plugged tapping, with local codes, or in the absence of accessible for test gauge connection,... -
Page 19: Electrical Requirements
• Gas suppliers recommend you purchase WARNING and install a UL-approved gas detector. • Gas leaks may occur in your system, • Install and use in accordance with the creating a dangerous situation. manufacturer’s instructions. • Gas leaks may not be detected by smell alone. -
Page 20: Installation
What’s included Make sure all the parts are included in the product package. If you have a problem with the dryer or the accessories, contact a local Samsung service center or the retailer. Dryer at a glance 01 Worktop... - Page 21 Accessories & tools Provided accessories Rack Dry Required tools Pliers Cutting knife Pipe wrench Nut screwdriver (gas models only) Level Philips screwdriver Duct tape Wrench WARNING Packing materials can be dangerous to children. Keep all packing materials (plastic bags, polystyrene, etc.) out of children’s reach. English 21 DV6500K_DC68-03381D-04_EN.indd 21 2019-06-03...
-
Page 22: Step-By-Step Installation
Installation Step-by-step installation Make sure you have a qualified technician install the dryer. Step by step installation instructions start below. STEP 1 Install the exhaust system Select a location and move the dryer to the site. For easy access, we recommend you install the dryer in the same location as your washer. - Page 23 STEP 3 Level the dryer To ensure optimal performance, the dryer must be level. Using a level (A), check if the dryer is level side to side and then front to back. If the dryer is not level, adjust the leveling feet (B) at the bottom of the dryer.
- Page 24 Installation STEP 4 Power on (Gas models) Make sure all gas connections, the exhaust line, and all wiring is connected correctly. Then, plug the power cord into a power source and check the dryer’s installation and operation using the final checklist in Step 5 below. STEP 5 Final Check When installation is complete, confirm that: •...
-
Page 25: Vent Blockage Test
Vent blockage test After the dryer is installed, start the Vent Blockage Test to check if the duct system is properly installed. The Vent Blockage Test automatically detects the status of the ducts and reports any blockage or problems. Proper ducting can reduce drying time and save energy. -
Page 26: Exhaust Ducting Guide
Installation NOTE • During or after the test, the internal drum is hot. Use caution to prevent burns. The Vent Blockage Test is used to check for problems to the current duct system when the dryer is installed for the first time. •... -
Page 27: Door Reversal
Door reversal Unplug the power cord. Remove two door hinge screws. Lift the door and remove it. NOTE There is a screw on the back side of the hinge that will support the door as you unscrew the hinge screws. Remove the two screws that are above and below the cut-out in the frame front. - Page 28 Installation Re-insert the two screws that held the lever holder into the same screw holes, and then tighten. Remove the single screw from the back of the door hinge. NOTE This is the screw that supports the door against the frame so you can unscrew or screw in the hinge without needing to support the door yourself.
- Page 29 11. Push the lever holder into the cut out on the other side of the door opening. Insert screws, and then tighten as shown. 12. Re-attach the remaining screws to the remaining holes above and below the lever holder, and then tighten. English 29 DV6500K_DC68-03381D-04_EN.indd 29 2019-06-03...
-
Page 30: Before You Start
Before you start Here are a few things you should know before starting your dryer. Sort and load • Put one wash load in the dryer at a • Overloading reduces the tumbling time. action, resulting in uneven drying and •... -
Page 31: Rack Dry
Remove the drying rack from its packaging and store the rack for later use. If a drying rack is not provided, you can purchase it at a local Samsung service center. (Part Code : DC61-02705A) To use the drying rack, follow these steps:... - Page 32 Before you start Drying rack drying suggestions Item Cycle settings Washable sweaters (block to shape and lay flat on rack) TIME DRY with the Extra Low temperature setting Stuffed toys (cotton or polyester fiber-filled) Stuffed toys (foam or rubber-filled) AIR FLUFF Foam rubber pillows Sneakers WARNING...
-
Page 33: Operations
Operations WARNING To reduce the risk of fire, electric shock, or injury, read the “Safety information“ before operating this appliance. Feature panel Turn the Cycle Selector to select the desired cycle. The indicator by the cycle name lights up. 01 Cycle Selector •... - Page 34 Operations Press Dry Level to select a dry level. This is available only with the Sensor Dry cycles. • Larger or bulkier loads may require Very Dry or More Dry for complete dryness. • Less Dry is best suited for lightweight fabrics or for leaving 03 Dry Level some moisture in the clothing at the end of the cycle.
- Page 35 The Mixed Load Bell notifies you when the average dry level in a load is damp dry (80 % dried). This lets you take items that you don’t want fully dried or that dry quickly out of the dryer early while letting others continue to dry.
-
Page 36: Simple Steps To Start
Operations Simple steps to start To change the cycle during operation Press POWER to turn on the dryer. Press START/PAUSE to stop operation. Turn the Cycle Selector to select a cycle. Select a different cycle. Change the cycle settings (Dry Level, Press START/PAUSE to start new cycle. -
Page 37: Cycle Overview
Cycle overview Cycle Description QUICK DRY A quick drying cycle that runs for 30 minutes TIME DRY You can specify a cycle time in minutes. AIR FLUFF Tumbles the load in room temperature air. The Wrinkle Release cycle will remove wrinkles from Manual Dry items that are clean, dry, and only slightly wrinkled, such WRINKLE... -
Page 38: Drying Guide
Operations Drying guide The best way to dry items is to follow the instructions on the care label. If no drying instructions are provided, see the following table for reference. Cycle Description Follow the care label instructions or dry using Bedding. Bedspreads &... -
Page 39: Special Features
To use Smart Care, you must have the code. For best results, hold the Samsung Smart Care app installed on your smartphone so that the front of the smartphone. panel and the smartphone are parallel NOTE or nearly parallel. -
Page 40: Maintenance
Maintenance Keep the dryer clean to prevent decreased performance and to lengthen its life. WARNING The control board and inlet valve are intentionally not grounded and may present a risk of electric shock only during servicing. Service personnel - Do not contact these parts while the dryer is energized. Vent sensor The dryer features a vent sensor that detects and notifies you when it is time to clean the ductwork. -
Page 41: Cleaning
Cleaning Feature panel Dryer exterior • Clean with a soft, damp cloth. Do not • Clean with a soft, damp cloth. Do not use abrasive substances. use abrasive substances. • Do not spray liquid cleaning agents • Protect the surface from sharp objects. directly on the display of the dryer. -
Page 42: Troubleshooting
Troubleshooting Checkpoints If the dryer operates abnormally, first check the list of problems in the table below and try the suggested actions. Problem Action • Make sure the door is latched shut. • Make sure the power cord is plugged into a live electrical outlet. - Page 43 Problem Action • Check the load for objects such as coins, loose buttons, nails, etc. Remove promptly. • It is normal to hear the dryer gas valve or heating element cycle on and off during the drying cycle. Is noisy. •...
- Page 44 Extended time. reached. The drying time can change according to the type and amount of laundry. See the cycle chart for reference. If a problem persists, contact a local Samsung service center. English DV6500K_DC68-03381D-04_EN.indd 44 2019-06-03 12:54:00...
-
Page 45: Information Codes
• If this information code remains, contact a Samsung service center. Incorrect door switch. • Contact a Samsung service center. If any information code keeps appearing on the screen, contact a Samsung service center. English 45 DV6500K_DC68-03381D-04_EN.indd 45 2019-06-03 12:54:00... -
Page 46: Specifications
Specifications Fabric care chart Bleach The following symbols provide garment care direction. The clothing care labels Any bleach (when needed) include symbols for drying, bleaching, Only non-chlorine (color-safe) ironing, and dry cleaning. The use of bleach (when needed) symbols ensures consistency among garment manufacturers of domestic Tumble dry and imported items. -
Page 47: Protecting The Environment
Iron dry or steam temperatures Dry-clean High Dry-clean Medium Do not dry-clean Line dry / Hang to dry Drip dry Warning symbols for laundering Dry flat Do not wash Do not wring Do not bleach Do not tumble dry No steam (added to iron) Do not iron Protecting the environment This appliance is manufactured from... -
Page 48: Specification Sheet
NOTE “A. Height” Spec can vary from 42.4 to 43.3 inches (107.7 - 108.9 cm) depending on the leveling feet adjustments. Front loading dryer Type DV15K6500GV Product - inches (cm) 38.7 (98.4) A. Height Required for Installation - inches 40.7 Product - inches (cm) 27.0 (68.6) -
Page 49: Cycle Chart
Cycle chart NOTE For best results, follow the load size recommendations for each dry cycle. • Large load: Fill the drum to about ¾ full. Do not add items over this level as they need to tumble freely. • Medium load : Fill the drum to about ½ full. •... - Page 50 Memo DV6500K_DC68-03381D-04_EN.indd 50 2019-06-03 12:54:04...
- Page 51 Memo DV6500K_DC68-03381D-04_EN.indd 51 2019-06-03 12:54:04...
- Page 52 QUESTIONS OR COMMENTS? COUNTRY CALL OR VISIT US ONLINE AT 0800-124-421 (Demais cidades e regiões) BRAZIL www.samsung.com/br/support 4004-0000 (Capitais e grandes centros) DC68-03381D-04 DV6500K_DC68-03381D-04_EN.indd 52 2019-06-03 12:54:04...
Need help?
Do you have a question about the DV15K6500GV and is the answer not in the manual?
Questions and answers