Chapters
Table of Contents

Related Manuals for LG LSCE305ST/00


Summary of Contents for LG LSCE305ST/00
- Page 1 OWNER’S MANUAL CERAMIC-GLASS RADIANT COOKTOP Please read this guide thoroughly before operating and keep it handy for reference at all times. LSCE305ST LSCE365ST www.lg.com MFL54169102_12...
-
Page 2: Table Of Contents
Important Safety Precautions........3–7 THANK YOU! COOKWARE TIPS Selecting Cookware ............8–9 Congratulations on your purchase and welcome to the LG family. PARTS AND FEATURES Your new LG RADIANT Cooktop Parts and Features of Your Cooktop......10 Touch Control Features ..........11 combines precision cooking... - Page 3 READ ALL INSTRUCTIONS BEFORE USE You can download an owner's & installation manual at http://www.lg.com. WARNING For your safety, the information in this manual must be followed to minimize the risk of fire, electric shock, or to prevent property damage, personal injury, or death.
- Page 4 READ ALL INSTRUCTIONS BEFORE USE SAFETY PRECAUTIONS (cont.) • Wear proper apparel. Loose-fitting or hanging • Use only dry pot holders. Moist or damp pot garments should never be worn while using holders on hot surfaces may result in burns from the appliance.
- Page 5 READ ALL INSTRUCTIONS BEFORE USE SAFETY DURING USE • This appliance may only be used for normal • If pan is smaller than element, a portion of the cooking and frying in the home. It is not element will be exposed to direct contact and designed for commercial or industrial purposes.
- Page 6 SAFETY DURING USE (cont.) • Do not place hot cookware on cold cooktop • Do not use water on grease fires. Use baking glass. This could cause glass to break. soda a dry chemical or foam-type extinguisher to smother fire or flame. •...
- Page 7 HOW TO AVOID DAMAGE TO THE APPLIANCE • Prior to using your cooktop for the first time, apply the • Do not slide metal or glass across the cooktop surface. recommended cooktop cleaning creme to the ceramic • Keep meltable objects or materials away from the surface.
-
Page 8: Selecting Cookware
SELECTING COOKWARE POTS AND PANS USE FLAT-BOTTOMED COOKWARE The better the pot, the better the cooking results. Cookware must fully contact the surface of the cooking element. Use flat-bottomed pans sized to • You can recognize good pots and pans by their fit the cooking element and bases. - Page 9 SELECTING COOKWARE (cont.) AVOIDING SCRATCHES TIPS FOR SAVING ENERGY: It is recommended to always use heavier gauge • Always position pots and pans before you switch stainless steel cookware on your ceramic cooktop on the Cooking Zone. surface. This will help reduce the possibility of •...
-
Page 10: Parts And Features Of Your Cooktop
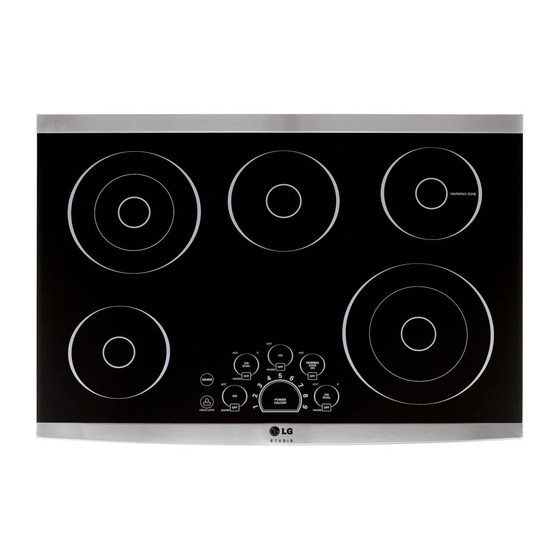
PARTS AND FEATURES OF YOUR COOKTOP Throughout this manual, features and appearance may vary from your model. LSCE305ST Radiant Cooktop Single Cooking Zone 7” (178 mm) 1500 W Warming Zone Dual Cooking Zone 6” (152 mm) 8”/5” (203/127 mm) 100 W 1900 / 950 W Dual Cooking Zone Single Cooking Zone... -
Page 11: Touch Control Features
TOUCH CONTROL FEATURES LOCATIONS OF SURFACE ELEMENTS AND CONTROLS The surface burner elements are positioned in the same locations on the cooktop and the control panel for ease of use. LSCE305ST Radiant Cooktop LSCE365ST Radiant Cooktop Dual Single Bridge Triple Left Rear Center Rear Warming... -
Page 12: Before Using The Cooktop
BEFORE USING THE COOKTOP Before using the cooktop for the first time, clean it CAUTION thoroughly with the included cleaner or ceramic cooktop cleaner according to the Care and Never use scrub pads, abrasive or etching Cleaning instructions in this guide. This will help cleaners. - Page 13 SETTING THE CONTROLS (cont.) SETTING THE POWER LEVEL WARNING The power level for the selected Cooking Zone can Your cooktop has a residual be set from 1 to 9. heat indicator for each Cooking Zone. This To select the power level: indicator will warn that this Select the number on the element area has been used and is still giving off enough...
-
Page 14: Using The Warming Zones
SETTING THE CONTROLS (cont.) WARM To activate: Touch the ON pad to activate the The cooktop has a WARM setting feature that can desired Cooking Zone and touch the be used on all Cooking Zone except the Warming WARM pad. The selected Cooking Zone Zone element. -
Page 15: Using The Bridge Cooking Zones
USING THE BRIDGE COOKING ZONES BRIDGE COOKING ZONES (LSCE365ST) The three left cooking zones can be used together as a single Cooking Zone using the Bridge function. This allows you to cook with larger oblong pans. The Bridge function can only be activated when the left front cooking zone and the left rear cooking zones are OFF. -
Page 16: Using The Triple Cooking Zones
USING THE TRIPLE COOKING ZONES (LSCE365ST) The Triple Element, located in the center position, offers three different size elements to accommodate different pan sizes. To Activate the Triple Cooking Zone Touch the ON pad. The inner most element will activate. Touch the ON pad again to activate the center and middle areas (Dual Element). -
Page 17: Using The Child Lock
USING CHILD LOCK You can lock the entire cooktop at any time when it is not in use. Locking the cooktop will prevent Cooking Zones from being turned on accidentally. SETTING CHILD LOCK CANCELING CHILD LOCK The cooktop must be OFF to set the To turn off CHILD LOCK, touch and CHILD LOCK function. -
Page 18: Cleaning The Cooktop
CLEANING THE COOKTOP NORMAL DAILY USE CLEANING Step. 2 When the cooking surface has ONLY use Ceramic Cooktop Cleaner on the glass cooled down apply a few dabs cooktop. Other creams may not be as effective or they (about the size of a dime) of might damage the surface with scratches or an approved cleaner in each permanent staining. -
Page 19: Installation Instructions
INSTALLATION INSTRUCTIONS AND SERVICE MUST BE PERFORMED BY A QUALIFIED INSTALLER. IMPORTANT: SAVE THESE INSTRUCTIONS FOR LOCAL ELECTRICAL INSPECTOR’S USE. READ AND SAVE THESE INSTRUCTIONS FOR FUTURE REFERENCE. BEFORE YOU BEGIN Read these instructions completely and NOTE TO CONSUMER: carefully. Keep this User’s Guide and Installation Instructions for future reference. -
Page 20: Technical Specifications
TECHNICAL SPECIFICATIONS LSCE305ST Radiant Cooktop COOKTOP DIMENSIONS COUNTERTOP CUTOUT DIMENSIONS ” Width 30-27/32 (783 mm) ” Width 29-3/8 (746 mm) ” Depth 21-23/32 (552mm) Depth 20-1/4” (515 mm) ” Height (101.6 mm) COOKING ZONES ELECTRICAL SPECIFICATIONS Connection voltage: Position Diameter Power 240/208 VAC 60 Hz. -
Page 21: Preparing The Installation Location
PREPARING THE INSTALLATION LOCATION IMPORTANT INSTALLATION INFORMATION • All electric cooktops run off a single phase, three- • Make sure the cabinets and wall coverings wire or four-wire cable, 240/208 volt, 60 hertz, around the cooktop can withstand the AC-only electrical supply with ground. temperatures (up to 93˚C [200˚F]) generated by the cooktop. -
Page 22: Dimensions And Clearances
DIMENSIONS AND CLEARANCES Overhead cabinet should not exceed a maximum depth of 13” (330 mm). Min. recommended distance between rear edge of cutout and nearest combustible 10” surface. (254 mm) 36” Min 18” (914 mm) (457 mm) CAUTION To eliminate the risk of burns or fire by reaching Min. -
Page 23: Preparing The Installation Location
PREPARING THE INSTALLATION LOCATION IMPORTANT INSTALLATION INFORMATION • All electric cooktops run off a single phase, three- • Make sure the cabinets and wall coverings wire or four-wire cable, 240/208 volt, 60 hertz, around the cooktop can withstand the AC-only electrical supply with ground. temperatures (up to 93˚C [200˚F]) generated by the cooktop. -
Page 24: Dimensions And Clearances
DIMENSIONS AND CLEARANCES Overhead cabinet should not exceed a maximum depth of 13” (330 mm). Min. recommended distance between rear edge of cutout and nearest combustible 10” surface. (254 mm) 36” Min (914 mm) 18” (457 mm) CAUTION To eliminate the risk of burns or fire by reaching Min. -
Page 25: Electrical Connections
ELECTRICAL CONNECTIONS IMPORTANT SAFETY INSTRUCTIONS PROVIDING THE ELECTRICAL CONNECTION Install the junction box under the cabinet and run • Be sure your cooktop is installed and grounded 120/240 or 120/208 volt, AC wire from the main properly by a qualified installer or service circuit panel. - Page 26 ELECTRICAL CONNECTIONS (cont.) ELECTRICAL CONNECTION WARNING Connect the flexible armored cable that extends DO NOT ground to a gas supply pipe. DO from the surface unit to the junction box using a NOT connect to electrical power supply until suitable strain relief at the point the armored cable appliance is permanently grounded.
-
Page 27: Cooktop Installation
ELECTRICAL CONNECTIONS (cont.) IF COOKTOP IS USED IN A NEW BRANCH CIRCUIT INSTALLATION (1996 NEC), MOBILE HOME, RECREATIONAL VEHICLE, OR WHERE LOCAL CODES DO NOT PERMIT GROUNDING TO THE NEUTRAL (WHITE) WIRE Observe all governing codes and local 4-WIRE GROUNDED JUNCTION BOX ordinances. -
Page 28: Final Check
COOKTOP INSTALLATION (cont.) Install the retainer brackets to the bottom of the NOTE: The retainer brackets MUST be installed cooktop; then snug the bolts against the bottom to meet local codes or, in their absence, with of the countertop as shown. the National Electrical Code ANSI/NFPA No. -
Page 29: Before Calling For Service
BEFORE CALLING FOR SERVICE Before you call for service, review this list. It may save you time and expense. This list includes common occurrences that are not the result of a defect in workmanship or materials. Problem Possible Causes Solutions Cooktop does not work •... - Page 30 BEFORE CALLING FOR SERVICE Problem Possible Causes Solutions Flashing • There is a fault with thermistor • Turn the cooktop off using the Power or Micom. ON/OFF. Turn cooktop back on using the Power ON/OFF. Flashing Flashing Flashing • Food spill/soil on touchpads. •...
- Page 31 LG RADIANT COOKTOP LIMITED WARRANTY - USA LG Electronics Inc. will repair or replace your product, at LGÕs option, if it proves to be defective in material or workmanship under normal use, during the warranty period set forth below, effective from the date of original consumer purchase of the product.
- Page 32 MEMO...
- Page 33 MANUAL DEL PROPIETARIO ESTUFA DE VIDRIO CERÁMICO RADIANTE Lea esta guía con detenimiento antes de utilizar el aparato y manténgala a mano para referencia en todo momento. LSCE305ST LSCE365ST www.lg.com P/No.: MFL54169102...
- Page 34 CONSEJOS SOBRE LOS RECIPIENTES DE COCCIÓN Felicitaciones por su compra y Cómo seleccionar recipientes de cocción....8–9 bienvenido a la familia de LG. PIEZAS Y CARACTERÍSTICAS Su nueva estufa RADIANTE LG Piezas y características de su estufa......10 Características de control táctiles .........11 combina características de cocción...
-
Page 35: Precauciones Importantes De Seguridad
LEA TODAS LAS INSTRUCCIONES ANTES DE USAR Puede descargar un manual del usuario y de instalación en http://www.lg.com. ADVERTENCIA Para su seguridad, debe seguirse la información de este manual a fin de minimizar el riesgo de incendio, descarga eléctrica o para prevenir daños a la propiedad, lesiones personales o la muerte. - Page 36 LEA TODAS LAS INSTRUCCIONES ANTES DE USAR PRECAUCIONES DE SEGURIDAD (cont.) • Utilice ropa adecuada. Nunca debe utilizar • Sólo utilice agarraderas secas. Las ropa suelta o que cuelgue mientras utiliza este agarraderas húmedas o mojadas sobre electrodoméstico. No permita que su ropa u superficies calientes pueden provocar otros materiales inflamables entren en contacto quemaduras de vapor.
- Page 37 LEA TODAS LAS INSTRUCCIONES ANTES DE USAR SEGURIDAD DURANTE EL USO • Este aparato sólo puede utilizarse para cocción y • Si el recipiente es más pequeño que el elemento, fritura normales en el hogar. No se encuentra una porción del elemento quedará expuesta al contacto diseñado para fines comerciales o industriales.
- Page 38 SEGURIDAD DURANTE EL USO (cont.) • No coloque recipientes de cocción calientes • No utilice agua en incendios de grasa. Utilice sobre el vidrio frío de la estufa. Esto puede bicarbonato de sodio o un extintor de químico provocar la rotura del vidrio. seco o de espuma para apagar un incendio o •...
- Page 39 CÓMO EVITAR DAÑOS AL APARATO • Antes de utilizar la estufa por primera vez, aplique la • Mantenga objetos o materiales que puedan derretirse crema de limpieza recomendada para la superficie de alejados de superficies de vidrio cerámico, por ejemplo, cerámica.
-
Page 40: Cómo Seleccionar Recipientes De Cocción
CÓMO SELECCIONAR RECIPIENTES DE COCCIÓN OLLAS Y SARTENES UTILICE RECIPIENTES DE COCCIÓN DE BASE PLANA Cuanto mejor sea la olla, mejores serán los resultados de la cocción. Los recipientes deben hacer contacto total sobre la • Las buenas ollas y sartenes se reconocen por superficie del elemento de sus bases. - Page 41 CÓMO SELECCIONAR RECIPIENTES DE COCCIÓN (cont.) CÓMO EVITAR RAYONES CONSEJOS PARA AHORRAR ENERGÍA: Se recomienda siempre utilizar recipientes de • Siempre coloque las ollas y sartenes antes de acero inoxidable de un grosor más elevado sobre encender la zona de cocción. la superficie de cerámica de la estufa.
-
Page 42: Piezas Y Características De Su Estufa
PIEZAS Y CARACTERÍSTICAS DE SU ESTUFA A lo largo de este manual, las características y apariencia pueden ser diferentes a las de su modelo. Estufa radiante LSCE305ST Zona de cocción única 7” (178 mm) 1500 W Zona de calentamiento Zona de cocción doble 6”... -
Page 43: Características De Control Táctiles
CARACTERÍSTICAS DE CONTROL TÁCTILES UBICACIONES DE ELEMENTOS DE SUPERFICIE Y CONTROLES Los elementos del quemador de superficie están colocados en las mismas ubicaciones sobre la estufa y el panel de control para facilidad de uso. Estufa radiante LSCE305ST Estufa radiante LSCE365ST Doble Individual Puente... -
Page 44: Antes De Usar La Estufa
ANTES DE USAR LA ESTUFA Antes de usar la estufa por primera vez, límpiela PRECAUCIÓN bien con el limpiador incluido o limpiador de estufas cerámicas según las instrucciones de Nunca utilice esponjillas para fregar o Cuidado y Limpieza de esta guía. Esto ayudará a limpiadores abrasivos o fuertes. - Page 45 CÓMO CONFIGURAR LOS CONTROLES (cont.) CÓMO CONFIGURAR EL NIVEL DE ENERGÍA ADVERTENCIA El nivel de energía de la zona de cocción Su estufa cuenta con un seleccionada puede configurarse de 1 a 9. indicador de calor residual para cada zona de cocción. Para seleccionar el nivel de energía: Este indicador le advierte Seleccione el número de las...
-
Page 46: Cómo Usar Las Zonas De Calentamiento
CÓMO CONFIGURAR LOS CONTROLES (cont.) CALENTAR Para activar: Presione la tecla ON para activar la La estufa cuenta con la característica de zona de cocción deseada y presione la configuración WARM (calentar) que puede tecla WARM (calentar). La zona de utilizarse en todas las zonas de cocción con cocción seleccionada quedará... -
Page 47: Cómo Usar Las Zonas De Cocción Puente
CÓMO USAR LAS ZONAS DE COCCIÓN PUENTE ZONAS DE COCCIÓN PUENTE (LSCE365ST) Las tres zonas de cocción izquierdas pueden utilizarse en conjunto como una zona de cocción única utilizando la función "puente”. Esto le permite cocinar con recipientes alargados más grandes. -
Page 48: Cómo Usar Las Zonas De Cocción Triples
CÓMO USAR LAS ZONAS DE COCCIÓN TRIPLES (LSCE365ST) El elemento triple, ubicado en la posición central, ofrece tres elementos de tamaño diferente para ubicar tamaños de recipiente diferentes. Para activar la zona de cocción triple Presione la tecla ON (encendido). Se activará... -
Page 49: Cómo Usar El Bloqueo Para Niños
CÓMO USAR EL BLOQUEO PARA NIÑOS Usted puede bloquear toda la estufa en cualquier momento cuando no se encuentre en uso. Bloquear la estufa evitará que las zonas de cocción se enciendan accidentalmente. CÓMO CANCELAR EL BLOQUEO PARA CÓMO CONFIGURAR EL BLOQUEO PARA NIÑOS NIÑOS Para apagar el bloqueo para niños,... -
Page 50: Cómo Limpiar La Estufa
CÓMO LIMPIAR LA ESTUFA LIMPIEZA DIARIA NORMAL Paso. 2 Una vez que la superficie de Utilice SÓLO el limpiador de superficies de cocción de cocción se haya enfriado, cerámica o el limpiador de superficies de cocción incluido aplique pequeñas cantidades con su cocina, sobre la superficie de cocción de vidrio. -
Page 51: Instrucciones De Instalación
LAS INSTRUCCIONES DE INSTALACIÓN Y LAS REPARACIONES DEBE REALIZARLAS UN INSTALADOR CALIFICADO. IMPORTANTE: GUARDE ESTAS INSTRUCCIONES PARA EL USO DEL INSPECTOR ELÉCTRICO LOCAL. LEA Y GUARDE ESTAS INSTRUCCIONES PARA REFERENCIA FUTURA. ANTES DE COMENZAR Lea estas instrucciones por completo y con detenimiento. -
Page 52: Especificaciones Técnicas
ESPECIFICACIONES TÉCNICAS Estufa radiante LSCE305ST DIMENSIONES DE LA ESTUFA DIMENSIONES DE LA ABERTURA DEL MOSTRADOR DE ENCIMERA ” Ancho 30-27/32 (783 mm) ” Ancho 29-3/8 (746 mm) ” Profundidad 21-23/32 (552mm) Profundidad 20-1/4” (515 mm) ” Altura (101.6 mm) ZONAS DE COCCIÓN ESPECIFICACIONES ELÉCTRICAS Voltaje de conexión: Posición... -
Page 53: Cómo Preparar La Ubicación De Instalación
CÓMO PREPARAR LA UBICACIÓN DE INSTALACIÓN INFORMACIÓN IMPORTANTE SOBRE LA INSTALACIÓN • Todas las estufas eléctricas funcionan con un • Asegúrese que los gabinetes y las cubiertas de suministro eléctrico de fase única, de tres o las paredes alrededor de la estufa puedan cuatro hilos, 240/208 voltios, 60 hercios, sólo AC soportar las temperaturas generadas por la estufa y con conexión a tierra. -
Page 54: Dimensiones Y Espacios
DIMENSIONES Y ESPACIOS El gabinete superior no debe superar una profundidad máxima de 13 (330 mm). ” Distancia mínima recomendada entre el lado trasero de la abertura y la superficie 10” combustible más (254 mm) cercana. 36” Min (914 mm) 18”... -
Page 55: Cómo Preparar La Ubicación De Instalación
CÓMO PREPARAR LA UBICACIÓN DE INSTALACIÓN INFORMACIÓN IMPORTANTE SOBRE LA INSTALACIÓN • Todas las estufas eléctricas funcionan con un • Asegúrese que los gabinetes y las cubiertas de suministro eléctrico de fase única, de tres o las paredes alrededor de la estufa puedan cuatro hilos, 240/208 voltios, 60 hercios, sólo AC soportar las temperaturas generadas por la estufa y con conexión a tierra. -
Page 56: Dimensiones Y Espacios
DIMENSIONES Y ESPACIOS El gabinete superior no debe superar una profundidad máxima de 13” (330 mm). Distancia mínima recomendada entre el lado trasero de la abertura y la superficie 10” combustible más (254 mm) cercana. 36” Min (914 mm) 18” (457 mm) PRECAUCIÓN Para eliminar el riesgo de... -
Page 57: Conexiones Eléctricas
CONEXIONES ELÉCTRICAS INSTRUCCIONES IMPORTANTES DE CÓMO REALIZAR LA CONEXIÓN ELÉCTRICA SEGURIDAD Instale la caja de conexiones bajo el gabinete y coloque un cable de 120/240 o 120/208 voltios AC • Verifique que un instalador o un técnico calificado desde el panel de circuitos principal. instale su estufa correctamente con adecuada NOTA: NO conecte el cable al panel de circuitos conexión a tierra. - Page 58 CONEXIONES ELÉCTRICAS (cont.) CONEXIÓN ELÉCTRICA ADVERTENCIA Conecte el cable armado flexible que se extiende NO conecte a tierra la tubería de suministro de desde la unidad de superficie a la caja de conexiones gas. NO conecte al suministro de energía utilizando un alivio de tensión en el punto donde el eléctrica hasta que el aparato se encuentre cable armado ingresa a la caja de conexiones.
-
Page 59: Instalación De La Estufa
CONEXIONES ELÉCTRICAS (cont.) SI LA ESTUFA SE USA EN UNA INSTALACIÓN NUEVA DE CIRCUITO DERIVADO (1996 NEC), CASA RODANTE, VEHÍCULO RECREATIVO, O DONDE LOS CÓDIGOS LOCALES NO PERMITEN LA CONEXIÓN A TIERRA CON EL CABLE NEUTRAL (BLANCO). Cumpla con todos los códigos y ordenanzas CAJA DE CONEXIONES CON locales vigentes. -
Page 60: Control Final
INSTALACIÓN DE LA ESTUFA (cont.) NOTA: Los soportes de retención DEBEN Instale los soportes de retención en la parte instalarse en cumplimiento con los códigos inferior de la estufa. Luego ajuste los pernos locales o, en su ausencia, con el Código contra la base del mostrador de encimera como Eléctrico Nacional ANSI/NFPA No. -
Page 61: Antes De Llamar Al Servicio Técnico
ANTES DE LLAMAR AL SERVICIO TÉCNICO Antes de llamar al servicio técnico, examine esta lista. Puede ahorrarle tiempo y dinero. La lista incluye situaciones comunes que no son el resultado de mano de obra o materiales defectuosos del artefacto. Problema Causas posibles Soluciones La estufa no funciona... - Page 62 ANTES DE LLAMAR AL SERVICIO TÉCNICO Problema Causas posibles Soluciones Parpadeo • Hay un problema con el • Apague la estufa utilizando la tecla Power termistor o Micom. ON/OFF. Vuelva a encender la estufa utilizando la tecla Power ON/OFF. Parpadeo Parpadeo Parpadeo •...
- Page 63 GARANT LIMITADA DE ESTUFA DE RADIANTE LG - EE.UU. LG Electronics Inc. reparará o reemplazará su producto, a criterio de LG, si llegara a tener defectos en los materiales o mano de obra bajo un uso normal, durante el período de garantía establecido a continuación, vigente desde la fecha original de compra del producto por parte del consumidor.
- Page 64 LG Customer Information Center 1-800-243-0000 USA, Consumer User 1-888-865-3026 USA, Commercial User Register your product Online! www.lg.com Printed in Korea...
Need help?
Do you have a question about the LSCE305ST/00 and is the answer not in the manual?
Questions and answers