Advertisement
Quick Links
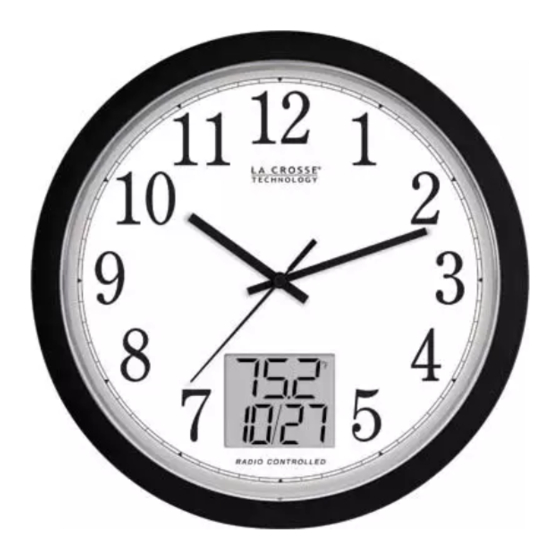
RADIO CONTROLLED ANALOG CLOCK WITH TEMPERATURE
INTRODUCTION:
Congratulations on purchasing this Analog Clock featuring WWVB radio controlled time with daylight
saving time function, indoor temperature and calendar display. The operation of this product is simple
and straightforward but please read this instruction manual to ensure that you have the full benefits of
all its features.
FEATURES:
•
WWVB radio control time with manual time setting option
•
4 time zones : Pacific Time (PT), Mountain Time (MT), Central Time (CT) and Eastern Time
(ET).
•
Indoor temperature in degrees Fahrenheit (°F) or Celsius (°C) (User selectable)
•
Calendar display
•
Indoor temperature
SPECIFICATIONS:
Indoor Temperature measuring range : -4°F to +140°F (-20°C to +60°C)
Indoor Temperature checking interval : every 15 seconds
POWER SUPPLY:
Analog Clock : 1 x AA, IEC LR6, 1.5V battery
LCD Thermo-Hygro Weather Monitor : 2 x AAA, IEC LR3, 1.5V battery
Battery life cycle : approximately 12 months (Alkaline batteries recommended)
DIMENSIONS:
Analog Clock (ø x W)
:
& DATE LCD
Instruction manual
13.0" x 1.7" (330 x 42.5 mm)
1
Advertisement

Related Manuals for La Crosse Technology WT-3132LCD


Summary of Contents for La Crosse Technology WT-3132LCD
- Page 1 RADIO CONTROLLED ANALOG CLOCK WITH TEMPERATURE & DATE LCD Instruction manual INTRODUCTION: Congratulations on purchasing this Analog Clock featuring WWVB radio controlled time with daylight saving time function, indoor temperature and calendar display. The operation of this product is simple and straightforward but please read this instruction manual to ensure that you have the full benefits of all its features.
- Page 2 The Digital Temperature and date LCD SETTING UP OF THE TEMP AND DATE LCD: The temperature LCD uses 2 x AAA, IEC LR3, 1.5V batteries. To install and replace the batteries, please follow the steps below: Battery compartment + key SET key 1.
- Page 3 °F/°C TEMPERATURE UNIT SETTING flashing The default temperature reading is set to °F (Fahrenheit). To select °C (Celsius): The “°F/ °C” will be flashing, use the + key to toggle between “°F” and “°C”. Once the desired temperature unit has been chosen, confirm with the SET to advance to the 12/ 24 hr time format.
- Page 4 Nothing is more precisely measured than time! And nothing keeps track of time more precisely and trouble-free than La Crosse Technology radio controlled clocks. Since the beginning of time, man has been fascinated with the measurement of time and has devised accurate machines to trap and measure time.
-
Page 5: Setup Instructions
MANUAL SET BUTTON will turn off WWVB reception! Daylight Saving Time (DST) ON/OFF Button MANUAL TIME SET BUTTON* *ONLY use in areas with No WWVB reception Eastern Time Pacific Time Mountain Time Central Time SET UP INSTRUCTIONS To set up your clock simply install one fresh AA, LR6 ALKALINE battery. Due to the nature of long-wave radio signals, it is normally not possible to receive a signal during the day so it is best to install the battery late in the evening. - Page 6 0:00, 2:00, 4:00, 6:00 … 20:00 & 22:00. TROUBLESHOOTING The wonderful advantage of owning a La Crosse Technology radio controlled clock is that it is virtually trouble free. If the clock receives a clear signal it will set itself perfectly. If it does not receive a signal...
- Page 7 Daylight Saving Time dates, your La Crosse Technology clock will automatically set itself to the correct time on the newly designated dates. Arizona and Indiana If you live in an area that does not recognize DST you must press the (unmarked) DST button for one second to deactivate your clock’s DST program.
- Page 8 La Crosse Technology, Ltd or La Crosse Technology, Ltd’s authorized service center. La Crosse Technology, Ltd will repair or replace this product, at our option and at no charge as stipulated herein, with new or reconditioned parts or products if found to be defective during the limited warranty period specified above.
- Page 9 This handbook may contain mistakes and printing errors. The information in this handbook is regularly checked and corrections made in the next issue. We accept no liability for technical mistakes or printing errors, or their consequences. All trademarks and patents are acknowledged.
Need help?
Do you have a question about the WT-3132LCD and is the answer not in the manual?
Questions and answers