Advertisement
Quick Links
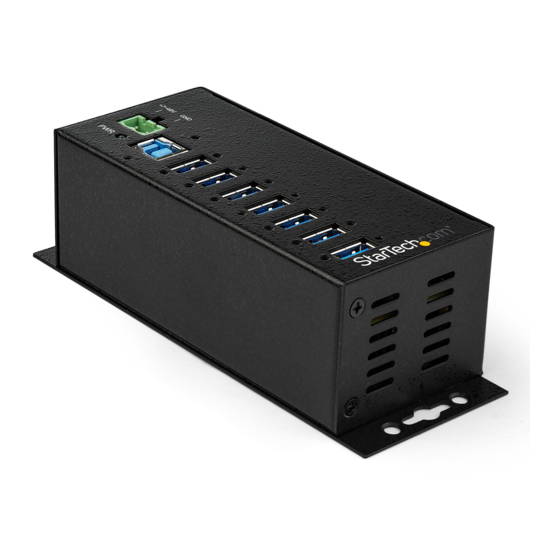
7-Port Industrial USB 3.0 (5 Gbps) Hub | USB 3.1 Gen 1 to 7x USB-A | ESD & Surge Protection
Product Diagram (HB30A7AME)
1
3
4
Component
• Used to connect an external DC Power Source
1
2-Wire Terminal Block
(7~48V DC Input) to the Hub.
• Used to securely lock a USB Device to the
USB-A Port on the Hub.
2
Screw Locks (x 8)
• Screw Lock Dimensions: Center to center 19
mm, thread size 4 - 40.
• Green: Indicates that the Hub is receiving
3
Power LED
power.
• Used to connect a Host Computer to the Hub.
4
USB-B Host Port
• Screw Lock Dimensions: Center to center 24
mm, thread size 4 - 40.
• Used to connect USB Devices ( x 7) to the Hub.
• Used to charge connected USB-A Devices.
5
USB-A Ports (x 7)
• USB-A Ports support surge and 15KV ESD
(Electrostatic Discharge) Protection.
To view manuals, FAQs, videos, drivers, downloads, technical drawings, and more, visit www.startech.com/support.
2
5
Function
Requirements
For the latest requirements, please visit www.startech.com/HB30A7AME.
• Phillips Head Screwdriver
• Writing Utensil
• Level
• Mounting Screws (x 2)
Installation
Notes: It is recommended to use an external DC Power Source (+7 - 48V DC)
connected to the 2-Wire Terminal Block to ensure sufficient power/current is
delivered to each USB-A Port on the Hub.
Powering the Hub Using the Universal Power Adapter
1. Connect the Universal Power Adapter to the Terminal Block and to a AC
Electrical Outlet.
2. Connect a USB-B to USB Cable (the end will depend on USB Port you are
connecting to) to the USB-B Host Port and to a USB port on the Host Computer.
3. The Host Computer's Operating System should detect the Hub and automatically
install it.
4. Connect your USB Devices to the USB-A Ports (x 7) on the Hub.
Powering the Hub Using the 2-Wire Terminal Block
1. Remove the Terminal Block Connector Housing from the Terminal Block on the
Hub.
2. Using a small screwdriver (Phillips or Flat Head), loosen the screws on the Terminal
Block Connectors.
3. Connect the Power and Ground Wires from your DC Power Source (+7 - 48V DC)
to the proper Terminal Block Connectors, the terminals are marked on the Hub's
Casing.
Quick-Start Guide
Manual Revision: July 3, 2019 1:35 PM
Advertisement

Summary of Contents for StarTech.com HB30A7AME
- Page 1 Terminal Block Connectors, the terminals are marked on the Hub’s USB-A Ports (x 7) • USB-A Ports support surge and 15KV ESD Casing. (Electrostatic Discharge) Protection. To view manuals, FAQs, videos, drivers, downloads, technical drawings, and more, visit www.startech.com/support. Manual Revision: July 3, 2019 1:35 PM...
- Page 2 London, Ontario Parkwy Gowerton Rd, and do not represent an endorsement of a product or service by StarTech.com, or an endorsement of the product(s) to which NL: startech.com/nl Brackmills this manual applies by the third-party company in question. StarTech.com hereby acknowledges that all trademarks, registered...


Need help?
Do you have a question about the HB30A7AME and is the answer not in the manual?
Questions and answers