
Related Manuals for Makita XPS02


Summary of Contents for Makita XPS02
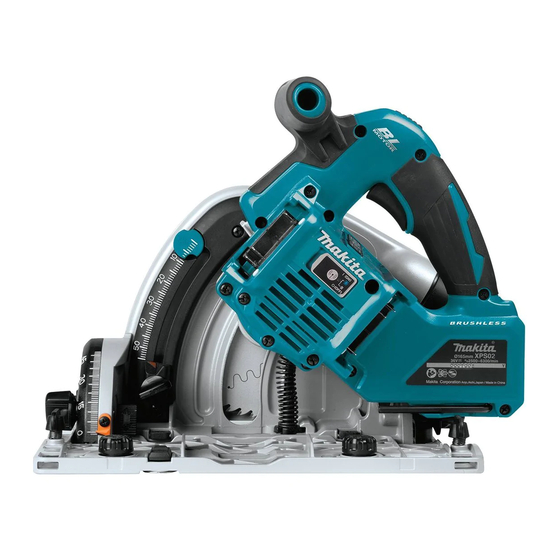
- Page 1 INSTRUCTION MANUAL MANUAL DE INSTRUCCIONES Cordless Plunge Cut Saw Sierra de Inmersión Inalámbrica XPS01 XPS02 IMPORTANT: Read Before Using. IMPORTANTE: Lea antes de usar.
-
Page 2: Specifications
ENGLISH (Original instructions) SPECIFICATIONS Model: XPS01 XPS02 Blade diameter 165 mm (6-1/2″) Max. Cutting depth at 0° 56 mm (2-3/16″) at 45° bevel 40 mm (1-9/16″) at 48° bevel 38 mm (1-1/2″) No load speed 2,500 - 6,300 /min Overall length 346 mm (13-5/8″) - Page 3 Prevent unintentional starting. Ensure the Use the power tool, accessories and tool bits switch is in the off-position before connecting etc. in accordance with these instructions, tak- to power source and/or BATTERY pack, pick- ing into account the working conditions and ing up or carrying the tool.
-
Page 4: Circular Saw Safety Warnings
Kickback is the result of saw misuse and/or incorrect Circular saw safety warnings operating procedures or conditions and can be avoided by taking proper precautions as given below. Cutting procedures Maintain a firm grip with both hands on the DANGER: Keep hands away from cutting area saw and position your arms to resist kickback and the blade. - Page 5 Always use the appropriate is marked on the tool or specified in the man- designated Makita saw blade for the materials ual. Use of an incorrectly sized blade may affect being cut. Use of incorrect blade may result in the proper guarding of the blade or guard opera- kickback and personal injury.
- Page 6 Use of non-genuine Makita batteries, or batteries that volts have been altered, may result in the battery bursting causing fires, personal injury and damage. It will also void the Makita warranty for the Makita tool and direct current charger. Tips for maintaining maximum...
-
Page 7: Functional Description
If not, 25. Do not insert any devices other than Makita it may accidentally fall out of the tool, causing injury to wireless unit into the slot on the tool. -
Page 8: Overload Protection
Tool / battery protection system Battery indicator status Remaining battery capacity The tool is equipped with a tool/battery protection sys- Blinking tem. This system automatically cuts off power to the 50% to 100% motor to extend tool and battery life. The tool will auto- matically stop during operation if the tool or battery is placed under one of the following conditions. -
Page 9: Adjusting Depth Of Cut
NOTE: Depending on the conditions of use and the ambient temperature, the indication may differ slightly from the actual capacity. Automatic speed change function NOTE: Automatic speed change function is only available when the speed adjusting dial is in 5. This tool has "high speed mode"... -
Page 10: Bevel Cutting
48°-bevel cutting Bevel cutting To perform 48°-bevel cutting, loosen the clamping Loosen the clamping screws. Set for the desired angle by screws and fully tilt the lever toward the direction of the tilting accordingly, then tighten the clamping screws securely. arrow in the figure. -
Page 11: Switch Action
In personal injury. Return tool to a Makita service center general, higher speeds will allow you to cut workpieces for proper repairs BEFORE further usage. - Page 12 Be sure the circular saw blade is installed with teeth pointing up at the front of the tool. CAUTION: Use only the Makita wrench to install or remove the circular saw blade. To remove the circular saw blade: Depress the lock-off button and lower the handle a little.
-
Page 13: Operation
Connecting a vacuum cleaner Optional accessory When you wish to perform clean cutting operation, connect a Makita vacuum cleaner to your tool. Connect a hose of the vacuum cleaner to the dust nozzle using the front cuff 24. ► 1. Hex bolt 2. Outer flange 3. Inner flange ►... -
Page 14: Guide Rail
Hold the tool firmly. The tool is provided with both a front grip and rear handle. Use both to best grasp the tool. If both hands are holding saw, they cannot be cut by the circular saw blade. Set the base on the workpiece to be cut without the circular saw blade making any contact. -
Page 15: Wireless Activation
Use of the clamp ensures firm hold of workpiece on the observe the following instructions. table. WIRELESS ACTIVATION FUNCTION For XPS02 only What you can do with the wireless activation function The wireless activation function enables clean and com- fortable operation. By connecting a supported vacuum cleaner to the tool, you can run the vacuum cleaner ►... - Page 16 Tool registration for the vacuum cleaner NOTE: A Makita vacuum cleaner supporting the wireless activation function is required for the tool registration. NOTE: Finish installing the wireless unit to the tool ►...
- Page 17 NOTE: The wireless activation lamps finish blinking in green after 20 seconds elapsed. Finish pressing the wireless activation button on the tool while the wireless activation lamp on the vacuum cleaner is blinking. If the wireless activation lamp does not blink in green, push the wireless activation button briefly and hold it down again.
- Page 18 Pull the switch trigger of the tool. Check if the vac- uum cleaner runs while the switch trigger is being pulled. To stop the wireless activation of the vacuum cleaner, push the wireless activation button on the tool. NOTE: The wireless activation lamp on the tool will stop blink- ing in blue when there is no operation for 2 hours.
- Page 19 If the cancellation is performed successfully, the wire- Cancelling tool registration for the less activation lamps will light up in red for 2 seconds vacuum cleaner and start blinking in blue. NOTE: The wireless activation lamps finish blinking Perform the following procedure when cancelling the in red after 20 seconds elapsed.
- Page 20 Before asking for repairs, conduct your own inspection first. If you find a problem that is not explained in the manual, do not attempt to dismantle the tool. Instead, ask Makita Authorized Service Centers, always using Makita replace- ment parts for repairs.
-
Page 21: Maintenance
State of abnormality Probable cause (malfunction) Remedy The vacuum cleaner does not run The wireless unit is not installed into Install the wireless unit correctly. along with the switch operation of the tool. the tool. The wireless unit is improperly installed into the tool. -
Page 22: Optional Accessories
To adjust the 45°-cut accuracy, make the base 45° to the inspection shows the trouble is caused by defective blade using a triangular rule by turning the adjusting bolt. workmanship or material, Makita will repair (or at our option, replace) without charge. This Warranty does not apply where: •... -
Page 23: Especificaciones
ESPAÑOL (Instrucciones originales) ESPECIFICACIONES Modelo: XPS01 XPS02 Diámetro del disco 165 mm (6-1/2″) Profundidad de corte máxima a 0° 56 mm (2-3/16″) bisel a 45° 40 mm (1-9/16″) bisel a 48° 38 mm (1-1/2″) Velocidad sin carga 2 500 r/min - 6 300 r/min Longitud total 346 mm (13-5/8″) - Page 24 Si no es posible evitar usar una herramienta Utilice siempre gafas protectoras para prote- eléctrica en condiciones húmedas, utilice un ger sus ojos de lesiones al usar herramientas alimentador protegido con interruptor de cir- eléctricas. Las gafas deben cumplir con la cuito de falla a tierra (ICFT).
- Page 25 Uso y cuidado de la herramienta a batería Ajuste la profundidad de corte al grosor de la pieza de trabajo. Debe verse menos de un diente Recargue sólo con el cargador especificado completo por debajo de la pieza de trabajo. por el fabricante.
- Page 26 El retroceso brusco es el resultado de un mal uso de No utilice discos dañados o desafilados. Las la sierra y/o de condiciones o procedimientos de uso discos colocados incorrectamente o desafilados incorrectos y se puede evitar tomando las precauciones producen un corte más angosto y causan una fric- que se indican a continuación.
- Page 27 Algunos materiales contienen sustancias siempre el disco de la sierra apropiado de químicas que pueden ser tóxicas. Tome pre- Makita designado para los materiales que se cauciones para evitar la inhalación de polvo o van a cortar. El uso de un disco incorrecto que éste tenga contacto con la piel.
- Page 28 Asimismo, esto inva- seguridad para el cartucho de lidará la garantía de Makita para la herramienta y el batería cargador Makita. Antes de utilizar el cartucho de batería, lea Consejos para alargar al máximo...
-
Page 29: Descripción Del Funcionamiento
Introduzca siempre com- 25. No inserte ningún otro dispositivo que no sea pletamente el cartucho de batería hasta que la unidad inalámbrica de Makita en la ranura de el indicador rojo no pueda verse. Si no, podría la herramienta. accidentalmente salirse de la herramienta y caer al 26. -
Page 30: Protección Contra Sobrecarga
Sistema de protección para la Estado del indicador de batería Capacidad restante de la herramienta/batería batería Encendido Apagado Parpadeando La herramienta está equipada con un sistema de pro- 50% a 100% tección para la herramienta/batería. Este sistema corta en forma automática el suministro de energía al motor para prolongar la vida útil de la herramienta y la batería. -
Page 31: Ajuste De La Profundidad De Corte
Afloje el tornillo de fijación en la guía de profundidad y NOTA: Dependiendo de las condiciones de uso y mueva el tope del límite inferior del disco a la profundidad la temperatura ambiente, la indicación podrá diferir deseada en la placa de la escala. En la profundidad de ligeramente de la capacidad real. -
Page 32: Corte En Bisel
Para conseguir una profundidad de corte de 2 mm a 3 mm, oprima el botón de parada rápida en dirección al disco de la sierra. Esto es útil para evitar que la pieza de trabajo se astille. Para liberar la profundidad de corte de esta posición y aplicar una profundidad de corte libre, simplemente jale el botón de regreso. -
Page 33: Accionamiento Del Interruptor
El uso de un interruptor que requiere reparación puede ocasionar una operación accidental y lesiones personales graves. Lleve la herramienta a un centro de servicio Makita para las reparaciones apropiadas ANTES de continuar su uso. El botón de desbloqueo es suministrado para evitar jalar accidentalmente el gatillo interruptor. -
Page 34: Montaje
PRECAUCIÓN: Utilice solamente la llave Las herramientas equipadas con funciones electrónicas Makita para instalar o extraer el disco de la sierra son fáciles de operar gracias a las características a circular. continuación. Extracción del disco de la sierra circular: Protector contra sobrecarga Oprima el botón de desbloqueo y baje un poco... -
Page 35: Operación
Conexión de una aspiradora Accesorio opcional Cuando desee realizar una operación de corte limpia, conecte una aspiradora Makita a su herramienta. Conecte la manguera de la aspiradora a la boquilla ► 1. Bloqueo del eje 2. Llave hexagonal 3. Apretar para polvo usando los manguitos delanteros 24. - Page 36 Corte de secciones (corte habitual) Carril guía Accesorio opcional Coloque la herramienta en el extremo trasero del carril guía. Gire los dos tornillos de ajuste sobre la base de la herramienta de tal forma que ésta se deslice suave y libremente. Sujete tanto la empuñadura delantera como el mango trasero de la herramienta firmemente.
- Page 37 Base inferior (regla guía) Corte de inmersión (recorte) Accesorio opcional ADVERTENCIA: Para evitar un retroceso Mediante el uso de la base inferior como regla guía, usted brusco, asegúrese de seguir las instrucciones a puede realizar cortes rectos con extrema precisión. Afloje continuación.
- Page 38 INALÁMBRICA completamente cerrada. Abra la tapa en la herramienta tal como se mues- Para el modelo XPS02 únicamente tra en la ilustración. Lo que puede hacer con la función de activación inalámbrica La función de activación inalámbrica permite una ope-...
- Page 39 Registro de la herramienta para la aspiradora NOTA: Para el registro de la herramienta, se requiere una aspiradora Makita compatible con la función de activación inalámbrica. NOTA: Termine de instalar la unidad inalámbrica en la herramienta antes de comenzar con el registro de la herramienta.
- Page 40 Oprima el botón de activación inalámbrica en la NOTA: Las luces indicadoras de activación inalám- herramienta durante un lapso breve. La luz indicadora brica terminarán parpadeando en verde después de de activación inalámbrica parpadeará en azul. un lapso de 20 segundos. Oprima el botón de acti- vación inalámbrica en la herramienta mientras la luz indicadora de activación inalámbrica en la aspiradora esté...
- Page 41 Descripción del estado de la luz indicadora de activación inalámbrica ► 1. Luz indicadora de activación inalámbrica La luz indicadora de activación inalámbrica muestra el estado de la función de activación inalámbrica. Consulte la tabla a continuación para ver qué significa el estado de la luz indicadora. Estado Luz indicadora de activación inalámbrica Descripción...
- Page 42 Si la cancelación se realiza exitosamente, las luces Cancelación del registro de la indicadoras de activación inalámbrica se encenderán herramienta para la aspiradora en rojo durante 2 segundos y comenzarán a parpadear en azul. Realice el siguiente procedimiento para cancelar el NOTA: Las luces indicadoras de activación inalám- registro de la herramienta para la aspiradora.
- Page 43 Antes de solicitar alguna reparación, primero realice una inspección por su cuenta. Si detecta algún problema que no esté explicado en el manual, no intente desensamblar la herramienta. En vez de esto, solicite la reparación a un centro de servicio autorizado de Makita, usando siempre piezas de repuesto Makita. Estado de la anomalía Causa probable (avería)
-
Page 44: Mantenimiento
Estado de la anomalía Causa probable (avería) Remedio La aspiradora no funciona junto con La unidad inalámbrica no está instalada Instale la unidad inalámbrica correctamente. el interruptor de la herramienta. en la herramienta. La unidad inalámbrica está instalada incorrectamente en la herramienta. La terminal de la unidad inalámbrica y/o Retire con cuidado el polvo y la suciedad en la la ranura está... -
Page 45: Accesorios Opcionales
Makita. Si la inspección muestra que el problema ha sido a causa de un defecto de mano de obra o material, Makita hará la reparación (o a su discreción, el reemplazo) sin ningún cargo. Esta garantía no aplica cuando: •... - Page 46 EN NINGÚN CASO MAKITA SE HARÁ RESPONSABLE DE NINGÚN DAÑO INDIRECTO, INCIDENTAL, O DERIVADO DE LA VENTA O USO DEL PRODUCTO. ESTE DESCARGO DE RESPONSABILIDAD APLICA DURANTE Y DESPUÉS DEL PLAZO DE ESTA GARANTÍA. MAKITA RENUNCIA A LA RESPONSABILIDAD POR CUALQUIER GARANTÍA IMPLÍCITA, INCLUYENDO...
- Page 48 Para reducir la exposición a estos productos químicos: trabaje en un área bien ventilada y póngase el equipo de seguridad indicado, tal como las máscaras contra polvo que están especialmente diseñadas para filtrar partículas microscópicas. Makita Corporation 3-11-8, Sumiyoshi-cho, Anjo, Aichi 446-8502 Japan 885610-949...
Need help?
Do you have a question about the XPS02 and is the answer not in the manual?
Questions and answers