Advertisement
Quick Links
Advertisement

Summary of Contents for TP-Link MS100
- Page 1 User Guide Smart Motion Sensor 1910012158 REV1.0.0...
-
Page 2: Table Of Contents
Contents About This Guide ···················································· 1 Introduction ······························································· 2 Appearance ······························································· 3 Set Up Your Motion Sensor ······························· 4 Main Pages ································································· 6 Authentication ·························································· 7... -
Page 3: About This Guide
• Specific product information can be found on the product page at http://www.tp-link.com. • • The latest firmware and management app are available from Download Center at http://www.tp-link.com/support. • A Technical Support Forum is provided for you to discuss our products at http://forum.tp-link.com. -
Page 4: Introduction
Introduction With Motion Sensor connected to your Kasa Smart Home Router, your home can use motion sensing to become even smarter, and that makes your life simpler. You can set your home in motion with Kasa app including: • Smart Lighting Control - Automatically turn smart lights on/off •... -
Page 5: Appearance
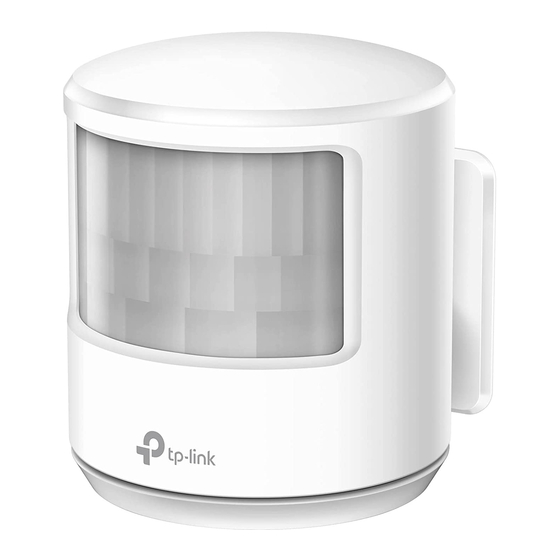
Appearance Motion Sensor has an internal LED that changes color according to its status, a sensor, a battery compartment and a wall mount. See the explanation below: Wall Mount Sensor Orange Power up or fail to join the network. Blue Battery Compartment Sensor event or succeed to join the network. -
Page 6: Set Up Your Motion Sensor
3. Place the sensor go to Google Play or the Apple App Store Open the app. Use your TP-Link ID to log in. Take your sensor to the location you would like or scan the QR code below to download the to monitor. - Page 7 Set Up Your Motion Sensor Follow the steps below to set up your Motion Sensor via Kasa for Mobile app. 4. Connect to Smart Home Router 5. Install the sensor if needed Remove the screw securing the wall mount It is all set up. You can install the sensor to the and slide the cover down.
-
Page 8: Main Pages
Main Pages After you successfully set up your Motion Sensor, you will see the home page of the Kasa app. Here you can view the working status of all devices that you've added to Kasa and manage them. Tap on a sensor to check the current status, time of last motion, the current battery level of your sensor. Click on sensor status page to view your device settings. -
Page 9: Authentication
No part of the specifications may be reproduced in any form or by any means or used to make any derivative such as translation, transformation, or adaptation without permission from TP-Link Technologies Co., Ltd. Copyright © 2017 TP-Link Technologies Co., Ltd. All rights reserved. - Page 10 FCC STATEMENT This equipment has been tested and found to comply with the limits for a Class B digital device, pursuant to part 15 of the FCC Rules. These limits are designed to provide reasonable protection against harmful interference in a residential installation. This equipment generates, uses and can radiate radio frequency energy and, if not installed and used in accordance with the instructions, may cause harmful interference to radio communications.
- Page 11 CE Mark Warning This is a class B product. In a domestic environment, this product may cause radio interference, in which case the user may be required to take adequate measures. RF Exposure Information This device meets the EU requirements (2014/53/EU Article 3.1a) on the limitation of exposure of the general public to electromagnetic fields by way of health protection.
- Page 12 Industry Canada Statement CAN ICES-3 (B)/NMB-3(B) Korea Warning Statements: 당해 무선설비는 운용중 전파혼신 가능성이 있음. NCC Notice & BSMI Notice: 注意! 依據 低功率電波輻射性電機管理辦法 第十二條 經型式認證合格之低功率射頻電機,非經許可,公司、商號或使用者均不得擅自變更頻率、加大功率或變更原設計之特性或功能。 第十四條 低功率射頻電機之使用不得影響飛航安全及干擾合法通行;經發現有干擾現象時,應立即停用,並改善至無干擾時方得繼續使用。前項合法 通信,指依電信規定作業之無線電信。低功率射頻電機需忍受合法通信或工業、科學以及醫療用電波輻射性電機設備之干擾。 安全諮詢及注意事項 • 請使用原裝電源供應器或只能按照本產品注明的電源類型使用本產品。 • 清潔本產品之前請先拔掉電源線。請勿使用液體、噴霧清潔劑或濕布進行清潔。 • 注意防潮,請勿將水或其他液體潑灑到本產品上。 • 插槽與開口供通風使用,以確保本產品的操作可靠並防止過熱,請勿堵塞或覆蓋開口。 • 請勿將本產品置放於靠近熱源的地方。除非有正常的通風,否則不可放在密閉位置中。 • 請不要私自打開機殼,不要嘗試自行維修本產品,請由授權的專業人士進行此項工作。 Продукт...
- Page 13 Safety Information • When product has power button, the power button is one of the ways to shut off the product; when there is no power button, the only way to completely shut off power is to disconnect the product or the power adapter from the power source. •...


Need help?
Do you have a question about the MS100 and is the answer not in the manual?
Questions and answers