Table of Contents
Advertisement
Quick Links
User Manual
IN-5907
HD
/ Wide Dynamic Range 720p CMOS Sensor for adverse lighting conditions
/ Automatic alarm by email and FTP video upload
/ Video recording on MicroSDHC card (up to 32 GB)
/ Easy camera configuration via the integrated WebUI
/ Multi-level user managment and access control
/ Accessible over the internet via preinstalled DDNS address
/ Full smartphone integration (iOS & Android App)
/ Scheduled motion detection via image analysis
/ Easy installation into your LAN/WLAN network
Advertisement
Table of Contents

Subscribe to Our Youtube Channel
Related Manuals for Instar IN-5907


Summary of Contents for Instar IN-5907
- Page 1 User Manual IN-5907 / Wide Dynamic Range 720p CMOS Sensor for adverse lighting conditions / Automatic alarm by email and FTP video upload / Video recording on MicroSDHC card (up to 32 GB) / Easy camera configuration via the integrated WebUI...
- Page 3 Wide-Dynamic Range CMOS Sensor The OmniVision® WDR Sensor raises the bar in security imaging with a single-chip SOC sensor that combines 720p high-definition video with WDR in a 1/3-inch optical format. The sensor is build on a 4.3 micron OmniPixel3-HS™ pixel enabling 720p HD at unparalleled low-light sensitivity and a dynamic range in colour of 115dB - compared to the 60 dB of a regular VGA IP camera.
-
Page 4: Table Of Contents
INSTAR INSTAR INSTAR HD IP Camera – Quick Installation INSTAR HD IP Camera – Quick Installation IN-5907 HD and IN-5907 HD PoE Th e following topics will be shortly explained in this Quick Th e following topics will be shortly explained in this Quick... - Page 5 More information (German/English) can be found www.instar.com www.instar.com Th is manual is for the IP camera models IN-5907 HD and the IN- 5907 HD PoE. Unless otherwise noted, operations are identical for both models. All photos and illustrations show the model IN-5907...
-
Page 6: Safety Warnings
Never install the device near explosive or fl ammable substances. » Don’t use the camera for any other purpose that it isn’t made for. INSTAR does not give any warranty if you use any third party fi rmware or WebUI. » CE-Conformity Th is device suites the basic requirements of the European regulations for electromagnetic compliance (2004/108/EC) and the low voltage regulations (2006/95/EC ). -
Page 7: Product Features
» WLAN compatible - 2.4 GHz Wi-Fi 802.11b/g/n (not for IN-5907 HD PoE) » » Remote access your live video with your smartphone (iOS & Android) » » Only the model IN-5907 HD PoE can be used via 802.3af Power-over- Ethernet! Software » » h.264 video encoding for reduced bandwidth requirements »... -
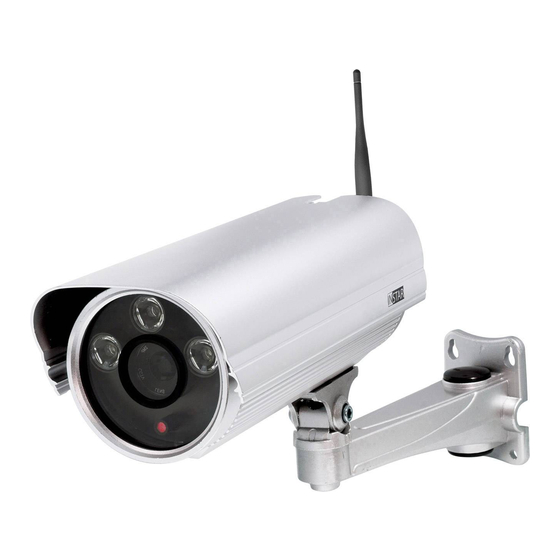
Page 8: Installation
Wall Mount Aluminium camera wall mount Network Port RJ45 LAN-port for the provided CAT5e LAN cable (For the power supply according to IEEE802.3af only in case of the IN-5907 HD PoE!) Audio Out Earphone / active speaker port Audio In... - Page 9 LAN port of your LAN router. For a di- rect connection to your Windows PC or Mac please refer to our FAQ section on www.faq.instar.de. But we recom- mend to connect the camera to your network router for the initial installation.
- Page 10 Ethernet cable. Plug the second IN-LAN unit into an outlet close to your INSTAR camera and connect the camera to the IN-LAN unit into an outlet close to your INSTAR camera and connect the camera to the IN-LAN adapter using the camera’s Ethernet cable.
-
Page 11: Start Up
Please start the INSTAR Camera Tool. Please start the INSTAR Camera Tool. Th e camera tool will automatically fi nd all INSTAR IP cameras in your network Th e camera tool will automatically fi nd all INSTAR IP cameras in your network and will show their IP address. - Page 12 Troubleshooting: Troubleshooting: In case the INSTAR Camera Tool doesn’t fi nd your INSTAR IP camera please make In case the INSTAR Camera Tool doesn’t fi nd your INSTAR IP camera please make sure that both status LEDs on the LAN connector are active - the orange LED should be...
- Page 13 IP camera. You can set the camera IP by using the INSTAR Camera Tool. As for Gateway and DNS can set the camera IP by using the INSTAR Camera Tool. As for Gateway and DNS server please fi ll in the computer IP.
- Page 14 When accessing the webUI for the fi rst time aft er installation, please allow the installa- When accessing the webUI for the fi rst time aft er installation, please allow the installa- tion of the ActiveX control element (only Internet Explorer): tion of the ActiveX control element (only Internet Explorer): For alternative browsers (Firefox, Chrome, Safari,...) please install the QuickTime Pl- For alternative browsers (Firefox, Chrome, Safari,...) please install the QuickTime Pl-...
-
Page 15: The Web User Interface Software
You can download regular soft ware updates for your cam- You can download regular soft ware updates for your cam- era from www.download.instar.de. Please use the browse era from www.download.instar.de. Please use the browse button to set the fi le path once you downloaded the up- button to set the fi le path once you downloaded the up- date and click “Submit”... -
Page 16: Network
- in case you didn’t assign a static IP address to your camera yet (s. 5.2.1). You might have to use the INSTAR Camera Tool again to rediscover your yet (s. 5.2.1). You might have to use the INSTAR Camera Tool again to rediscover your camera (s. -
Page 17: Ddns
5.2.3 NETWORK/DDNS 5.2.3 NETWORK/DDNS Your camera comes with a personal DDNS address - Your camera comes with a personal DDNS address - e.g. http://xxxx77.ddns-instar.de. Everything you need e.g. http://xxxx77.ddns-instar.de http://xxxx77.ddns-instar.de. Everything you need for a remote access to your camera is a port forward- for a remote access to your camera is a port forward- ing rule (s. -
Page 18: Point-To-Point (P2P)
5.2.5 NETWORK/Point-to-Point (P2P) 5.2.5 NETWORK/Point-to-Point (P2P) Activate the p2p function to access your camera from Activate the p2p function to access your camera from the internet without the need for a port forwarding the internet without the need for a port forwarding in your router (s. -
Page 19: System
5.3 SYSTEM 5.3 SYSTEM 5.3 SYSTEM 5.3 SYSTEM 5.3.1 SYSTEM/INFO 5.3.1 SYSTEM/INFO Th e Device Info menu gives you an overview of several Th e Device Info menu gives you an overview of several important camera parameters - like your soft ware ver- important camera parameters - like your soft ware ver- sion and connection status. -
Page 20: Onvif
Th e ONVIF specifi cation will ensure interoperability between products regardless of manu- interoperability between products regardless of manu- facturer, allowing you to integrate your INSTAR cam- facturer, allowing you to integrate your INSTAR cam- era as a generic ONVIF camera into existing security era as a generic ONVIF camera into existing security systems. -
Page 21: Image
Th e MJPEG mode of the camera allows you to access the videostream with your browser Th e MJPEG mode of the camera allows you to access the videostream with your browser without the need of additional browser-plugins! You can use the MJPEG mode when without the need of additional browser-plugins! You can use the MJPEG mode when you are accessing the camera from a system that doesn’t allow you to install the ActiveX you are accessing the camera from a system that doesn’t allow you to install the ActiveX... -
Page 22: Actions
IN-Motion 300 - the passive infrared detector es- IN-Motion 300 - the passive infrared detector es- pecially designed for your INSTAR camera. Th e pecially designed for your INSTAR camera. Th e pecially designed for your INSTAR camera. Th e... -
Page 23: Schedule
‘;’ . E.g. simply separate the addresses with a semicolon ‘;’ . E.g. max.mustermann@instar.de;franz.fi ngerhut@instar.de max.mustermann@instar.de;franz.fi ngerhut@instar.de... -
Page 24: Ftp
FTP server can be reached by “./”. Th e separator for the folders is the forward slash. A subfolder (e.g. INSTAR) can be reached by “./INSTAR”. An ending forward slash is not A subfolder (e.g. INSTAR) can be reached by “./INSTAR”. An ending forward slash is not obligatory, but can be used. -
Page 25: Sd Card
5.5.8 ALARM/SD CARD 5.5.8 ALARM/SD CARD Please check the corresponding box and click submit to Please check the corresponding box and click submit to submit to submit either format or unmount your SD card. either format or unmount your SD card. A click on the link above the submit button will lead A click on the link above the submit button will lead you to the SD card directory where all your snapshots... -
Page 26: Help
Here you can set the record path for your videos and snap- Here you can set the record path for your videos and snap- shots. Th e set path is used by all your INSTAR Megapixel shots. Th e set path is used by all your INSTAR Megapixel... -
Page 27: Web Userinterface Update
Th e fi rmware or webUI fi le can be uploaded to your camera via the web userinterface Th e fi rmware or webUI fi le can be uploaded to your camera via the web userinterface (s.5.1.4) or by using the INSTAR camera tool. (s.5.1.4) or by using the INSTAR camera tool. -
Page 28: Reset Your Camera
Menu Bar Video Menu Bar 6 RESET YOUR CAMERA 6 RESET YOUR CAMERA 6 RESET YOUR CAMERA 6 RESET YOUR CAMERA In order to reset your camera (if you have lost your password), please hold the small reset button on the end of the cameras connection cable (see 5 #8) for min. 15 seconds. Please make sure the camera is connected to the power supply and disconnected from the LAN cable. -
Page 29: Lense Adjustment
7 LENSE ADJUSTMENT 7 LENSE ADJUSTMENT 7 LENSE ADJUSTMENT 7 LENSE ADJUSTMENT Th e IN-5907 HDs lense off ers a limited fi eld depth that was adjusted to a fi eld between 1m to 10m. In case the object you... - Page 30 “instar”. Model: Model: Please choose your INSTAR camera model. Please choose your INSTAR camera model. Now please choose “Add Camera” to save the settings and to return to the home screen Now please choose “Add Camera” to save the settings and to return to the home screen (Fig.3).
-
Page 31: Windows Software
Th e Soft ware can record the live stream of any Webcam, TV Cards, Video-Recording Cards (DVR), INSTAR IP Camera or other of any Webcam, TV Cards, Video-Recording Cards (DVR), INSTAR IP Camera or other devices with up to 30 fps. - Page 32 IP Camera to start the Camera Tool. Click on search to discover all IP Camera to start the Camera Tool. Click on search to discover all INSTAR cameras inside your local network and right-click the cameras INSTAR cameras inside your local network and right-click the cameras to assign it to a channel.
-
Page 33: Rtsp Streaming
Access via internet: Please use your DDNS address to remote access your cameras RTSP stream: Please use your DDNS address to remote access your cameras RTSP stream: rtsp://<user>:<password>@xxx.ddns-instar.de:<RTSP Port>/11 rtsp://<user>:<password>@xxx.ddns-instar.de:<RTSP Port>/11 rtsp://<user>:<password>@xxx.ddns-instar.de:<RTSP Port>/11 xxx = please check your personal DDNS address under network/DDNS (s. 5.2.3) xxx = please check your personal DDNS address under network/DDNS (s. -
Page 34: Technical Data
11 TECHNICAL DATA 11 TECHNICAL DATA 11 TECHNICAL DATA 11 TECHNICAL DATA Image Sensor Sensor ”Megapixel WDR CMOS Resolution max. 1280x720 Pixel (1.0 Megapixel) Lense f = 8 mm; F/1.2 (IR Lense) Angle of View 45 ° diagonal Min. Illumination 0.5 Lux @ F/1.2 Video Properties Video Encoding... -
Page 35: Warranty & Disposal
Warranty Warranty INSTAR off ers a 2-year warranty on its products. During this period you can send in INSTAR off ers a 2-year warranty on its products. During this period you can send in your camera for a free repair. Th is excludes cameras installed with custom-made or 3rd your camera for a free repair. -
Page 36: Faq Questions & Answers
13 FAQ 13 FAQ 13 FAQ 13 FAQ Questions & Answers Questions & Answers 1) Th e video doesn’t start in Internet Explorer? 1) Th e video doesn’t start in Internet Explorer? Please make sure that you installed the Active Control Element (s. page 10). You can Please make sure that you installed the Active Control Element (s. -
Page 37: Available Accessories
It can take up to 12 hours before you can reach your camera via the ddns-instar address - usually it takes about 30 minutes. Please note that you fi rst have ddns-instar address - usually it takes about 30 minutes. Please note that you fi rst have to set up a port forwarding rule in your router (s. - Page 38 PERSONAL NOTES PERSONAL NOTES...
Need help?
Do you have a question about the IN-5907 and is the answer not in the manual?
Questions and answers