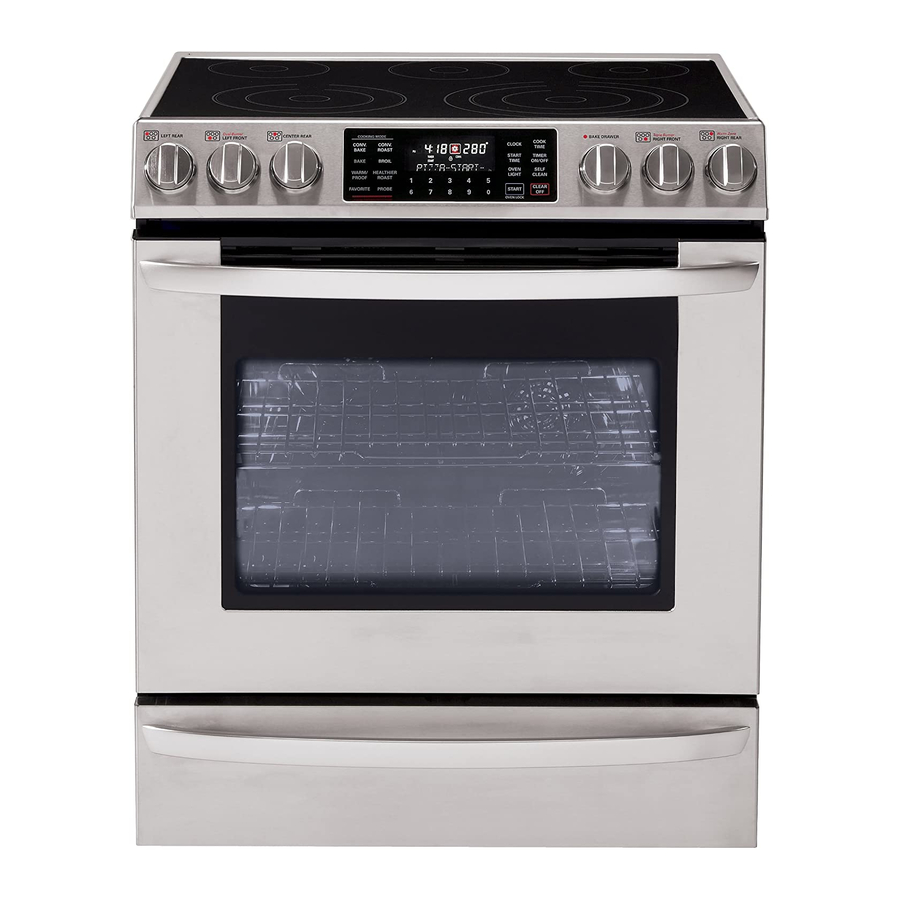
LG LSE3092ST User Manual
Extra-large capacity slide-in electric range with dual true convection system
Hide thumbs
Also See for LSE3092ST:
- Owner's manual (92 pages) ,
- Service manual (85 pages) ,
- Specifications (2 pages)
Table of Contents
Advertisement
ELECTRIC RANGE
operating and keep it handy
for reference at all times.
LSE3092ST
Printed in Mexico
P/No. MFL62114702
USER'S GUIDE
Please read this guide
thoroughly before
Models
To contact LG Electronics, 24 hours a day,
7 days a week:
1-800-243-0000 (USA)
Or visit us on the Web at: us.lge.com (USA)
Advertisement
Table of Contents

Related Manuals for LG LSE3092ST


Summary of Contents for LG LSE3092ST
- Page 1 Models LSE3092ST Printed in Mexico P/No. MFL62114702 To contact LG Electronics, 24 hours a day, 7 days a week: 1-800-243-0000 (USA) Or visit us on the Web at: us.lge.com (USA)
-
Page 2: Table Of Contents
WARRANTY Warranty for Customers in the U.S.A ...50 THANK YOU! Congratulations on your purchase and welcome to the LG family. Your new LG Electric range combines precision cooking features with simple operation and stylish design. Follow the operating and care... -
Page 3: Important Safety Information
I M P O RTA N T S A F E T Y I N F O R M AT I O N READ ALL INSTRUCTIONS BEFORE USE Read and follow all instructions before using your oven to prevent the risk of fire, electric shock, personal injury, or damage when using the range. - Page 4 I M P O RTA N T S A F E T Y I N F O R M AT I O N READ ALL INSTRUCTIONS BEFORE USE SAFETY PRECAUTIONS • DO NOT TOUCH HEATING ELEMENTS OR INTERIOR SURFACES OF OVEN. Heating elements may be hot even though they are dark in color.
-
Page 5: Electrical Safety
I M P O RTA N T S A F E T Y I N F O R M AT I O N READ ALL INSTRUCTIONS BEFORE USE ELECTRICAL SAFETY • Protective Liners. Do not use aluminum foil or any other material to line the oven bottoms. Improper installation of these liners may result in a risk of electric shock or fire. -
Page 6: Surface Cooking Units
I M P O RTA N T S A F E T Y I N F O R M AT I O N READ ALL INSTRUCTIONS BEFORE USE SURFACE COOKING UNITS • Use Proper Pan Sizes. This appliance is equipped with one or more surface units of different size. -
Page 7: Child Safety
I M P O RTA N T S A F E T Y I N F O R M AT I O N READ ALL INSTRUCTIONS BEFORE USE CHILD SAFETY WARNING • Children should be kept away from the oven. •... - Page 8 I M P O RTA N T S A F E T Y I N F O R M AT I O N READ ALL INSTRUCTIONS BEFORE USE GLASS/CERAMIC COOKING SURFACES • DO NOT place aluminum foil or plastic items such as salt and pepper shakers, spoon holders, or plastic wrappings or any other material on the range when it is in use.
-
Page 9: Safety When Cleaning
I M P O RTA N T S A F E T Y I N F O R M AT I O N READ ALL INSTRUCTIONS BEFORE USE SAFETY WHEN CLEANING • Open window or turn on a ventilation fan or hood before self cleaning. -
Page 10: Surface Controls Cooking
S U R FA C E C O N T RO L S C O O K I N G LOCATIONS OF SURFACE ELEMENTS AND CONTROLS SURFACE COOKING AREA LOCATOR : Identify which element the knob controls. ELEMENT ON/OFF INDICATOR LIGHT : Shows whether the surface element is turned on/off or hot. -
Page 11: Setting Surface Controls
S U R FA C E C O N T RO L S C O O K I N G SETTING SURFACE CONTROLS Use to operate the surface elements. The control knobs can be set anywhere between HI and LO. Place pan on surface element. -
Page 12: Recommended Surface Cooking Setting
S U R FA C E C O N T RO L S C O O K I N G USING THE ELEMENT To turn on a TRIPLE surface unit: (Right Front) There is one triple element located in the right front position. -
Page 13: Tips To Protect The Glass/Ceramic Cooktop Surface
S U R FA C E C O N T RO L S C O O K I N G TIPS TO PROTECT THE GLASS/CERAMIC COOKTOP SURFACE Cleaning (See pages 40~42 for more information). Before first use, clean the cooktop. Clean your cooktop daily or after each use. -
Page 14: Cooking Areas
S U R FA C E C O N T RO L S C O O K I N G COOKING AREAS The cooking areas on your range are identified by permanent circles on the glass cooktop surface. For the most efficient cooking, fit the pan size to the element size. -
Page 15: Lower Oven Controls
USING THE LOWER OVEN The purpose of the Lower Oven is to bake foods using the same cooking times and temperatures you would in a standard oven. Foods ideal for baking in the lower oven drawer include pizza, frozen foods, casseroles, biscuit, rolls and many desserts. -
Page 16: Parts And Features
P A RT S A N D F E AT U R E S PARTS AND FEATURES Single element Dual element Ceramic glass Broiler pan & Insert Broil Pan Anti-tip bracket Model and serial number plate Dual Purpose Roast Rack Heavy Rack Insert Broil Pan Broiler Pan... -
Page 17: Control Panel Features
CONTROL PANEL FEATURES READ THE INSTRUCTIONS CAREFULLY BEFORE USING THE OVEN. For satisfactory use of your oven, become familiar with the various features and functions of the oven as described below. Detailed instructions for each feature and function are listed in this Owner's Manual. BAKE : Use to select the Bake function. -
Page 18: Operating Instructions
O P E R AT I N G I N S T R U C T I O N S CLOCK How to set the Clock The clock must be set to the correct time of day for the automatic oven timing functions to work properly. The time of day cannot be changed during a timed baking or Self Clean cycle. -
Page 19: Timer On/Off
TIMER ON/OFF The TIMER ON/OFF serves as an extra timer in the kitchen that will beep when the set time has run out. It does not start or stop cooking. The TIMER ON/OFF feature can be used during any of the other oven control functions. To set the Timer (example for 5 minutes): Touch TIMER ON/OFF twice. -
Page 20: Special Features Of Your Oven Control
O P E R AT I N G I N S T R U C T I O N S SPECIAL FEATURES OF YOUR OVEN CONTROL Your new touch pad control has additional features that you may choose to use. The following pages describe these features and how you may activate them. - Page 21 SPECIAL FEATURES OF YOUR OVEN CONTROL How to select language Your oven control is set to display in English but you may change this to display in Spanish or French. Touch and hold the WARM/PROOF pad for 3 seconds. “AUTO” will appear in the display.
-
Page 22: Before Using Oven Racks
O P E R AT I N G I N S T R U C T I O N S BEFORE USING OVEN RACKS The upper oven has four racks. Two heavy racks, one telescopic rack and one split rack. The heavy duty rack and split rack have turned up back edge to prevent the rack from complete coming out when sliding back and forth. -
Page 23: Telescopic Rack
TELESCOPIC RACK The fully extendable Telescopic Rack makes food preparation easier, especially when preparing heavier dishes. The Telescopic Rack has 2 glide tracks that allow you to extend the food out the oven with touching the sides of the oven walls. Closed and Engaged Position A. -
Page 24: Cooking Mode
O P E R AT I N G I N S T R U C T I O N S BAKE Baking is cooking with just lower element except during preheat. Bake can be used to prepare foods like pastries, bread, casseroles and roast meats. The oven can be programmed to bake at any temperature from 170°F (77°C) to 550°F (288°C). -
Page 25: Baking Layer Cakes
BAKING LAYER CAKES Baking results will be better if baking pans are centered in the oven as much as possible. If baking with more than one pan, place the pans so each has at least 1” to 1 ” of air space around it. If cooking on multiple racks, place the oven racks in positions B and D (for 2 racks). -
Page 26: Broil
O P E R AT I N G I N S T R U C T I O N S BROIL Broil uses an intense heat radiated from the upper heating element. The Broil function works best when broiling thing tender cuts of meat (1” or less), poultry or fish. IMPORTANT NOTE: •... -
Page 27: Recommended Broiling Guide
RECOMMENDED BROILING GUIDE The size, weight, thickness, starting temperature, and your preference of doneness will affect broiling times. This guide is based on meats at refrigerator temperature. For best results when broiling, use a pan designed for broiling (refer to the Fig.1) Broiling Chart Quantity and/ or Shelf... -
Page 28: Dual Convection Bake
O P E R AT I N G I N S T R U C T I O N S DUAL CONVECTION BAKE Dual Convection baking uses two fans to circulate the oven's heat evenly and continuously within the oven. Improved heat distribution allows for even cooking and excellent results using multiple racks at the time. -
Page 29: Dual Convection Bake
DUAL CONVECTION BAKE NOTE: • Reduce standard recipe temperature by 25°F for Convection Bake. Temperatures have been adjusted in this chart. oven rack cooking may slightly increase cook times for some foods, but the overall result is time saved. Convection Baking Chart Oven Food Temperature... -
Page 30: Convection Roast
O P E R AT I N G I N S T R U C T I O N S CONVECTION ROAST The CONV Roast feature is designed to give optimum roasting performance. The Convection Roast feature combines a cooking with the convection fan to roast meats and poultry. The heated air circulates around the food from all sides, sealing in juices and flavors. -
Page 31: Timed Cook
TIMED COOK This feature is available only for BAKE, CONVECTION BAKE, CONVECTION ROAST and FAVORITE mode. The oven will turn on immediately and cook for a selected length of time. At the end of the cooking time, the oven will turn off automatically. To set the oven to begin cooking immediately and shut off automatically: (example below to bake at 300°F for 30... -
Page 32: Delayed Timed Cook
O P E R AT I N G I N S T R U C T I O N S DELAYED TIMED COOK This feature is available only for BAKE, CONVECTION BAKE and CONVECTION ROAST mode. The automatic timer of the Delayed Timed Cook will turn the oven ON and OFF at the time you select in advance. To set the oven for a Delayed Start . -
Page 33: Warm/Proof
O P E R AT I N G I N S T R U C T I O N S WARM The WARM function will maintain an oven temperature of 170°F. This function should not be used to reheat cold food. The Warm function will keep cooked food warm for serving up to 3 hours after cooking has finished. After 3 hours the WARM function will shut the oven OFF automatically. -
Page 34: Healthier Roast
O P E R AT I N G I N S T R U C T I O N S HEALTHIER ROAST This Healthier Roast function is designed to give cooking results of fat, results lower in fat for roasting meats and poultry. -
Page 35: Meat Probe
MEAT PROBE The meat probe accurately measures the internal temperature of meat, poultry and casseroles. It should not be used during broiling, Self Clean, warming or proofing. Always unplug and remove the meat probe from the oven when removing food. Before using, insert the probe into the center of the thickest part of meat or into the inner thigh or breast of poultry, away from fat or bone. -
Page 36: The Favorite
O P E R AT I N G I N S T R U C T I O N S MEAT PROBE (cont') CAUTION • Always use an oven mitt to remove temperature probe. Do NOT touch broil element. - Failure to do so can result in severe personal injury. -
Page 37: Activate The Lock Out Feature
OVEN LOCKOUT FEATURE The START pad controls the Oven Lockout feature. The Oven Lockout feature automatically, locks the oven door prevents most oven controls from being turned ON. It does not disable the clock, timer or the interior oven light. Activate the lock out feature: Touch and hold START pad for 3 seconds. -
Page 38: Self Clean
O P E R AT I N G I N S T R U C T I O N S SELF CLEAN The self clean cycle uses above normal cooking temperatures to clean the oven cavity. You may see some smoke and smell an odor the first few times the oven is cleaned. - Page 39 SELF CLEAN (cont') The SELF CLEAN pad is used to start a Self Clean cycle. When used with START TIME pad, a delayed Self Clean cycle may also be programmed. The Self- Clean function has cycle times of 2, 3, or 4 hours. To start an immediate Self Clean cycle and shut off automatically Be sure the clock is set with the...
-
Page 40: Self Clean
O P E R AT I N G I N S T R U C T I O N S SELF CLEAN (cont') If it becomes necessary to stop or interrupt a selfcleaning cycle due to excessive smoke or fire in the oven: Touch CLEAR/OFF. -
Page 41: Maintenance
CARE & CLEANING Changing the Oven Light The oven light is a standard 40-watt appliance bulb. It will come on when the oven door is open. When the oven door is closed, press Oven LIGHT to turn it on or off. To replace: •... -
Page 42: Cleaning The Glass/Ceramic Cooktop
M A I N T E N A N C E CARE & CLEANING Oven Racks Remove the oven racks before operating the selfclean cycle. Leaving the racks in place could cause discoloration, and, if food is spilled into the tracks, could causes the racks to become stuck. - Page 43 CLEANING THE GLASS/CERAMIC COOKTOP Burned-On Residue To clean the glass/ceramic cooktop Step. 1 First remove any burnt-on deposits or spilled food from your glass/ceramic cooking surface with a suitable metal razor scraper (similar to scraping paint off of your windowpanes in your home - it will not damage the decorated cooking surface).
-
Page 44: Removing & Replacing The Lift-Off Oven Door
M A I N T E N A N C E REMOVING & REPLACING THE LIFT-OFF OVEN DOOR CAUTION • Be careful when removing and lifting the door. • DO NOT lift the door by the handle. - The door is very heavy. To remove the door: Step. -
Page 45: Removing & Replacing The Lower Oven Drawer
REMOVING & REPLACING THE LOWER OVEN DRAWER WARNING • Turn POWER OFF before removing the Lower Oven Drawer. - Failure to do so can result in severe personal injury, death, or electrical shock. Most cleaning can be done with the drawer in place. However, the drawer may be removed if further cleaning is needed. -
Page 46: Troubleshooting
T RO U B L E S H O OT I N G BEFORE CALLING FOR SERVICE Before you call for service, review this list.It may save you time and expense. The list includes common occurrences that are not the result of defective workmanship or materials in this appliance. Problem Range is not level. - Page 47 BEFORE CALLING FOR SERVICE Problem Oven will not work • Plug on range is not completely inserted in the electrical outlet. - Make sure electrical plug is plugged into a live, properly grounded outlet. • A fuse in your home may be blown or the circuit breaker tripped. - Replace the fuse or reset the circuit breaker.
- Page 48 T RO U B L E S H O OT I N G BEFORE CALLING FOR SERVICE Problem Food does not broil • Aluminum foil used on the the broiling pan and grid has not been fitted properly and properly slit as recommended.
-
Page 49: Before Calling For Service
BEFORE CALLING FOR SERVICE Problem Excessive smoking • Excessive soil. during a self clean - Press the CLEAR/OFF pad. Open the windows to rid the room of smoke. Wait cycle until the self clean mode is cancelled. Wipe up the excess soil and reset the clean. -
Page 50: Warranty For Customers In The U.s.a
LG ELECTRIC OVEN LIMITED WARRANTY – USA LG Electronics Inc.will repair or replace your product,at LG’s option,if it proves to be defective in material or workmanship under normal use, during the warranty period set forth below, effective from the date of original consumer purchase of the product.
Need help?
Do you have a question about the LSE3092ST and is the answer not in the manual?
Questions and answers