Table of Contents
Advertisement
Quick Links
Advertisement
Table of Contents

Related Manuals for Kurzweil SP6-7


Summary of Contents for Kurzweil SP6-7
- Page 1 Including ® It’s the sound. ® Part Number 910584-006 Rev. F...
- Page 2 CAUTION The lightning flash with the arrowhead symbol, within an equilateral triangle is intended to alert the user to the presence of uninsulated RISK OF ELECTRIC SHOCK "dangerous voltage" within the product's enclosure that may be of sufficient magnitude to constitute a risk of electric shock to persons. DO NOT OPEN CAUTION: TO REDUCE THE RISK OF ELECTRIC SHOCK, The exclamation point within an equilateral triangle is intended...
- Page 3 Wash hands after handling.] ©2018 Young Chang Co., Ltd. All rights reserved. Kurzweil® is a product line of Young Chang Co., Ltd. Kurzweil®, Young Chang®, V. A. S. T.®, and SP6® are trademarks of Young Chang Co., Ltd. All other trademarks and copyrights are property of their respective companies.
- Page 4 Kurzweil International Contacts Contact the Kurzweil office listed below to locate your local Kurzweil representative. Customers outside the US: US Customers: HDC YOUNG CHANG American Music & Sound 196, Bongsu-daero, Seo-gu 925 Broadbeck Dr #220 Newbury Park, CA 91320 Incheon, Korea Post Code: 22840...
-
Page 5: Table Of Contents
Table of Contents Table of Contents Getting Started ..............1-1 Features of the SP6 ...................... 1-1 Quick Start ........................1-2 The Front Panel ......................1-4 The Rear Panel......................1-9 SP6 Sounds ......................... 1-12 Modes .......................... 1-15 Program Mode ..............2-1 Selecting Programs ...................... - Page 6 Delete Page ......................... 6-10 Info Page ........................6-11 Reset Page ........................6-11 Troubleshooting ............... 7-1 Maintenance ........................7-1 Power On Problems ..................... 7-1 Audio Problems ......................7-2 MIDI Problems ....................... 7-3 Pedal Problems......................7-4 Kurzweil Support ......................7-5 MIDI Implementation ............A-1 MIDI Control ........................A-2 TOC-ii...
- Page 7 Table of Contents Physical Specifications............B-1 Programs ................C-1 Multis .................D-1 Index ................Index-1 TOC-iii...
-
Page 8: Getting Started
• Optimized German D and Japanese C7 Pianos, Triple Strike Piano, 73 Electric Piano, Clavinets, Harpsichords, Celeste, Bowed and Hit Crotales, Vector Synthesis Waveforms • Updated Rock, Synth and Orchestral sounds from Kurzweil’s Forte SE, PC3, and KORE64 • 10 Categories of Programs (Piano, E. Piano, Clav, Organ, Strings/Pads, Brass/Winds, Voices/Misc, Leads/Synths, Guitar/Bass, Drums/Perc) •... -
Page 9: Quick Start
Getting Started Quick Start Quick Start Be sure to check the Kurzweil website at www.kurzweil.com for new sounds, documentation and software updates. Setting Up the SP6 1. If your SP6 keyboard has been out in the cold during shipping, give it time to warm up to room temperature before powering it on, since condensation may have formed inside. - Page 10 Getting Started The Front Panel 4. If you are using speakers and the SP6 is not loud enough, turn up the volume on your amplifier or mixer. 5. If you are using a mixer and hear distortion, reduce the gain level on the mixer, or use the mixer’s Pad button if it has one (a button that typically decreases the audio input level by 20dB).
-
Page 11: The Front Panel
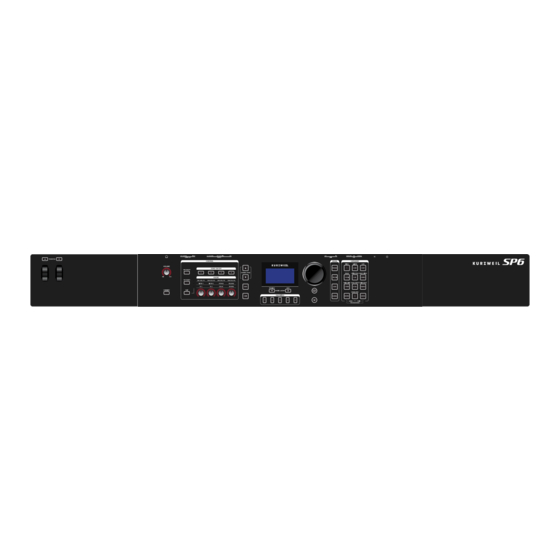
Getting Started The Front Panel The Front Panel TRANSPOSE Buttons VOLUME Knob ARP ON/OFF Button and TAP TEMPO Button ZONE ON/OFF Buttons CHANNEL/PAGE Buttons LCD Display ALPHA WHEEL MODE Buttons and USER Button CATEGORY Buttons LOCAL DEST Button and EXIT Button PREVIOUS/NEXT Buttons and FAVORITES Buttons SAVE Button and EDIT Button KNOBS... - Page 12 Getting Started The Front Panel ALPHA WHEEL In Program and Multi Mode, use the ALPHA WHEEL to navigate through the Program or Multi list. In Program Edit or Multi Edit Mode, use the ALPHA WHEEL to scroll through the list of values for the currently selected parameter.
- Page 13 Getting Started The Front Panel TRANSPOSE Buttons The TRANSPOSE buttons can be used to change the tuning of notes played on the SP6 keyboard in semitones (also known as half steps). The current transpose amount is shown in the LCD display (for example, the default is “Xp:0st”). Press both TRANSPOSE buttons simultaneously to reset the transposition to 0.
- Page 14 Getting Started The Front Panel SHIFT Button The SHIFT button allows you to shift between 3 groups of knob assignments. The available knob assignments are labeled in 3 rows below the knobs. Press the SHIFT button to shift to the next assignment group, indicated by a lit LED to the left of each row. ARP ON/OFF Button Use the ARP ON/OFF button to turn on and off the SP6’s Arpeggiator.
- Page 15 Getting Started The Front Panel CHANNEL/PAGE Buttons Use the CHANNEL/PAGE buttons to change the current MIDI Channel in Program Mode, or the current page in Program Edit or Multi Edit Mode. LOCAL DEST Button The LOCAL DEST button controls the destination of MIDI notes produced by playing the SP6 keyboard.
-
Page 16: The Rear Panel
Getting Started The Rear Panel The Rear Panel POWER Button Press the POWER button to power the SP6 on or off. DC Power Jack Plug the included power adaptor into the DC Power jack. USB Ports Use the USB ports to connect the SP6 to a computer/tablet or USB hard drive in order to do the following: •... - Page 17 Getting Started The Rear Panel SW1 (SUSTAIN) and SW2 Jacks Use the SW1 (SUSTAIN) and SW2 jacks to connect switch pedals. One switch pedal is included with the SP6. In Program Mode, SW1 (SUSTAIN) defaults to controlling Sustain, and SW2 defaults to controlling Sostenuto.
- Page 18 The SW1 (SUSTAIN) jack is also compatible with continuous switch pedals (Half-Damper) that use a 1/4 inch tip-ring-sleeve plug (such as the Kurzweil KP-1H). When connected to the SW1 (SUSTAIN) jack, a Half Damper pedal enables finer control of Sustain than a standard switch pedal.
-
Page 19: Sp6 Sounds
Getting Started SP6 Sounds SP6 Sounds The SP6 contains Programs and Multis. A Program is typically a single instrument sound such as a Piano, Organ, or Synth. Programs are organized by instrument type in 10 categories. A Multi is a combination of Programs arranged as layers and/or splits across the keyboard. Multis are not categorized by instrument type, so the KEYPAD button is always on when in Multi Mode. - Page 20 Getting Started SP6 Sounds Selecting Multis In Multi Mode, use any of the methods below to select a Multi. Browse All Multis Make sure the USER button is off, then use the ALPHA WHEEL or PREVIOUS and NEXT buttons to select a Multi from all of the available Multis. Select a Multi by ID Number The KEYPAD button allows you to use the numbers labeled on the CATEGORY buttons to select Multis by ID number.
- Page 21 Getting Started SP6 Sounds Splits and Layers The Split and Layer function can be used to Split or Layer the current Program or Multi. Different keyboard regions can play different Programs, or multiple Programs can be played from the same region. To Split or Layer a Multi, it must contain at least one Zone which is unused (Off).
-
Page 22: Modes
Getting Started Modes Modes Program Mode The SP6 always powers up in Program Mode, where single instrument sounds can be played directly from the keyboard, or multitimbrally via MIDI. Saving Programs If you make changes to the current Program using any of the controllers (Knobs, Wheels or Buttons), the SAVE button turns on to indicate that a change has been made to that Program. - Page 23 Loading from External Storage Programs and Multis can be loaded onto the SP6 from USB Flash Drives or a computer. This allows you to load new sounds from Kurzweil or other developers, or to load sounds that you have previously saved.
- Page 24 1-17...
-
Page 25: Program Mode
Program Mode Selecting Programs Chapter 2 Program Mode Use Program Mode to play a Program directly from the keyboard, or to play up to 16 Programs multitimbrally via MIDI. Programs typically contain a single instrument sound, although some Programs may contain multiple instrument sounds. The SP6 always powers on with Program Mode selected. -
Page 26: Program Demo
Program Mode Program Demo Select a Program by ID Number Press and turn on the KEYPAD button. The keypad button allows you to use the numbers labeled on the CATEGORY buttons to select Programs or Multis by ID number. Type an ID number followed by pressing the ENTER button to select the associated Program. -
Page 27: Favorites
Program Mode Favorites Favorites Use the FAVORITES buttons to quickly store and recall a set of 5 favorite Programs and/or Multis while in Program or Multi Mode. To recall a favorite Program or Multi, simply press one of the FAVORITES buttons. The FAVORITES buttons work from both Program or Multi Mode, and pressing a FAVORITES button will automatically bring you to Program Mode or Multi Mode if required. - Page 28 Program Mode Controllers MODULATION WHEEL Use the MODULATION WHEEL to vary the modulation amount. The MODULATION WHEEL will perform an assigned modulation for each Program. The name of the current assignment is shown in the LCD display when the wheel is moved. VARIATION Button Pressing the VARIATION button will perform an assigned variation for each Program.
- Page 29 Program Mode Controllers The top row of knob assignments control user-assignable parameters (P1 through P4). Move a knob to see the assigned parameter and value in the LCD display. These assignments can be adjusted in Program Edit Mode. The bottom two rows of knob assignments perform the functions labeled on the front panel: The FILTER 1 knob is usually assigned to filter frequency.
- Page 30 The SW1 (SUSTAIN) jack is compatible with continuous switch pedals (Half-Damper) that use a 1/4 inch tip-ring-sleeve plug (such as the Kurzweil KP-1H). When connected to the SW1 (SUSTAIN) jack, a Half Damper pedal enables finer control of Sustain than a standard switch pedal.
-
Page 31: Split/Layer
Program Mode SPLIT/LAYER SPLIT/LAYER Press the PREVIOUS and NEXT buttons simultaneously to access the Split/Layer function. The Split and Layer functions have identical parameters, but produce different results. The Split function allows you to quickly create a Multi such that keys in one range of the keyboard produce different sounds than another range. - Page 32 Program Mode SPLIT/LAYER 3. On the “Split or Layer” Page, use the PREVIOUS or NEXT buttons to select “Split <ENTER>”, then press the ENTER button. 4. On the “Split” Page, Zone 2 is selected with a default Bass Program selected for the left hand of the Split.
- Page 33 Program Mode SPLIT/LAYER 5. Additional Layer parameters are described in Split/Layer Parameters on page 2-9. Use the CHANNEL/PAGE buttons to navigate between each of the 3 Layer function pages. Use the PREVIOUS or NEXT buttons to select each parameter, and the ALPHA WHEEL or CATEGORY buttons to change the value of each parameter.
- Page 34 Program Mode SPLIT/LAYER Split Mixer Page / Layer Mixer Page Volume The Volume parameter sets the volume of each Zone. To change the volume of a Zone: 1. Select a Volume parameter for the desired Zone by using the PREVIOUS and NEXT buttons.
-
Page 35: Program Save Dialog
Program Mode Program Save Dialog Split Key Range Page / Layer Key Range Page Key Low / Key High The Key Low and Key High parameters set the keyboard ranges for each Zone. Using Split sets the boundary between Zone 1 and Zone 2 to E3. Using Layer sets the Zone 2 keyboard range to C1 - G9. - Page 36 Program Mode Program Save Dialog If you are saving a Program that has not been previously edited, the next available unused ID number will be selected. If you are saving a previously edited User Program, the ID number that the Program was last saved with will be selected.
-
Page 37: Changing The Midi Channel
Program Mode Changing the MIDI Channel Saving a User Program To save a User Program, select the Program Save Page and press the SAVE button, (or press the EXIT button to exit without saving). The display will show a brief message to confirm that the Program was saved. -
Page 38: Program Edit Mode
Program Edit Mode Assignable Params Page Chapter 3 Program Edit Mode Program Edit Mode allows you to edit and customize Programs. Any Program can be edited in Program Edit Mode and saved to one of the 1024 User IDs. To enter Program Edit Mode, first press the PROGRAM Mode button to enter Program Mode, then press the EDIT button. -
Page 39: Arpeggiator Page
Program Edit Mode Arpeggiator Page Value Column The Value column shows the current value (0-127) of each parameter. The values that are shown when the Program is saved will be recalled each time the Program is selected. To adjust the value of each parameter by using the knobs, use the SHIFT button to select the top row of knob assignments. - Page 40 Program Edit Mode Arpeggiator Page Beats The Beats parameter sets the rate of the arpeggiator, based on a measure of 4 beats. Select from the following settings: 1 note per measure (whole notes) 2 notes per measure (half notes) 4 notes per measure (quarter notes) 8 notes per measure (eighth notes) 1/12 12 notes per measure (eighth note triplets) 1/16 16 notes per measure (sixteenth notes)
- Page 41 Program Edit Mode Arpeggiator Page Velocity The Velocity parameter determines how the arpeggiator processes the attack velocity of the played notes. Select from the following settings: Constant: All notes play at the velocity of the first played note. Played: Each note plays at the velocity which you played. Human1 through Human4: These settings randomly change played note velocities within a range in order to make arpeggiation sound more human like, with each note varying slightly in velocity.
-
Page 42: Master Page
Program Edit Mode Master Page Shift Limit When the Shift parameter is set to a value other than 0, Shift Limit determines how far up or down the Arpeggiator can shift the arpeggiated notes. Limit Option The Limit Option parameter determines what the Arpeggiator does when it has shifted the currently arpeggiated notes up (or down) to the value set by the Shift Limit parameter. - Page 43 Program Edit Mode Master Page Mono When the Mono parameter is set to Off, the Program is polyphonic—it can play multiple notes at a time. When the Mono parameter is set to On, the Program will play only one note at a time.
-
Page 44: All Parameters Page
Program Edit Mode All Parameters Page OutGain Use the OutGain parameter to adjust the overall volume of a Program. Category This parameter sets the category that the Program will be grouped into when you press one of the CATEGORY buttons in Program Mode. For example, if you were to edit a Program in the VOICES/MISC category that you want to use primarily as a Synth, you could make it appear in the LEADS/SYNTHS category by changing this parameter to Leads/Synths. - Page 45 Program Edit Mode All Parameters Page Control Column Use the Control column to assign an SP6 control or MIDI CC number for the Parameter in that row. Use the PREVIOUS/NEXT buttons to navigate to the Control column. To assign an SP6 control, select the Control column for the desired Parameter, then hold the ENTER button and move the desired SP6 control (knob, VARIATION button, MODULATION WHEEL, or pedal).
-
Page 46: Save User Programs
Program Edit Mode Save User Programs chorus effect. This is independent of the classic switchable chorus/vibrato KB3 effect (selected with the Chorus/Vibrato Select parameter), and the FX2 knob does not control dry/wet for the classic effect. Save User Programs For details on saving User Program, see Program Save Dialog on page 2-11. -
Page 47: Multi Mode
Multi Mode Selecting Multis Chapter 4 Multi Mode Use Multi Mode to play up to 4 split or layered Programs directly from the keyboard. Each of the 4 Zones in a Multi can have a different Program, controller settings, and MIDI transmit channel. -
Page 48: The Lcd
Multi Mode The LCD The LCD In Multi Mode, the top line of the LCD shows the current Mode and MIDI transposition. The Multi ID number and name are displayed in the center of the LCD. When a controller is moved, the controller assignment and value for each Zone is briefly displayed below the Multi ID and name. - Page 49 Multi Mode Controllers ZONE ON/OFF Buttons The ZONE ON/OFF buttons allow you to turn each of the 4 Zones on or off. When a Zone is on, the corresponding button is lit, and you can hear the Program in the Zone. When a Zone is off, the corresponding button is not lit, and the Program in the Zone is silent.
- Page 50 Multi Mode Controllers ARP ON/OFF Button Use the ARP ON/OFF button to turn on and off the Arpeggiator in each Zone. Each Zone in a Multi has an arpeggiator, allowing up to 4 simultaneous arpeggiations. The ARP ON/ OFF button can be enabled or disabled for each Zone in Multi Edit Mode. The Arpeggiator takes note input from the keyboard and outputs a rhythmic and/or melodic pattern of MIDI notes.
- Page 51 Multi Mode Controllers The RELEASE knob is assigned to amplitude release time (the time it takes for each note to fade to silence after a key is released). When the RELEASE knob is set to a low value, the release time will be fast, and each note will quickly fade to silence. When the RELEASE knob is set to a high value, the release time will be slow, and each note will slowly fade to silence.
-
Page 52: Split/Layer
Multi Mode SPLIT/LAYER CC (VOLUME) Pedal The CC (VOLUME) pedal defaults to control Program volume (pre-FX). For KB3 Organ Programs, the CC (VOLUME) pedal controls organ swell. Organ swell is similar to Program volume, except volume can not be turned all the way down to silence. The LCD display shows “KB3”... - Page 53 Multi Mode SPLIT/LAYER To create a Split in Multi Mode, the selected Multi must have at least one ZONE ON/ OFF button set to off (an inactive Zone). When creating a Split in Multi Mode, the lowest numbered inactive Zone will be used for the new left hand Zone. You can choose a Program that will be used in the new left hand Zone of the Split Multi.
- Page 54 Multi Mode SPLIT/LAYER Follow these steps to create a Layer: 1. In Multi Mode, select a Multi that you wish to layer. The selected Multi must have at least one ZONE ON/OFF button set to off (an inactive Zone). 2. Press the PREVIOUS and NEXT buttons simultaneously to access the “Split or Layer” Page.
- Page 55 Multi Mode SPLIT/LAYER Split Page / Layer Page Program The default Split or Layer Program will appear in the lowest numbered inactive Zone. Use the ALPHA WHEEL or CATEGORY buttons to select a different Program for the selected Zone. Split Mixer Page / Layer Mixer Page Volume The Volume parameter sets the volume of each Zone.
-
Page 56: Multi Save Dialog
Multi Mode Multi Save Dialog 2. Change the panning by using the ALPHA WHEEL, or use the keypad function of the CATEGORY buttons to type a pan value (0-127) followed by pressing the ENTER button. A value of 0 is full left, 64 is center, and 127 is full right. Other values will move the stereo placement in between these positions. - Page 57 Multi Mode Multi Save Dialog To save a copy of the Multi, press the SAVE button once to view the Save Dialog. The Save Dialog allows you to choose an ID number and name for the Multi you are saving. Use the CHANNEL/PAGE buttons to switch between ID selection and naming pages.
-
Page 58: Panic
Multi Mode PANIC To name a Multi: 1. Use the PREVIOUS and NEXT buttons to move the cursor to each character. 2. Change the current character by using the ALPHA WHEEL, or use the keypad function of the CATEGORY buttons to type a character. To insert a space before the selected character, press and hold the NEXT button. -
Page 59: Multi Edit Mode
Multi Edit Mode Main Page Chapter 5 Multi Edit Mode Multi Edit Mode allows you to edit and customize Multis. Any Multi can be edited in Multi Edit Mode and saved to one of the 1024 User IDs. To enter Multi Edit Mode from another Mode, press and turn on the MULTI Mode button to enter Multi Mode, then press and turn on the EDIT button. -
Page 60: Mixer Page
Multi Edit Mode Mixer Page Browse All Programs Make sure the USER button is off, then use the ALPHA WHEEL or PREVIOUS and NEXT buttons to select a Program from all of the available Programs. Select a Program by Category Make sure the KEYPAD button is off, then press one of the CATEGORY buttons to select the first Program of a category (or the current Category Default Program). -
Page 61: Key/Velocity Page
Multi Edit Mode Key/Velocity Page A value of “None” can be selected by using the ALPHA WHEEL to scroll below 0. This is useful if you wish to manually set Zone volumes with the SP6 knobs, rather than using default values when the Multi is selected. A value of “None” will use the last volume value used by the Zone’s MIDI channel (a MIDI channel from the previously selected Multi, or from Program Mode). -
Page 62: Transpose/Bend Page
Multi Edit Mode Transpose/Bend Page Velocity Low / Velocity High The Velocity Low and Velocity High parameters set the playable velocity range of each Zone by setting the lowest and highest playable velocity of each Zone. Velocities within this range will trigger a note for the selected Zone. -
Page 63: Fx Page
Multi Edit Mode FX Page FX Page Use the FX Page to enable or disable the FX of the Program in each Zone. Each Zone can be set to Y to enable effects, or to N to disable effects. Some Zones set to Y may be displayed as (Y). -
Page 64: Switch Pedals Page
Multi Edit Mode Switch Pedals Page Switch Pedals Page Use the Switch Pedals Page to select an assignment for each switch pedal in each Zone. When a switch pedal is plugged into the SW1 (SUSTAIN) and/or SW2 jacks, use the parameters in the SW1a and SW2a columns to select an assignment for the switch pedals in each Zone. -
Page 65: Cc Pedal Page
Multi Edit Mode CC Pedal Page Sost When Sost is selected, the selected pedal is assigned to the Sostenuto function in the selected Zone. Pedals assigned to Sost will sustain notes from any keys that are being held in the selected Zone when the pedal is pressed, for as long as the pedal is held. -
Page 66: Controllers Page
Multi Edit Mode Controllers Page Foot The Foot assignment controls a wah effect for some Programs. Usually the wah effect must be enabled with the VARIATION button. The Foot assignment can also be used to send MIDI CC 4 to external MIDI devices. The Pan assignment controls panning (left/right stereo placement). - Page 67 Multi Edit Mode Controllers Page Use the Ctl parameter to select a controller. When the Ctl parameter is selected, you can select a controller by using the ALPHA WHEEL, or by holding the ENTER button and moving the MODULATION WHEEL or one the KNOBS. Value Use the Value parameter to set a value (0-127) for the selected controller.
-
Page 68: Channel Page
Multi Edit Mode Channel Page Use the Add parameter to offset the value of the selected controller for each Zone. The Add parameter offsets the current value of the controller by the selected Add amount (-128 through 127). Press the MULTI Mode button to quickly apply the selected value. The Add parameter effectively allows you to apply different values to each Zone, while maintaining a single value for each controller. -
Page 69: Common Page
Multi Edit Mode Common Page The Destination parameters work in combination with the LOCAL DEST button on the front panel. The Destination parameters and the LOCAL DEST button each act like filters. For example, if the Zone 1 Destination parameter is set to LOCAL, and the LOCAL DEST button is set to LOCAL + MIDI, MIDI data from Zone 1 will be sent to LOCAL only. -
Page 70: Save User Multis
Multi Edit Mode Save User Multis KB3 Chan Use the KB3 Chan (KB3 Channel) parameter to set the MIDI channel which will be used for KB3 organ Programs. Only one KB3 Program can be loaded at a time. If KB3 Programs are selected for more than one Zone, this parameter specifies which MIDI channel has priority to load a KB3 Program. -
Page 71: Global Mode
Global Mode Settings Page Chapter 6 Global Mode Global Mode allows you to adjust performance settings which affect all Programs and Multis. Global Mode also allows you to Store, Load, and Delete Programs and Multis, or restore factory defaults by performing a Reset. Navigate to each page by using the CHANNEL/PAGE buttons. - Page 72 Global Mode Settings Page Light3 Makes it increasingly easier to produce high MIDI velocity values for the same key strike velocity (with Light3 being the easiest). These maps Light2 work best for those with a light touch. Light1 The default map. Linear, allows MIDI velocities to pass unchanged. It Linear follows a linear response.
- Page 73 Global Mode Settings Page 4 Harmonic The perfect 4th, Tritone, and Dominant 7th are heavily flatted. 5 JustHarm Approximation of a historical intonation. Named for its inventor, Andreas Werkmeister, it was developed to enable 6 Werkmeiste transposition with less dissonance than classic equal temperament. 7 1/5thCmma Approximation of a historical intonation based on the comma system.
- Page 74 Global Mode Settings Page If you are not using an external MIDI device to play Multis, you can ignore this parameter and leave it set to None. When Local Chan is set to None, an external MIDI device transmitting on one channel will only play one Channel/Zone of a Multi. In Program Mode, an external MIDI keyboard or sequencer transmitting on the Local Chan will always play the Program on the currently selected Program Mode MIDI channel.
- Page 75 Global Mode Settings Page SysEx ID The SysEx ID parameter sets the ID number for the unit if you are using more than one device with the same MIDI manufacturer ID number. You can set this parameter to any number from 0 to 127. Unless you have multiple SP6 keyboards receiving SysEx messages from a single source, you will not need to change the SysEx ID from the default setting of 0.
-
Page 76: Overrides Page
Global Mode Overrides Page Show Params When the Show Params parameter is set to Yes, the All Parameters page appears in Program Edit Mode. See All Parameters Page on page 3-7 for details. When the Show Params parameter is set to No, the All Parameters page is hidden in Program Edit Mode. - Page 77 Global Mode Overrides Page Use the FavoriteInc and FavoriteDec assignments (Favorite increment/decrement) to select the next or previous Favorite when you depress the pedal. If you are not playing any Favorites, FavoriteInc and FavoriteDec will select the first Favorite, or the last Favorite that was selected since turning on the SP6.
-
Page 78: File Page
Global Mode File Page File Page The File Page allows you use a USB Device (such as a thumb drive) or a computer to store and load backup files of User Objects (Programs and Multis), or to load new sounds. On the File Page, press the ENTER button to go to the File Options Page. - Page 79 Global Mode File Page 2. On the Load Device Page, use the PREVIOUS and NEXT buttons to select USB Device, then press the ENTER button. 3. On the Load File Page, use the PREVIOUS and NEXT buttons to select the file in the list, then press the ENTER button.
-
Page 80: Delete Page
Global Mode Delete Page Press the ENTER button to store the selected objects, or press the EXIT button to cancel. Store Device After selecting a store method, use the Store Device Page to select the device you wish to store to. Store a File to a Computer 1. -
Page 81: Info Page
The Info Page shows currently installed Operating System version (OS) and Objects version. To make sure that you have the latest Operating System and sound Objects, go to the Kurzweil website at www.kurzweil.com. Select the About parameter and press the ENTER button to see a list of credits and acknowledgments. - Page 82 6-12...
-
Page 83: Troubleshooting
Troubleshooting Maintenance Chapter 7 Troubleshooting Use this chapter to learn how to maintain your SP6 and solve operational problems. Maintenance Clean the SP6 with a soft cloth dampened with water. Never use abrasives or solvents as they may damage the SP6. Power On Problems This is the normal power on sequence: 1. -
Page 84: Audio Problems
Troubleshooting Audio Problems Audio Problems CAUTION: To protect your ears, do not troubleshoot audio problems while wearing headphones. Additionally, always set the SP6 and connected audio system or mixer to a low volume level when troubleshooting audio problems. NOTE: When solving audio problems, playing the SP6 Demo Songs is an easy way to test if the audio is working properly. -
Page 85: Midi Problems
Troubleshooting MIDI Problems MIDI Problems Problem Sending MIDI messages to a computer or external MIDI device is not working Solutions Make sure the MIDI channel being used by the SP6 matches the MIDI channel being used by the external device. Press the LOCAL DEST button until the LCD shows “Destination MIDI.”... -
Page 86: Pedal Problems
Troubleshooting Pedal Problems Pedal Problems Switch Pedal Problems Problem Sustain or Sostenuto pedals are stuck “on”, or functioning backwards (“on” when up instead of down) Solution Always plug pedals in before powering on the SP6, and do not press the pedals before the SP6 has powered on. Turn power off, then on, if necessary. -
Page 87: Kurzweil Support
0, and when it is in the fully up position, the impedance is at its maximum rating. Kurzweil Support For additional help, contact Kurzweil support at kurzweil.com/support. You may also find unofficial help at some of the internet communities listed at kurzweil.com/community. -
Page 88: Midi Implementation
MIDI Implementation Appendix A MIDI Implementation Function Transmitted Recognized Remarks Default Basic Channel Memorized Changed 1–16 1–16 Default Mode 3 Mode 3 For multi-timbral applications, set the Global Mode “FXMode” parameter to “MultiTrk” (see Mode Messages for details) FXMode on page 6-5 Altered 0–127 Note Number... -
Page 89: Midi Control
MIDI Implementation MIDI Control MIDI Control SP6 Physical Controllers In Program and Multi Mode the SP6 physical controllers can send MIDI messages to an external MIDI device. The parameters assigned to each of these physical controllers can be controlled by an external MIDI device by sending the appropriate message on the appropriate channel. -
Page 90: Physical Specifications
Appendix B Physical Specifications SP6: RPHA: Real Piano Hammer Action. 88-key, fully-weighted hammer-action with velocity sensitive adjustable keys Keyboard: SP6-7: SWA76: Semi-Weighted Action. 76-key, semi-weighted action with velocity sensitive adjustable keys Display: 128x64 pixel monochrome LCD with front-panel contrast adjust Polyphony:... -
Page 91: Programs
Programs Appendix C Programs Object Version 1.01.8 PIANO Walrus Pianet Gimme Some Dyn 9ft Grand She'sNotThere VAST-ly Organ Rich Grand 7ft E-cousticGrand VAST Bars Bright Jazz 9ft VidKilledRadio OleTime Gospel Intimate Pno 7ft FM EP Funky Perc Punchy Edge Thick FM Digital Mr. - Page 92 Programs Adagio Magic VOICES/MISC Armonica Reed EP Gliss/Arp Harp In A Good Place Whale Call Pedal Pad Choir Redux Fisher Cove Square Pad Aaahlicious Upstream Evolving Pad EnvelopingVoices Sense Delay Water Buffalo Haah Singers Polyphon JunoWhatIMean Swept Voices Kinderklavier Warm Encounter Swell Choir Space Agogos Prophet Pad...
- Page 93 Programs Robin's Lead MiniFunk Bass Tabla Arp D'tuned Polysyn Squeeze Mini Soft Bell Keys AM SquareSynth Skool Bass Blue PVC Tubes Prophesied Six Dolby Bass Vintage Woobler Poppit SynBass UTILITY Quadra Comp Classic Mini 1021 Click Track Punch Synth KneeDeep Mini 1022 Silent Program Super Saw Stabs Rave Bass...
-
Page 94: Multis
Multis Appendix D Multis Object Version 1.01.8 Arp & Pad 80s Power Celestial Fears Metallicscape Synth & Lead Pulsing Xenia Wine GLASSical Gleam Cake African Wash Triumphant! Tranquil Moods Sea Breeze M'drnApparatus Dream Segue Noxlumos Plucky EP Tine Expansive Pad Planet J Pno Bass &... - Page 95 Multis Rock Jam 2 AccOrgian Circus No Cry Calypso Ens Jazz Quartet Bwow Theme Bluegrass Group Magnetic Horns Boingo Ens Lo-volt Sax New Music Ens Helter Skelter AnyNote Jam Split Default Hallelujah! Layer Default Netromantic Clear Multi Royal Splits Baroque Ens Wind Strgs Horn Harp &...
-
Page 96: Index
Index Index KNOBS 1-6 in Program Mode 2-4 KB3 2-5 ALPHA WHEEL 1-5 P1 through P4 2-5 Auto Power Off 6-4 Auto Power Off Time 6-4 Load 6-8 LOCAL DEST Button 1-8, 7-2 CATEGORY Buttons 1-5 in Multi Edit Mode 5-11 CC (VOLUME) Jack 1-11 CHANNEL/PAGE Buttons 1-8 Continuous Switch Pedals (Half-Damper) 1-11... - Page 97 Index Selecting Multis 4-1 Selecting Programs 2-1 SHIFT Button 1-7 SPLIT/LAYER in Multi Mode 4-6 in Program Mode 2-7 Store 6-9 Support 7-5 SW1 (SUSTAIN) and SW2 Jacks 1-10 TAP TEMPO Button 1-7 TRANSPOSE Buttons 1-6 Tune 6-1 Tuning 1-6 USB Ports 1-9 USER Button 1-7 VARIATION Button 1-6...
Need help?
Do you have a question about the SP6-7 and is the answer not in the manual?
Questions and answers