Table of Contents
Advertisement
OWNER'S MANUAL
SIDE BY SIDE
REFRIGERATOR
Please read this manual carefully before operating
your set and retain it for future reference.
MANUAL DE USUARIO
REFRIGERADOR
DE DOS PUERTAS
Lea detenidamente este manual antes
de empezar a utilizar el refrigerador y guárdelo
como referencia para el futuro.
Model Name/Nombre de Modelo
**color number/número de color
LSC27921**
P/No. MFL62306005
www.lg.com
Advertisement
Table of Contents

Related Manuals for LG LSC27921SB


Summary of Contents for LG LSC27921SB
-
Page 1: Warranty (Usa)
MANUAL DE USUARIO REFRIGERADOR DE DOS PUERTAS Lea detenidamente este manual antes de empezar a utilizar el refrigerador y guárdelo como referencia para el futuro. Model Name/Nombre de Modelo **color number/número de color LSC27921** P/No. MFL62306005 www.lg.com... - Page 2 Visit our web site http://www.lg.com LG Electronics will repair or at its option replace, without charge, your product which proves to be defective in material or workmanship under normal use during the warranty period listed below from the date of original purchase.
-
Page 3: Table Of Contents
Warranty (USA) Important Safety Instructions Grounding Requirements Refrigerator Installation Unpacking your Refrigerator Installation Base Grille Installation Handle Removal Removing and Replacing Refrigerator Doors Door Alignment Connecting the water line Before you begin What you will need Installation Instructions Refrigerator Features Using Your Refrigerator Ensuring Proper Air Circulation Prior to Use... -
Page 4: Important Safety Instructions
IMPORTANT SAFETY INSTRUCTIONS This guide contains many important safety messages. Always read and obey. This is the safety alert symbol. It alerts you to safety messages that inform you of hazards that can kill or hurt you or others, or cause damage to the product. All safety messages will be preceded by the safety alert symbol and the hazard signal word DANGER, WARNING, or CAUTION. -
Page 5: Grounding Requirements
GROUNDING REQUIREMENTS REPLACING ELECTRICAL CABLE If the power cord is damaged, it must be replaced by our service center of qualified LG technician to avoid any risk. RECOMMENDED GROUNDING METHOD The refrigerator should always be plugged into its own individual properly grounded electrical outlet rated for 115 V ~ 60 Hz only and fused at 15 or 20 amperes. -
Page 6: Refrigerator Installation
WARNING EXCESSIVE WEIGHT HAZARD Use two or more people to move and install the refrigerator. Failure to do so can result in back or other injury. UNPACKING YOUR REFRIGERATOR Remove tape and any temporary labels from your refrigerator before using. Do not remove any warning type labels, the model and serial number label. -
Page 7: Removing And Replacing
WARNING ELECTRIC SHOCK HAZARD • Disconnect electrical supply to the refrigerator before installing. Failure to do so could result in death or serious injury. • Do not put hands, feet or other objects into the air vents, base grille, or bottom of the refrigerator. You may be injured or receive an electrical shock. -
Page 8: Door Alignment
Reinstalling the left (freezer) door (2 ) (1 ) Rivet Type 2 Type 1 1. Feed the water tubes through the lower hinge pin and place the door onto the lower hinge pin. 2. Fit top hinge (6) over hinge lever latch (7) and into place. -
Page 9: Connecting The Water Line
CONNECTING THE WATER LINE NOTE: Water line installation is needed when the Automatic Icemaker and/or Water Dispenser features are available on your product. BEFORE YOU BEGIN This water line installation is not warranted by the refrigerator or icemaker manufacturer or seller. Follow these instructions carefully to minimize the risk of expensive water damage. - Page 10 3. DRILL THE HOLE FOR THE VALVE Drill a 1/4” (6,35 mm) hole in the water pipe using a sharp bit. Remove any burrs resulting from drilling the hole in the pipe. Take care not to allow water to drain into the drill.
-
Page 11: Refrigerator Installation
Back of refrigerator ¼” (6,35 mm) Tubing Tubing Clamp ¼” (6,35 mm) Compression Ferrule (sleeve) Refrigerator Figure 1 Fasten the tubing into the tubing clamp attached to the back of the refrigerator. First, loosen the screw fastening the clamp. Next, insert the tubing in the groove. -
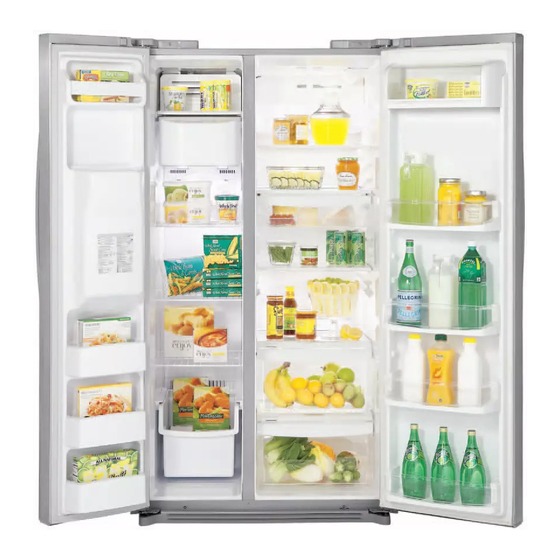
Page 12: Refrigerator Features
Use this page to become more familiar with the parts and features. NOTE: This guide covers several different models. The refrigerator you have purchased may have some or all of the items listed below. The locations of the features shown below may not match your model. Freezer Door Rack Automatic Icemaker The ice is produced in the icemaker... -
Page 13: Using Your Refrigerator
ENSURING PROPER AIR CIRCULATION In order to ensure proper temperatures, air MUST flow between the refrigerator and freezer sections. • Cool air enters the freezer through the vents located at the top of the compartment and exits through the vents located behind the freezer drawers. •... -
Page 14: Diagnosis Function
LIGHT/FILTER LIGHT/FILTER button controls the lamp in the dispenser, resets the water filter replacement indicator when the filter has been replaced. The water filter needs replacement once wvery six months. Filter month indicator becomes “0” to let you know when replace filter. LIGHT/FILTER Press and hold the than 3 seconds to reset the filter month indicator to six... -
Page 15: Adjusting Control Settings
ADJUSTING CONTROL SETTINGS Give the refrigerator time to cool down completely before making final adjustments. It is best to wait 24 hours before doing this. The initial settings mentioned in CONTROL PANEL FEATURES section should be correct for normal household refrigerator use. The refrigerator control functions as the thermostat for the entire appliance (refrigerator and freezer sections). -
Page 16: Food Storage Guide
FOOD STORAGE GUIDE Wrap or store food in the refrigerator in airtight and moisture-proof material unless otherwise noted. This prevents food odor and taste transfer throughout the refrigerator. For dated products, check date code to ensure freshness. ITEMS HOW TO STORE Butter or Keep opened butter in a covered dish margarine... -
Page 17: Water And Ice Dispenser
WATER AND ICE DISPENSER Your refrigerator has a mechanism that dispatch cool water and ice cubes without open the door. • Tray can be easily removed by pressing and pulling it. • Tilt up the front of tray slightly and snap the ribs into the holes to reinstall the tray. -
Page 18: Crisper And Crisper Cover
CRISPER AND CRISPER COVER The crisper allows for better conservation of fruits and vegetables. • To remove the crisper compartment cover, pull out the crisper compartment a bit to the front , lift the front part of the cover as shown in , and take it out •... -
Page 19: Filter
WATER FILTER Before removing or installing water filter: 1. IMPORTANT: Turn off household water supply. 2.Take out the top shelf and move it to the lowest level. Removing the water filter: 1. For filter replacement, remove old filter by turning it counterclockwise and pulling it down. -
Page 20: Performance Data Sheet
Use with replacement cartridge 5231JA2002A This system has been tested according to NSF/ANSI Standards 42 for the reduction of the substances listed below. The concentration of the indicated substances in water entering the system was reduced to a concentration less than or equal to the permissible limit for water leaving the system as specified in NSF/ANSI 42. System tested and certified by NSF International against NSF/ANSI Standard 42 for the reduction of Chlorine Taste and Odor and Nominal Particulate Class III. -
Page 21: Care And Cleaning
WARNING EXPLOSION HAZARD Use non-flammable cleaner. Failure to do so can result in death, explosion, or fire. Both the refrigerator and freezer sections defrost automatically. However, clean both sections about once a month to prevent odors. Wipe up spills immediately GENERAL CLEANING TIPS •... -
Page 22: When You Go On Vacation
b) Place 2 lbs. (1 kg) of dry ice in the freezer for every cubic foot (28 L) of freezer space. This will keep the food frozen for two to four days. While handling dry ice, wear gloves to protect your hands from frostbite. -
Page 23: Troubleshooting Guide
UNDERSTANDING SOUNDS YOU MAY HEAR Your new refrigerator may make sounds that your old one did not make. Because the sounds are new to you, you might be concerned about them. Most of the new sounds are normal. Hard surfaces, like the floor, walls and cabinets, can make the sounds seem louder than they actually are. - Page 24 Problem Possible causes COMPRESSOR • The refrigerator that was replaced was MOTOR SEEMS TO an older model. RUN TOO MUCH • The room temperature is hotter than normal. • The refrigerator was recently plugged in and the refrigerator control was set correctly.
- Page 25 Problem Possible causes TEMPERATURE IS • The doors are opened often. TOO WARM OR THERE IS INTERIOR MOISTURE BUILDUP • The control is not set correctly for the surrounding conditions. • A large amount of food has just been added to the refrigerator or freezer. •...
- Page 26 Problem Possible causes THE ICEMAKER IS • The freezer temperature is cold enough NOT PRODUCING to produce ice. ICE OR ICE CUBES ARE FREEZING • Door left open. TOO SLOWLY AUTOMATIC • Icemaker power switch on OFF (O) ICEMAKER DOES position.
- Page 27 LG Customer Information Center 1-800-243-0000 USA, Consumer User 1-888-865-3026 USA, Commercial User 1-888-542-2623 CANADA Register your Product Online! www.lg.com...
Need help?
Do you have a question about the LSC27921SB and is the answer not in the manual?
Questions and answers