LG AF115 Owner's Manual
Lcos projector
Hide thumbs
Also See for AF115:
- Owner's manual (36 pages) ,
- Manual de usuario (36 pages) ,
- Specifications (2 pages)

Related Manuals for LG AF115


Summary of Contents for LG AF115
- Page 1 OWNER’S MANUAL LCOS PROJECTOR Please read this manual carefully before operating your set and retain it for future reference. AF115 www.lg.com...
- Page 2 LCOS PROJECTOR LCOS PROJECTOR Warning This is a class B product. In a domestic environment this product may cause radio interference, in which case the user may be required to take adequate measures.
-
Page 3: Table Of Contents
Contents Safety Instructions ... 4 Names of parts Main Body ...7 Connecting Part ... 8 Control Panel ... 9 Remote Control ...10 Installing Batteries ...10 Projector Status Indicators ... 11 Accessories ...12 Optional Extras ...12 Installing and Composition Installation Precautions ...13 Positioning the Projector ...14 Kensington Security System ...15 Turning on the Projector ...16... -
Page 4: Safety Instructions
Safety Instructions Please take note of the safety instructions to prevent any potential accident or misuse of the projector. ꔈ Safety Instructions are given in two forms as detailed below. WARNING : The violation of this instruction may cause serious injuries and even death. NOTES : The violation of this instruction may cause injuries or damage to the projector. - Page 5 Power Never touch the power plug with a wet hand. This may cause an electric shock hazard! Power Hold the plug firmly when unplugging. If you pull the cord, it may be damaged. This may cause a fire hazard! Place the projector where people Do not turn the projector On/Off by plugging-in or unplugging the will not trip or tread on the power power plug to the wall outlet.
- Page 6 Using If the projector is in a room that experiences a gas leak, do not touch the projector. It can cause a fire or a burn by a spark. Using Do not place heavy objects on top of projector. This may cause mechanical failure or personal injury! Do not use any sharp tools on the projector as this will damage...
-
Page 7: Names Of Parts
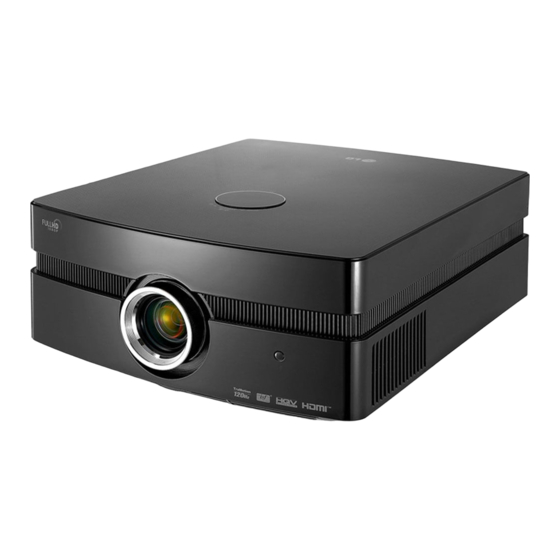
Names of parts Main Body * The projector is manufactured using high-precision technology. You may, however, see on the Projector screen tiny black points and/or bright points (red, blue, or green). This can be a normal result of the manufacturing process and does not always indicate a malfunction. Focus ring Zoom ring Front remote control sensor... -
Page 8: Connecting Part
Names of parts Connecting Part Rear remote control sensor USB(SVC Only) Control Panel RGB IN Kensington Security System Connector (Refer to page 15) Video COMPONENT IN AC IN S-Video HDMI IN 1/2... -
Page 9: Control Panel
Control Panel POWER Button Turn On/Off the projector. INPUT Button Switches to RGB, HDMI, Video, S-Video or Component mode. AUTO Button It automatically corrects the position and shaking of the image in RGB mode. ∧/∨/</> Adjusts functions of menus MENU Button Selects or closes menus. -
Page 10: Remote Control
Remote Control POWER Button AUTO Button EXIT Button ꔉOK, ∧/∨/</> Button Brightness Button BLANK Button PICTURE Button STILL Button C.TEMP Button Installing Batteries CAUTION RISK OF EXPLOSION IF BATTERY IS REPLACED WITH AN INCORRECT TYPE. DISPOSE OF USED BATTERIES ACCORDING TO THE INSTRUCTIONS. •... -
Page 11: Projector Status Indicators
Projector Status Indicators * Lamp indicator, operation indicator and temperature indicator at the top of the projector show the user the operating status of the projector. Orange (flashing) Green (flashing) Operation Indicator / Temperature Indicator Red (flashing) Lamp Indicator Red (flashing) Green (flashing) Deco LED Blue (flashing) -
Page 12: Accessories
Accessories Remote Control Power Cord Optional Extras * Contact your dealer to purchase these items. * The lamp is consumable and needs to be replaced with a new one when it is burned out. Contact your dealer or service center for a replacement lamp. -
Page 13: Installing And Composition
Installing and Composition Installation Precautions Provide proper ventilation for this projector. • The projector is equipped with ventilation holes(intake) on the bottom and ventilation holes(exhaust) on the front. Do not block or place anything near these holes. Internal heat build-up may occur, causing picture degradation or dam- age to the projector. -
Page 14: Positioning The Projector
Positioning the Projector 1. Place the projector on a sturdy and horizontal surface. 2. Place the projector the desired distance from the screen. The distance between the projector and the screen determines the actual size of the image. 3. Position the projector so that the lens is set at a right angle to the screen. If the projector is not set at a right angle, the screen image will be crooked. -
Page 15: Kensington Security System
Kensington Security System • This projector has a Kensington Security System Connector on the side panel. Connect the Kensington Security System cable as below. • For the detailed installation and use of the Kensington Security System, refer to the user’s guide included with the Kensington Security System set. -
Page 16: Turning On The Projector
Turning on the Projector 1. Make sure the power cord is connected correctly. 2. Remove the lens cap. If it is left on, it could become deformed due to the heat produced by the projection lamp. 3. Press the POWER button on the remote control or back cover. •... -
Page 17: Focus And Position Of The Screen Image
Focus and Position of the Screen Image When an image appears on the screen, check if it is in focus and fits the screen properly. Focus ring Zoom ring • To adjust the focus of the image, rotate the focus ring which is the outer ring on the lens. •... -
Page 18: Connection
Connection Connecting to a Desktop PC * You can connect the projector to a computer with VGA, SVGA, XGA, SXGA and 1080p/60Hz output. * Refer to page 30 for resolutions the projector supports. < How to connect > Connect the RGB IN of the projector and the computer output port with a computer cable. -
Page 19: Connecting To A Dvd Player
Connecting to a DVD Player * Depending on the equipment, the component output jacks (Y, P Y, Cb, Cr. < How to connect > a. Connect the DVD Player component cable to the Y, P and P of the COMPONENT IN of the projector. * When connecting the component cable, match the jack colors with the component cable.(Y=green, P =red) -
Page 20: Function
Function * The On-Screen Display (OSD) in this manual may be slightly different from your projector. * This operating guide explains operation of RGB(PC) mode mainly. PICTURE Menu Options Picture mode * Use the Picture mode function to set the projector for the best picture appearance. 1. -
Page 21: Adv. Picture Menu Options
ADV. PICTURE Menu Options * This function adjusts the brightness of the entire image depending on inputted image to provide optimum image quality. Auto Iris Function 1. Press the A.IRIS button on the remote control. 2. Press the <, > button to adjust the screen condition as you want. •... - Page 22 ► Fresh Contrast : Adjusts contrast to optimum levels depending on image brightness. •Fresh Contrast ꔗ ꔉ ► Fresh Colour : Adjusts image colors close to natural colors. ꔗ •Fresh Colour ꔉ ► Color Temp : Selects the mood of screen colors. ꔗ...
-
Page 23: Advanced Picture Reset Function
► Gamma Mode : You can select this mode only when Picture Mode is Expert 1/2. •Gamma Mode ꔗ Preset ꔉ • Adjustment : You can select Low, Medium or High. • Level : You can adjust from 0 to 8. •... -
Page 24: Screen Menu Options
SCREEN Menu Options To Change PJT Mode * This function turns the projected image upside down or flips horizontal. 1. Press the MENU button. Then, move to SCREEN with the ∧, ∨, <, > buttons and press the ꔉOK button. 2. -
Page 25: Using Keystone Function
Using Keystone Function Use this function when the screen is not at a right angle to the projector and the image is a trapezoid shape. Only use the Keystone function when you can’t get the best angle of projection. 1. Press the KEYSTONE button of remote control. 2. -
Page 26: Rgb Config. Function
RGB Config. Function 1. Press the MENU button. Then, move to SCREEN with the ∧, ∨, <, > buttons and press the ꔉOK button. 2. Move to a sub-item with the > button. Then, use the ∧, ∨ buttons to move to RGB Config. -
Page 27: Option Menu Options
OPTION Menu Options Using the Still Function 1. Press the STILL button on the remote control. * You can freeze the moving image. <Moving Image> 2. To exit STILL, press any button. * The STILL function will release automatically after approximately 10 minutes. Selecting Language 1. -
Page 28: Selecting Blank Image Color
Selecting Blank image color 1. Press the MENU button. Then, move to OPTION with the ∧, ∨, <, > buttons and press the ꔉOK button. 2. Move to a sub-item with the > button. Then, use the ∧, ∨ buttons to move to Blank Image and press the ꔉOK button. -
Page 29: Auto Sleep Function
Auto sleep Function * This function turns the projector off automatically after 10 minutes is passed when there is no signal. 1. Press the MENU button. Then, move to OPTION with the ∧, ∨, <, > buttons and press the ꔉOK button. 2. -
Page 30: Information
Information Supported Monitor Display * The following table lists the display formats supported by the projector. Sources Format * If the projector does not support the input signal, “Out of Range” message appears on the screen. * The projector supports DDC1/2B type as Plug & Play function. (Auto recognition of PC monitor) * The Synchronization input form for horizontal and vertical frequencies are Separate. -
Page 31: Maintenance
Maintenance * The projector needs little maintenance. You should keep the lens clean because any dirt or stains may appear on the screen. If any parts need to be replaced, contact your dealer. When cleaning any part of the projector, always turn the power off and unplug the projector first. -
Page 32: Replacing The Lamp
▪ Never touch the glass on the lamp. Image quality may be compromised or lamp life may be reduced. To obtain a replacement Lamp unit Lamp model number is on page 35. Check the lamp model and then purchase it from an LG Electronics Service Center. Using another manufacturers lamp may cause damage to the projector. - Page 33 • Make sure the lamp cover is securely fastened. If the lamp cover is not installed correctly the unit will not power on. • If this fault persists contact an LG Authorized Service Center. Unscrew the screw from the lamp cover using a screwdriver.
- Page 34 Regarding the projector lamp control WARNING • Don’t turn off the projector at least 5 minutes after activating it. - The frequent On/Off changes may cause the lamp to deteriorate. • Don’t pull out the power cord while operating the projector or the cooling fan. - It will shorten the life of the lamp or damage it.
-
Page 35: Specifications
In storage and transit : -20°C ~ 60°C Humidity In operation : 0 % ~ 75% relative humidity Not in operation : 0 % ~ 85% relative humidity AF115 (AF115-JS) 1920 (Horizontal) x 1080 (Vertical) pixel 16:9 (horizontal:vertical) 15.4 Wide: 0.9 m ~ 9.1 m (76.2 cm ~ 762.0 cm) Tele: 1.6 m ~ 16.4 m (76.2 cm ~ 762.0 cm) - Page 36 The model and serial number of the projector is located on the back or one side of the projector. Record it below should you ever need service. MODEL SERIAL...
Need help?
Do you have a question about the AF115 and is the answer not in the manual?
Questions and answers